Page 253 of 429

�µ
�µ
�µ
�µ
�µ To shift to Second,
pressthereleasebuttonontheside
of the shif t lever. This position locks
the transmission in second gear. It
does not downshif t to f irst gear
when you come to a stop. Second
gives you more power when climbing,
and increased engine braking when
going down steep hills. Use second
gear when starting out on a slippery
surf ace or in deep snow. It will help
reduce wheelspin.
To shif t f rom Second to
First, press the release button on the
side of the shift lever. With the lever
in this position, the transmission
locks in First gear. By upshif ting and
downshif ting through 1, 2, D , and D,
you can operate this transmission
much like a manual transmission
without a clutch pedal.
This position is similar
to D, except only the first three
gears are selected instead of all f ive.
Use D when towing a trailer in hilly
terrain, or to provide engine braking
when going down a steep hill. D can
also keep the transmission f rom
cycling between third and f ourth
gears in stop-and-go driving.
Use Neutral if you
need to restart a stalled engine, or if
it is necessary to stop brief ly with
the engine idling. Shif t to Park posi-
tion if you need to leave the car for
any reason. Press on the brake pedal
when you are moving the shif t lever
f rom Neutral to another gear.
Use this position f or
your normal driving. The transmis-
sion automatically selects a suitable
gear (1 through 5) f or your speed
and acceleration. You may notice the
transmission shif ting up at higher
speeds when the engine is cold. This
helps the engine warm up f aster. ForfasteraccelerationwheninD or
D, you can get the transmission to
automatically downshif t by pushing
the accelerator pedal to the floor.
The transmission will shif t down one,
two or three gears, depending on
your speed.
3
3
3
3
Second (2)
First (1)
Drive (D )
Neutral (N)
Drive (D)3
Automatic Transmission
Driving250
Page 256 of 429

�µMake sure the parking brake is f ully
released bef ore driving away.
Driving with the parking brake
partially set can overheat or damage
the rear brakes.
Always use the parking brake when
you park your car. The indicator on
the instrument panel shows that the
parking brake is not f ully released; it
does not indicate that the parking
brakeisfirmlyset.Makesurethe
parking brake is set f irmly or your
car may roll if it is parked on an
incline.
If your car has an automatic
transmission, set the parking brake
bef ore you put the transmission in
Park.Thiskeepsthecarfrom
moving and putting pressure on the
parking mechanism in the
transmission making it easier to
move the shift lever out of Park
when you want to drive away. If the car is f acing uphill, turn the
f ront wheels away f rom the curb. If
you have a manual transmission, put
it in f irst gear.
If the car is f acing downhill, turn the
f ront wheels toward the curb. If you
have a manual transmission, put it in
reverse gear.
Make sure the moonroof (if
equipped) and the windows are
closed.
Lockthedoorswiththekeyorthe
remote transmitter. Place any packages, valuables, etc.,
in the trunk or take them with you. Turn of f the lights.
Never park over dry leaves, tall
grass, or other f lammable
materials. The three way catalytic
converter gets very hot, and could
cause these materials to catch on
fire. Check the indicator on the
instrument panel to verif y that the
security system is set.
On cars with security system
Parking T ips
Parking
Driving253
Page 272 of 429
Always drive slowly and have
someone guide you when backing up.
Grip the of the steering
wheel; then turn the wheel to the lef t
to get the trailer to move to the lef t,
andturnthewheelrighttomovethe
trailer to the right.Follow all normal precautions when
parking, including f irmly setting the
parking brake and putting the
transmission in Park (automatic) or
in 1st or Reverse (manual). Also,
place wheel chocks at each of the
trailer’s tires.
Crosswinds and air turbulence
caused by passing trucks can disrupt
your steering and cause trailer
swaying. When being passed by a
large car, keep a constant speed and
steer straight ahead. Do not try to
make quick steering or braking
corrections.
bottom
Handling Crosswinds and Buf f et ing
Backing Up Parking
Towing a Trailer
Driving269
Page 274 of 429

This section also includes
Maintenance Schedules f or normal
driving and severe driving conditions,
a Maintenance Record, and instruc-
tions f or simple maintenance tasks
you may want to take care of
yourself .
If you have the skills and tools to per-
f orm more complex maintenance
tasks on your Honda, you may want
to purchase the Service Manual. See
page f or inf ormation on how to
obtain a copy, or see your Honda
dealer. This section explains the importance
of keeping your car well maintained
andwhyyoushouldfollowbasic
maintenance saf ety precautions.......................
Maintenance Saf ety .272
.
Important Safety Precautions . 273
.................
Maintenance Schedule . 274
Maintenance Schedule ..................
(4-cylinder Models) . 276 ...
Required Maintenance Record . 281
Maintenance Schedule ..................
(6-cylinder Models) . 284
...
Required Maintenance Record . 289
.......
Owner Maintenance Checks . 291
..............................
Fluid Locations .292
......................................
Engine Oil .294
..................................
Adding Oil .294
....................
Recommended Oil .294
..............................
Synthetic Oil .295
....................................
Additives .296
.....
Changing the Oil and Filter . 296
.............................
Cooling System .299
............
Adding Engine Coolant . 299
.......
Replacing Engine Coolant . 301
....................
Windshield Washers .306
.......................
Transmission Fluid .307
..........
Automatic Transmission . 307
5-speed Manual .........................
Transmission .310
6-speed Manual .........................
Transmission .311
................
Brake and Clutch Fluid . 313
............................
Brake System .313
...........................
Clutch System .314
..............................
Power Steering .315 .....................
Air Cleaner Element .316
....................................
Hood Latch .318
Spark Plugs ..................
(4-cylinder Models) . 318
Spark Plugs ..................
(6-cylinder Models) . 321
...........................................
Battery .324
.................................
Wiper Blades .327
..............
Air Conditioning System . 329
..................
Dust and Pollen Filter . 330
.......................................
Drive Belt .332
....................................
Timing Belt .332
...............................................
Tires .333
......................................
Inf lation .333
..................................
Inspection .335
..............................
Maintenance .335
.............................
Tire Rotation .336
...
Replacing Tires and Wheels . 336
......................
Wheels and Tires .337
..........................
Winter Driving .338
.............................
Snow Tires .338
............................
Tire Chains .338
.............................................
Lights .340
.....................
Headlight Aiming .342
........................
Replacing Bulbs .342
...........................
Storing Your Car .354
413
Maintenance
Maint enance271
Page 295 of 429
4-cylinder Models
Fluid Locations
Maint enance292
BRAKE FLUID
(Gray cap)
ENGINE OIL DIPSTICK
(Orange handle)
WASHER FLUID
(Blue cap)
POWER STEERING
FLUID (Red cap)
RADIATOR CAPAUTOMATIC
TRANSMISSION
FLUID DIPSTICK
(Yellow loop) ENGINE OIL
FILL CAP CLUTCH FLUID
(5-speed Manual
Transmission only)
(Light gray cap)
ENGINE
COOLANT
RESERVOIR
Page 296 of 429
6-cylinder Models
Fluid Locations
Maint enance293
ENGINE OIL FILL CAPRADIATOR CAP
ENGINE OIL DIPSTICK
(Orange loop)
WASHER FLUID
(Blue cap)
POWER STEERING
FLUID (Red cap) BRAKE FLUID
(Gray cap)
AUTOMATIC
TRANSMISSION
FLUID DIPSTICK
(Yellow loop)
ENGINE
COOLANT
RESERVOIR CLUTCH FLUID
(Gray cap)
(6-speed Manual
Transmission only)
Page 308 of 429

The cooling system capacity is:Start the engine and let it run for
about 30 seconds. Then turn of f
the engine.
Fill the radiator with coolant up to
the base of the f iller neck.
Fill the reserve tank to the MAX
mark. Install the reserve tank cap.
Install the radiator cap, and
tighten it to the first stop.
Start the engine and let it run until
the radiator cooling f an comes on
at least twice. Then stop the
engine.
Remove the radiator cap. Pour
coolant into the radiator up to the
base of the f iller neck and into the
reserve tank up to the MAX mark. Start the engine and hold it at
1,500 rpm until the cooling f an
comes on. Turn of f the engine.
Check the coolant level in the
radiator and add coolant if needed.
Install the radiator cap, and
tighten it fully.
If necessary, f ill the reserve tank
to the MAX mark. Install the
reserve tank cap.
16.
17.
18.
15. 14. 13.
12. 10.
11.
With automatic transmission:
With 5-speed manual transmission:
With 6-speed manual transmission:With automatic transmission:
Cooling Syst em
Maint enance
4-cylinder models
6-cylinder models
305
1.37 US gal (5.2)
1.40 US gal (5.3
)
1.77 US gal (6.7
)
1.74 US gal (6.6
)
Page 313 of 429

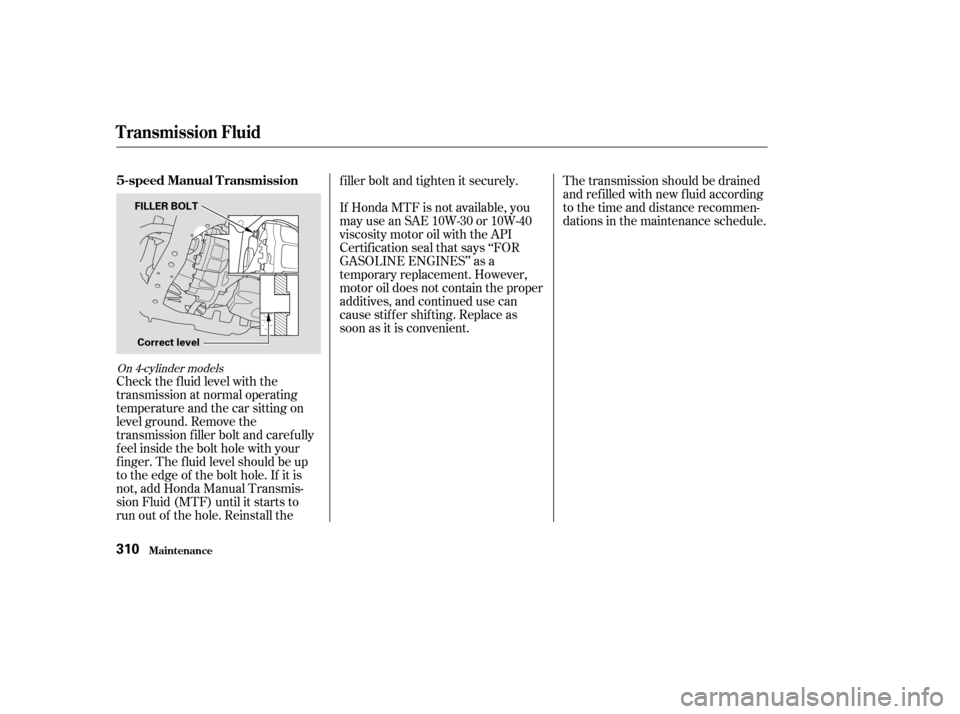
Check the f luid level with the
transmission at normal operating
temperature and the car sitting on
level ground. Remove the
transmission f iller bolt and caref ully
f eel inside the bolt hole with your
f inger. The f luid level should be up
to the edge of the bolt hole. If it is
not, add Honda Manual Transmis-
sion Fluid (MTF) until it starts to
run out of the hole. Reinstall thef iller bolt and tighten it securely.
If Honda MTF is not available, you
may use an SAE 10W-30 or 10W-40
viscosity motor oil with the API
Certif ication seal that says ‘‘FOR
GASOLINE ENGINES’’ as a
temporary replacement. However,
motor oil does not contain the proper
additives, and continued use can
cause stiffer shifting. Replace as
soon as it is convenient.
The transmission should be drained
and ref illed with new f luid according
to the time and distance recommen-
dations in the maintenance schedule.
On 4-cylinder models
5-speed Manual Transmission
T ransmission Fluid
Maint enance310
FILLER BOLT
Correct level