Page 8 of 200

WARNING LIGHTS AND CHIMES
Warning lights and gauges can alert you to a vehicle condition that may
become serious enough to cause expensive repairs. A warning light may
illuminate when a problem exists with one of your vehicle’s functions.
Many lights will illuminate when you start your vehicle to make sure the
bulb works. If any light remains on after starting the vehicle, have the
respective system inspected immediately.
Emission system/Check engine:
TheCheck Engineindicator light
illuminates when the ignition is first
turned to the ON position to check
the bulb. Solid illumination after the engine is started indicates the On
Board Diagnostics System (OBD-II) has detected a malfunction. Refer to
On board diagnostics (OBD-II)in theMaintenance and Specifications
chapter. If the light is blinking, engine misfire is occurring which could
damage your catalytic converter. Drive in a moderate fashion (avoid
heavy acceleration and deceleration) and have your vehicle serviced
immediately.
Under engine misfire conditions, excessive exhaust temperatures
could damage the catalytic converter, the fuel system, interior
floor coverings or other vehicle components, possibly causing a fire.
Check fuel cap:Illuminates when
the fuel cap may not be properly
installed. Continued driving with
this light on may cause the Emission
system/Check engine warning light
to come on. Refer toFuel Filler Capin theMaintenance and
Specificationschapter.
CHECK
FUEL
CAP
Instrument Cluster
8
Page 26 of 200
PANEL DIMMER CONTROL
Use to adjust the brightness of the
instrument panel during parklamp,
headlamp and autolamp operation.
•Rotate up to brighten.
•Rotate down to dim.
•Rotate fully up to turn on the
interior lights.
Note:The panel dimmer control is only active when the autolamp has
determined that it is night.
HEADLAMP VERTICAL AIM ADJUSTMENT
1. Park the vehicle on a level surface approximately 7.6 meters (25 feet)
from a vertical wall or screen directly in front of it.
•(1) Eight feet
•(2) Center height of lamp to ground
•(3) Twenty five feet
•(4) Horizontal reference line
2. Measure the height from the
center of your headlamp to the
ground and mark a 2.4 meter (8
foot) horizontal reference line on
the vertical wall or screen at this
height (a piece of masking tape
works well). The center of the lamp
is marked by a 3.0 mm circle on the
headlamp lens.
3. Turn on the low beam headlamps to illuminate the wall or screen and
open the hood.
Lights
26
Page 27 of 200
4. On the wall or screen you will
observe a light pattern with flat
edges at the top of the beam
pattern. If the flat edges are not at
the horizontal reference line, the
beam will need to be adjusted.
5. Locate the vertical adjuster on
each headlamp, then usea6mm
allen wrench or screwdriver to
adjust the headlamp up or down.
6. HORIZONTAL AIM IS NOT REQUIRED FOR THIS VEHICLE AND IS
NON-ADJUSTABLE.
7. Close the hood and turn off the lamps.
TURN SIGNAL CONTROL
•Push down to activate the left
turn signal.
•Push up to activate the right turn
signal.
INTERIOR LAMPS
Map lamps
The map lamps and controls are
located on the rearview mirror.
Press the controls on the bottom of
the mirror to activate the lamps.
Lights
27
Page 29 of 200
Interior bulbs
Check the operation of all bulbs frequently.
Replacing headlamp bulbs
To remove the headlamp bulb:
1. Make sure headlamp switch is in
OFF position, then open the hood.
2. Pry up the two retainer pins to
release the headlamp assembly from
the vehicle.
3. Remove the screw from the back
of the headlamp and pull headlamp
forward.
4. Disconnect the electrical
connector from the bulb by pulling
rearward.
5. Remove the bulb retaining ring by
rotating it counterclockwise (when
viewed from the rear) to free it
from the bulb socket, and slide the
ring off the plastic base. Keep the
ring to retain the new bulb.
Lights
29
Page 56 of 200

Doorkeyunlocking/locking
Unlocking the doors
Turn the key in the door cylinder to unlock the driver’s door.
The illuminated entry feature will turn on all the interior lamps for 25
seconds or until the ignition is turned to the RUN position.
The inside lights will not turn off if:
•they have been turned on using the dimmer control or
•any door is open.
The battery saver feature will turn off the interior lamps 30 minutes after
the ignition is turned to the OFF position.
Locking the doors
Turn the key in the door cylinder to lock the driver’s door.Note:Locking
the driver’s door using a key does not arm the perimeter alarm.
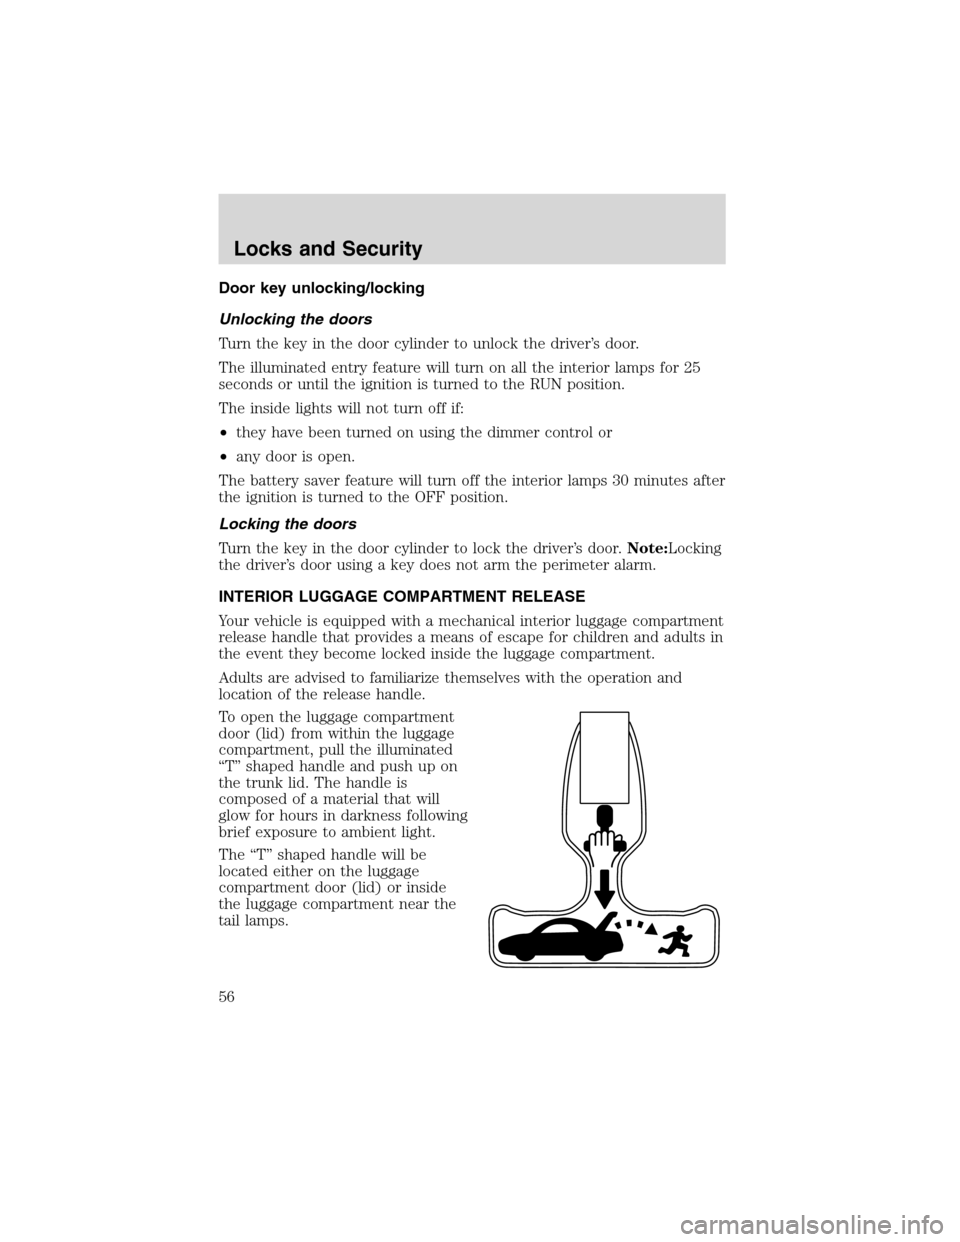
INTERIOR LUGGAGE COMPARTMENT RELEASE
Your vehicle is equipped with a mechanical interior luggage compartment
release handle that provides a means of escape for children and adults in
the event they become locked inside the luggage compartment.
Adults are advised to familiarize themselves with the operation and
location of the release handle.
To open the luggage compartment
door (lid) from within the luggage
compartment, pull the illuminated
“T”shaped handle and push up on
the trunk lid. The handle is
composed of a material that will
glow for hours in darkness following
brief exposure to ambient light.
The“T”shaped handle will be
located either on the luggage
compartment door (lid) or inside
the luggage compartment near the
tail lamps.
Locks and Security
56
Page 58 of 200

If there is any potential remote keyless entry problem with your vehicle,
ensureALL remote entry transmittersare taken to your authorized
dealer to aid in troubleshooting.
Locking the doors
1. Pressand release to lock all the doors and activate the anti-theft
system.Note:the turn signal lamps will flash once to confirm the doors,
trunk and hood are closed.
2. Press
and release again within three seconds to confirm that all the
doors, trunk and hood are closed and locked.Note:the doors will lock
again, and the horn will chirp once.
If any of the doors , the trunk or the hood are not properly closed the
horn will make two quick chirps.
Unlocking the doors
1. Pressand release to unlock the driver’s door and deactivate the
perimeter alarm (if activated).Note:The interior lamps will illuminate.
2. Press
and release again within three seconds to unlock all the
doors.
The remote entry system comes with an illuminated entry feature. This
feature turns on the interior lamps for 25 seconds or until the ignition is
turned to the RUN position.
The inside lights will not turn off if:
•they have been turned on using the dimmer control or
•any door is open.
The battery saver feature will turn off the interior lamps 30 minutes after
the ignition is turned to the OFF position.
Opening the trunk
Pressonce to open the trunk.
•Ensure that the trunk is closed and latched before driving your
vehicle. Failure to properly latch the trunk may cause objects to fall
out or block the driver’s rear view.
Sounding a panic alarm
Press
to activate the alarm. The horn will sound for a maximum of
30 seconds and the turn signal lamps will flash for a maximum of 5
Locks and Security
58
Page 60 of 200

Howto reprogram your remote entry transmitters
You must haveall remote entry transmitters(maximum of four)
available before beginning this procedure.
To reprogram the remote entry
transmitters:
1. Ensure the vehicle is electronically unlocked.
2. Put the key in the ignition.
3. Turn the key from the 2 (OFF) position to 4 (RUN).
4. Cycle, eight times, rapidly (within 10 seconds) between the 2 (OFF)
position and 4 (RUN).Note:The eighth turn must end in the 4 (RUN)
position.
5. The doors will lock, then unlock, to confirm that the programming
mode has been activated.
6. Within 20 seconds press any button on the remote entry transmitter.
Note:If more than 20 seconds have passed you will need to start the
procedure over again.
7. The doors will lock, then unlock, to confirm that this remote entry
transmitter has been programmed.
8. Repeat Step 6 to program each additional remote entry transmitter.
9. Turn the ignition to the 2 (OFF) position after you have finished
programming all of the remote entry transmitters.
10. The doors will lock, then unlock, to confirm that the programming
mode has been exited.
Illuminated entry
The interior lamps illuminate when the remote entry system is used to
unlock the door(s).
The illuminated entry system will turn off the interior lights if:
•the ignition switch is turned to the RUN position, or
•the remote transmitter lock control is pressed, or
23 1
4
5
Locks and Security
60
Page 61 of 200

•after 25 seconds of illumination.
The inside lights will not turn off if:
•they have been turned on with the dimmer control, or
•any door is open.
The battery saver will shut off the interior lamps 30 minutes after the
ignition has been turned to the OFF position.
Autolock
The autolock feature will lock the vehicle’s doors when:
•all the doors are closed,
•the ignition is in the RUN position, and
•you shift into forward or reverse, putting the vehicle in motion.
Relock
The autolock feature repeats when:
•either door is opened then closed while the ignition is in the RUN
position,
•you shift into forward or reverse, and
•you put the vehicle in motion by releasing the brake pedal.
Deactivating/activating autolock
Your vehicle comes with the autolock feature activated. There are two
methods to enable/disable this feature: One is through your dealer, and
the second is using a power door unlock/lock sequence.
Before following the activation or deactivation procedures, make sure
that the anti-theft system is not activated, ignition is off, and the vehicle
doors are closed.
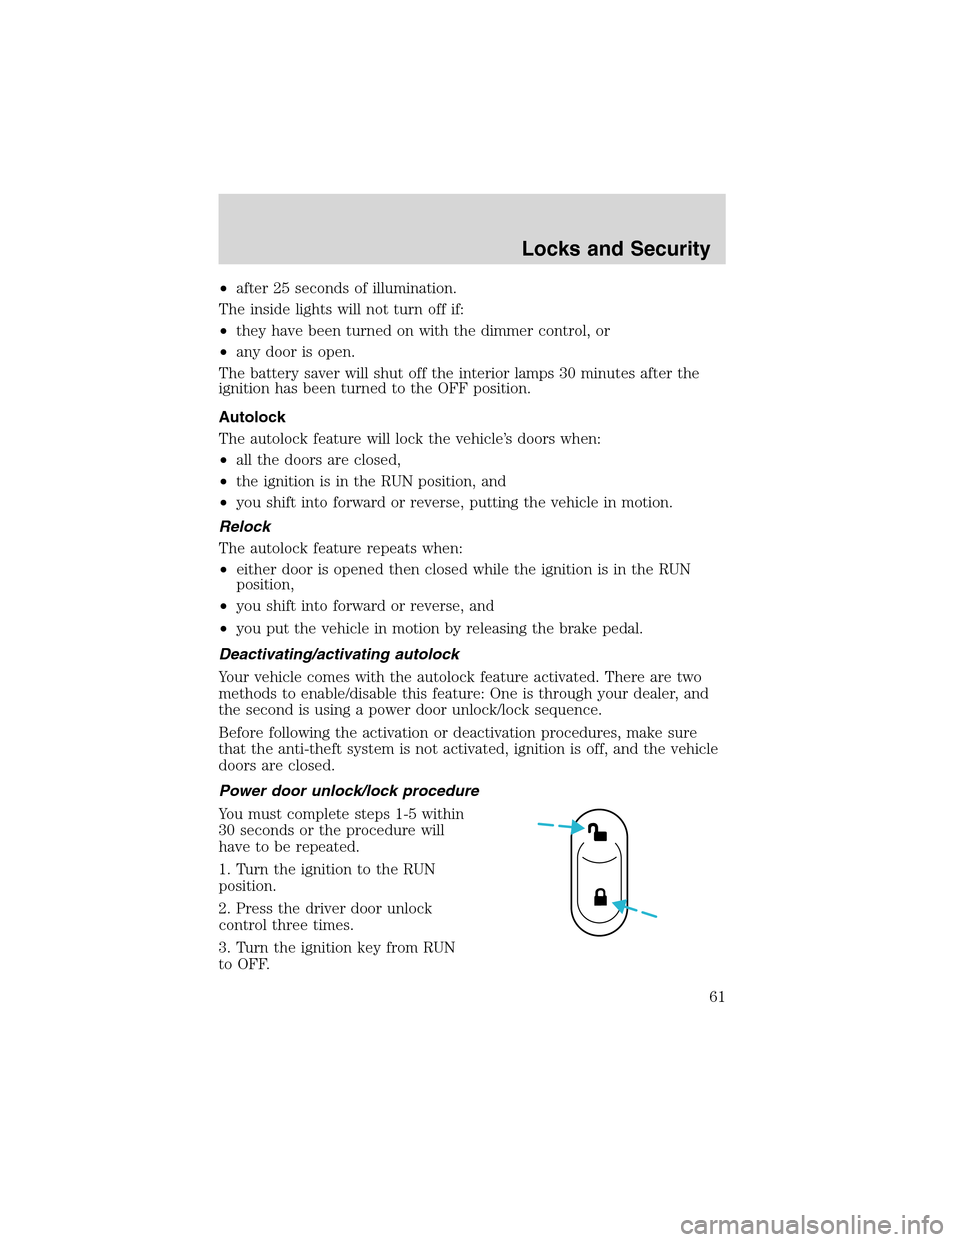
Power door unlock/lock procedure
You must complete steps 1-5 within
30 seconds or the procedure will
have to be repeated.
1. Turn the ignition to the RUN
position.
2. Press the driver door unlock
control three times.
3. Turn the ignition key from RUN
to OFF.
Locks and Security
61