Page 51 of 200
Removing the top
It is recommended that you prepare the storage rack before removing
the top. SeeRemovable top storage rackin this section.
1. Take the mounting key from the bag located in the trunk.
2. Using the mounting key, loosen
the two screws at the front of the
top. The two screws remain
undetachable in the windscreen
panel of your vehicle.
3. Push the two screws down into
the windscreen panel of your
vehicle.
4. Undo the locking levers at the
rear right and left sides of the
vehicle. Rotate the levers rearward
while applying a slight upward force
to the top.
5. With the aid of a second person,
lift the top off the vehicle and store
it as described inRemovable top
storagein the chapter.
Driver Controls
51
Page 56 of 200

Doorkeyunlocking/locking
Unlocking the doors
Turn the key in the door cylinder to unlock the driver’s door.
The illuminated entry feature will turn on all the interior lamps for 25
seconds or until the ignition is turned to the RUN position.
The inside lights will not turn off if:
•they have been turned on using the dimmer control or
•any door is open.
The battery saver feature will turn off the interior lamps 30 minutes after
the ignition is turned to the OFF position.
Locking the doors
Turn the key in the door cylinder to lock the driver’s door.Note:Locking
the driver’s door using a key does not arm the perimeter alarm.
INTERIOR LUGGAGE COMPARTMENT RELEASE
Your vehicle is equipped with a mechanical interior luggage compartment
release handle that provides a means of escape for children and adults in
the event they become locked inside the luggage compartment.
Adults are advised to familiarize themselves with the operation and
location of the release handle.
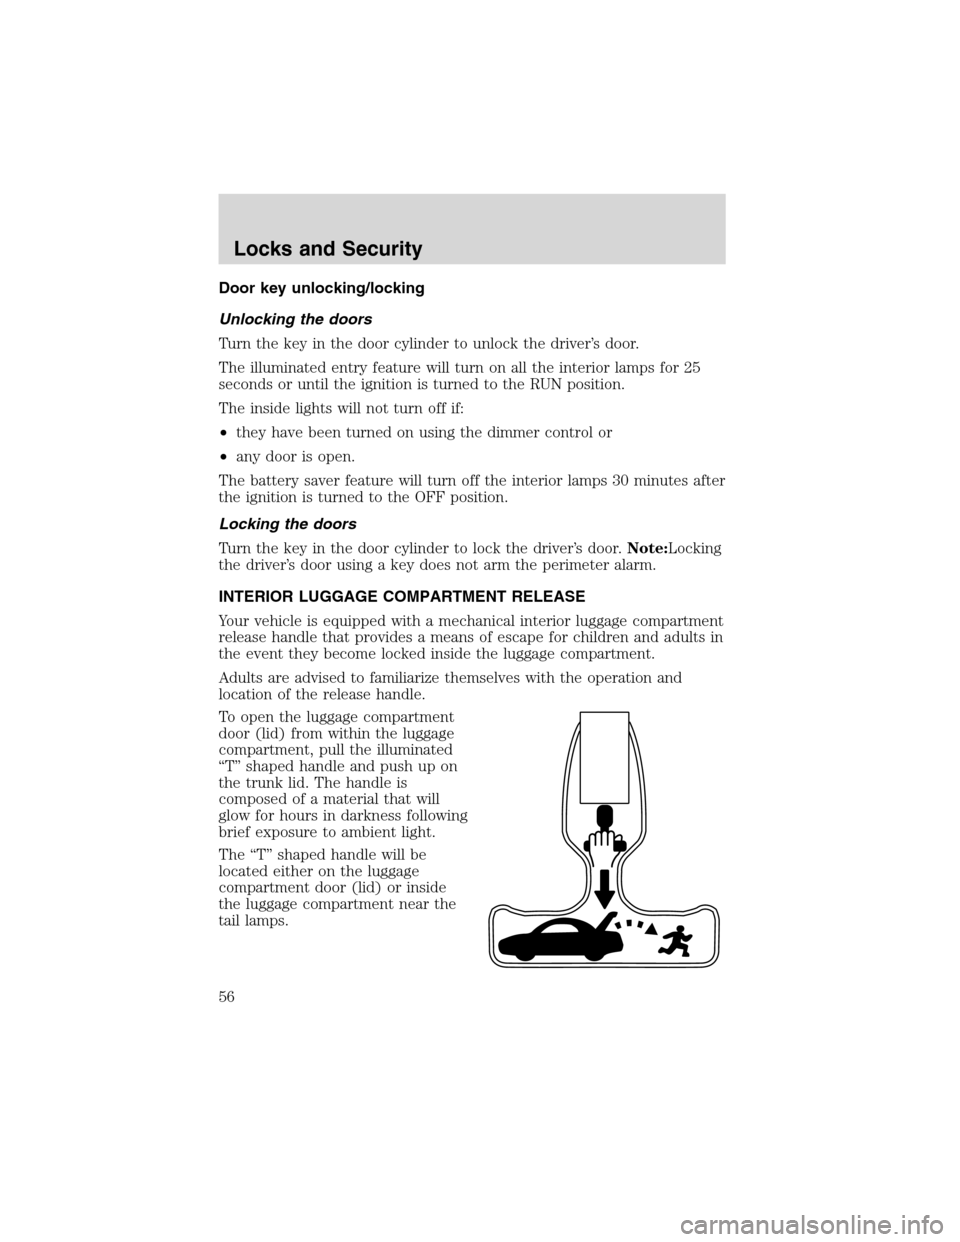
To open the luggage compartment
door (lid) from within the luggage
compartment, pull the illuminated
“T”shaped handle and push up on
the trunk lid. The handle is
composed of a material that will
glow for hours in darkness following
brief exposure to ambient light.
The“T”shaped handle will be
located either on the luggage
compartment door (lid) or inside
the luggage compartment near the
tail lamps.
Locks and Security
56
Page 58 of 200

If there is any potential remote keyless entry problem with your vehicle,
ensureALL remote entry transmittersare taken to your authorized
dealer to aid in troubleshooting.
Locking the doors
1. Pressand release to lock all the doors and activate the anti-theft
system.Note:the turn signal lamps will flash once to confirm the doors,
trunk and hood are closed.
2. Press
and release again within three seconds to confirm that all the
doors, trunk and hood are closed and locked.Note:the doors will lock
again, and the horn will chirp once.
If any of the doors , the trunk or the hood are not properly closed the
horn will make two quick chirps.
Unlocking the doors
1. Pressand release to unlock the driver’s door and deactivate the
perimeter alarm (if activated).Note:The interior lamps will illuminate.
2. Press
and release again within three seconds to unlock all the
doors.
The remote entry system comes with an illuminated entry feature. This
feature turns on the interior lamps for 25 seconds or until the ignition is
turned to the RUN position.
The inside lights will not turn off if:
•they have been turned on using the dimmer control or
•any door is open.
The battery saver feature will turn off the interior lamps 30 minutes after
the ignition is turned to the OFF position.
Opening the trunk
Pressonce to open the trunk.
•Ensure that the trunk is closed and latched before driving your
vehicle. Failure to properly latch the trunk may cause objects to fall
out or block the driver’s rear view.
Sounding a panic alarm
Press
to activate the alarm. The horn will sound for a maximum of
30 seconds and the turn signal lamps will flash for a maximum of 5
Locks and Security
58
Page 60 of 200

Howto reprogram your remote entry transmitters
You must haveall remote entry transmitters(maximum of four)
available before beginning this procedure.
To reprogram the remote entry
transmitters:
1. Ensure the vehicle is electronically unlocked.
2. Put the key in the ignition.
3. Turn the key from the 2 (OFF) position to 4 (RUN).
4. Cycle, eight times, rapidly (within 10 seconds) between the 2 (OFF)
position and 4 (RUN).Note:The eighth turn must end in the 4 (RUN)
position.
5. The doors will lock, then unlock, to confirm that the programming
mode has been activated.
6. Within 20 seconds press any button on the remote entry transmitter.
Note:If more than 20 seconds have passed you will need to start the
procedure over again.
7. The doors will lock, then unlock, to confirm that this remote entry
transmitter has been programmed.
8. Repeat Step 6 to program each additional remote entry transmitter.
9. Turn the ignition to the 2 (OFF) position after you have finished
programming all of the remote entry transmitters.
10. The doors will lock, then unlock, to confirm that the programming
mode has been exited.
Illuminated entry
The interior lamps illuminate when the remote entry system is used to
unlock the door(s).
The illuminated entry system will turn off the interior lights if:
•the ignition switch is turned to the RUN position, or
•the remote transmitter lock control is pressed, or
23 1
4
5
Locks and Security
60
Page 61 of 200

•after 25 seconds of illumination.
The inside lights will not turn off if:
•they have been turned on with the dimmer control, or
•any door is open.
The battery saver will shut off the interior lamps 30 minutes after the
ignition has been turned to the OFF position.
Autolock
The autolock feature will lock the vehicle’s doors when:
•all the doors are closed,
•the ignition is in the RUN position, and
•you shift into forward or reverse, putting the vehicle in motion.
Relock
The autolock feature repeats when:
•either door is opened then closed while the ignition is in the RUN
position,
•you shift into forward or reverse, and
•you put the vehicle in motion by releasing the brake pedal.
Deactivating/activating autolock
Your vehicle comes with the autolock feature activated. There are two
methods to enable/disable this feature: One is through your dealer, and
the second is using a power door unlock/lock sequence.
Before following the activation or deactivation procedures, make sure
that the anti-theft system is not activated, ignition is off, and the vehicle
doors are closed.
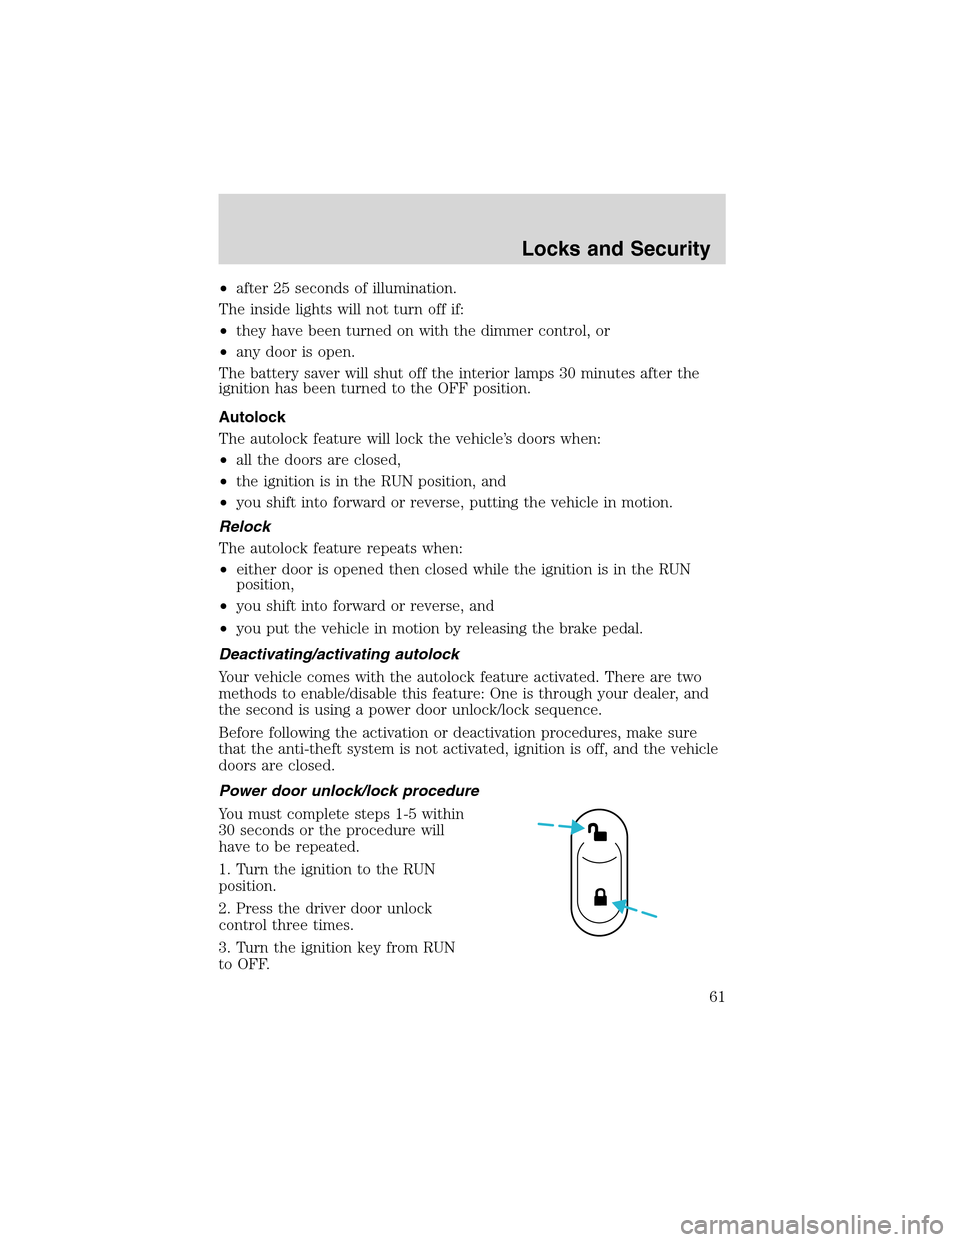
Power door unlock/lock procedure
You must complete steps 1-5 within
30 seconds or the procedure will
have to be repeated.
1. Turn the ignition to the RUN
position.
2. Press the driver door unlock
control three times.
3. Turn the ignition key from RUN
to OFF.
Locks and Security
61
Page 64 of 200

•If no previously programmed coded keys are available, you must take
your vehicle to your dealer to have the spare key(s) programmed.
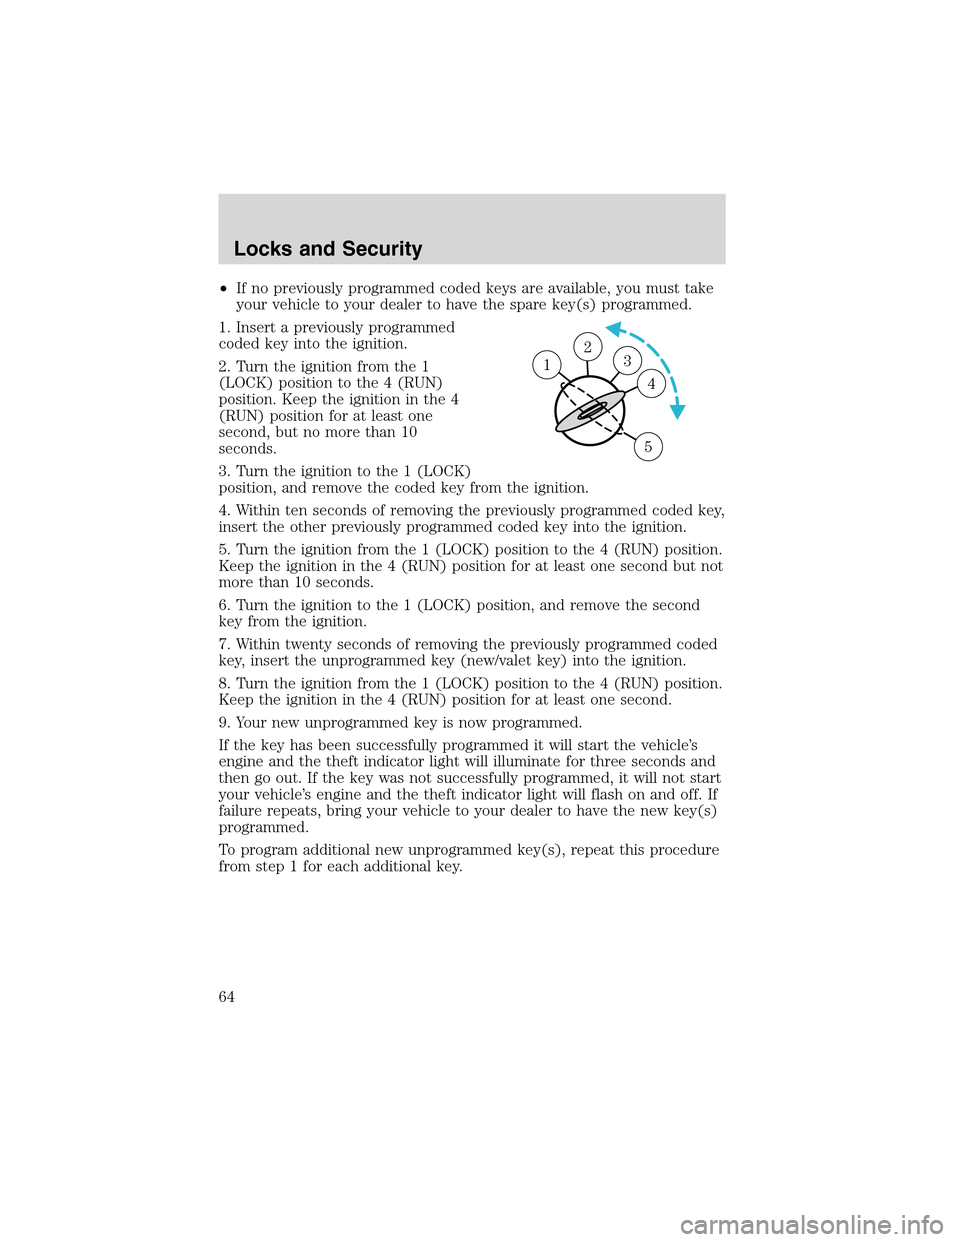
1. Insert a previously programmed
coded key into the ignition.
2. Turn the ignition from the 1
(LOCK) position to the 4 (RUN)
position. Keep the ignition in the 4
(RUN) position for at least one
second, but no more than 10
seconds.
3. Turn the ignition to the 1 (LOCK)
position, and remove the coded key from the ignition.
4. Within ten seconds of removing the previously programmed coded key,
insert the other previously programmed coded key into the ignition.
5. Turn the ignition from the 1 (LOCK) position to the 4 (RUN) position.
Keep the ignition in the 4 (RUN) position for at least one second but not
more than 10 seconds.
6. Turn the ignition to the 1 (LOCK) position, and remove the second
key from the ignition.
7. Within twenty seconds of removing the previously programmed coded
key, insert the unprogrammed key (new/valet key) into the ignition.
8. Turn the ignition from the 1 (LOCK) position to the 4 (RUN) position.
Keep the ignition in the 4 (RUN) position for at least one second.
9. Your new unprogrammed key is now programmed.
If the key has been successfully programmed it will start the vehicle’s
engine and the theft indicator light will illuminate for three seconds and
then go out. If the key was not successfully programmed, it will not start
your vehicle’s engine and the theft indicator light will flash on and off. If
failure repeats, bring your vehicle to your dealer to have the new key(s)
programmed.
To program additional new unprogrammed key(s), repeat this procedure
from step 1 for each additional key.
23 1
4
5
Locks and Security
64
Page 69 of 200
Press rear to raise or lower the rear
portion of the seat cushion.
Press the control to move the seat
forward, backward, up or down.
Adjusting the passenger’s power seat
The control is located on the outboard side of the seat cushion.
Press the control to move the seat
forward or backward.
Heated seats (if equipped)
To operate the heated seats:
•Push the indicated side of the
control for maximum heat.
•Push again to deactivate.
•Push the indicated side of the
control for minimum heat.
•Push again to deactivate.
The heated seat module resets at every ignition run cycle. While the
ignition is in the run position, activating the high or low heated seat
switch enables heating mode. When activated, they will turn off
automatically when the ignition is turned to the OFF position.
The indicator light will illuminate when the heated seats have been
activated.
Seating and Safety Restraints
69
Page 74 of 200

BELT AND RETRACTOR ASSEMBLY MUST BE REPLACED if
the safety belt assembly“automatic locking retractor”feature or
any other safety belt function is not operating properly. In addition, all
safety belts should be checked for proper function. Failure to replace
the belt and retractor assembly could increase the risk of injury in
collisions.
Safety belt pretensioner
Your vehicle is equipped with safety belt pretensioners at the driver and
front passenger seating positions.
The safety belt pretensioner is a device which removes excess webbing
from the safety belt system. The safety belt pretensioner uses the same
crash sensor system as the front air bag supplemental restraint system
(SRS). When the safety belt pretensioner deploys, webbing from the lap
and shoulder belt is tightened. The driver and front passenger seat belt
system (including retractors, buckles and height adjusters) must be
replaced if the vehicle is involved in a collision that results in
deployment of front air bags and safety belt pretensioners. Refer to the
Safety belt maintenancesection in this chapter.
Failure to replace the safety belt assembly under the above
conditions could result in severe personal injuries in the event of
a collision.
Safety belt warning light and indicator chime
The safety belt warning light illuminates in the instrument cluster and a
chime sounds to remind the occupants to fasten their safety belts.
Seating and Safety Restraints
74