2003 FORD SUPER DUTY ABS
[x] Cancel search: ABSPage 11 of 256

Brake system warning light:To
confirm the brake system warning
light is functional, it will
momentarilyilluminate when the
ignition is turned to the ON position when the engine is not running, or
in a position between ON and START, or byapplying the parking brake
when the ignition is turned to the ON position. If the brake system
warning light does not illuminate at this time, seek service immediately
from your dealership. Illumination after releasing the parking brake
indicates low brake fluid level and the brake system should be inspected
immediatelybyyour servicing dealership.
Driving a vehicle with the brake system warning light on is
dangerous. A significant decrease in braking performance may
occur. It will take you longer to stop the vehicle. Have the vehicle
checked byyour dealer immediately.
Anti-lock brake system:If the
ABS light stays illuminated or
continues to flash, a malfunction has
been detected, have the system
serviced immediately. Normal
braking is still functional unless the brake warning light also is
illuminated.
Air bag readiness:If this light fails
to illuminate when ignition is turned
to ON, continues to flash or remains
on, have the system serviced
immediately. A chime will also sound when a malfunction in the
supplemental restraint system has been detected.
Safety belt:Reminds you to fasten
your safety belt. A chime will also
sound to remind you to fasten your
safetybelt.
Charging system:Illuminates when
the batteryis not charging properly.
ABS
Instrument Cluster
11
Page 41 of 256
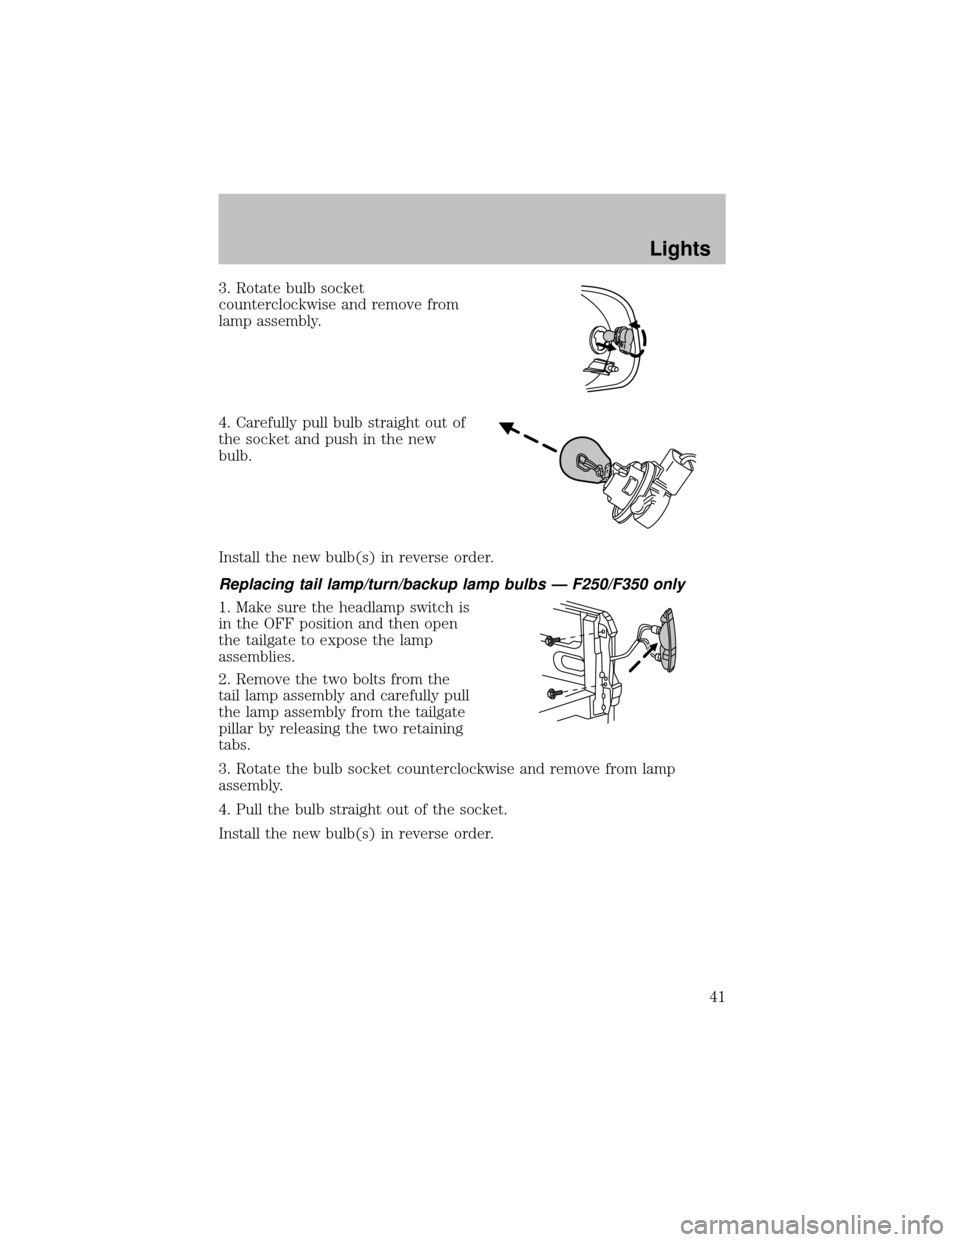
3. Rotate bulb socket
counterclockwise and remove from
lamp assembly.
4. Carefullypull bulb straight out of
the socket and push in the new
bulb.
Install the new bulb(s) in reverse order.
Replacing tail lamp/turn/backup lamp bulbs — F250/F350 only
1. Make sure the headlamp switch is
in the OFF position and then open
the tailgate to expose the lamp
assemblies.
2. Remove the two bolts from the
tail lamp assemblyand carefullypull
the lamp assemblyfrom the tailgate
pillar byreleasing the two retaining
tabs.
3. Rotate the bulb socket counterclockwise and remove from lamp
assembly.
4. Pull the bulb straight out of the socket.
Install the new bulb(s) in reverse order.
Lights
41
Page 102 of 256
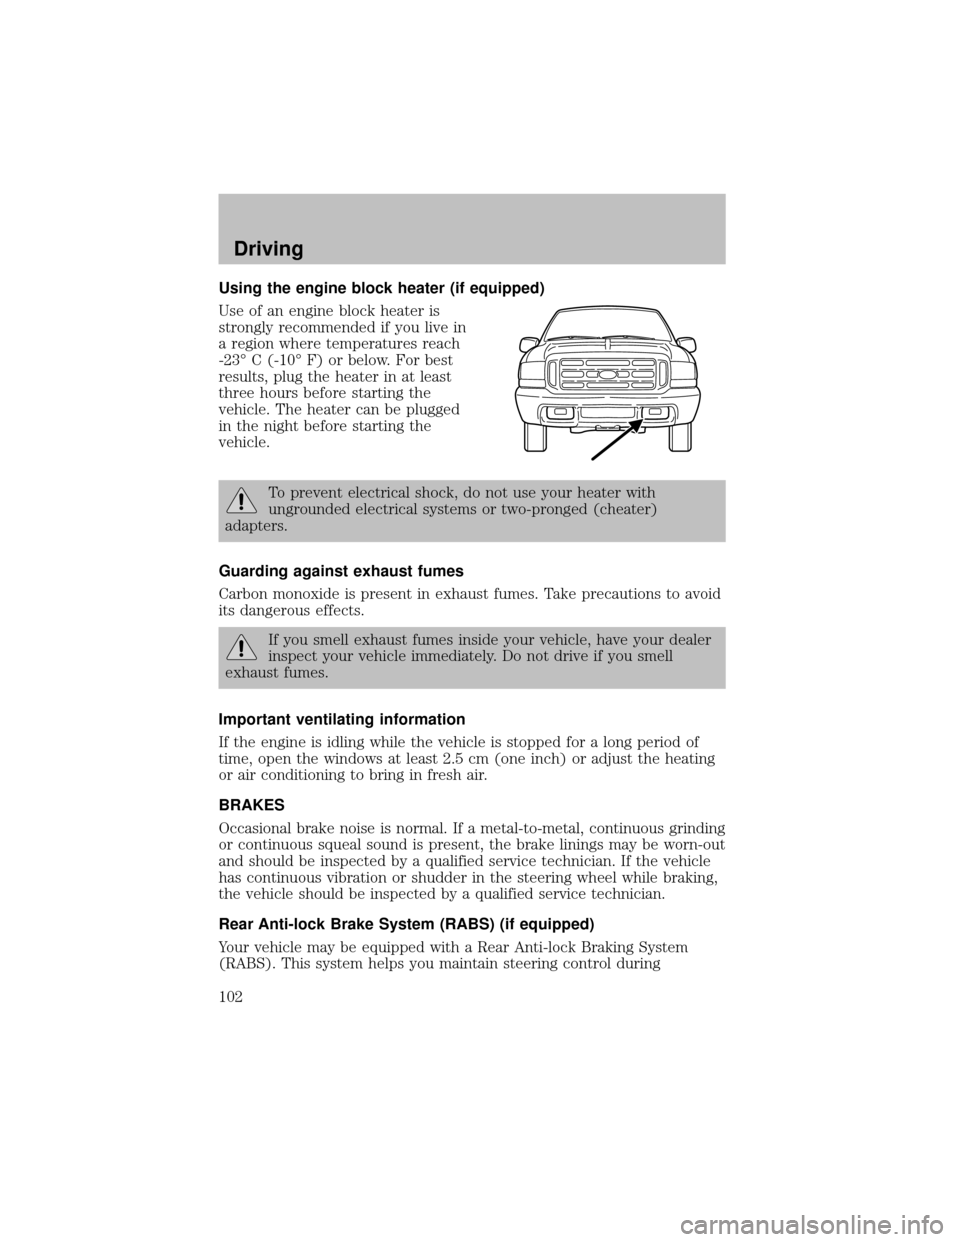
Using the engine block heater (if equipped)
Use of an engine block heater is
stronglyrecommended if you live in
a region where temperatures reach
-23° C (-10° F) or below. For best
results, plug the heater in at least
three hours before starting the
vehicle. The heater can be plugged
in the night before starting the
vehicle.
To prevent electrical shock, do not use your heater with
ungrounded electrical systems or two-pronged (cheater)
adapters.
Guarding against exhaust fumes
Carbon monoxide is present in exhaust fumes. Take precautions to avoid
its dangerous effects.
If you smell exhaust fumes inside your vehicle, have your dealer
inspect your vehicle immediately. Do not drive if you smell
exhaust fumes.
Important ventilating information
If the engine is idling while the vehicle is stopped for a long period of
time, open the windows at least 2.5 cm (one inch) or adjust the heating
or air conditioning to bring in fresh air.
BRAKES
Occasional brake noise is normal. If a metal-to-metal, continuous grinding
or continuous squeal sound is present, the brake linings maybe worn-out
and should be inspected bya qualified service technician. If the vehicle
has continuous vibration or shudder in the steering wheel while braking,
the vehicle should be inspected bya qualified service technician.
Rear Anti-lock Brake System (RABS) (if equipped)
Your vehicle maybe equipped with a Rear Anti-lock Braking System
(RABS). This system helps you maintain steering control during
Driving
102
Page 103 of 256

emergencystops bykeeping the rear brakes from locking. The front
wheels, however, maystill lock since theyare not controlled bythe
RABS. Noise from the ABS pump motor and brake pedal pulsation may
be observed during ABS braking; this is normal.
RABS warning lamp
The
ABSwarning lamp in the instrument cluster momentarilyilluminates
when the ignition is turned to the ON position. If the light does not
illuminate momentarilyat start up, remains on or continues to flash, the
ABS needs to be serviced.
With the ABS light on, the anti-lock
brake system is disabled and normal
braking is still effective unless the
brake warning light also remains
illuminated with parking brake released. (If your brake warning lamp
illuminates, have your vehicle serviced immediately.)
Using RABS
In an emergency, apply ing full pressure may cause the front wheels to
lock.If the front brakes lock, the vehicle cannot be steered.Yo u
should applythe brakes with steadilyincreasing force, as if “squeezing”
the brakes. If you feel the front wheels begin to lock, momentarily
release the pedal and repeat the “squeeze” technique.
Four-wheel anti-lock brake system (ABS) (if equipped)
Your vehicle maybe equipped with an Anti-lock Braking System (ABS).
This system helps you maintain steering control during emergency stops
bykeeping the brakes from locking. Noise from the ABS pump motor
and brake pedal pulsation maybe observed during ABS braking; any
pulsation or mechanical noise you may feel or hear is normal.
ABS warning lamp
ABS
TheABSlamp in the instrument cluster momentarilyilluminates when
the ignition is turned to ON. If the light does not illuminate during start
up, remains on or flashes, the ABS maybe disabled and the ABS may
need to be serviced.
Even when the ABS is disabled,
normal braking is still effective. (If
your BRAKE warning lamp
illuminates with the parking brake
released, have your brake system serviced immediately.)
Driving
103
Page 104 of 256
Using ABS
When hard braking is required, applycontinuous force on the brake
pedal; do not pump the brake pedal since this will reduce the
effectiveness of the ABS and will increase your vehicle’s stopping
distance. The ABS will be activated immediately, allowing y ou to retain
full steering control during hard braking and on slipperysurfaces.
However, the ABS does not decrease stopping distance.
Parking brake
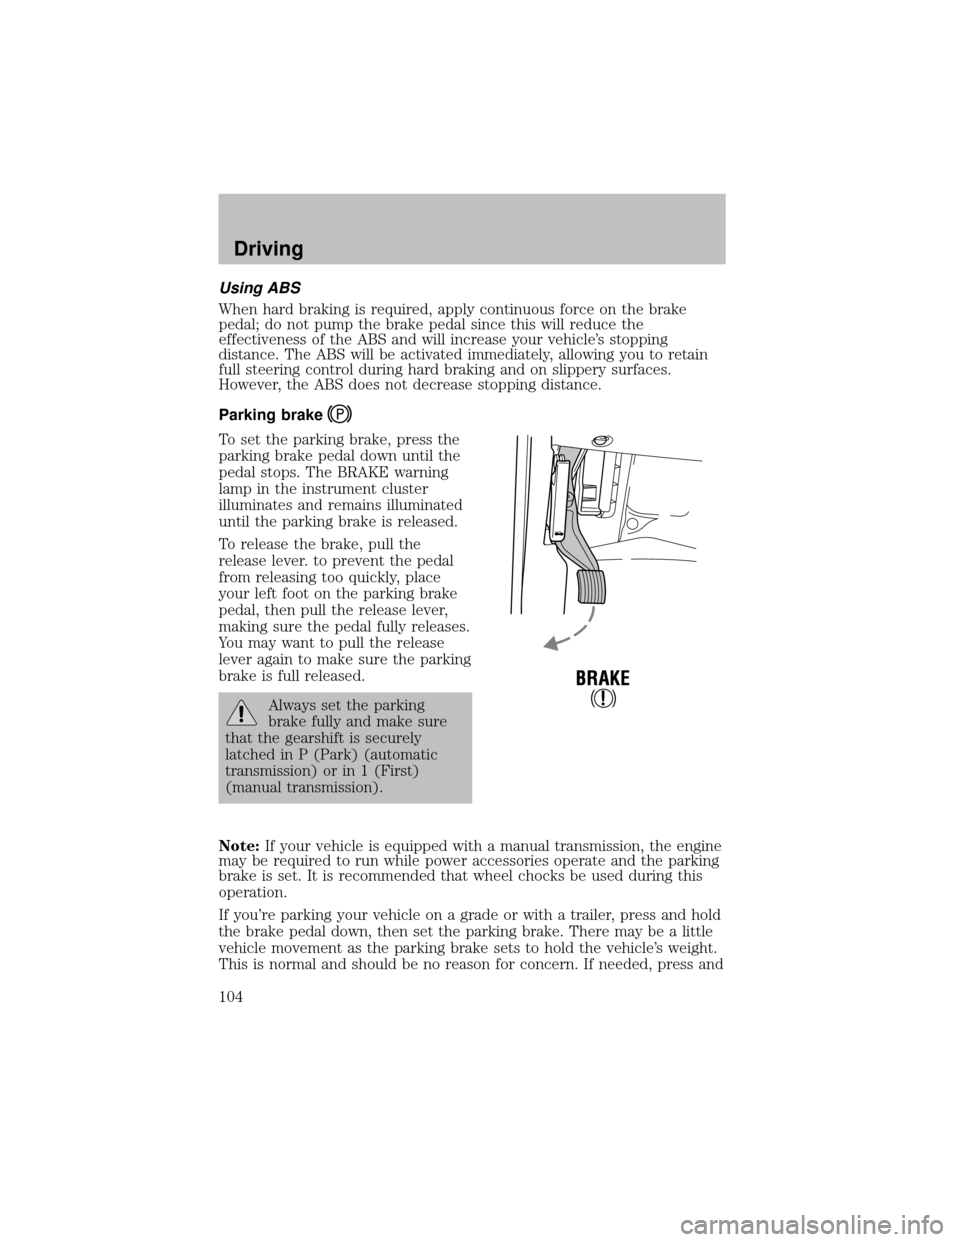
To set the parking brake, press the
parking brake pedal down until the
pedal stops. The BRAKE warning
lamp in the instrument cluster
illuminates and remains illuminated
until the parking brake is released.
To release the brake, pull the
release lever. to prevent the pedal
from releasing too quickly, place
your left foot on the parking brake
pedal, then pull the release lever,
making sure the pedal fullyreleases.
You maywant to pull the release
lever again to make sure the parking
brake is full released.
Always set the parking
brake fullyand make sure
that the gearshift is securely
latched in P (Park) (automatic
transmission) or in 1 (First)
(manual transmission).
Note:If your vehicle is equipped with a manual transmission, the engine
maybe required to run while power accessories operate and the parking
brake is set. It is recommended that wheel chocks be used during this
operation.
If you’re parking your vehicle on a grade or with a trailer, press and hold
the brake pedal down, then set the parking brake. There maybe a little
vehicle movement as the parking brake sets to hold the vehicle’s weight.
This is normal and should be no reason for concern. If needed, press and
Driving
104
Page 122 of 256
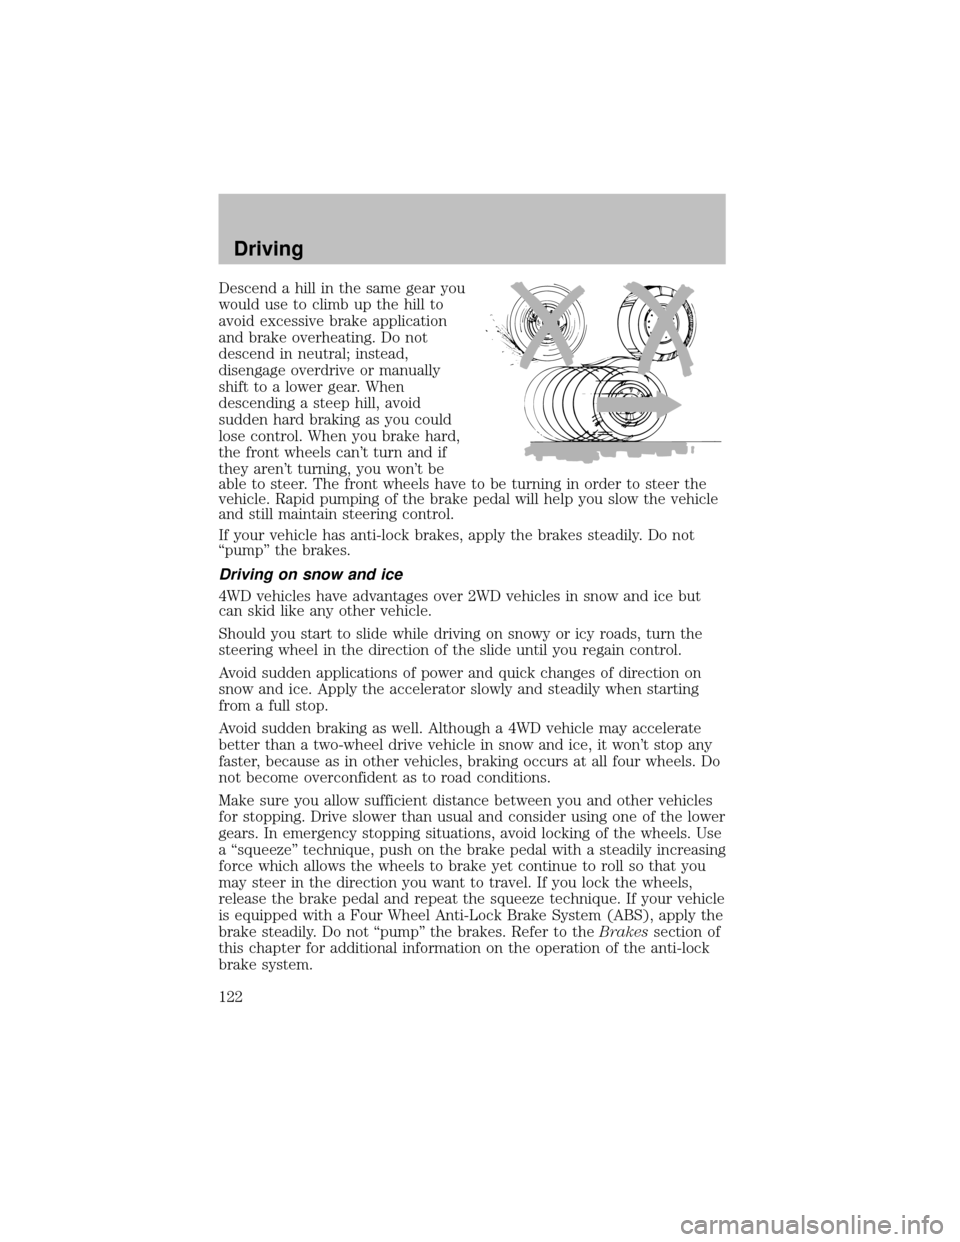
Descend a hill in the same gear you
would use to climb up the hill to
avoid excessive brake application
and brake overheating. Do not
descend in neutral; instead,
disengage overdrive or manually
shift to a lower gear. When
descending a steep hill, avoid
sudden hard braking as you could
lose control. When you brake hard,
the front wheels can’t turn and if
theyaren’t turning, you won’t be
able to steer. The front wheels have to be turning in order to steer the
vehicle. Rapid pumping of the brake pedal will help you slow the vehicle
and still maintain steering control.
If your vehicle has anti-lock brakes, apply the brakes steadily. Do not
“pump” the brakes.
Driving on snow and ice
4WD vehicles have advantages over 2WD vehicles in snow and ice but
can skid like anyother vehicle.
Should you start to slide while driving on snowyor icyroads, turn the
steering wheel in the direction of the slide until you regain control.
Avoid sudden applications of power and quick changes of direction on
snow and ice. Applythe accelerator slowlyand steadilywhen starting
from a full stop.
Avoid sudden braking as well. Although a 4WD vehicle mayaccelerate
better than a two-wheel drive vehicle in snow and ice, it won’t stop any
faster, because as in other vehicles, braking occurs at all four wheels. Do
not become overconfident as to road conditions.
Make sure you allow sufficient distance between you and other vehicles
for stopping. Drive slower than usual and consider using one of the lower
gears. In emergencystopping situations, avoid locking of the wheels. Use
a “squeeze” technique, push on the brake pedal with a steadilyincreasing
force which allows the wheels to brake yet continue to roll so that you
may steer in the direction you want to travel. If you lock the wheels,
release the brake pedal and repeat the squeeze technique. If your vehicle
is equipped with a Four Wheel Anti-Lock Brake System (ABS), apply the
brake steadily. Do not “pump” the brakes. Refer to theBrakessection of
this chapter for additional information on the operation of the anti-lock
brake system.
Driving
122
Page 157 of 256
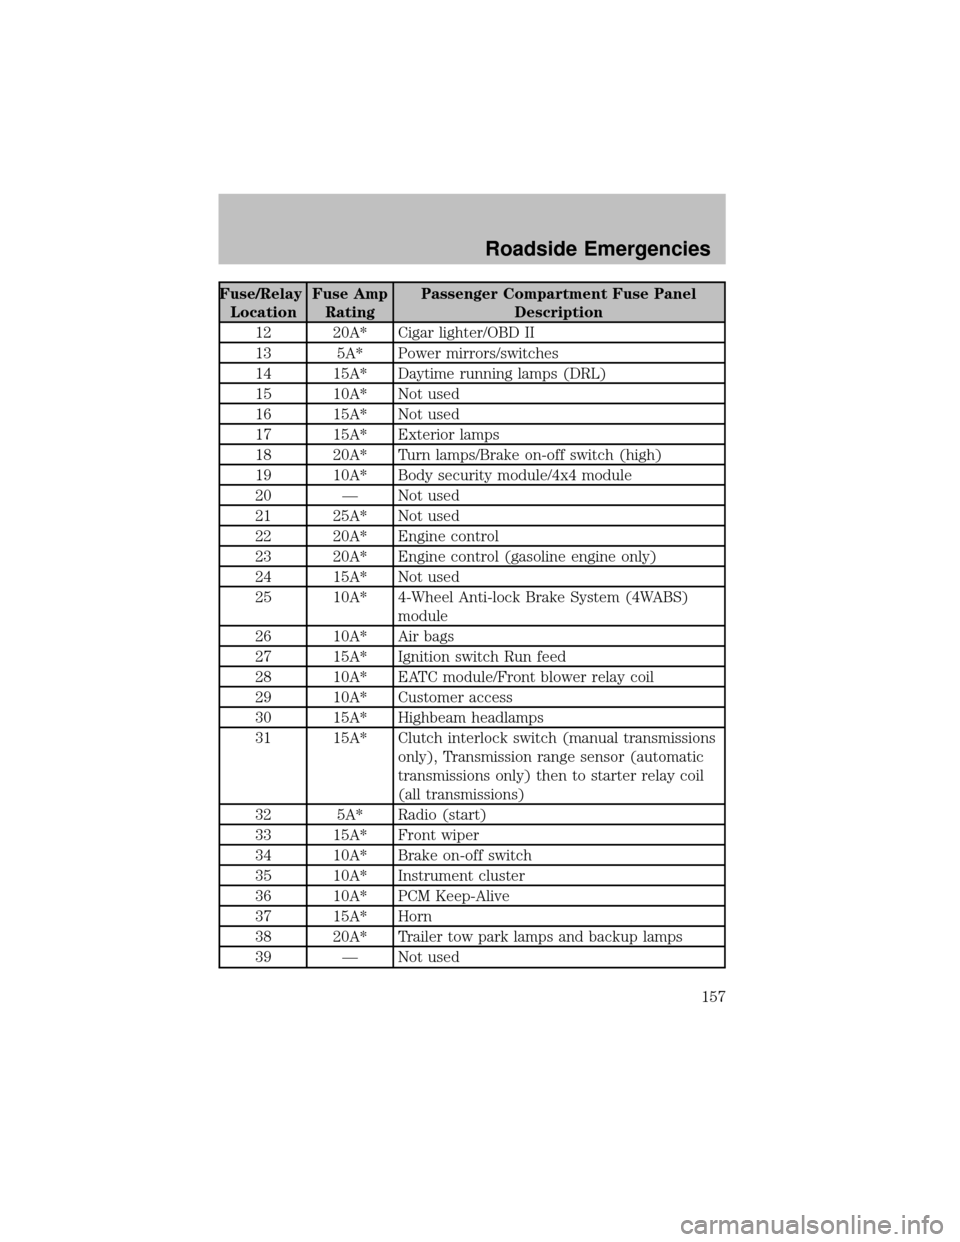
Fuse/Relay
LocationFuse Amp
RatingPassenger Compartment Fuse Panel
Description
12 20A* Cigar lighter/OBD II
13 5A* Power mirrors/switches
14 15A* Daytime running lamps (DRL)
15 10A* Not used
16 15A* Not used
17 15A* Exterior lamps
18 20A* Turn lamps/Brake on-off switch (high)
19 10A* Bodysecuritymodule/4x4 module
20 — Not used
21 25A* Not used
22 20A* Engine control
23 20A* Engine control (gasoline engine only)
24 15A* Not used
25 10A* 4-Wheel Anti-lock Brake System (4WABS)
module
26 10A* Air bags
27 15A* Ignition switch Run feed
28 10A* EATC module/Front blower relaycoil
29 10A* Customer access
30 15A* Highbeam headlamps
31 15A* Clutch interlock switch (manual transmissions
only), Transmission range sensor (automatic
transmissions only) then to starter relay coil
(all transmissions)
32 5A* Radio (start)
33 15A* Front wiper
34 10A* Brake on-off switch
35 10A* Instrument cluster
36 10A* PCM Keep-Alive
37 15A* Horn
38 20A* Trailer tow park lamps and backup lamps
39 — Not used
Roadside Emergencies
157
Page 158 of 256
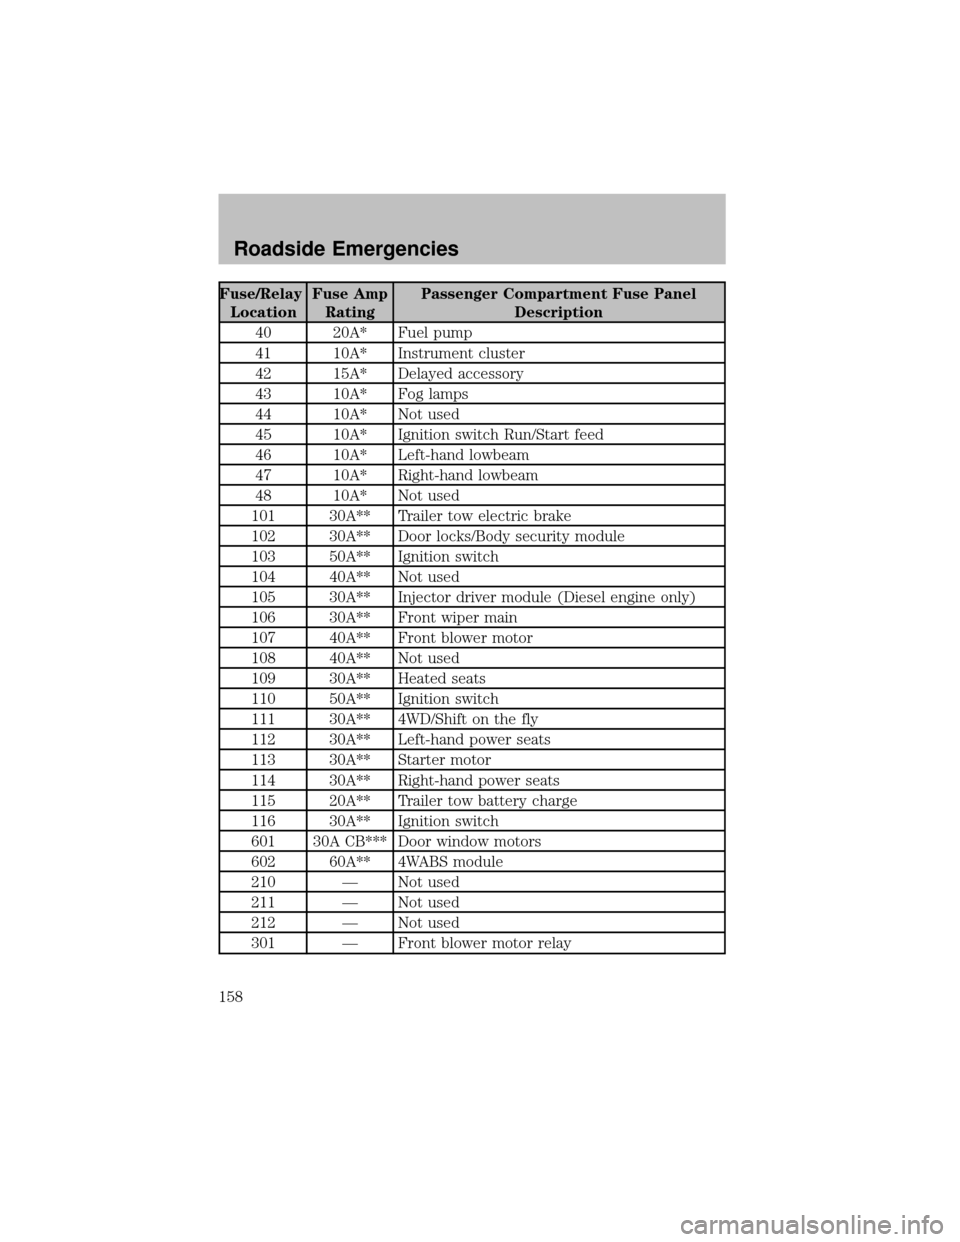
Fuse/Relay
LocationFuse Amp
RatingPassenger Compartment Fuse Panel
Description
40 20A* Fuel pump
41 10A* Instrument cluster
42 15A* Delayed accessory
43 10A* Fog lamps
44 10A* Not used
45 10A* Ignition switch Run/Start feed
46 10A* Left-hand lowbeam
47 10A* Right-hand lowbeam
48 10A* Not used
101 30A** Trailer tow electric brake
102 30A** Door locks/Bodysecuritymodule
103 50A** Ignition switch
104 40A** Not used
105 30A** Injector driver module (Diesel engine only)
106 30A** Front wiper main
107 40A** Front blower motor
108 40A** Not used
109 30A** Heated seats
110 50A** Ignition switch
111 30A** 4WD/Shift on the fly
112 30A** Left-hand power seats
113 30A** Starter motor
114 30A** Right-hand power seats
115 20A** Trailer tow batterycharge
116 30A** Ignition switch
601 30A CB*** Door window motors
602 60A** 4WABS module
210 — Not used
211 — Not used
212 — Not used
301 — Front blower motor relay
Roadside Emergencies
158