2003 FORD SUPER DUTY tire pressure
[x] Cancel search: tire pressurePage 168 of 256

2. Slide the wheel partiallyunder the vehicle and install the retainer
through the wheel center. Pull on the cable to align the components at
the end of the cable.
3. Turn the jack handle clockwise until the tire is raised to its stowed
position underneath the vehicle. The effort to turn the jack handle
increases significantlyand the spare tire carrier ratchets or slips when
the tire is raised to the maximum tightness. Tighten to the best of your
ability, to the point where the ratchet/slip occurs, if possible. The spare
tire carrier will not allow you to overtighten. If the spare tire carrier
ratchets or slips with little effort, take the vehicle to your dealer for
assistance at your earliest convenience.
4. Check that the tire lies flat against the frame and is properly
tightened. Tryto push or pull, then turn the tire to be sure it will not
move. Loosen and retighten, if necessary. Failure to properly stow the
spare tire mayresult in failure of the winch cable and loss of the tire.
5. Repeat this tightness check procedure when servicing the spare tire
pressure (everysix months, per scheduled maintenance guide), or at any
time that the spare tire is disturbed through service of other
components.
6. If removed, install the spare tire lock (if equipped) into the bumper
drive tube with the spare tire lock key(if equipped) and jack handle.
JUMP STARTING YOUR VEHICLE
The gases around the batterycan explode if exposed to flames,
sparks, or lit cigarettes. An explosion could result in injuryor
vehicle damage.
Batteries contain sulfuric acid which can burn skin, eyes and
clothing, if contacted.
Do not attempt to push-start your vehicle. Automatic
transmissions do not have push-start capability; also, the
catalytic converter may become damaged.
Preparing your vehicle
When the batteryis disconnected or a new batteryis installed, the
transmission must relearn its shift strategy. As a result, the transmission
mayhave firm and/or soft shifts. This operation is considered normal and
will not affect function or durabilityof the transmission. Over time, the
adaptive learning process will fullyupdate transmission operation.
Roadside Emergencies
168
Page 185 of 256

PAINT CHIPS
Your dealer has touch-up paint and sprays to match your vehicle’s color.
Take your color code (printed on a sticker in the driver’s door jam) to
your dealer to ensure you get the correct color.
•Remove particles such as bird droppings, tree sap, insect deposits, tar
spots, road salt and industrial fallout before repairing paint chips.
•Always read the instructions before using the products.
ALUMINUM WHEELS AND WHEEL COVERS
Aluminum wheels and wheel covers are coated with a clearcoat paint
finish. In order to maintain their shine:
•Clean weeklywith Motorcraft Wheel and Tire Cleaner (ZC-37–A),
which is available from your dealer. Heavy dirt and brake dust
accumulation mayrequire agitation with a sponge. Rinse thoroughly
with a strong stream of water.
•Never applyanycleaning chemical to hot or warm wheel rims or
covers.
•Some automatic car washes maycause damage to the finish on your
wheel rims or covers. Chemical-strength cleaners, or cleaning
chemicals, in combination with brush agitation to remove brake dust
and dirt, could wear awaythe clearcoat finish over time.
•Do not use hydrofluoric acid-based or high caustic-based wheel
cleaners, steel wool, fuels or strong household detergent.
•To remove tar and grease, use Ford Extra Strength Tar and Road Oil
Removal (B7A-19520–AA), available from your dealer.
ENGINE
Engines are more efficient when theyare clean because grease and dirt
buildup keep the engine warmer than normal. When washing:
•Take care when using a power washer to clean the engine. The
high-pressure fluid could penetrate the sealed parts and cause
damage.
•Do not spraya hot engine with cold water to avoid cracking the
engine block or other engine components.
•SprayMotorcraft Engine Shampoo and Degreaser (ZC-20) on all parts
that require cleaning and pressure rinse clean.
•Cover the highlighted areas to prevent water damage when cleaning
the engine.
Cleaning
185
Page 212 of 256

•Revving the engine before turning it off mayreduce fuel economy.
•Using the air conditioner or defroster mayreduce fuel economy.
•You maywant to turn off the speed control in hillyterrain if
unnecessaryshifting between third and fourth gear occurs.
Unnecessaryshifting of this type could result in reduced fuel
economy.
•Warming up a vehicle on cold mornings is not required and may
reduce fuel economy.
•Resting your foot on the brake pedal while driving may reduce fuel
economy.
•Combine errands and minimize stop-and-go driving.
Maintenance
•Keep tires properlyinflated and use onlyrecommended size.
•Operating a vehicle with the wheels out of alignment will reduce fuel
economy.
•Use recommended engine oil. Refer toLubricant specificationsin
this chapter.
•Perform all regularlyscheduled maintenance items. Follow the
recommended maintenance schedule and owner maintenance checks
found in your vehicle scheduled maintenance guide.
Conditions
•Heavilyloading a vehicle or towing a trailer mayreduce fuel economy
at anyspeed.
•Carrying unnecessaryweight mayreduce fuel economy(approximately
0.4 km/L [1 mpg] is lost for every180 kg [400 lb] of weight carried).
•Adding certain accessories to your vehicle (for example bug
deflectors, rollbars/light bars, running boards, ski/luggage racks) may
reduce fuel economy.
•Using fuel blended with alcohol maylower fuel economy.
•Fuel economymaydecrease with lower temperatures during the first
12–16 km (8–10 miles) of driving.
•Driving on flat terrain offers improved fuel economyas compared to
driving on hillyterrain.
•Transmissions give their best fuel economywhen operated in the top
cruise gear and with steadypressure on the gas pedal.
Maintenance and Specifications
212
Page 223 of 256

which all passenger car tires must meet under the Federal Motor Vehicle
SafetyStandard No. 109. Grades B and A represent higher levels of
performance on the laboratorytest wheel than the minimum required by
law.
The temperature grade for this tire is established for a tire that
is properlyinflated and not overloaded. Excessive speed,
underinflation, or excessive loading, either separatelyor in
combination, can cause heat buildup and possible tire failure.
SERVICING YOUR TIRES
Checking the tire pressure
•Use an accurate tire pressure gauge.
•Check the tire pressure when tires are cold, after the vehicle has been
parked for at least one hour or has been driven less than 5 km (3
miles).
•Adjust tire pressure to recommended specifications found on the
Certification Label. Tire pressure information can also be found on the
Tire Information label located on the inside of the fuel filler door.
Improperlyinflated tires can affect vehicle handling and can fail
suddenly, possibly resulting in loss of vehicle control, vehicle
rollover and/or personal injury.
Maintenance and Specifications
223
Page 224 of 256

Tire inflation information
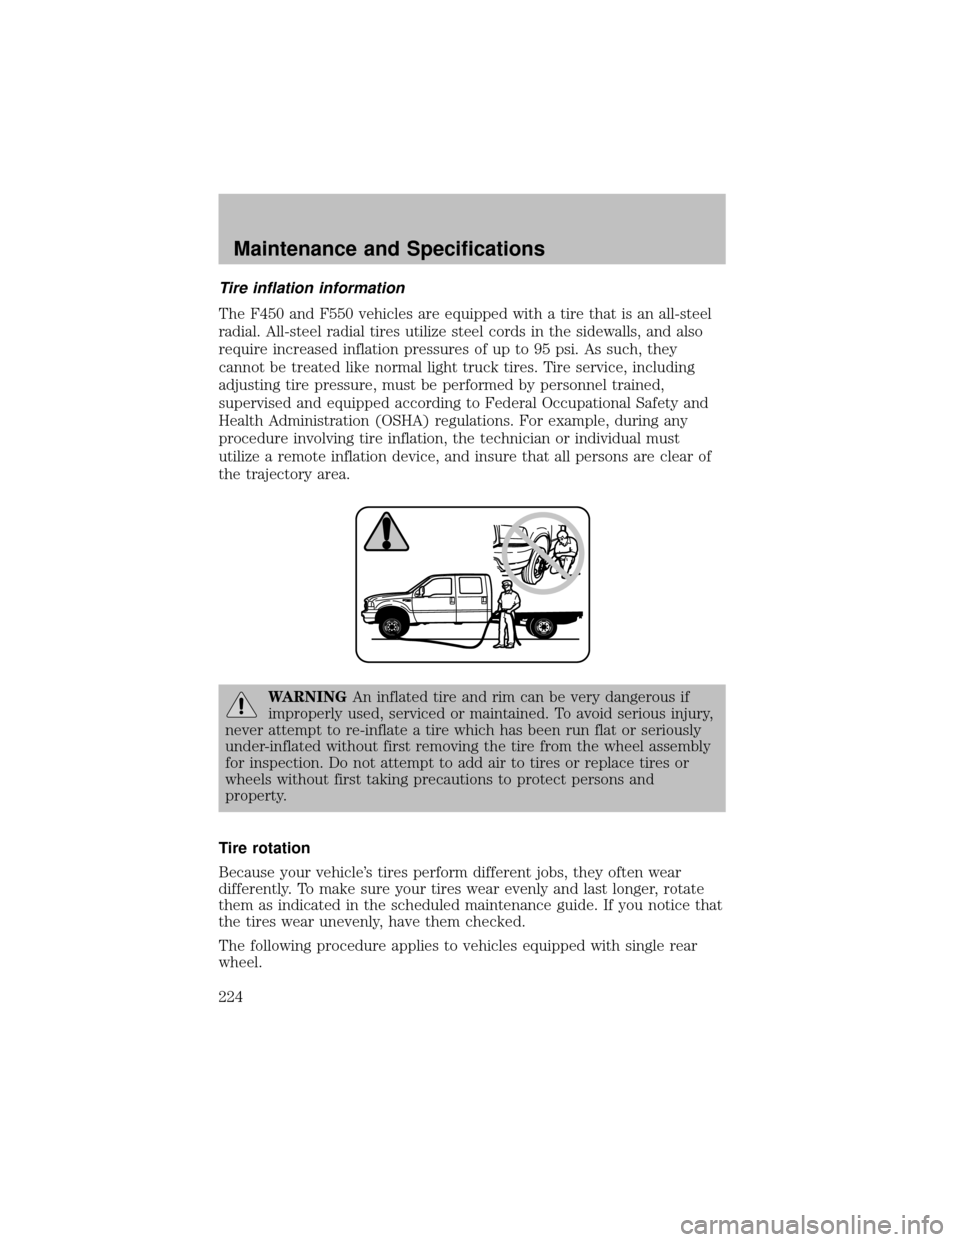
The F450 and F550 vehicles are equipped with a tire that is an all-steel
radial. All-steel radial tires utilize steel cords in the sidewalls, and also
require increased inflation pressures of up to 95 psi. As such, they
cannot be treated like normal light truck tires. Tire service, including
adjusting tire pressure, must be performed bypersonnel trained,
supervised and equipped according to Federal Occupational Safetyand
Health Administration (OSHA) regulations. For example, during any
procedure involving tire inflation, the technician or individual must
utilize a remote inflation device, and insure that all persons are clear of
the trajectoryarea.
WARNINGAn inflated tire and rim can be verydangerous if
improperlyused, serviced or maintained. To avoid serious injury,
never attempt to re-inflate a tire which has been run flat or seriously
under-inflated without first removing the tire from the wheel assembly
for inspection. Do not attempt to add air to tires or replace tires or
wheels without first taking precautions to protect persons and
property.
Tire rotation
Because your vehicle’s tires perform different jobs, they often wear
differently. To make sure y our tires wear evenly and last longer, rotate
them as indicated in the scheduled maintenance guide. If you notice that
the tires wear unevenly, have them checked.
The following procedure applies to vehicles equipped with single rear
wheel.
Maintenance and Specifications
224
Page 226 of 256

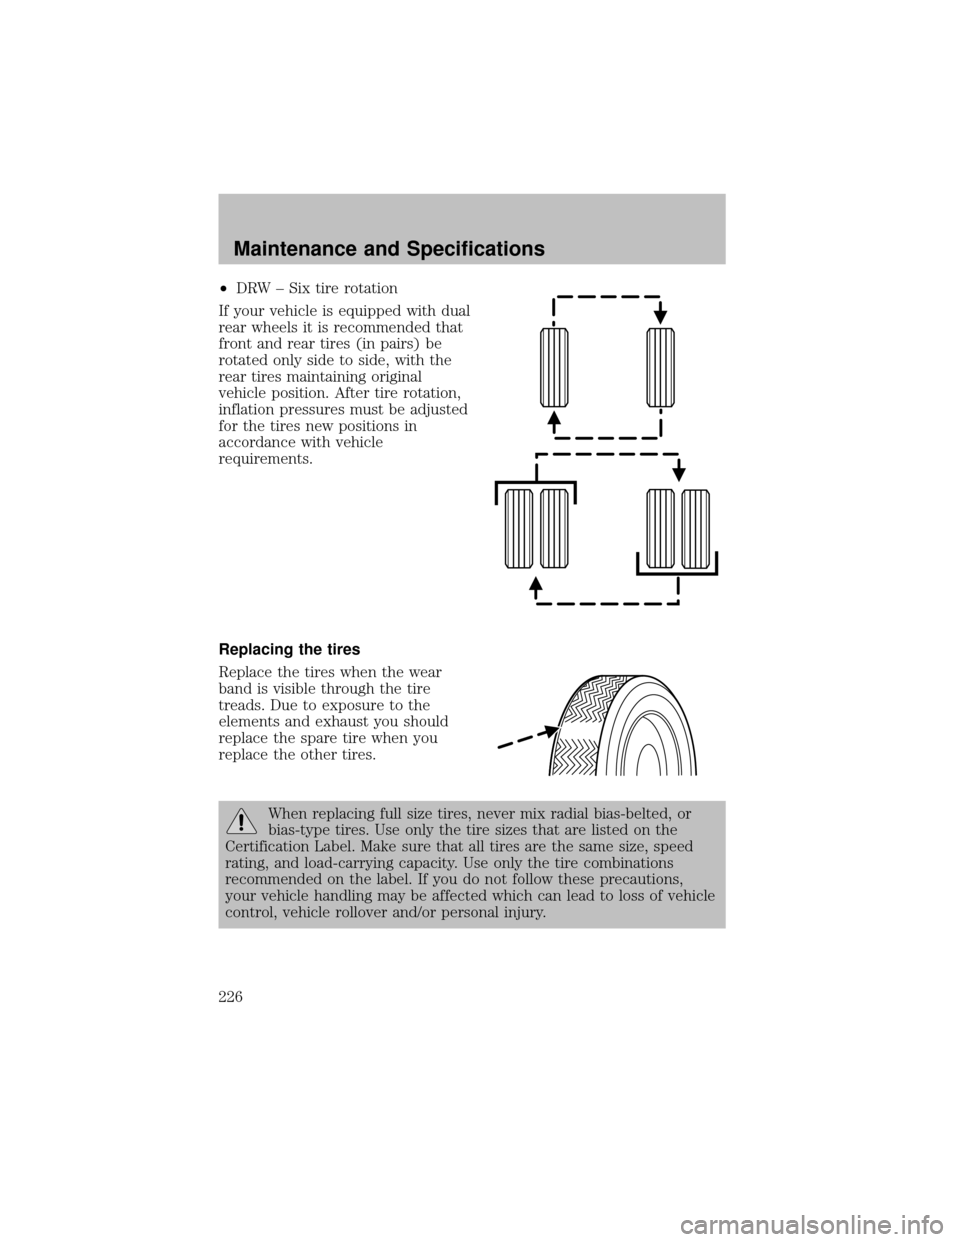
•DRW – Six tire rotation
If your vehicle is equipped with dual
rear wheels it is recommended that
front and rear tires (in pairs) be
rotated onlyside to side, with the
rear tires maintaining original
vehicle position. After tire rotation,
inflation pressures must be adjusted
for the tires new positions in
accordance with vehicle
requirements.
Replacing the tires
Replace the tires when the wear
band is visible through the tire
treads. Due to exposure to the
elements and exhaust you should
replace the spare tire when you
replace the other tires.
When replacing full size tires, never mix radial bias-belted, or
bias-type tires. Use only the tire sizes that are listed on the
Certification Label. Make sure that all tires are the same size, speed
rating, and load-carrying capacity. Use only the tire combinations
recommended on the label. If you do not follow these precautions,
your vehicle handling may be affected which can lead to loss of vehicle
control, vehicle rollover and/or personal injury.
Maintenance and Specifications
226
Page 253 of 256

fluid, refill capacity................228
fluid, specifications .........232, 235
Power Windows ...........................47
Preparing to drive your
vehicle ........................................105
R
Radio ..........................17–18, 21, 25
Relays ........................................154
Remote entrysystem .................58
illuminated entry......................60
locking/unlocking doors ...........56
Reverse sensing system ...........111
Roadside assistance ..................152
S
Safetybelts (see Safety
restraints) ........................68–71, 73
Safetydefects, reporting ..........183
Safetyrestraints ....................68–73
belt minder ...............................74
cleaning the safetybelts ..........78
extension assembly..................78
for adults .............................69–71
for children .........................87–88
warning light and chime ..........74
Safetyseats for children ............90
Seat belts (see Safety
restraints) ....................................68
Seats ............................................63
child safetyseats ......................90
cleaning ...................................188
Servicing your vehicle ..............191
Snowplowing .................6, 148–150Spare tire
(see Changing the Tire) ...........159
Spark plugs,
specifications .....................228, 235
Special notice ................................7
ambulance conversions ..............6
diesel-powered vehicles .............6
four-wheel drive vehicles .......151
utility-type vehicles ....................6
Specification chart,
lubricants ...........................232, 235
Speed control ..............................48
Starting your vehicle ....98–99, 101
jump starting ..........................168
Steering wheel
tilting .........................................45
T
Tailgate ........................................55
Tires ...................................221–223
changing ..........................159, 161
checking the pressure ............223
replacing ..................................226
rotating ....................................224
snow tires and chains ............227
tire grades ...............................222
treadwear ................................222
Towing .......................................127
trailer towing ..........................127
wrecker ....................................173
Traction-lok rear axle ...............105
Transfer case
fluid checking .........................220
Transmission
automatic operation ...............106
fluid, checking and adding
(automatic) .............................216
Index
253