Page 2469 of 4378
24. Unclip the harness.
25.
WARNING: The torque converter is heavy and may result in injury if it falls out of
the transmission. Secure the torque converter in the transmission.
Using the special tool, secure the torque converter in the transmission then lower the
transmission from the vehicle.
26. Carry out the transmission fluid cooler backflushing and cleaning. For additional information, refer to Transmission Fluid Cooler — Backflushing and Cleaning . �K�l�j . 6 �b�a
72003 Mustang Workshop Manual
18. 11. 2011file:///C:/Ford/2000 - 2004/tsocache/SHEF_2748/S3B~us~en~ ...
Page 2530 of 4378
does not slide freely on the serrations or that is not flat.
12. Check the clutch hub thrust surfaces for scores and clutch hub splines for wear.
13. Remove the direct clutch pack. 1. Remove the selective retaining ring.
2. Remove the direct clutch pack.
14. Using the special tool, compress the piston return spring and remove the snap ring.
15. WARNING: Wear safety glasses when using compressed air.
NOTE: If necessary, use regulated compressed air 207 kPa (30 psi) max pressure to remove
the clutch piston. Remove the support and spring assembly and piston. �K�l�j . 5 �b�a
112003 Mustang Workshop Manual
18. 11. 2011file:///C:/Ford/2000 - 2004/tsocache/SHEF_2748/S3B~us~en~ ...
Page 2541 of 4378
DISASSEMBLY AND ASSEMBLY OF SUBASSEMBLIES
Torque Converter Leak Check
1. Clean the outside surface of the torque converter.
2. Install the special tool into the converter hub.
3. WARNING: Always follow correct safety procedures while using press. Failure to
follow these instructions may result in personal injury.
Install the torque converter with the installed special tool into the arbor press.
Secure the press, apply enough force to seal the tool into the torque converter.
4. NOTE: Use clean dry shop air.
Apply air pressure to the valve on the special tool.
SECTION 307-
01: Automatic Transaxle/Transmission 2003 Mustang Workshop Manual Special Tool(s)
Leak Tester, Torque Converter
307-
421 �K�l�j . 1 �b�a
32003 Mustang Workshop Manual
18. 11. 2011file:///C:/Ford/2000 - 2004/tsocache/SHEF_2748/S3B~us~en~ ...
Page 2575 of 4378
68. Lightly lubricate the converter hub with clean automatic transmission fluid.
69.
WARNING: The torque converter can fall out if the transmission is tipped.
CAUTION: Make sure the converter hub is fully engaged in the front pump support
and gear and rotates freely. Do not damage the hub seal.
CAUTION: If the torque converter slides out, the hub seal may be damaged.
Using the special tools, install the torque converter.
70. Lubricate the torque converter pilot hub with multi- purpose grease. �K�l�j . 24 �b�a
252003 Mustang Workshop Manual
18. 11. 2011file:///C:/Ford/2000 - 2004/tsocache/SHEF_2748/S3B~us~en~ ...
Page 2587 of 4378

DIAGNOSIS AND TESTING
Transmission Cooling
Inspection and Verification
WARNING: Never remove the radiator cap under any conditions while the engine is
operating. Failure to follow these instructions could result in personal injury and/or damage to
the cooling system or engine. To avoid having scalding hot coolant or steam blow out of the
radiator, use extreme care when removing the radiator cap from a hot radiator. Wait until the
engine has cooled, then wrap a thick cloth around the radiator cap and turn it slowly to the first
stop. Step back while the pressure is released from the cooling system. When you are certain
all the pressure has been released, press down on the radiator cap (with a cloth), turn and
remove.
The transmission fluid cooler is integral to the radiator (8005). Whenever leaks or damage to the
radiator are found, install an entire new radiator. For additional information, refer to Section 303 - 03A or
Section 303 - 03B .
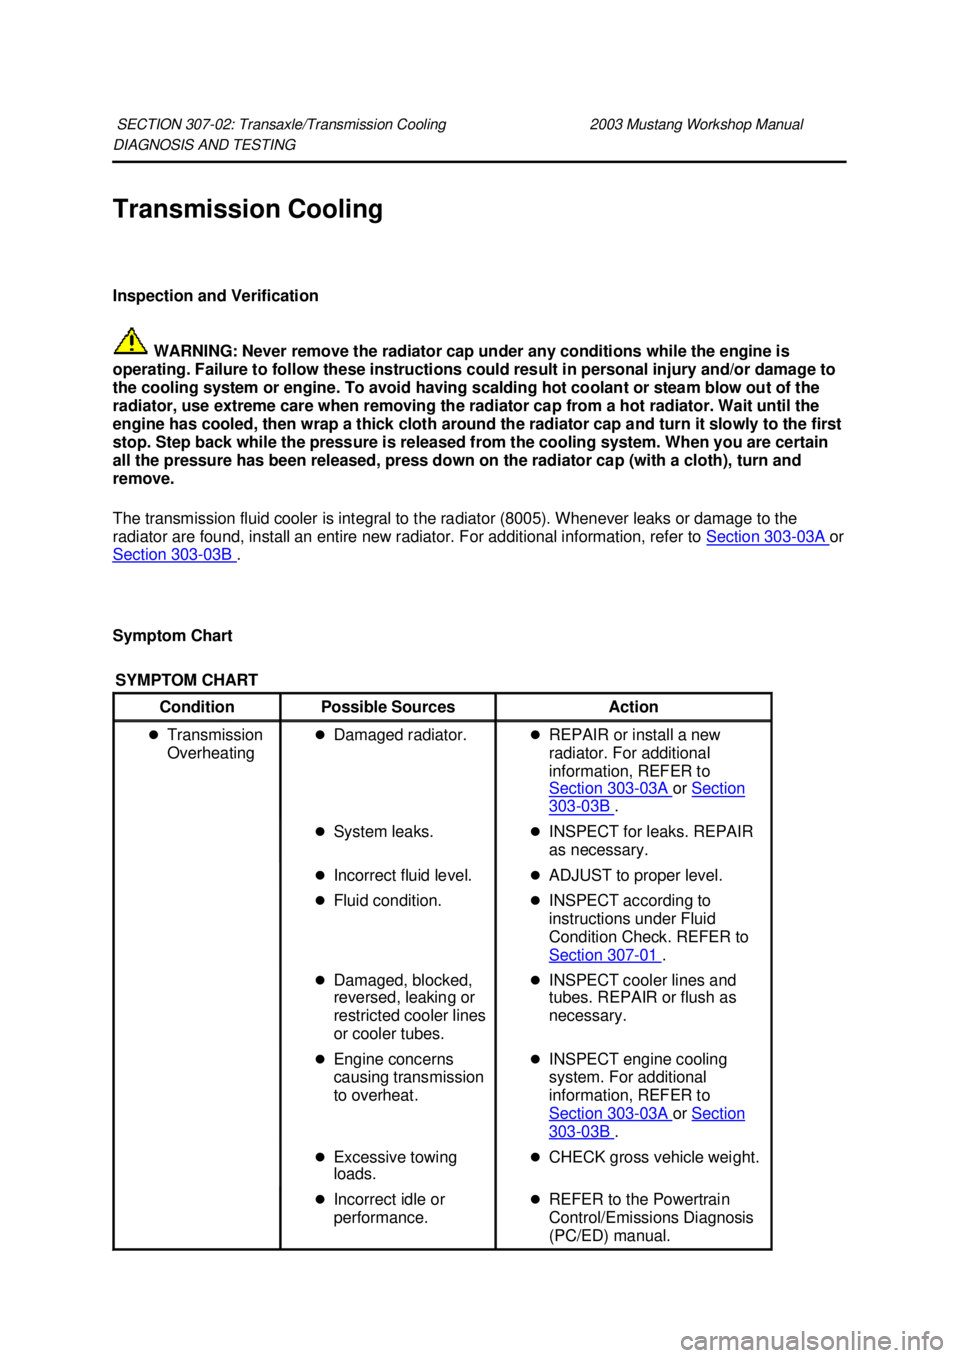
Symptom Chart SECTION 307-
02: Transaxle/Transmission Cooling 2003 Mustang Workshop Manual SYMPTOM CHART
Condition
Possible Sources Action
�z Transmission
Overheating �z
Damaged radiator. �zREPAIR or install a new
radiator. For additional
information, REFER to
Section 303 - 03A or
Section 303 - 03B .
�z System leaks. �zINSPECT for leaks. REPAIR
as necessary.
�z Incorrect fluid level. �zADJUST to proper level.
�z Fluid condition. �zINSPECT according to
instructions under Fluid
Condition Check. REFER to
Section 307 - 01 .
�z Damaged, blocked,
reversed, leaking or
restricted cooler lines
or cooler tubes. �z
INSPECT cooler lines and
tubes. REPAIR or flush as
necessary.
�z Engine concerns
causing transmission
to overheat. �z
INSPECT engine cooling
system. For additional
information, REFER to
Section 303 - 03A or
Section 303 - 03B .
�z Excessive towing
loads. �z
CHECK gross vehicle weight.
�z Incorrect idle or
performance. �z
REFER to the Powertrain
Control/Emissions Diagnosis
(PC/ED) manual. �K�l�j . 1 �b�a
22003 Mustang Workshop Manual
18. 11. 2011file:///C:/Ford/2000 - 2004/tsocache/SHEF_2748/S3B~us~en~ ...
Page 2645 of 4378

GENERAL PROCEDURES
Disc Check
WARNING: Dust and dirt present on wheel brake and clutch assemblies may contain
asbestos fibers that are hazardous to health when made airborne by cleaning with compressed
air or by dry brushing. Failure to follow these instructions may result in personal injury.
WARNING: Wheel brake assemblies and clutch facings should be cleaned using a vacuum
cleaner recommended for use with asbestos fibers such as the brake automobile brake drum
system with vacuum. Dust and dirt from the vacuum should be disposed of in a manner that
prevents dust exposure such as sealed bags. The bag must be labeled according to OSHA
instructions and the trash hauler notified as to the bag's contents. Failure to follow these
instructions may result in personal injury.
WARNING: If a vacuum suitable for asbestos is not available, cleaning should be done
wet. If dust generation is still possible, technicians should wear government- approved toxic
dust purifying respirators. Failure to follow these instructions may result in personal injury.
WARNING: Grinding or sanding on the brake linings, pads, rotors, drums or clutch
facings should be done only while using correct exhaust- ventilated equipment. Failure to
follow these instructions may result in personal injury.
WARNING: OSHA requires areas where asbestos dust generation is possible to be
isolated and posted with warning signs. Only technicians concerned with carrying out brake or
clutch service should be present in the area. Failure to follow these instructions may result in
personal injury.
1. Check the clutch disc lining surface for hardening or the presence of oil.
2. Check for a worn clutch disc lining. Measure the minimum allowable depth to the rivet heads with a slide caliper.
SECTION 308-
00: Manual Transaxle/Transmission and Clutch — General
Information 2003 Mustang Workshop
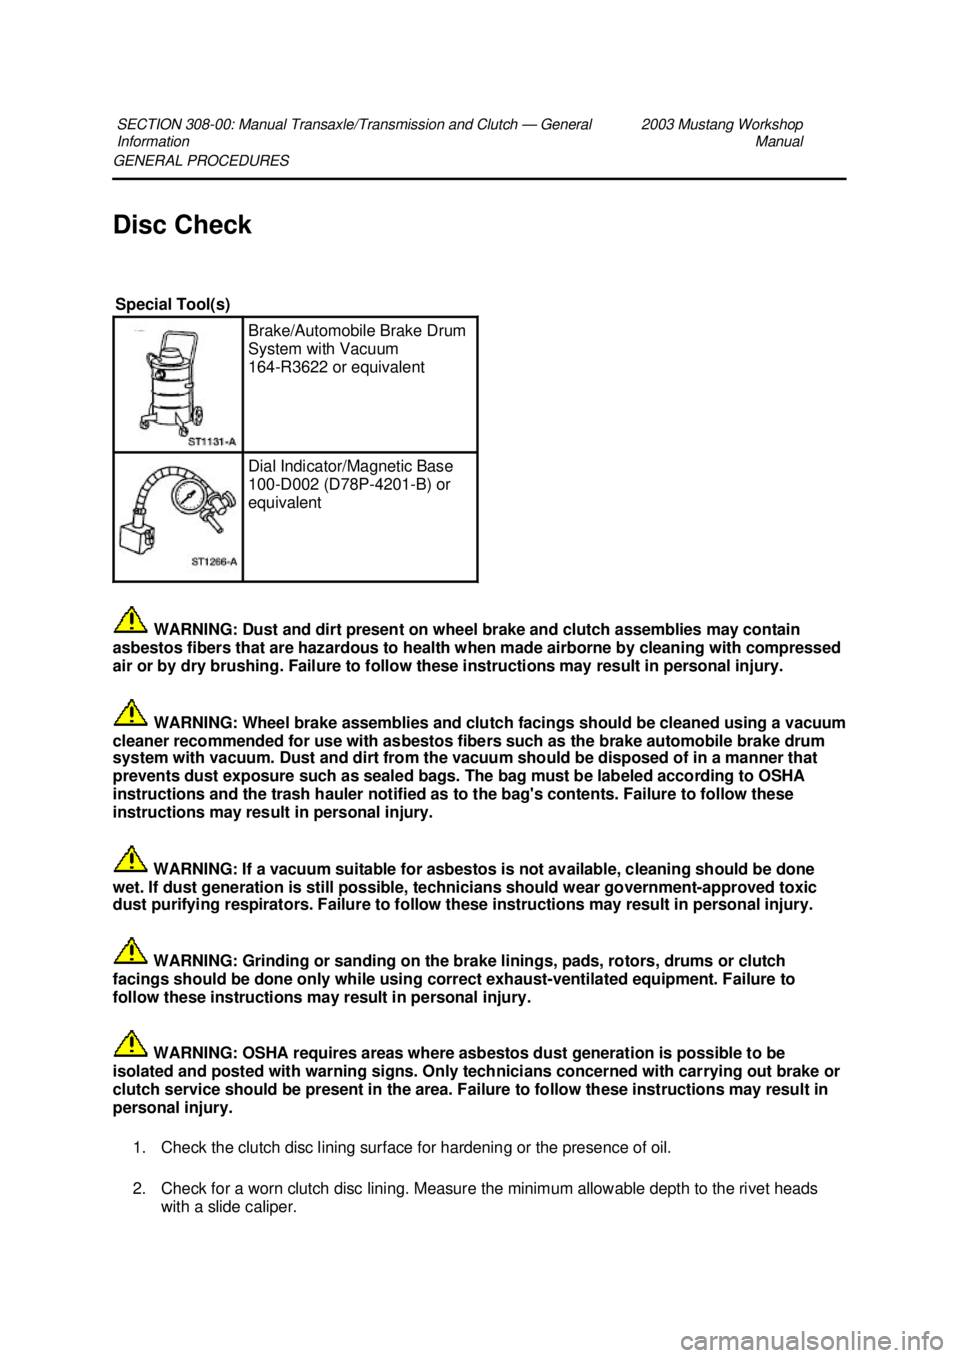
Manual Special Tool(s)
Brake/Automobile Brake Drum
System with Vacuum
164-
R3622 or equivalent Dial Indicator/Magnetic Base
100-
D002 (D78P-4201- B) or
equivalent �K�l�j . 1 �b�a
32003 Mustang Workshop Manual
18. 11. 2011file:///C:/Ford/2000 - 2004/tsocache/SHEF_2308/S3B~us~en~ ...
Page 2669 of 4378

REMOVAL AND INSTALLATION
Flywheel Ring Gear
Removal
1. Remove the flywheel. For additional information, refer to Section 303 - 01A ,
Section 303 - 01B or
Section 303 - 01C .
2. WARNING: This procedure should be carried out only by a correctly equipped and
experienced acetylene torch operator. Tongs must be used or asbestos gloves worn
when handling the heated flywheel ring gear. Failure to follow these instructions can
result in personal injury.
CAUTION: Tap the flywheel ring gear evenly to prevent binding.
Remove the flywheel ring gear from the flywheel. �zEvenly heat the flywheel ring gear with an acetylene torch and use a brass drift to drive
the flywheel ring gear off the flywheel.
Installation
1. WARNING: This procedure should be carried out only by a properly equipped and
experienced acetylene torch operator. Tongs must be used or asbestos gloves worn
when handling the heated flywheel ring gear. Failure to follow these instructions can
result in personal injury.
CAUTION: Do not heat the flywheel ring gear beyond 261°C (500°F). Use heat-
indicating crayons to prevent overheating.
CAUTION: Keep the torch moving to prevent hot spots.
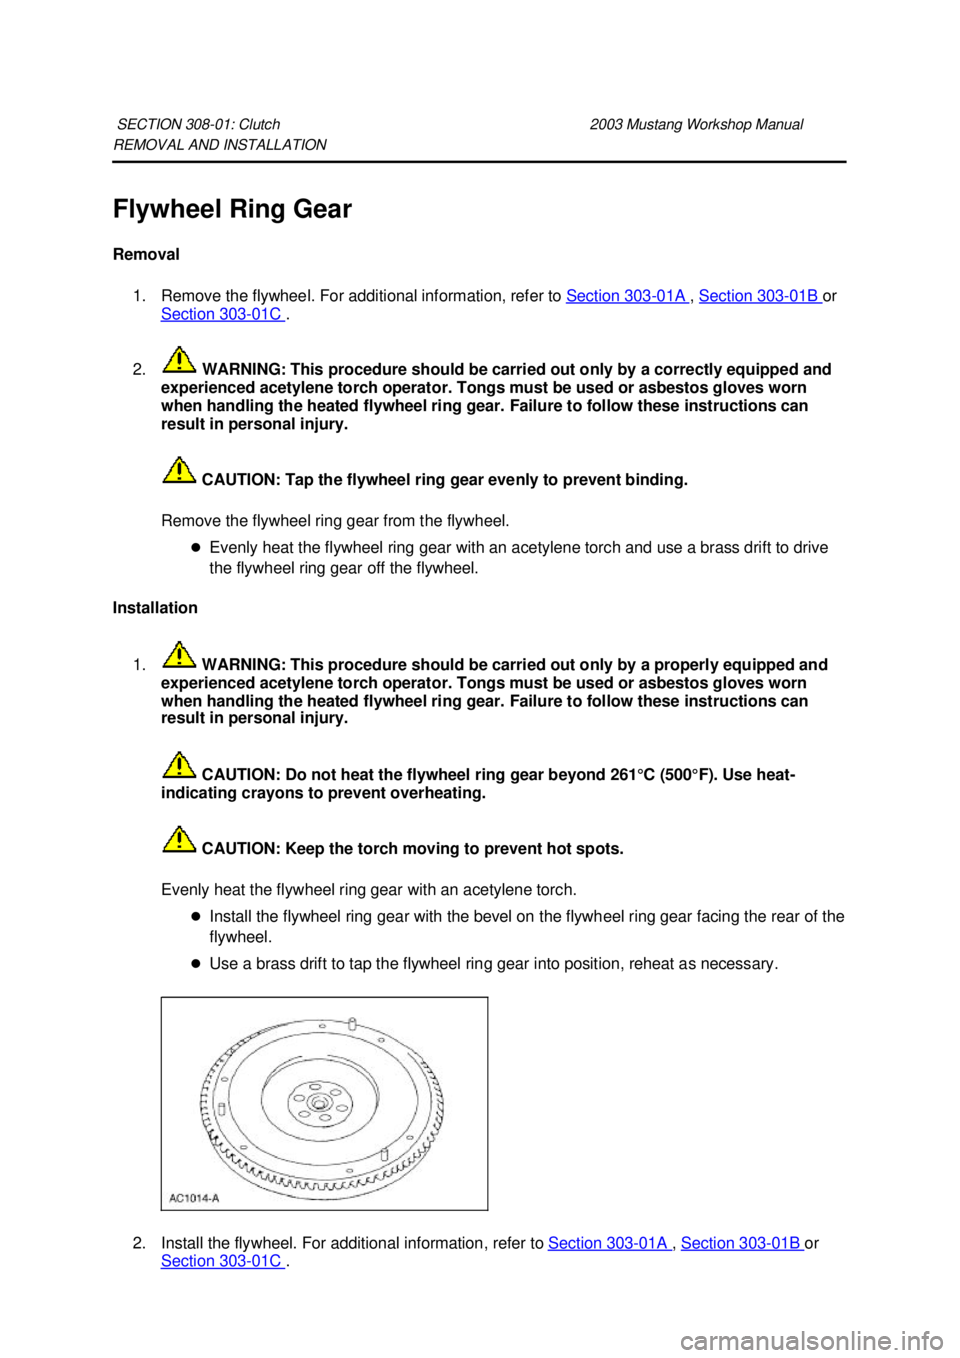
Evenly heat the flywheel ring gear with an acetylene torch. �zInstall the flywheel ring gear with the bevel on the flywheel ring gear facing the rear of the
flywheel.
�z Use a brass drift to tap the flywheel ring gear into position, reheat as necessary.
2. Install the flywheel. For additional information, refer to Section 303 - 01A ,
Section 303 - 01B or
Section 303 - 01C . SECTION 308-
01: Clutch 2003 Mustang Workshop Manual �K�l�j . 1 �b�a
22003 Mustang Workshop Manual
18. 11. 2011file:///C:/Ford/2000 - 2004/tsocache/SHEF_2308/S3B~us~en~ ...
Page 2678 of 4378
9.
WARNING: Do not allow the quadrant to snap rearward. Failure to follow this
instruction may result in personal injury.
NOTE: Lift the clutch pedal all the way up to release the clutch release lever cable (7K553).
Rotate the clutch pedal adjuster quandrant (7L583) and unhook the clutch release lever cable
(7K553).
10. Remove the nuts.
11. Remove the screw.
12. Remove the nut and the clutch pedal (7519). �K�l�j . 3 �b�a
62003 Mustang Workshop Manual
18. 11. 2011file:///C:/Ford/2000 - 2004/tsocache/SHEF_2308/S3B~us~en~ ...