Page 1 of 216
Table of Contents
Introduction 4
Instrument Cluster 10
Warning and control lights 10
Gauges 14
Entertainment Systems 17
AM/FM stereo cassette 17
AM/FM stereo with CD 20
Climate Controls 35
Heater only 35
Manual heating and air conditioning 36
Lights 38
Headlamps 38
Turn signal control 41
Driver Controls 50
Windshield wiper/washer control 50
Steering wheel adjustment 51
Power windows 52
Mirrors 53
Speed control 53
Locks and Security 62
Keys 62
Locks 62
Anti-theft system 65
Table of Contents
1
Page 39 of 216

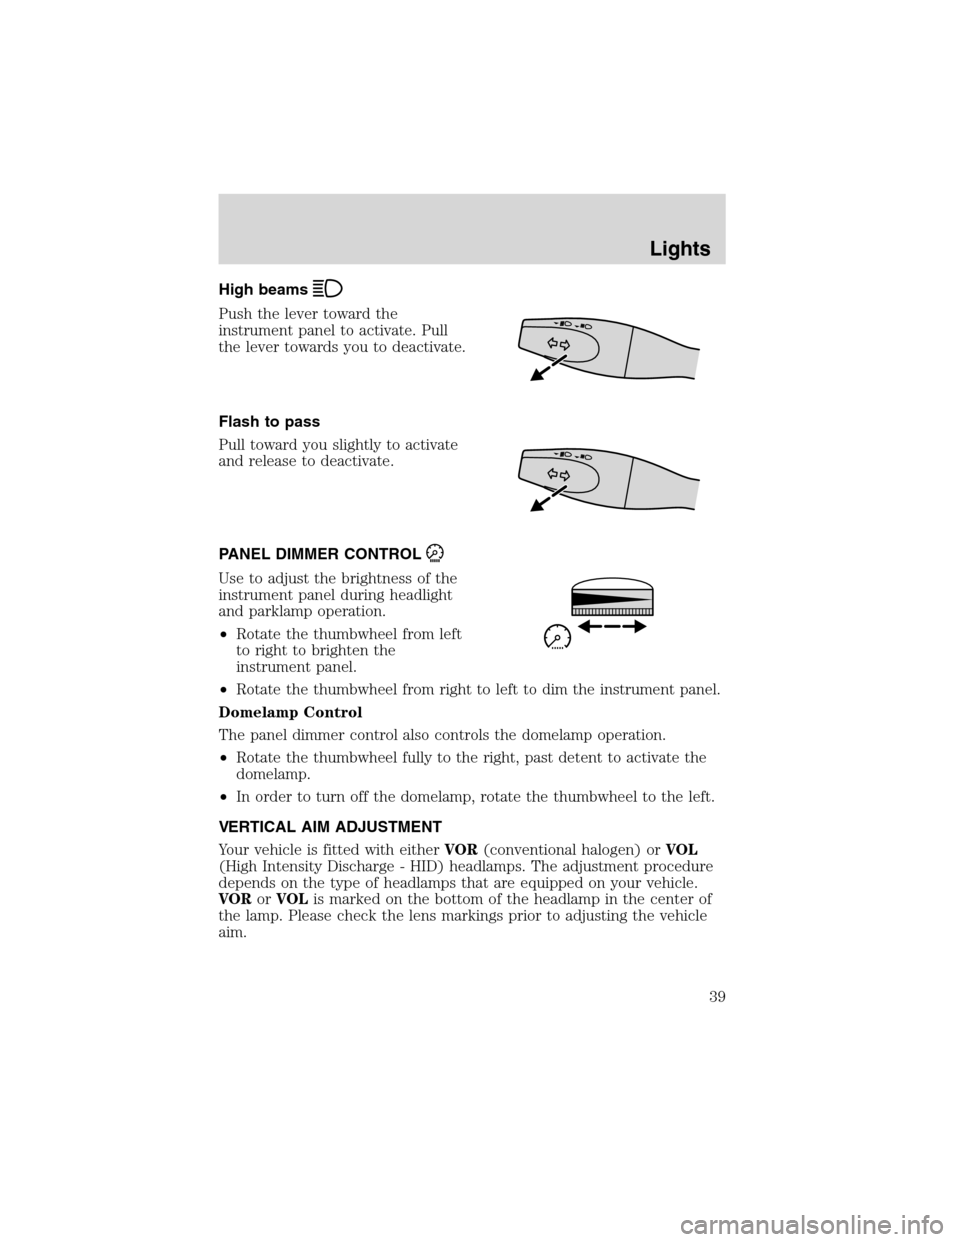
High beams
Push the lever toward the
instrument panel to activate. Pull
the lever towards you to deactivate.
Flash to pass
Pull toward you slightly to activate
and release to deactivate.
PANEL DIMMER CONTROL
Use to adjust the brightness of the
instrument panel during headlight
and parklamp operation.
•Rotate the thumbwheel from left
to right to brighten the
instrument panel.
•Rotate the thumbwheel from right to left to dim the instrument panel.
Domelamp Control
The panel dimmer control also controls the domelamp operation.
•Rotate the thumbwheel fully to the right, past detent to activate the
domelamp.
•In order to turn off the domelamp, rotate the thumbwheel to the left.
VERTICAL AIM ADJUSTMENT
Your vehicle is fitted with eitherVOR(conventional halogen) orVOL
(High Intensity Discharge - HID) headlamps. The adjustment procedure
depends on the type of headlamps that are equipped on your vehicle.
VORorVOLis marked on the bottom of the headlamp in the center of
the lamp. Please check the lens markings prior to adjusting the vehicle
aim.
Lights
39
Page 41 of 216

3. Open the hood.
4. Remove the battery cover.
5. Remove the headlamp bulb cover by releasing the four snap hooks
(two top and two bottom).
Note:On the left headlamp, pull the bulb cover approximately 1 inch
rearward and then slide it out until the vertical aiming adjuster is
accessible.
6. Turn on the low beam to illuminate the wall or screen. On the wall or
screen you will observe an area of high intensity light. If the left side of
each light pattern is not at the reference line, the beam needs to be
adjusted.
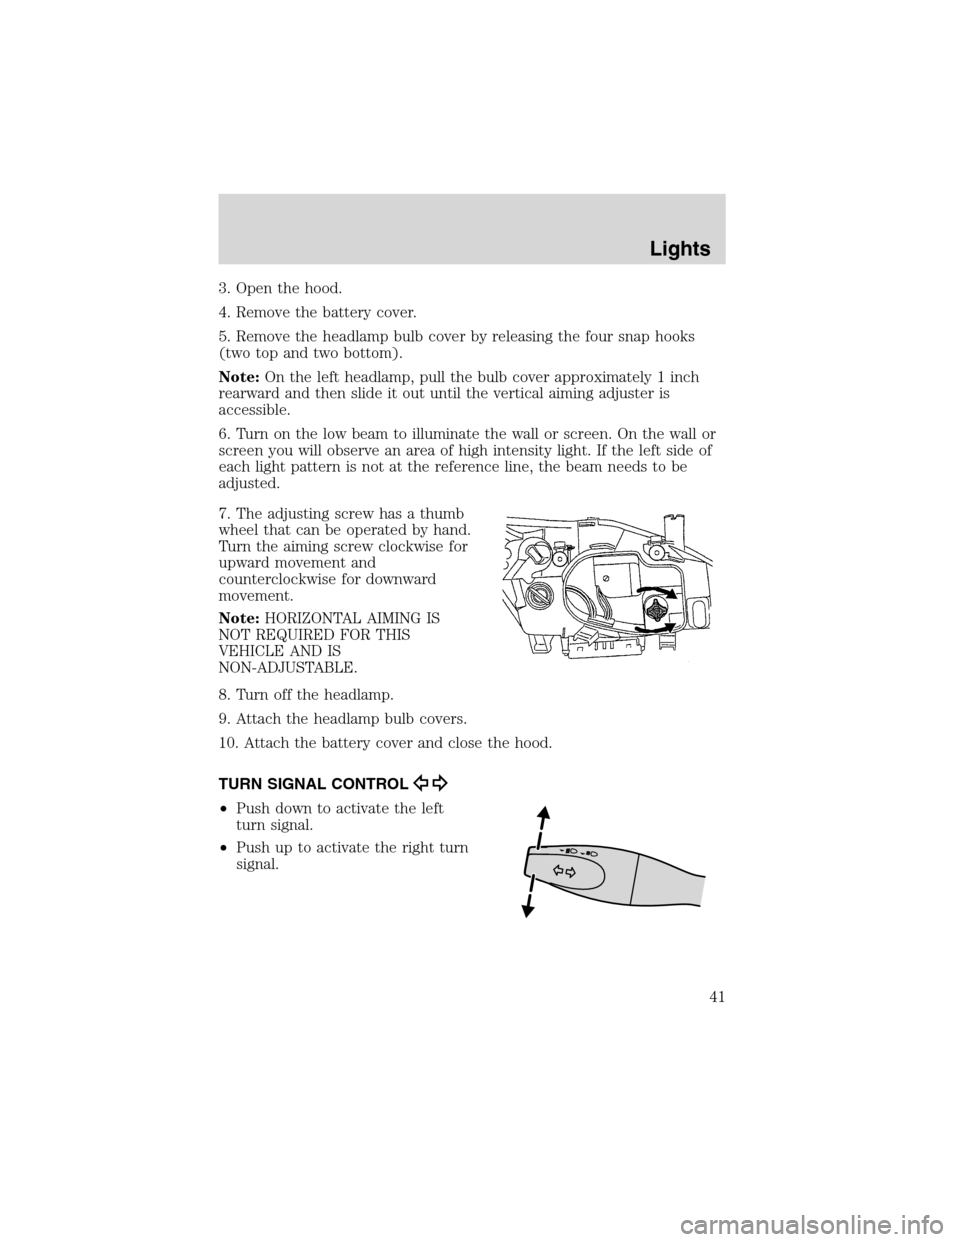
7. The adjusting screw has a thumb
wheel that can be operated by hand.
Turn the aiming screw clockwise for
upward movement and
counterclockwise for downward
movement.
Note:HORIZONTAL AIMING IS
NOT REQUIRED FOR THIS
VEHICLE AND IS
NON-ADJUSTABLE.
8. Turn off the headlamp.
9. Attach the headlamp bulb covers.
10. Attach the battery cover and close the hood.
TURN SIGNAL CONTROL
•Push down to activate the left
turn signal.
•Push up to activate the right turn
signal.
Lights
41
Page 51 of 216
Changing the wiper blades
1. Pull the wiper arm away from the
vehicle. Turn the blade at an angle
from the wiper arm. Push the lock
pin manually to release the blade
and pull the wiper blade down
toward the windshield to remove it
from the arm.
2. Attach the new wiper to the
wiper arm and press it into place
until a click is heard.
3. Replace wiper blades every 6
months for optimum performance.
TILT AND TELESCOPE STEERING COLUMN (IF EQUIPPED)
Pull the locking lever down to adjust
and telescope the steering column
position. Return the lever to its
original position to secure the
wheel.
The telescope function is adjusted
by moving the wheel toward the
driver to telescope out and toward
the instrument panel to telescope
in. Always place both hands
opposite each other to adjust.
Never adjust the steering wheel when the vehicle is moving.
Driver Controls
51
Page 52 of 216
HORN
Press the steering wheel pad. The
horn can be operated when the
ignition is off.
POWER WINDOWS (IF EQUIPPED)
When closing the power windows, you should verify they are free
of obstructions and ensure that children and/or pets are not in
the proximity of the window openings.
Press and hold the bottom part of
the rocker switch to open the
window. Press and hold the top part
of the rocker switch to close the
window.
One touch down:Allows the
driver’s window to open fully
without holding the control down.
Press the driver window control completely down then release. Press
again to stop.
Window lock
The window lock feature allows only
the driver to operate the power
windows.
To lock out all the window controls
slide the control to the left. Slide
the control to the right to restore
the window controls.
Driver Controls
52
Page 54 of 216
Setting speed control
The controls for using your speed
control are located on the steering
wheel for your convenience.
1. Press the ON control and release
it.
2. Accelerate to the desired speed.
3. Press the SET ACCEL control
and release it.
4. Take your foot off the accelerator
pedal.
5. The indicator light on the
instrument cluster will turn on.
Note:
•Vehicle speed may vary momentarily when driving up and down a
steep hill.
•If the vehicle speed increases above the set speed on a downhill, you
may want to apply the brakes to reduce the speed.
•If the vehicle speed decreases more than 16 km/h (10 mph) below
your set speed on an uphill, your speed control will disengage.
Disengaging speed control
To disengage the speed control:
•Depress the brake pedal or
•Depress the clutch pedal (if equipped).
Disengaging the speed control will not erase previous set speed.
Driver Controls
54
Page 61 of 216
LUGGAGE RACK (IF EQUIPPED)
The maximum recommended load is
100 kg (220 lbs) on the luggage
rack structure. The loadmust be
placed directly on the luggage rack.
The vehicle’s roof panelis not
designed to carry a load.
When loading the luggage rack, it is
recommended to evenly distribute
the load, as well as maintain a low center of gravity. Ensure that the load
is securely fastened.
Your fuel economy will decrease when you drive with items on the
luggage rack. When the rack is loaded, check the tightness of the rear
adjusting thumbwheel before driving and at each refueling stop.
Loaded vehicles, with a higher center of gravity, may handle
differently than unloaded vehicles. Extra precautions, such as
slower speeds and increased stopping distance, should be taken when
driving a heavily loaded vehicle.
Driver Controls
61
Page 107 of 216

DrivingSTARTING
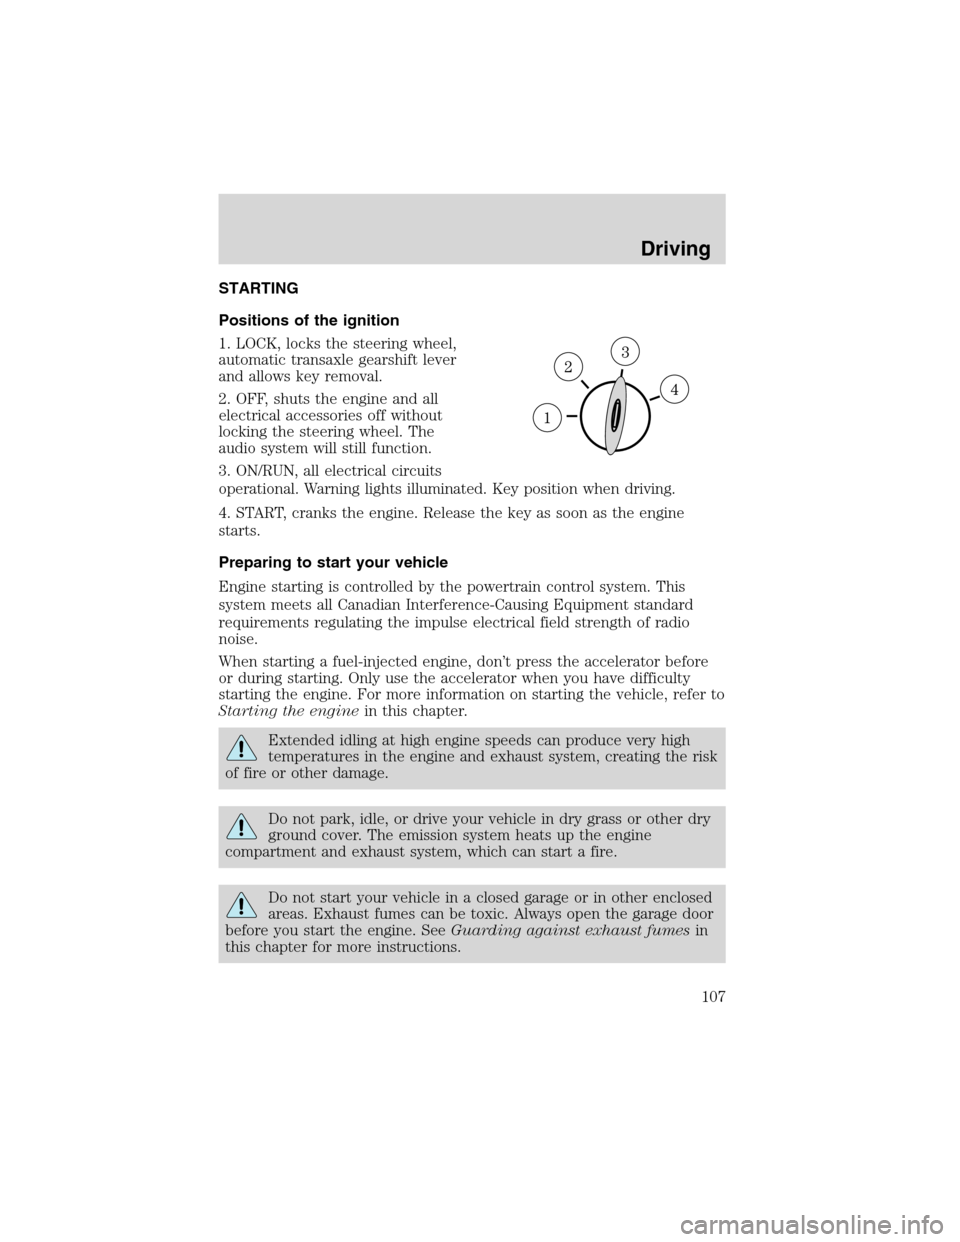
Positions of the ignition
1. LOCK, locks the steering wheel,
automatic transaxle gearshift lever
and allows key removal.
2. OFF, shuts the engine and all
electrical accessories off without
locking the steering wheel. The
audio system will still function.
3. ON/RUN, all electrical circuits
operational. Warning lights illuminated. Key position when driving.
4. START, cranks the engine. Release the key as soon as the engine
starts.
Preparing to start your vehicle
Engine starting is controlled by the powertrain control system. This
system meets all Canadian Interference-Causing Equipment standard
requirements regulating the impulse electrical field strength of radio
noise.
When starting a fuel-injected engine, don’t press the accelerator before
or during starting. Only use the accelerator when you have difficulty
starting the engine. For more information on starting the vehicle, refer to
Starting the enginein this chapter.
Extended idling at high engine speeds can produce very high
temperatures in the engine and exhaust system, creating the risk
of fire or other damage.
Do not park, idle, or drive your vehicle in dry grass or other dry
ground cover. The emission system heats up the engine
compartment and exhaust system, which can start a fire.
Do not start your vehicle in a closed garage or in other enclosed
areas. Exhaust fumes can be toxic. Always open the garage door
before you start the engine. SeeGuarding against exhaust fumesin
this chapter for more instructions.
Driving
107