2003 FORD FOCUS height
[x] Cancel search: heightPage 40 of 216
VOR
1. Park the vehicle on a level surface approximately 7.6 meters (25 feet)
from the vertical wall or the screen directly in front of it.
2. Measure the height of the headlamp bulb center from the ground and
mark a 2.5 meters (8 foot) horizontal reference line on the vertical wall
or screen at this height. (A piece of masking tape works well.)
3. Turn on the low beam headlamps to illuminate the wall or screen and
open the hood.
4. On the wall or screen you will observe an area of high intensity light.
The top of the high intensity area should touch the horizontal reference
line. If not, the beam will need to be adjusted.
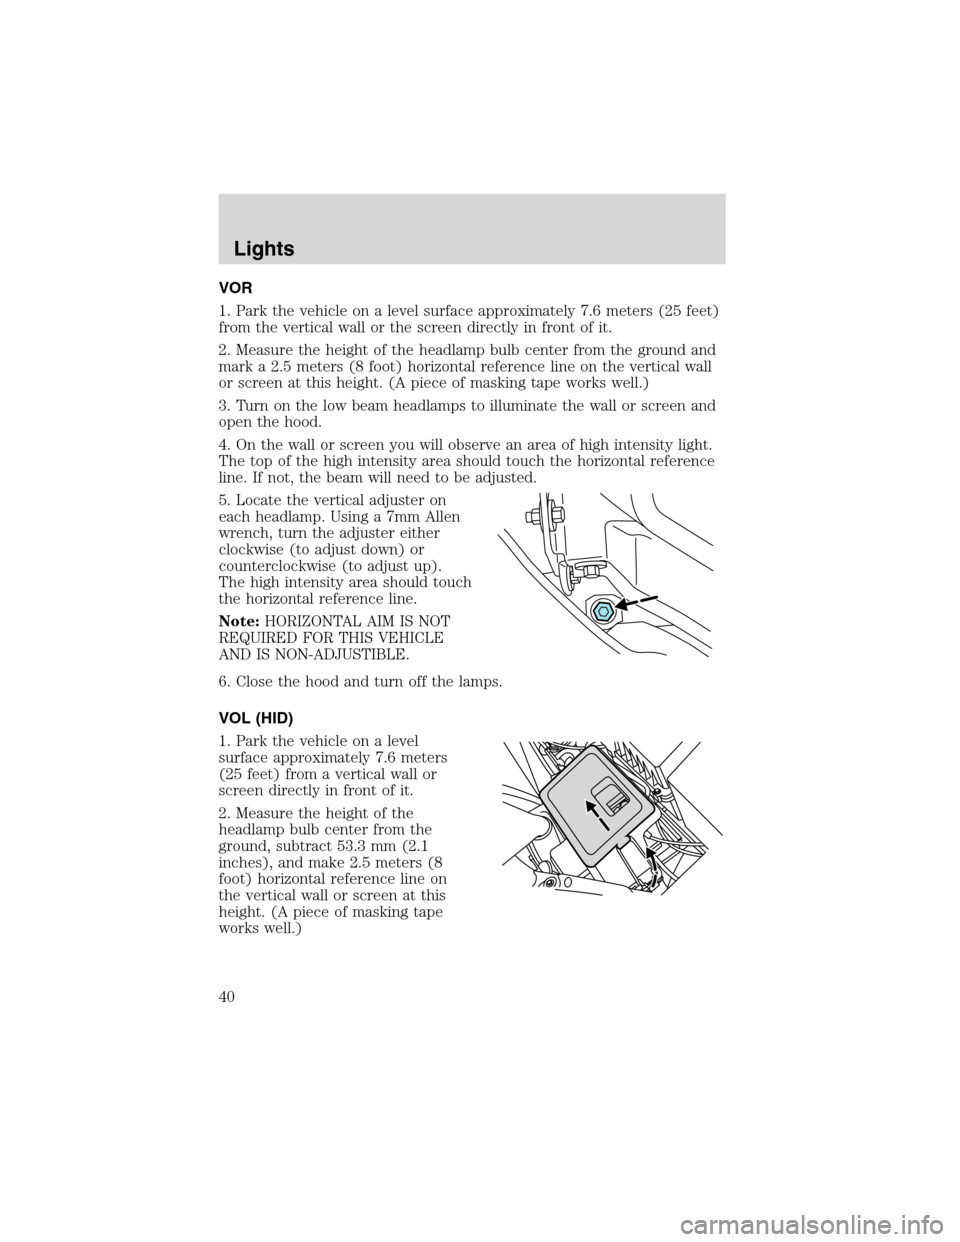
5. Locate the vertical adjuster on
each headlamp. Using a 7mm Allen
wrench, turn the adjuster either
clockwise (to adjust down) or
counterclockwise (to adjust up).
The high intensity area should touch
the horizontal reference line.
Note:HORIZONTAL AIM IS NOT
REQUIRED FOR THIS VEHICLE
AND IS NON-ADJUSTIBLE.
6. Close the hood and turn off the lamps.
VOL (HID)
1. Park the vehicle on a level
surface approximately 7.6 meters
(25 feet) from a vertical wall or
screen directly in front of it.
2. Measure the height of the
headlamp bulb center from the
ground, subtract 53.3 mm (2.1
inches), and make 2.5 meters (8
foot) horizontal reference line on
the vertical wall or screen at this
height. (A piece of masking tape
works well.)
Lights
40
Page 72 of 216
Seating and Safety RestraintsSEATING
Notes:
Reclining the seatback can cause an occupant to slide under the
seat’s safety belt, resulting in severe personal injuries in the
event of a collision.
Do not pile cargo higher than the seatbacks to reduce the risk of
injury in a collision or sudden stop.
Adjustable head restraints (if equipped)
Your vehicle’s seats may be equipped with head restraints which are
vertically adjustable. The purpose of these head restraints is to help limit
head motion in the event of a rear collision. To properly adjust your head
restraints, lift the head restraint so that it is located directly behind your
head or as close to that position as possible. Refer to the following to
raise and lower the head restraints.
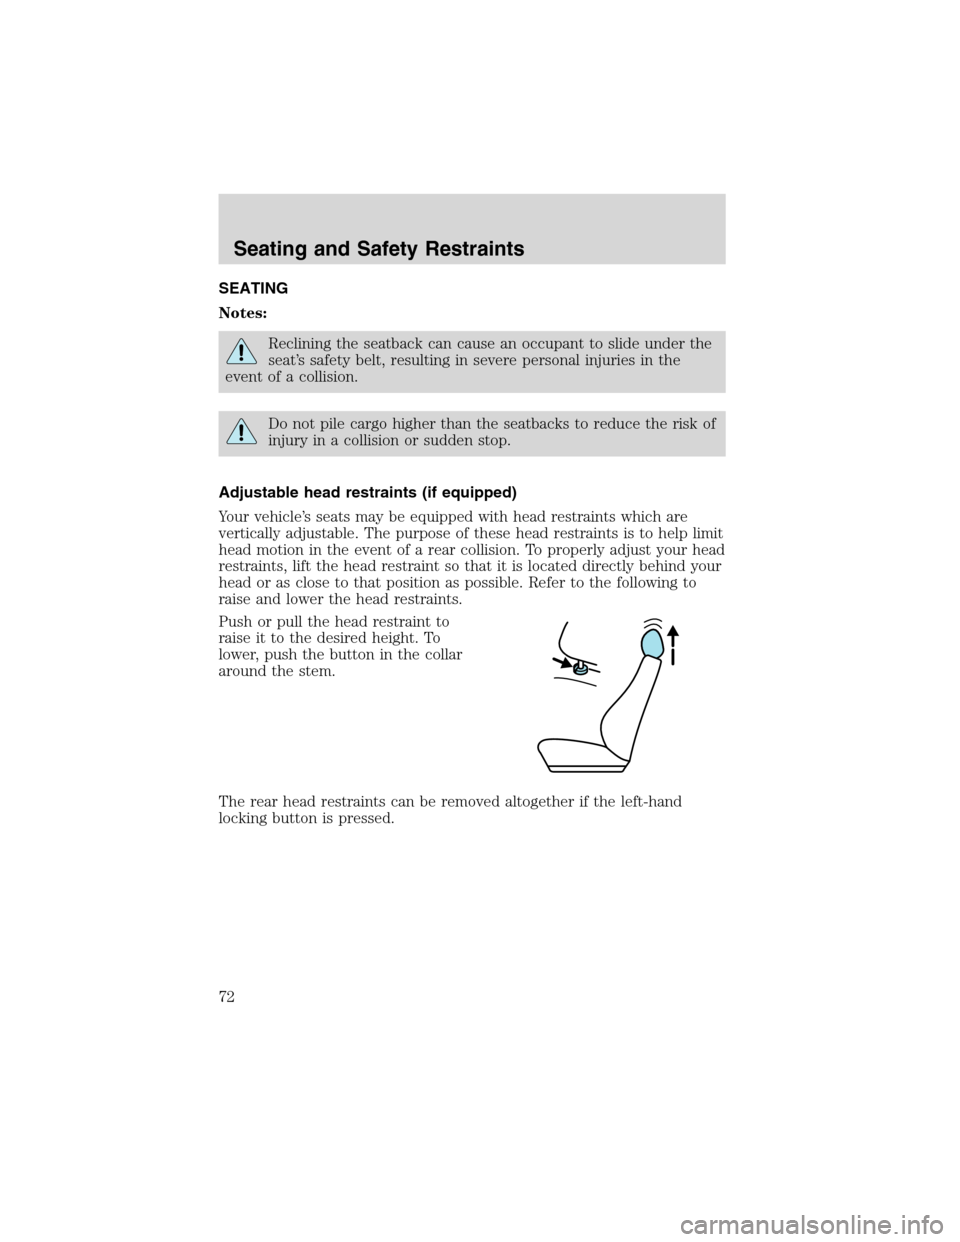
Push or pull the head restraint to
raise it to the desired height. To
lower, push the button in the collar
around the stem.
The rear head restraints can be removed altogether if the left-hand
locking button is pressed.
Seating and Safety Restraints
72
Page 73 of 216
Adjusting the front manual seat
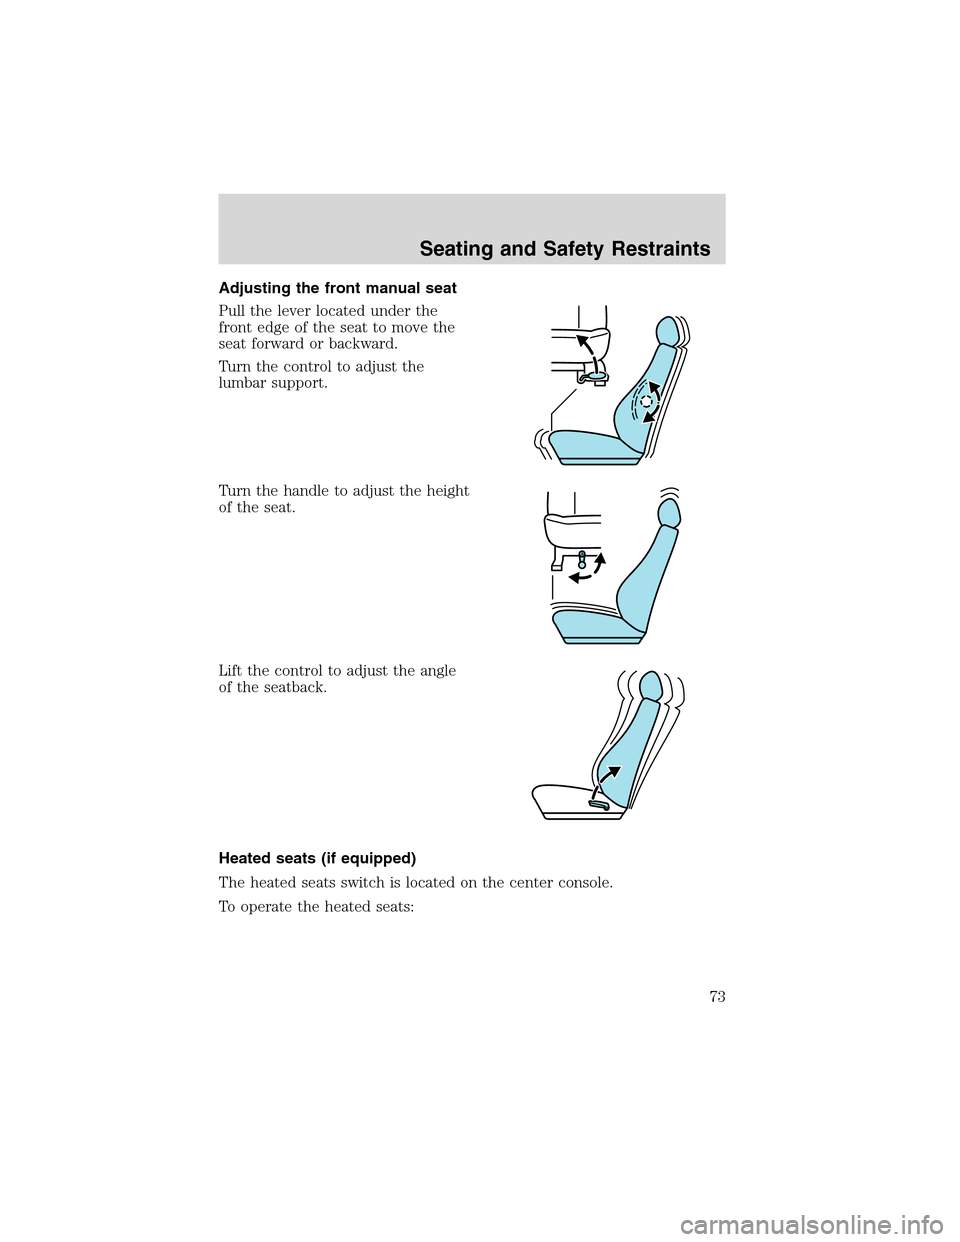
Pull the lever located under the
front edge of the seat to move the
seat forward or backward.
Turn the control to adjust the
lumbar support.
Turn the handle to adjust the height
of the seat.
Lift the control to adjust the angle
of the seatback.
Heated seats (if equipped)
The heated seats switch is located on the center console.
To operate the heated seats:
Seating and Safety Restraints
73
Page 83 of 216
Safety belt pretensioner
Your vehicle is equipped with safety belt pretensioners at the driver and
front passenger seating positions.
The safety belt pretensioner is a device which removes excess webbing
from the safety belt system. The safety belt pretensioner uses the same
crash sensor system as the front air bag supplemental restraint system
(SRS). When the safety belt pretensioner deploys, webbing from the lap
and shoulder belt is tightened. The driver and front passenger seat belt
system (including retractors, buckles and height adjusters) must be
replaced if the vehicle is involved in a collision that results in
deployment of front air bags and safety belt pretensioners. Refer to the
Safety belt maintenancesection in this chapter.
Failure to replace the safety belt assembly following a collision
that involved deployment of front airbags and/or safety belt
pretensioners could result in severe personal injuries in the event of a
collision.
Front safety belt height adjustment
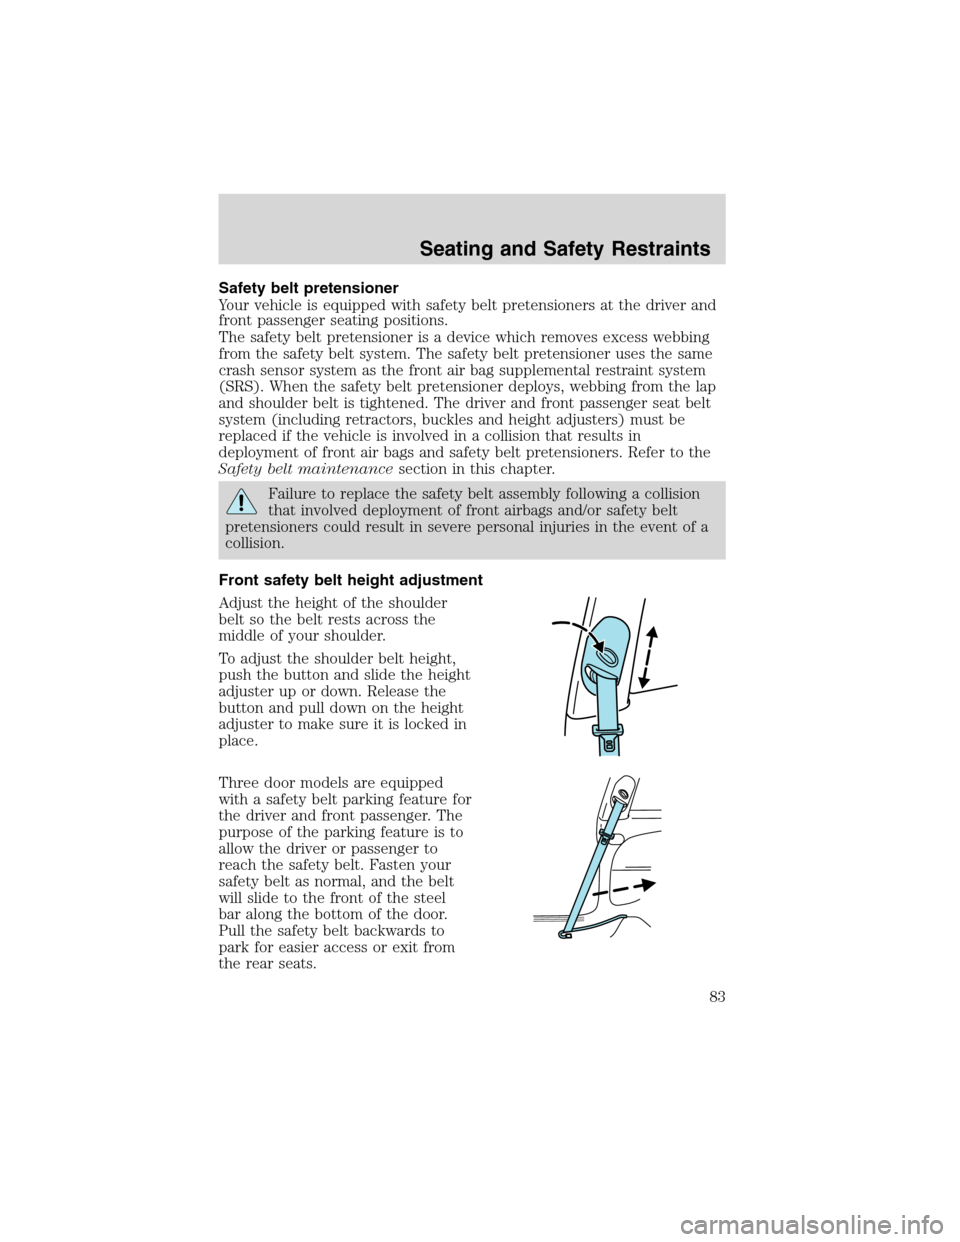
Adjust the height of the shoulder
belt so the belt rests across the
middle of your shoulder.
To adjust the shoulder belt height,
push the button and slide the height
adjuster up or down. Release the
button and pull down on the height
adjuster to make sure it is locked in
place.
Three door models are equipped
with a safety belt parking feature for
the driver and front passenger. The
purpose of the parking feature is to
allow the driver or passenger to
reach the safety belt. Fasten your
safety belt as normal, and the belt
will slide to the front of the steel
bar along the bottom of the door.
Pull the safety belt backwards to
park for easier access or exit from
the rear seats.
Seating and Safety Restraints
83
Page 84 of 216
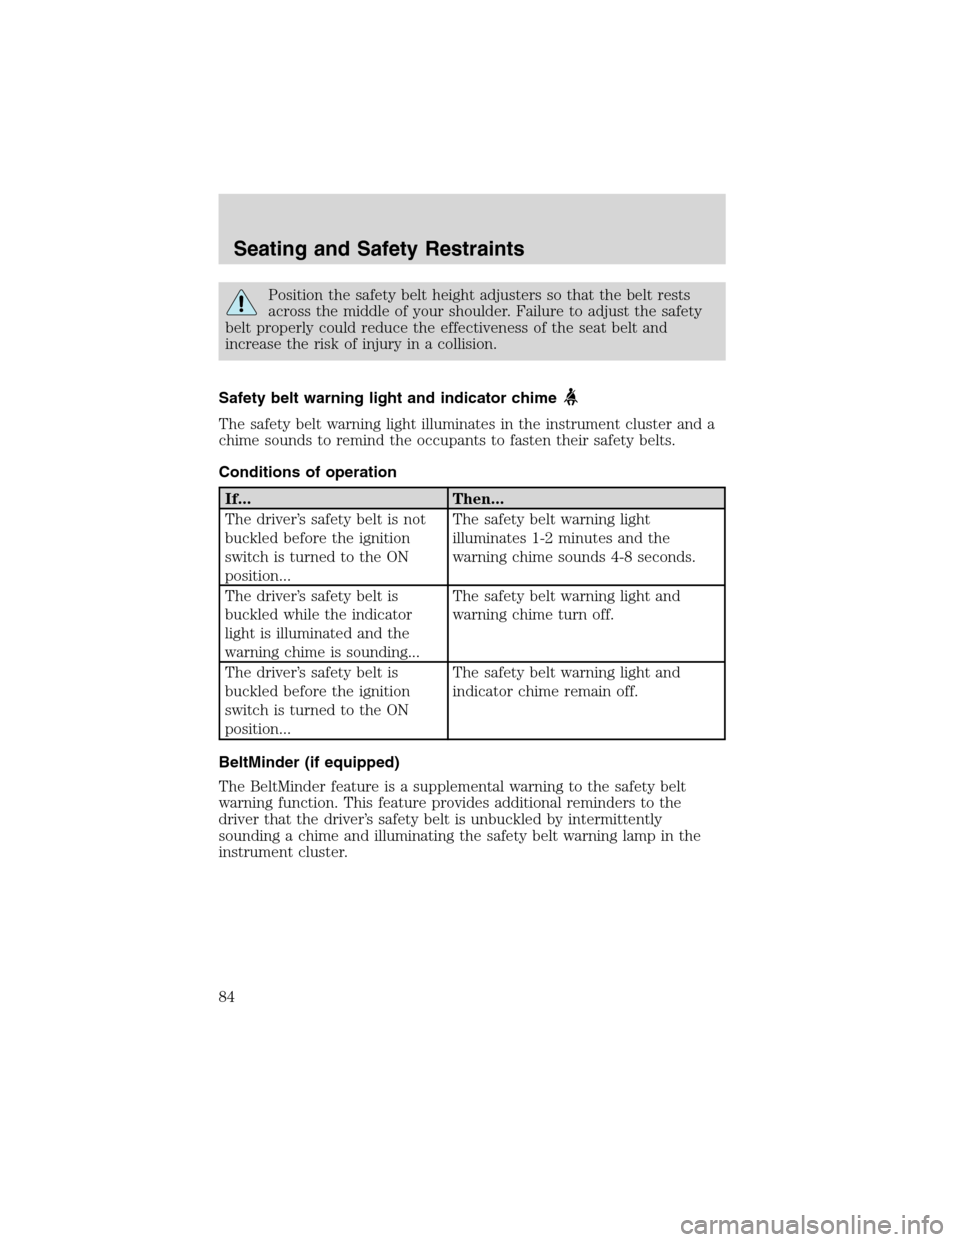
Position the safety belt height adjusters so that the belt rests
across the middle of your shoulder. Failure to adjust the safety
belt properly could reduce the effectiveness of the seat belt and
increase the risk of injury in a collision.
Safety belt warning light and indicator chime
The safety belt warning light illuminates in the instrument cluster and a
chime sounds to remind the occupants to fasten their safety belts.
Conditions of operation
If... Then...
The driver’s safety belt is not
buckled before the ignition
switch is turned to the ON
position...The safety belt warning light
illuminates 1-2 minutes and the
warning chime sounds 4-8 seconds.
The driver’s safety belt is
buckled while the indicator
light is illuminated and the
warning chime is sounding...The safety belt warning light and
warning chime turn off.
The driver’s safety belt is
buckled before the ignition
switch is turned to the ON
position...The safety belt warning light and
indicator chime remain off.
BeltMinder (if equipped)
The BeltMinder feature is a supplemental warning to the safety belt
warning function. This feature provides additional reminders to the
driver that the driver’s safety belt is unbuckled by intermittently
sounding a chime and illuminating the safety belt warning lamp in the
instrument cluster.
Seating and Safety Restraints
84
Page 88 of 216
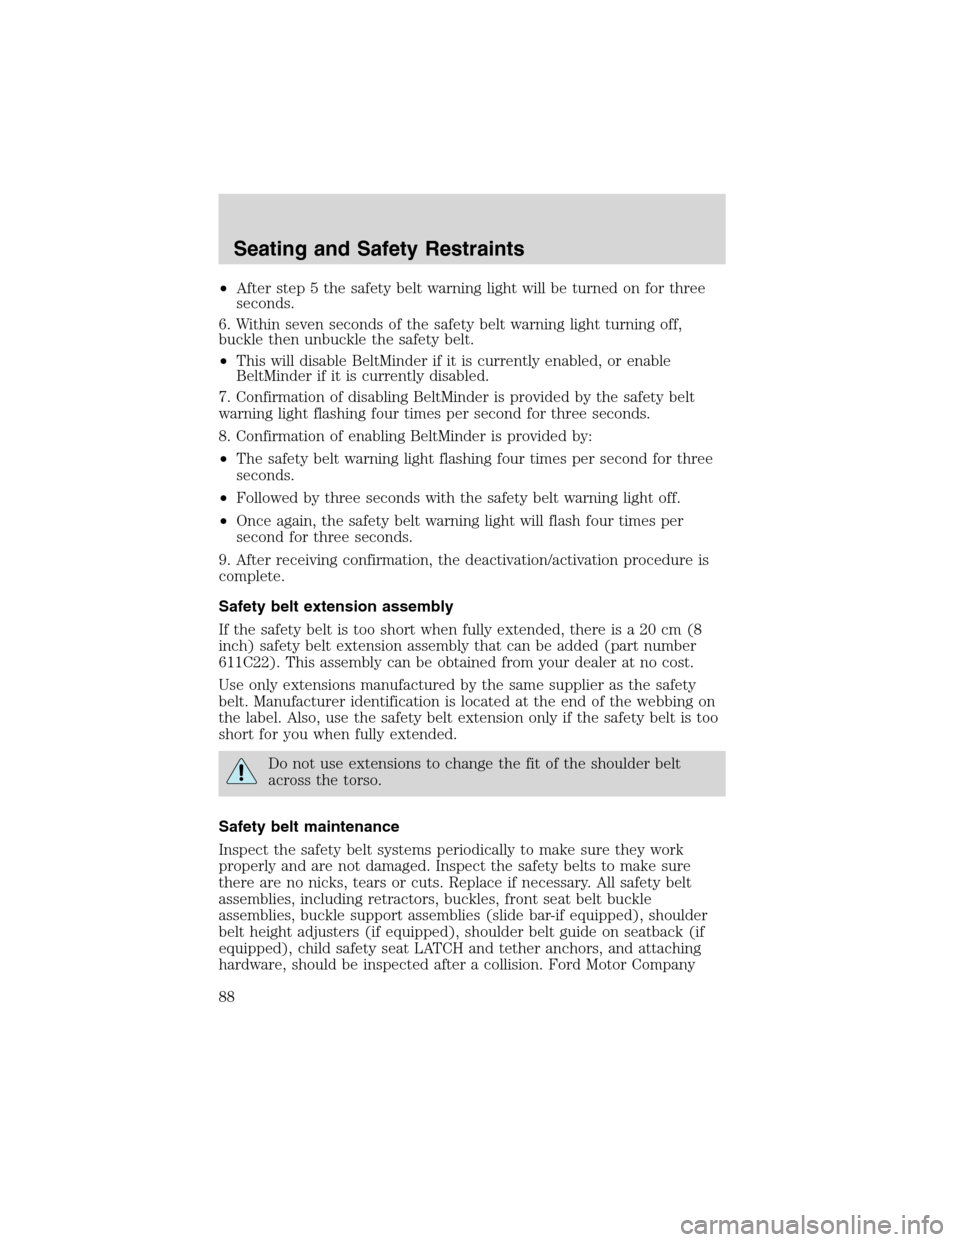
•After step 5 the safety belt warning light will be turned on for three
seconds.
6. Within seven seconds of the safety belt warning light turning off,
buckle then unbuckle the safety belt.
•This will disable BeltMinder if it is currently enabled, or enable
BeltMinder if it is currently disabled.
7. Confirmation of disabling BeltMinder is provided by the safety belt
warning light flashing four times per second for three seconds.
8. Confirmation of enabling BeltMinder is provided by:
•The safety belt warning light flashing four times per second for three
seconds.
•Followed by three seconds with the safety belt warning light off.
•Once again, the safety belt warning light will flash four times per
second for three seconds.
9. After receiving confirmation, the deactivation/activation procedure is
complete.
Safety belt extension assembly
If the safety belt is too short when fully extended, there is a 20 cm (8
inch) safety belt extension assembly that can be added (part number
611C22). This assembly can be obtained from your dealer at no cost.
Use only extensions manufactured by the same supplier as the safety
belt. Manufacturer identification is located at the end of the webbing on
the label. Also, use the safety belt extension only if the safety belt is too
short for you when fully extended.
Do not use extensions to change the fit of the shoulder belt
across the torso.
Safety belt maintenance
Inspect the safety belt systems periodically to make sure they work
properly and are not damaged. Inspect the safety belts to make sure
there are no nicks, tears or cuts. Replace if necessary. All safety belt
assemblies, including retractors, buckles, front seat belt buckle
assemblies, buckle support assemblies (slide bar-if equipped), shoulder
belt height adjusters (if equipped), shoulder belt guide on seatback (if
equipped), child safety seat LATCH and tether anchors, and attaching
hardware, should be inspected after a collision. Ford Motor Company
Seating and Safety Restraints
88
Page 200 of 216
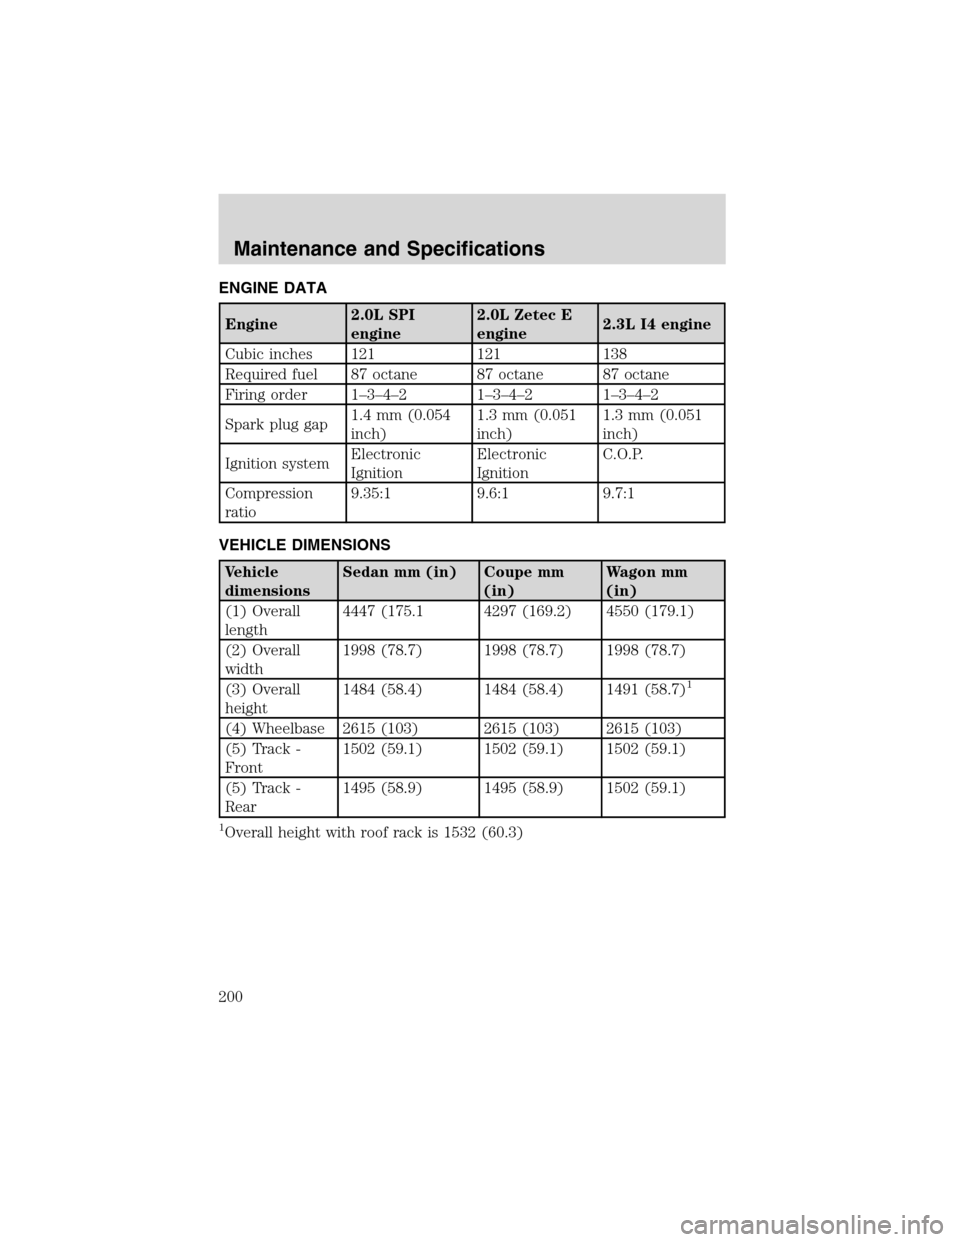
ENGINE DATA
Engine2.0L SPI
engine2.0L Zetec E
engine2.3L I4 engine
Cubic inches 121 121 138
Required fuel 87 octane 87 octane 87 octane
Firing order 1–3–4–21–3–4–21–3–4–2
Spark plug gap1.4 mm (0.054
inch)1.3 mm (0.051
inch)1.3 mm (0.051
inch)
Ignition systemElectronic
IgnitionElectronic
IgnitionC.O.P.
Compression
ratio9.35:1 9.6:1 9.7:1
VEHICLE DIMENSIONS
Vehicle
dimensionsSedan mm (in) Coupe mm
(in)Wagon mm
(in)
(1) Overall
length4447 (175.1 4297 (169.2) 4550 (179.1)
(2) Overall
width1998 (78.7) 1998 (78.7) 1998 (78.7)
(3) Overall
height1484 (58.4) 1484 (58.4) 1491 (58.7)
1
(4) Wheelbase 2615 (103) 2615 (103) 2615 (103)
(5) Track -
Front1502 (59.1) 1502 (59.1) 1502 (59.1)
(5) Track -
Rear1495 (58.9) 1495 (58.9) 1502 (59.1)
1Overall height with roof rack is 1532 (60.3)
Maintenance and Specifications
200