Page 42 of 280
COURTESY/READING LAMPS (IF EQUIPPED)
The dome lamp lights when the
control is in the DOOR (left)
position, any door is open, the
instrument panel switch is pushed
past the detent and when any of the
remote entry controls are pressed
while the ignition is off.
The reading lamps can be turned on
by pressing the rocker controls next
to each lamp.
MAP LAMPS
With trip computer
Without trip computer
To turn on the map lamps, press the control next to each lamp.
BULBS
Replacing exterior bulbs
Check the operation of all the bulbs frequently.
Using the right bulbs
Replacement bulbs are specified in the chart below. Headlamp bulbs
must be marked with an authorized“D.O.T.”for North America and an
Lights
42
ProCarManuals.com
Page 52 of 280
5. Place the height adjusters onto
the back of the storage
compartment door. Add as many
adjusters needed to activate the
garage door opener.
6. Close the storage compartment
door and press the garage door
opener control to verify that it
works. If not, you may need to add
more adjusters.
One-touch moon roof (if equipped)
With trip computer
Without trip computer
Toopenthe moon roof using the one-touch operation switch:
•Press and release the rear portion of the one-touch moon roof control.
•To halt motion at any point during one-touch opening, press the
control a second time.
Toclosethe moon roof:
•Press and hold the front portion of the moon roof control. Release the
control to stop the roof closing at any position.
Driver Controls
52
ProCarManuals.com
Page 60 of 280

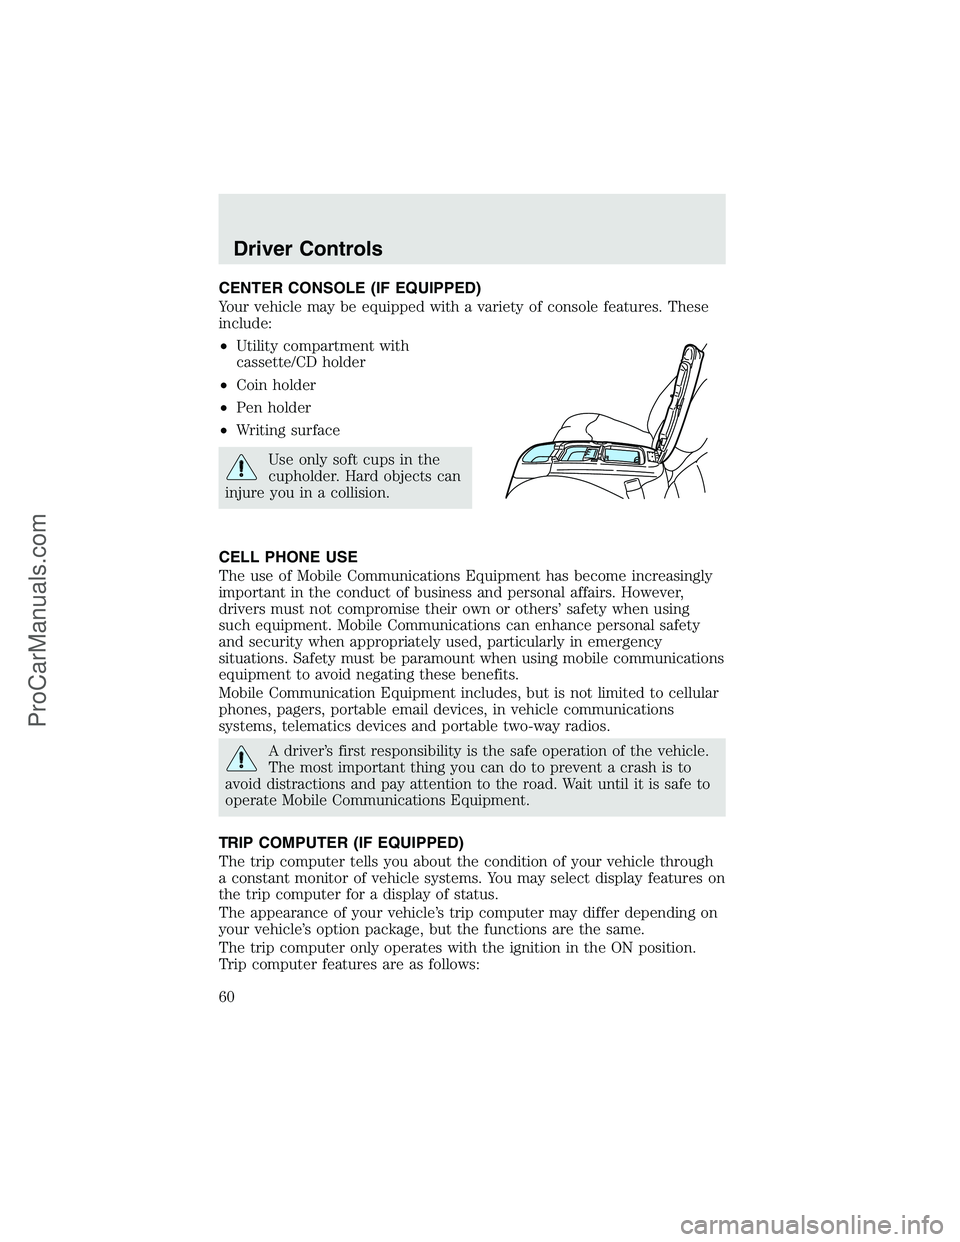
CENTER CONSOLE (IF EQUIPPED)
Your vehicle may be equipped with a variety of console features. These
include:
•Utility compartment with
cassette/CD holder
•Coin holder
•Pen holder
•Writing surface
Use only soft cups in the
cupholder. Hard objects can
injure you in a collision.
CELL PHONE USE
The use of Mobile Communications Equipment has become increasingly
important in the conduct of business and personal affairs. However,
drivers must not compromise their own or others’safety when using
such equipment. Mobile Communications can enhance personal safety
and security when appropriately used, particularly in emergency
situations. Safety must be paramount when using mobile communications
equipment to avoid negating these benefits.
Mobile Communication Equipment includes, but is not limited to cellular
phones, pagers, portable email devices, in vehicle communications
systems, telematics devices and portable two-way radios.
A driver’s first responsibility is the safe operation of the vehicle.
The most important thing you can do to prevent a crash is to
avoid distractions and pay attention to the road. Wait until it is safe to
operate Mobile Communications Equipment.
TRIP COMPUTER (IF EQUIPPED)
The trip computer tells you about the condition of your vehicle through
a constant monitor of vehicle systems. You may select display features on
the trip computer for a display of status.
The appearance of your vehicle’s trip computer may differ depending on
your vehicle’s option package, but the functions are the same.
The trip computer only operates with the ignition in the ON position.
Trip computer features are as follows:
Driver Controls
60
ProCarManuals.com
Page 61 of 280

Selectable features
English/metric display
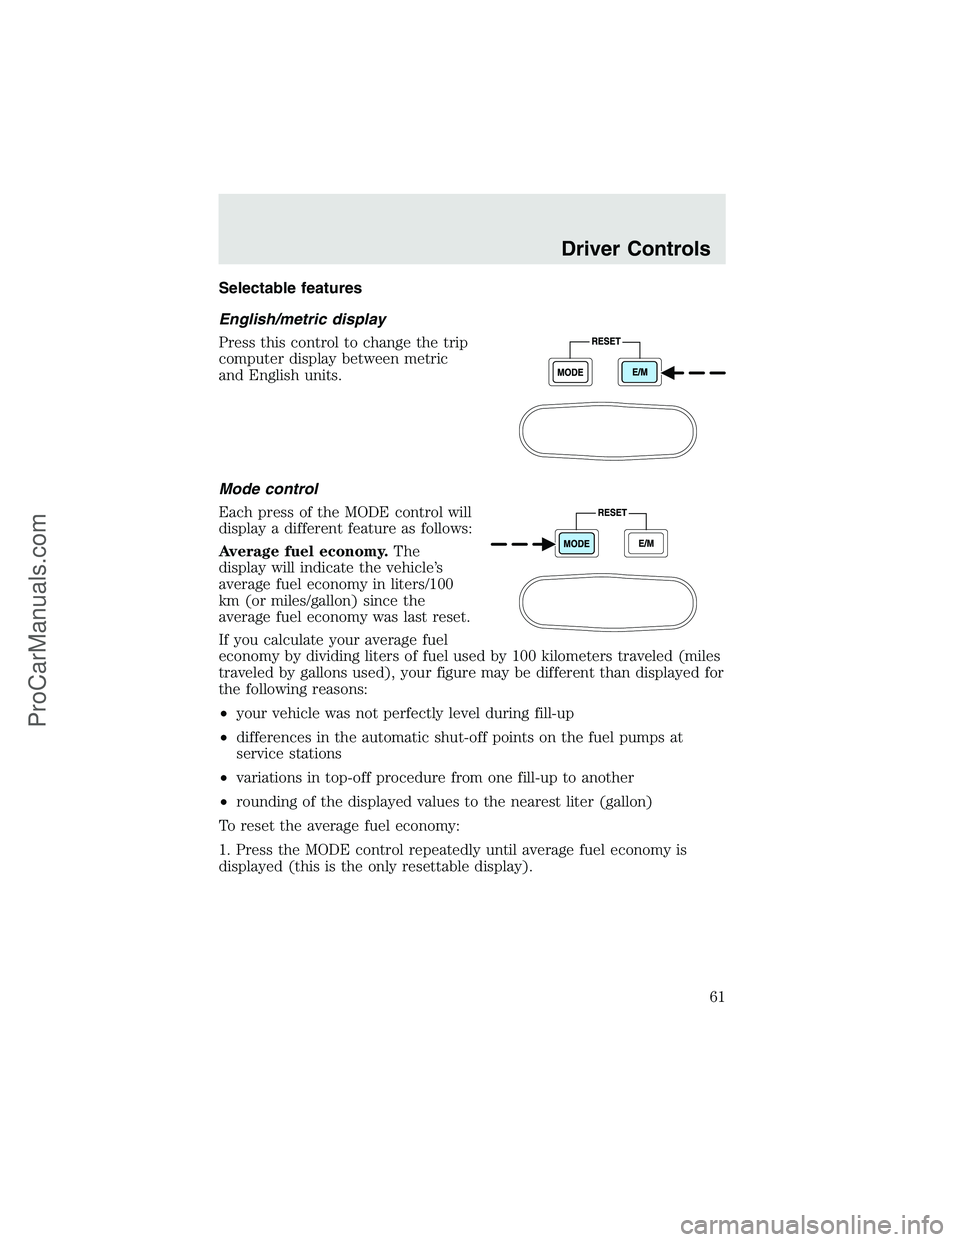
Press this control to change the trip
computer display between metric
and English units.
Mode control
Each press of the MODE control will
display a different feature as follows:
Average fuel economy.The
display will indicate the vehicle’s
average fuel economy in liters/100
km (or miles/gallon) since the
average fuel economy was last reset.
If you calculate your average fuel
economy by dividing liters of fuel used by 100 kilometers traveled (miles
traveled by gallons used), your figure may be different than displayed for
the following reasons:
•your vehicle was not perfectly level during fill-up
•differences in the automatic shut-off points on the fuel pumps at
service stations
•variations in top-off procedure from one fill-up to another
•rounding of the displayed values to the nearest liter (gallon)
To reset the average fuel economy:
1. Press the MODE control repeatedly until average fuel economy is
displayed (this is the only resettable display).
Driver Controls
61
ProCarManuals.com
Page 63 of 280

The compass heading is displayed in average fuel economy modes, fuel
range modes and temperature modes.
The compass reading may be affected when you drive near large
buildings, bridges, power lines and powerful broadcast antennas.
Magnetic or metallic objects placed in or on the vehicle may also affect
compass accuracy. Adjustments may need to be made to the zone and
calibration of the compass.
Compass zone adjustment
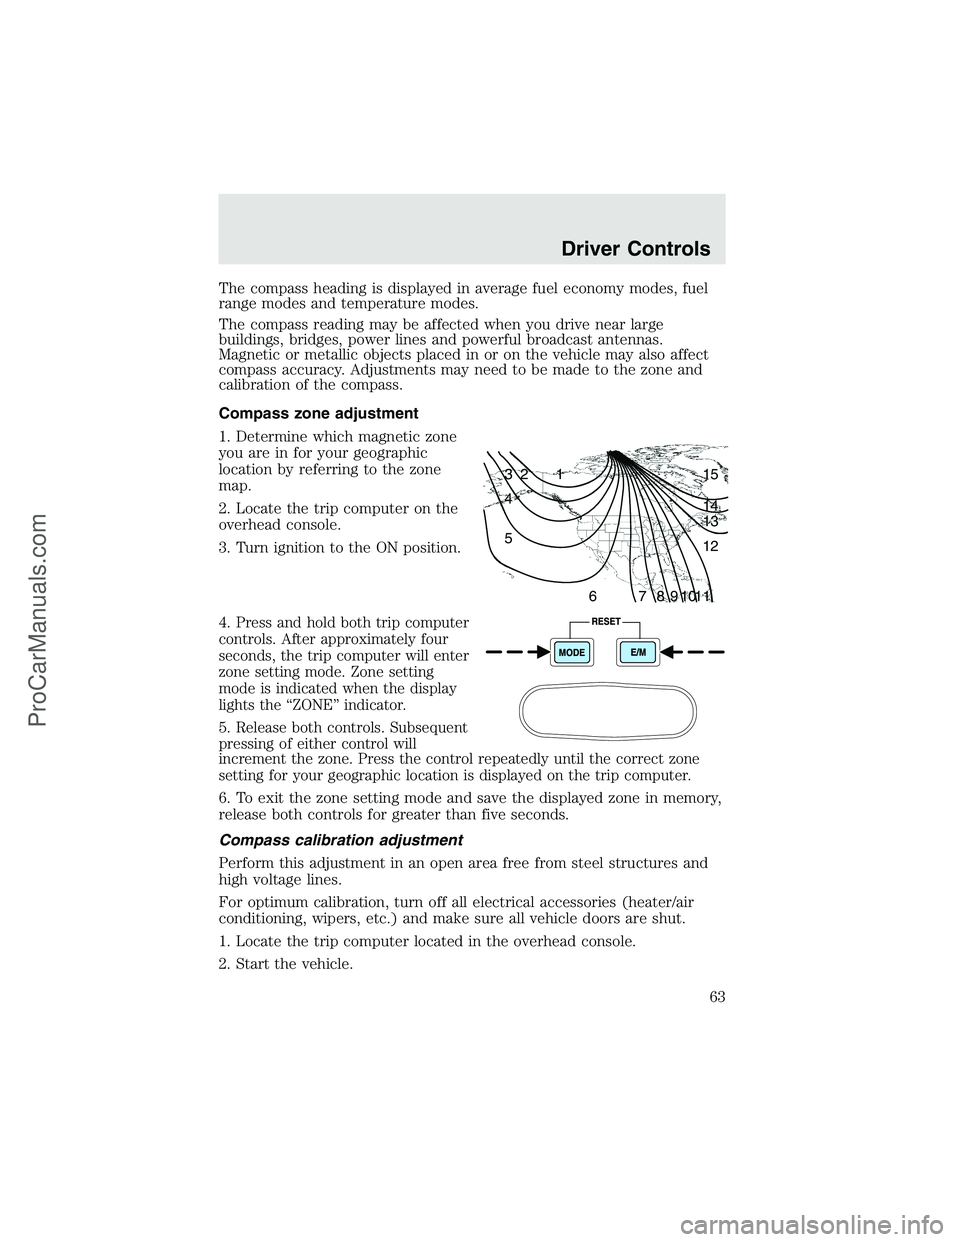
1. Determine which magnetic zone
you are in for your geographic
location by referring to the zone
map.
2. Locate the trip computer on the
overhead console.
3. Turn ignition to the ON position.
4.
Press and hold both trip computer
controls. After approximately four
seconds, the trip computer will enter
zone setting mode. Zone setting
mode is indicated when the display
lights the“ZONE”indicator.
5.Release both controls. Subsequent
pressing of either control will
increment the zone. Press the control repeatedly until the correct zone
setting for your geographic location is displayed on the trip computer.
6. To exit the zone setting mode and save the displayed zone in memory,
release both controls for greater than five seconds.
Compass calibration adjustment
Perform this adjustment in an open area free from steel structures and
high voltage lines.
For optimum calibration, turn off all electrical accessories (heater/air
conditioning, wipers, etc.) and make sure all vehicle doors are shut.
1. Locate the trip computer located in the overhead console.
2. Start the vehicle.
1 2 3
4
5
6 7 8 9 101112 13 14 15
Driver Controls
63
ProCarManuals.com
Page 64 of 280

3. Press and hold both trip
computer controls. After
approximately eight seconds, the
trip computer will enter CAL mode.
CAL mode is indicated when the
display lights the“CAL”indicator.
4.
Release both controls. The display
will return to normal, except that the
CAL indicator will remain lit until the compass is successfully calibrated.
5.Slowly drive the vehicle in a circle (less than 5 km/h [3 mph]) until the
CAL indicator turns off. It may take up to five circles to complete calibration.
6. The compass is now calibrated.
TAILGATE LOCK (IF EQUIPPED)
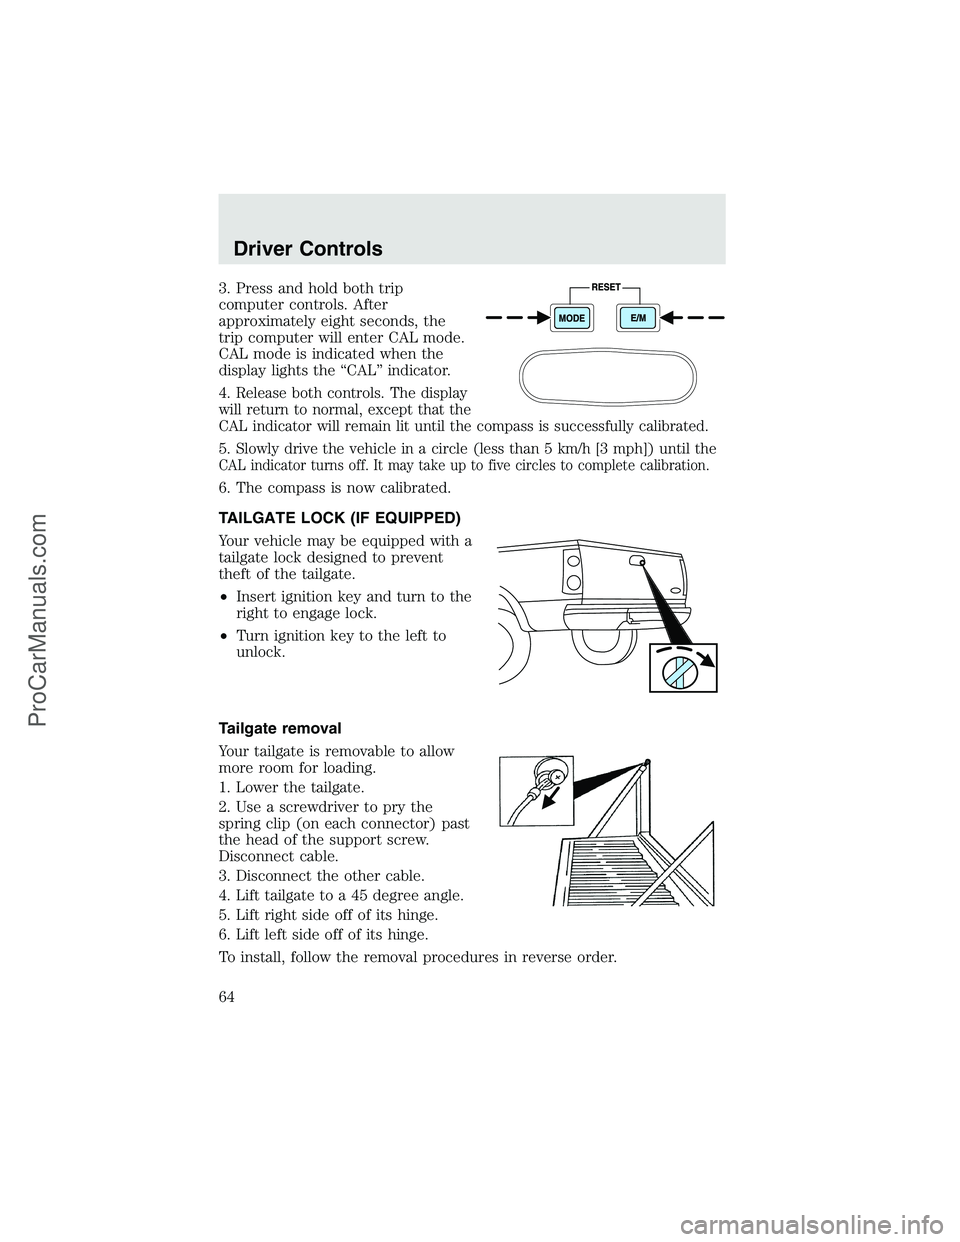
Your vehicle may be equipped with a
tailgate lock designed to prevent
theft of the tailgate.
•Insert ignition key and turn to the
right to engage lock.
•Turn ignition key to the left to
unlock.
Tailgate removal
Your tailgate is removable to allow
more room for loading.
1. Lower the tailgate.
2. Use a screwdriver to pry the
spring clip (on each connector) past
the head of the support screw.
Disconnect cable.
3. Disconnect the other cable.
4. Lift tailgate to a 45 degree angle.
5. Lift right side off of its hinge.
6. Lift left side off of its hinge.
To install, follow the removal procedures in reverse order.
Driver Controls
64
ProCarManuals.com