Page 32 of 280
17.Disc/Tune:Radio: Press
orto manually tune down or up
the frequency band.
CD: Press
orto select the previous or next track on the CD.
18.CD door:Insert a CD label side
up.
CD CHANGER (IF EQUIPPED)
Your CD changer is in one of the following locations:
•Behind the passenger’s seat
•In the center console
•Under the rear bench on the driver’s side (see instructions below)
•In the stowage bin on the passenger’s side
1. Slide the door to access the CD
changer magazine.
2. Press
to eject the magazine.
3. Turn the magazine (A) over.
4. Using the disc holder release
knob (C), pull the disc holder (B)
out of the magazine.
Do not pull too hard on the disc holder as the disc holder may come
completely out of the magazine. If this happens, reinsert the disc holder
back into the magazine while pressing on the lever.
AB
C
Entertainment Systems
32
ProCarManuals.com
Page 51 of 280

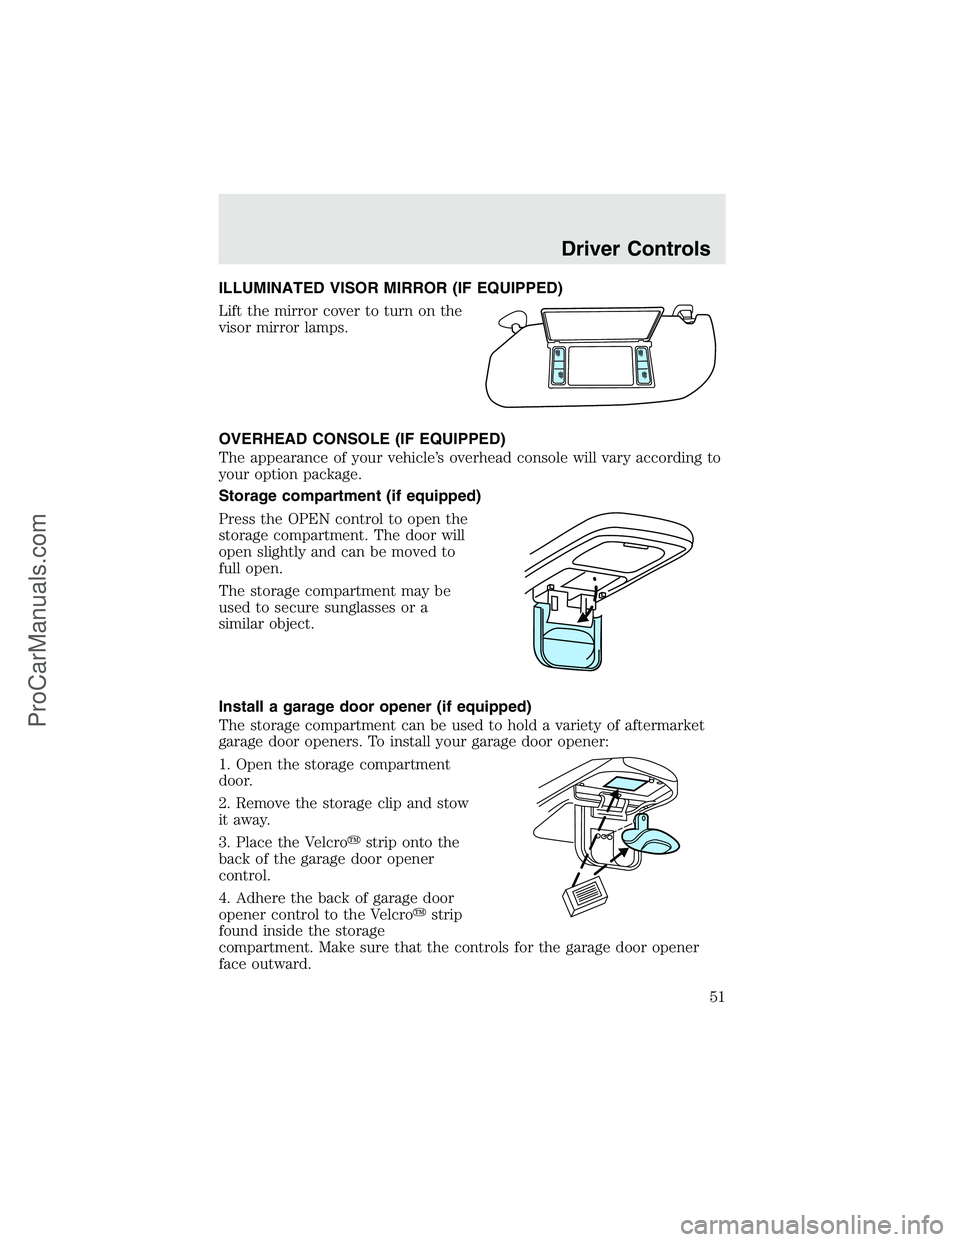
ILLUMINATED VISOR MIRROR (IF EQUIPPED)
Lift the mirror cover to turn on the
visor mirror lamps.
OVERHEAD CONSOLE (IF EQUIPPED)
The appearance of your vehicle’s overhead console will vary according to
your option package.
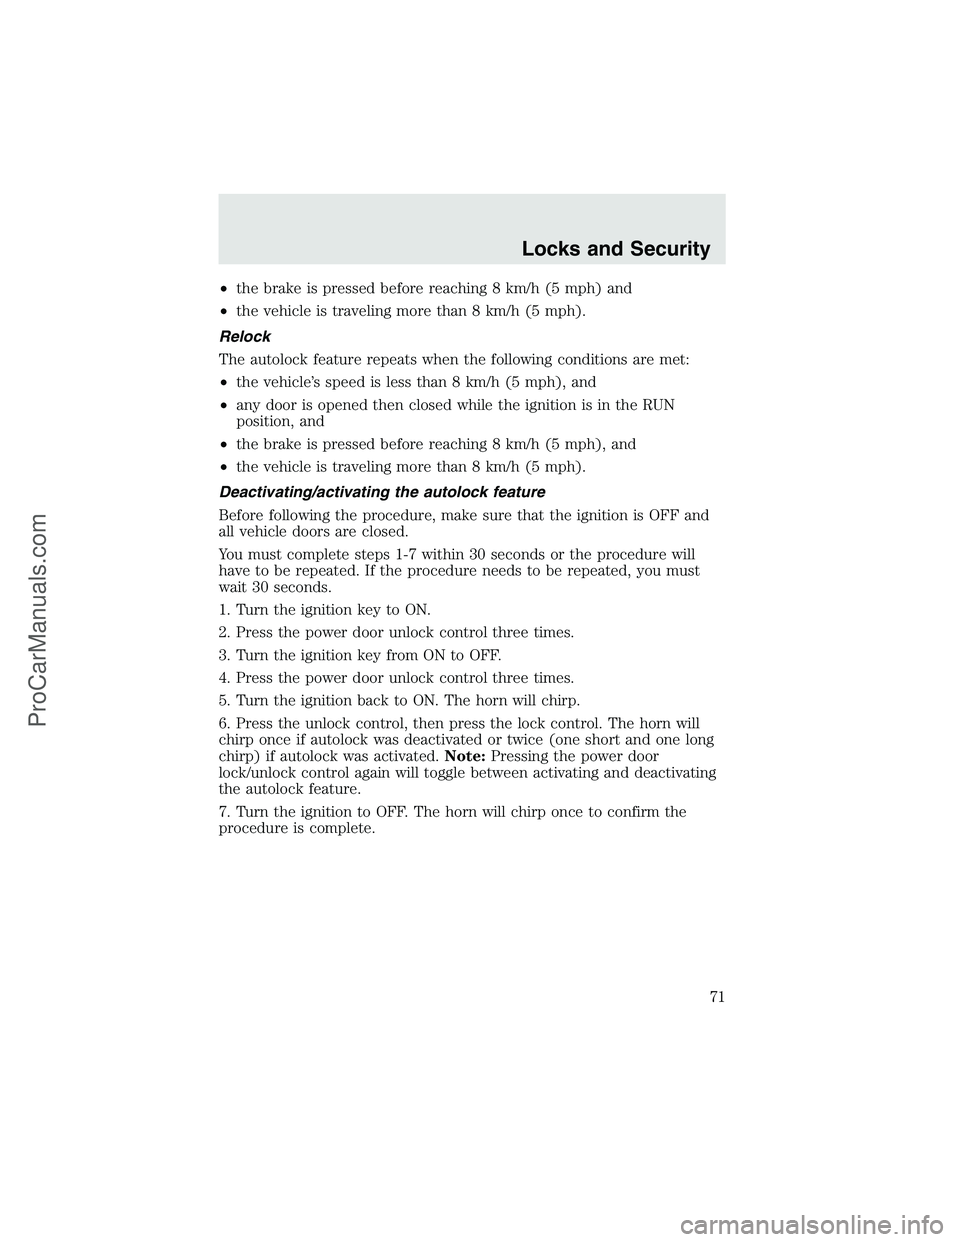
Storage compartment (if equipped)
Press the OPEN control to open the
storage compartment. The door will
open slightly and can be moved to
full open.
The storage compartment may be
used to secure sunglasses or a
similar object.
Install a garage door opener (if equipped)
The storage compartment can be used to hold a variety of aftermarket
garage door openers. To install your garage door opener:
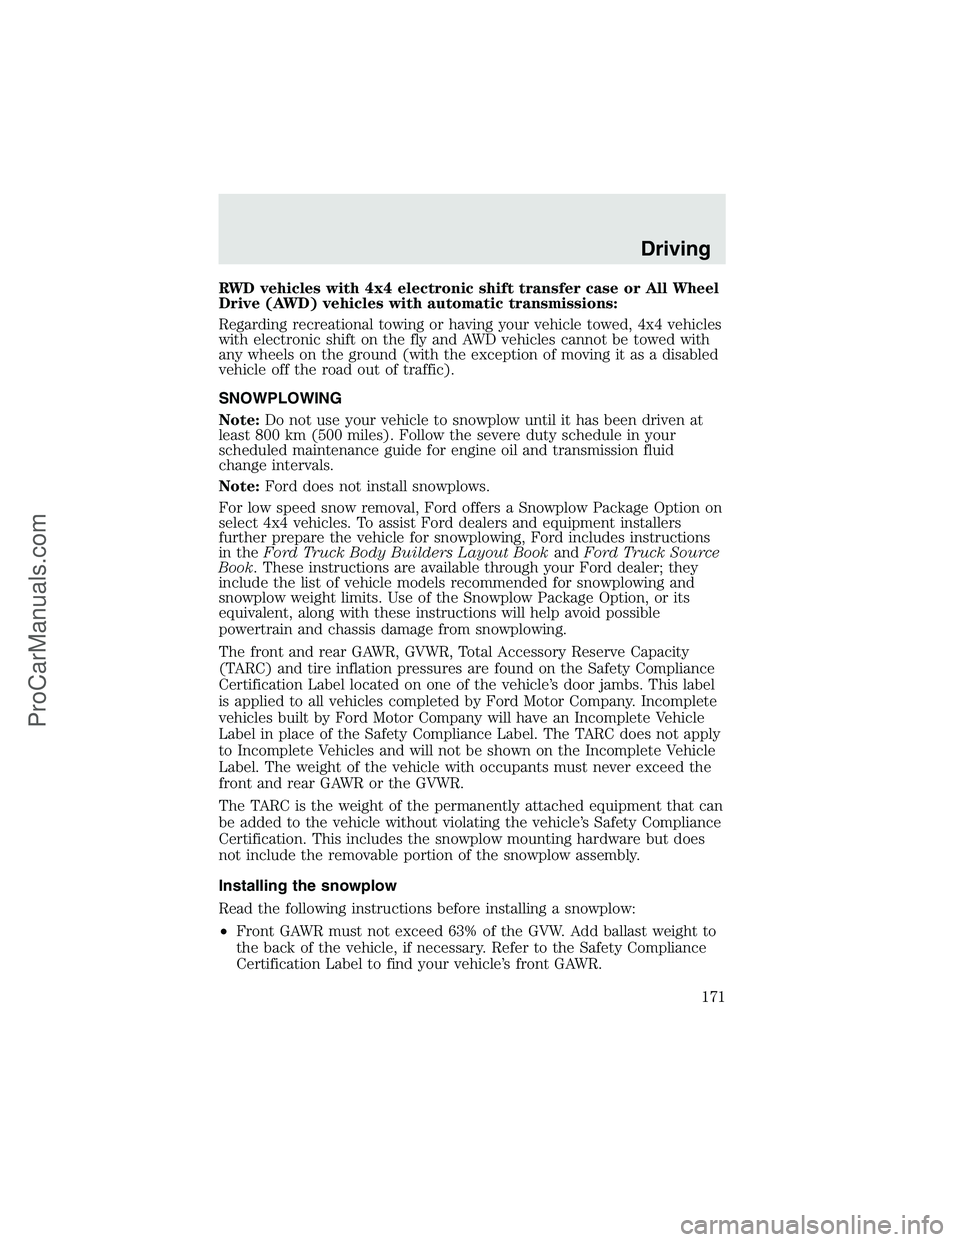
1. Open the storage compartment
door.
2. Remove the storage clip and stow
it away.
3. Place the Velcro�strip onto the
back of the garage door opener
control.
4. Adhere the back of garage door
opener control to the Velcro�strip
found inside the storage
compartment. Make sure that the controls for the garage door opener
face outward.
Driver Controls
51
ProCarManuals.com
Page 52 of 280
5. Place the height adjusters onto
the back of the storage
compartment door. Add as many
adjusters needed to activate the
garage door opener.
6. Close the storage compartment
door and press the garage door
opener control to verify that it
works. If not, you may need to add
more adjusters.
One-touch moon roof (if equipped)
With trip computer
Without trip computer
Toopenthe moon roof using the one-touch operation switch:
•Press and release the rear portion of the one-touch moon roof control.
•To halt motion at any point during one-touch opening, press the
control a second time.
Toclosethe moon roof:
•Press and hold the front portion of the moon roof control. Release the
control to stop the roof closing at any position.
Driver Controls
52
ProCarManuals.com
Page 71 of 280

•the brake is pressed before reaching 8 km/h (5 mph) and
•the vehicle is traveling more than 8 km/h (5 mph).
Relock
The autolock feature repeats when the following conditions are met:
•the vehicle’s speed is less than 8 km/h (5 mph), and
•any door is opened then closed while the ignition is in the RUN
position, and
•the brake is pressed before reaching 8 km/h (5 mph), and
•the vehicle is traveling more than 8 km/h (5 mph).
Deactivating/activating the autolock feature
Before following the procedure, make sure that the ignition is OFF and
all vehicle doors are closed.
You must complete steps 1-7 within 30 seconds or the procedure will
have to be repeated. If the procedure needs to be repeated, you must
wait 30 seconds.
1. Turn the ignition key to ON.
2. Press the power door unlock control three times.
3. Turn the ignition key from ON to OFF.
4. Press the power door unlock control three times.
5. Turn the ignition back to ON. The horn will chirp.
6. Press the unlock control, then press the lock control. The horn will
chirp once if autolock was deactivated or twice (one short and one long
chirp) if autolock was activated.Note:Pressing the power door
lock/unlock control again will toggle between activating and deactivating
the autolock feature.
7. Turn the ignition to OFF. The horn will chirp once to confirm the
procedure is complete.
Locks and Security
71
ProCarManuals.com
Page 171 of 280

RWD vehicles with 4x4 electronic shift transfer case or All Wheel
Drive (AWD) vehicles with automatic transmissions:
Regarding recreational towing or having your vehicle towed, 4x4 vehicles
with electronic shift on the fly and AWD vehicles cannot be towed with
any wheels on the ground (with the exception of moving it as a disabled
vehicle off the road out of traffic).
SNOWPLOWING
Note:Do not use your vehicle to snowplow until it has been driven at
least 800 km (500 miles). Follow the severe duty schedule in your
scheduled maintenance guide for engine oil and transmission fluid
change intervals.
Note:Ford does not install snowplows.
For low speed snow removal, Ford offers a Snowplow Package Option on
select 4x4 vehicles. To assist Ford dealers and equipment installers
further prepare the vehicle for snowplowing, Ford includes instructions
in theFord Truck Body Builders Layout BookandFord Truck Source
Book. These instructions are available through your Ford dealer; they
include the list of vehicle models recommended for snowplowing and
snowplow weight limits. Use of the Snowplow Package Option, or its
equivalent, along with these instructions will help avoid possible
powertrain and chassis damage from snowplowing.
The front and rear GAWR, GVWR, Total Accessory Reserve Capacity
(TARC) and tire inflation pressures are found on the Safety Compliance
Certification Label located on one of the vehicle’s door jambs. This label
is applied to all vehicles completed by Ford Motor Company. Incomplete
vehicles built by Ford Motor Company will have an Incomplete Vehicle
Label in place of the Safety Compliance Label. The TARC does not apply
to Incomplete Vehicles and will not be shown on the Incomplete Vehicle
Label. The weight of the vehicle with occupants must never exceed the
front and rear GAWR or the GVWR.
The TARC is the weight of the permanently attached equipment that can
be added to the vehicle without violating the vehicle’s Safety Compliance
Certification. This includes the snowplow mounting hardware but does
not include the removable portion of the snowplow assembly.
Installing the snowplow
Read the following instructions before installing a snowplow:
•Front GAWR must not exceed 63% of the GVW. Add ballast weight to
the back of the vehicle, if necessary. Refer to the Safety Compliance
Certification Label to find your vehicle’s front GAWR.
Driving
171
ProCarManuals.com
Page 181 of 280

Fuse/Relay
LocationFuse Amp
RatingPassenger Compartment Fuse Panel
Description
36 10A* PCM Memory
37 15A* Horn
38 20A* Trailer tow park lamps
39 15A* Trailer tow back-up lamps
40 20A* Fuel pump
41 10A* Instrument cluster
42 15A* Delayed accessory
43 10A* Fog lamps
44—Not used
45 10A* Ignition switch Run/Start feed
46 10A* Left-hand lowbeam
47 10A* Right-hand lowbeam
48—Not used
101 30A** Trailer tow electric brake
102 30A** Door locks/Body security module
103 50A** Ignition switch (gasoline engine only),
FICM power (Diesel engine only)
104 40A** Heated backlight
105 30A** Fuel heater (Diesel engine only)
106 30A** Front wiper main
107 40A** Front blower motor
108—Not used
109 30A** Heated seats
110 50A** Ignition switch
111 30A** 4WD/Shift on the fly
112 30A** Left-hand power seats
113 30A** Starter motor
114 30A** Right-hand power seats
115 20A** Trailer tow battery charge
116 30A** Ignition switch
601 30A CB*** Window motors, Moonroof
Roadside Emergencies
181
ProCarManuals.com