2003 FORD F250 fuel
[x] Cancel search: fuelPage 123 of 280
D (Overdrive) with Tow/Haul OFF
D (Overdrive) with Tow/Haul OFF is the normal driving position for the
best fuel economy. The overdrive function allows automatic upshifts and
downshifts through gears one through five.
D (Overdrive) with Tow/Haul ON
The Tow/Haul feature improves transmission operation when towing a
trailer or a heavy load. All transmission gear ranges are available when
using Tow/Haul.
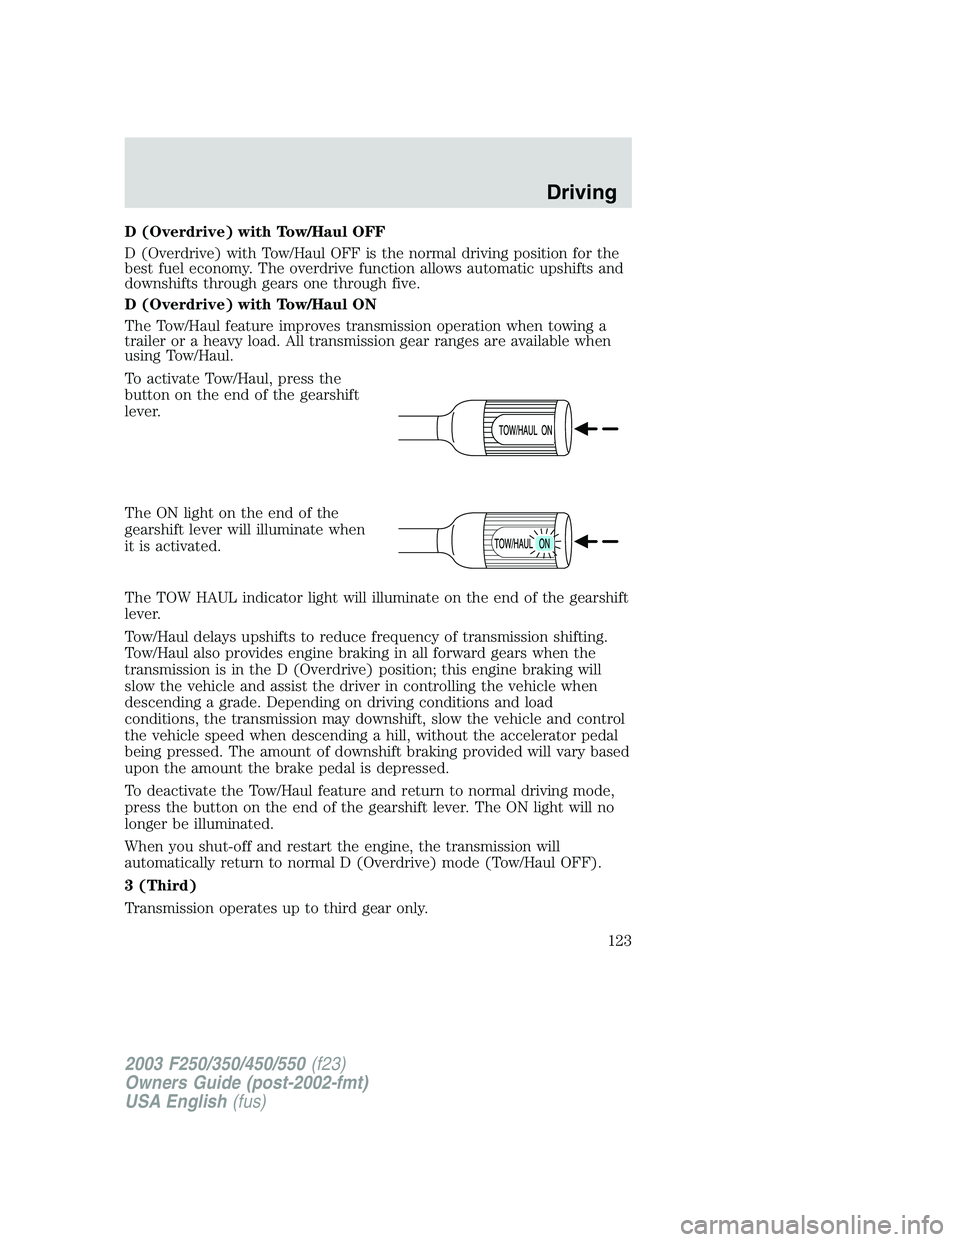
To activate Tow/Haul, press the
button on the end of the gearshift
lever.
The ON light on the end of the
gearshift lever will illuminate when
it is activated.
The TOW HAUL indicator light will illuminate on the end of the gearshift
lever.
Tow/Haul delays upshifts to reduce frequency of transmission shifting.
Tow/Haul also provides engine braking in all forward gears when the
transmission is in the D (Overdrive) position; this engine braking will
slow the vehicle and assist the driver in controlling the vehicle when
descending a grade. Depending on driving conditions and load
conditions, the transmission may downshift, slow the vehicle and control
the vehicle speed when descending a hill, without the accelerator pedal
being pressed. The amount of downshift braking provided will vary based
upon the amount the brake pedal is depressed.
To deactivate the Tow/Haul feature and return to normal driving mode,
press the button on the end of the gearshift lever. The ON light will no
longer be illuminated.
When you shut-off and restart the engine, the transmission will
automatically return to normal D (Overdrive) mode (Tow/Haul OFF).
3 (Third)
Transmission operates up to third gear only.
2003 F250/350/450/550(f23)
Owners Guide (post-2002-fmt)
USA English(fus)
Driving
123
Page 125 of 280
To start the vehicle:
1. Make sure the parking brake is fully set.
2. Press the clutch pedal to the floor, then put the gearshift lever in the
neutral position.
3. Start the engine, then press the brake pedal and release the parking
brake.
4. Move the gearshift lever to the desired gear, then slowly release the
clutch pedal while slowly pressing on the accelerator.
During each shift, the clutch pedal must be fully depressed to the floor.
Failure to fully depress the clutch pedal to the floor may cause increased
shift efforts and prematurely wear components in the transmission. Make
sure the floor mat is properly positioned so it doesn’t interfere with the
full extension of the clutch pedal.
Do not drive with your foot resting on the clutch pedal or use the clutch
pedal to hold your vehicle at a standstill while waiting on a hill. These
actions will reduce the life of the clutch.
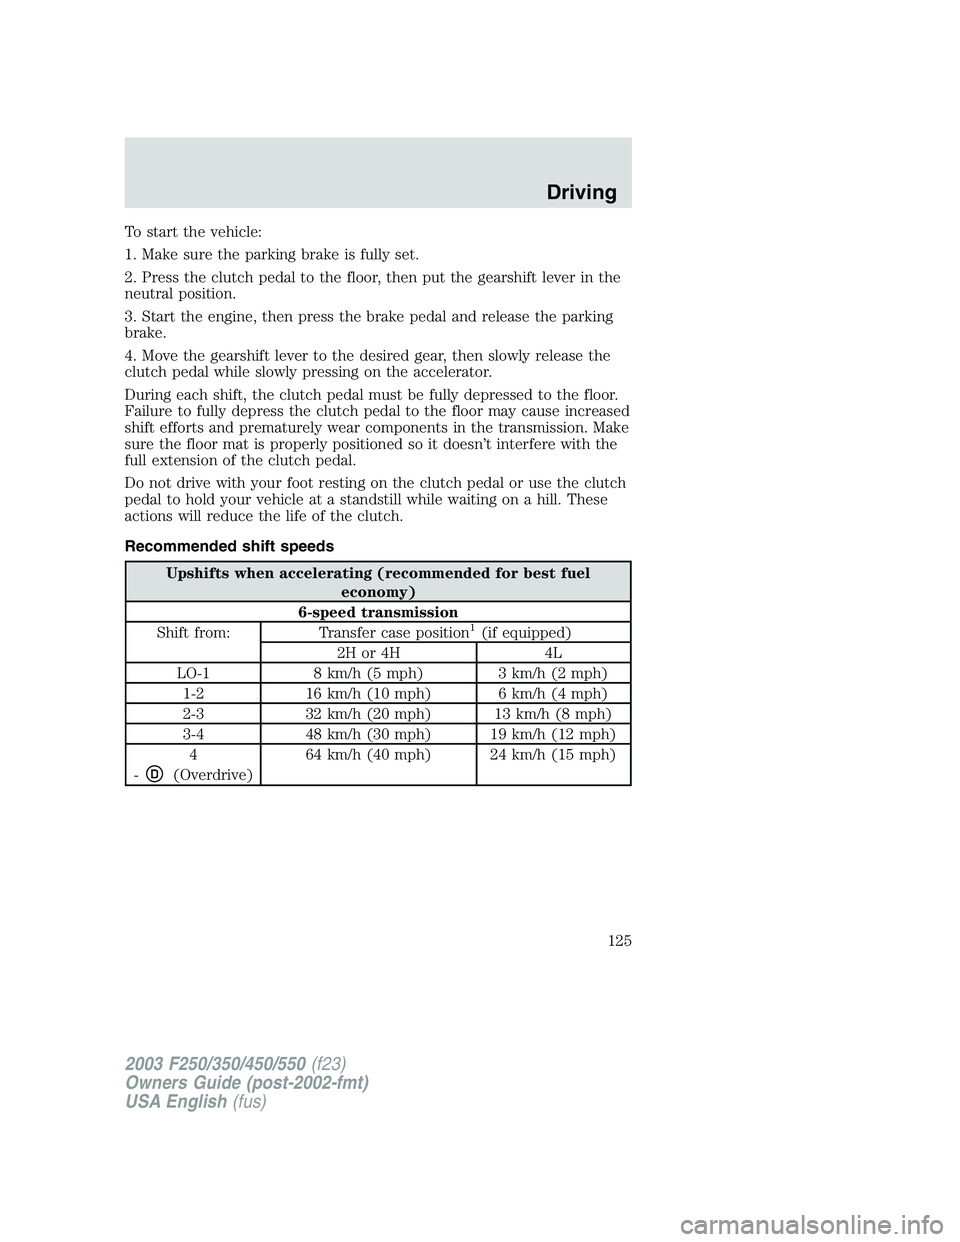
Recommended shift speeds
Upshifts when accelerating (recommended for best fuel
economy)
6-speed transmission
Shift from: Transfer case position
1(if equipped)
2H or 4H 4L
LO-1 8 km/h (5 mph) 3 km/h (2 mph)
1-2 16 km/h (10 mph) 6 km/h (4 mph)
2-3 32 km/h (20 mph) 13 km/h (8 mph)
3-4 48 km/h (30 mph) 19 km/h (12 mph)
4
-
D(Overdrive)64 km/h (40 mph) 24 km/h (15 mph)
2003 F250/350/450/550(f23)
Owners Guide (post-2002-fmt)
USA English(fus)
Driving
125
Page 129 of 280
FOUR-WHEEL DRIVE (4WD) OPERATION (IF EQUIPPED)
For important information regarding safe operation of this type
of vehicle, seePreparing to drive your vehiclein this chapter.
When four–wheel drive (4WD) is engaged, power is supplied to all four
wheels through a transfer case. 4WD can be selected when additional
driving power is desired.
4WD operation is not recommended on dry pavement. Doing so could
result in difficult disengagement of the transfer case, increased tire wear
and decreased fuel economy.
Manual 4x4 system (if equipped)
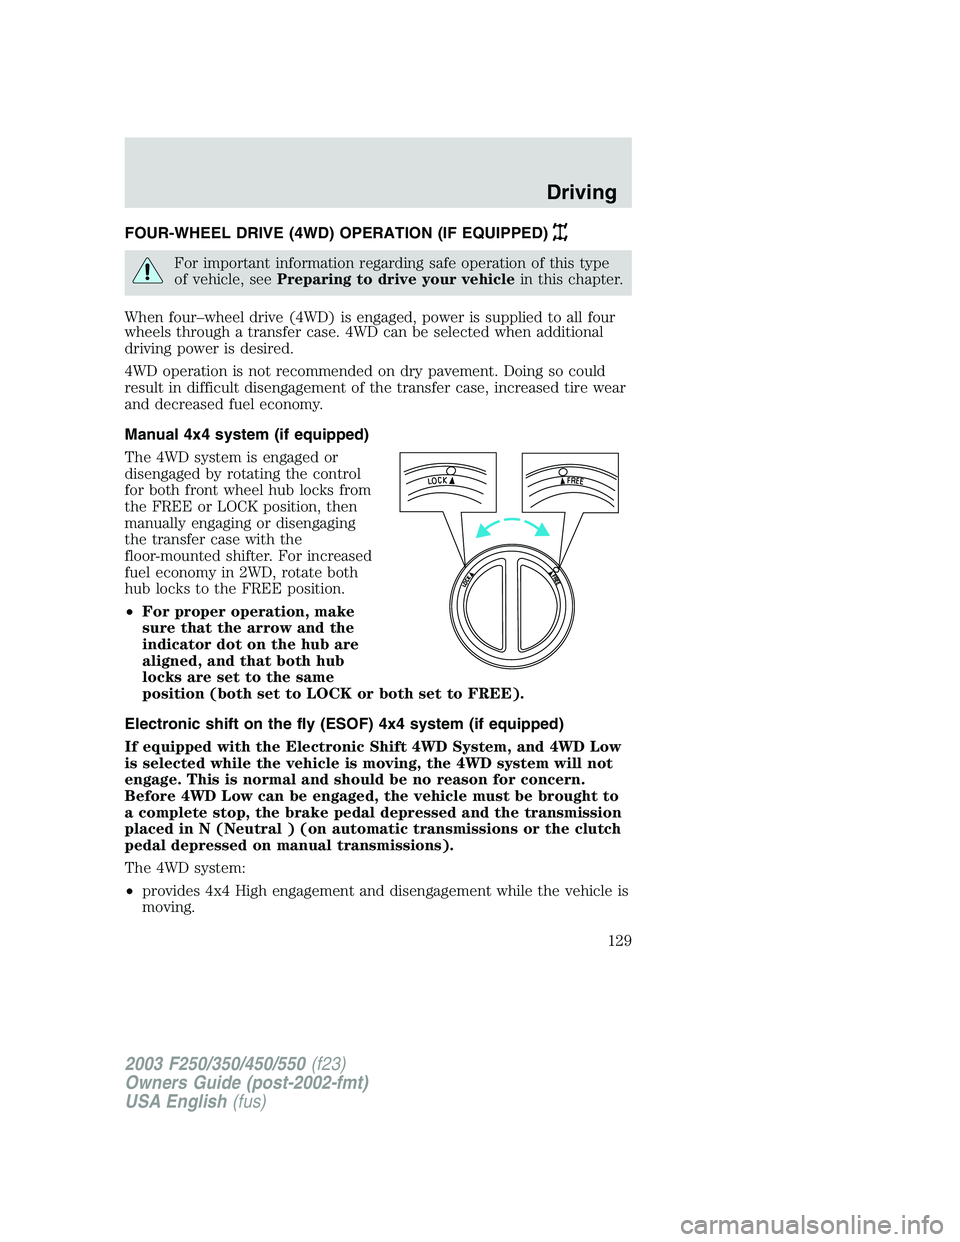
The 4WD system is engaged or
disengaged by rotating the control
for both front wheel hub locks from
the FREE or LOCK position, then
manually engaging or disengaging
the transfer case with the
floor-mounted shifter. For increased
fuel economy in 2WD, rotate both
hub locks to the FREE position.
•For proper operation, make
sure that the arrow and the
indicator dot on the hub are
aligned, and that both hub
locks are set to the same
position (both set to LOCK or both set to FREE).
Electronic shift on the fly (ESOF) 4x4 system (if equipped)
If equipped with the Electronic Shift 4WD System, and 4WD Low
is selected while the vehicle is moving, the 4WD system will not
engage. This is normal and should be no reason for concern.
Before 4WD Low can be engaged, the vehicle must be brought to
a complete stop, the brake pedal depressed and the transmission
placed in N (Neutral ) (on automatic transmissions or the clutch
pedal depressed on manual transmissions).
The 4WD system:
•provides 4x4 High engagement and disengagement while the vehicle is
moving.
2003 F250/350/450/550(f23)
Owners Guide (post-2002-fmt)
USA English(fus)
Driving
129
Page 130 of 280
•is operated by a rotary control located on the instrument panel that
allows you select 2WD, 4x4 High or 4x4 Low operation.
•uses auto-manual hub locks that can be engaged and disengaged
automatically based on the 4x4 mode selected.
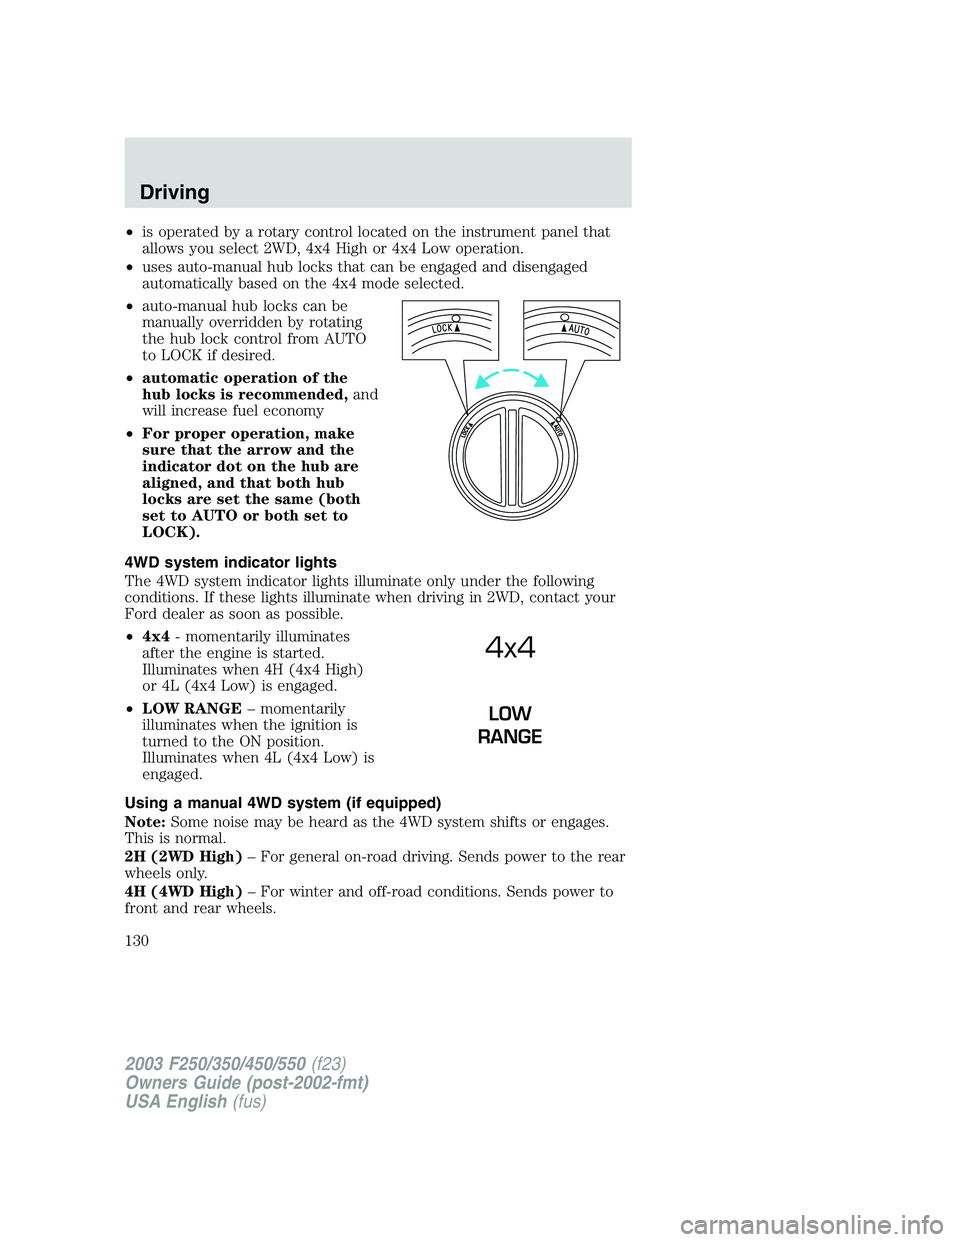
•auto-manual hub locks can be
manually overridden by rotating
the hub lock control from AUTO
to LOCK if desired.
•automatic operation of the
hub locks is recommended,and
will increase fuel economy
•For proper operation, make
sure that the arrow and the
indicator dot on the hub are
aligned, and that both hub
locks are set the same (both
set to AUTO or both set to
LOCK).
4WD system indicator lights
The 4WD system indicator lights illuminate only under the following
conditions. If these lights illuminate when driving in 2WD, contact your
Ford dealer as soon as possible.
•4x4- momentarily illuminates
after the engine is started.
Illuminates when 4H (4x4 High)
or 4L (4x4 Low) is engaged.
•LOW RANGE–momentarily
illuminates when the ignition is
turned to the ON position.
Illuminates when 4L (4x4 Low) is
engaged.
Using a manual 4WD system (if equipped)
Note:Some noise may be heard as the 4WD system shifts or engages.
This is normal.
2H (2WD High)–For general on-road driving. Sends power to the rear
wheels only.
4H (4WD High)–For winter and off-road conditions. Sends power to
front and rear wheels.
4x4
LOW
RANGE
2003 F250/350/450/550(f23)
Owners Guide (post-2002-fmt)
USA English(fus)
Driving
130
Page 174 of 280
GETTING ROADSIDE ASSISTANCE
To fully assist you should you have a vehicle concern, Ford Motor
Company offers a complimentary roadside assistance program. This
program is separate from the New Vehicle Limited Warranty. The service
is available:
•24–hours, seven days a week
•for the New Vehicle Limited Warranty period of three years or
60,000 km (36,000 miles), whichever occurs first on Ford and Mercury
vehicles, and four years or 80,000 km (50,000 miles) on Lincoln
vehicles.
Roadside assistance will cover:
•changing a flat tire
•jump-starts
•lock-out assistance
•limited fuel delivery
•towing of your disabled vehicle to the nearest Ford Motor Company
dealership, or your selling dealer if within 56.3 km (35 miles) of the
nearest Ford Motor Company dealership (one tow per disablement).
Even non-warranty related tows, like accidents or getting stuck in the
mud or snow, are covered (some exclusions apply, such as impound
towing or repossession).
Canadian customers refer to your Owner Information Guide for
information on:
•coverage period
•exact fuel amounts
•towing of your disabled vehicle
•emergency travel expense reimbursement
•travel planning benefits
USING ROADSIDE ASSISTANCE
Complete the roadside assistance identification card and place it in your
wallet for quick reference. In the United States, this card is found in the
Owner Guide portfolio in the glove compartment in Ford vehicles and is
mailed to you if you own a Mercury or Lincoln. In Canada, the card is
found in the Owner Information Guide in the glove compartment.
U.S. Ford or Mercury vehicle customers who require roadside assistance,
call 1–800–241–3673; Lincoln vehicle customers call 1–800–521–4140.
2003 F250/350/450/550(f23)
Owners Guide (post-2002-fmt)
USA English(fus)
Roadside Emergencies
Roadside Emergencies
174
Page 175 of 280
Canadian customers who require roadside assistance, call
1–800–665–2006.
If you need to arrange roadside assistance for yourself, Ford Motor
Company will reimburse a reasonable amount. To obtain reimbursement
information, U.S. Ford or Mercury vehicles customers call
1-800-241-3673; Lincoln vehicle customers call 1–800–521–4140.
Canadian customers who need to obtain reimbursement information, call
1–800–665–2006.
ROADSIDE COVERAGE BEYOND BASIC WARRANTY
In the United States, you may purchase additional roadside assistance
coverage beyond this period through the Ford Auto Club by contacting
your Ford or Lincoln Mercury dealer.
Similarly in Canada, for uninterrupted Roadside Assistance coverage, you
may purchase extended coverage prior to your Basic Warranty’s Roadside
Assistance expiring. For more information and enrollment, contact
1–877–294–2582 or visit our website at www.ford.ca.
HAZARD FLASHER
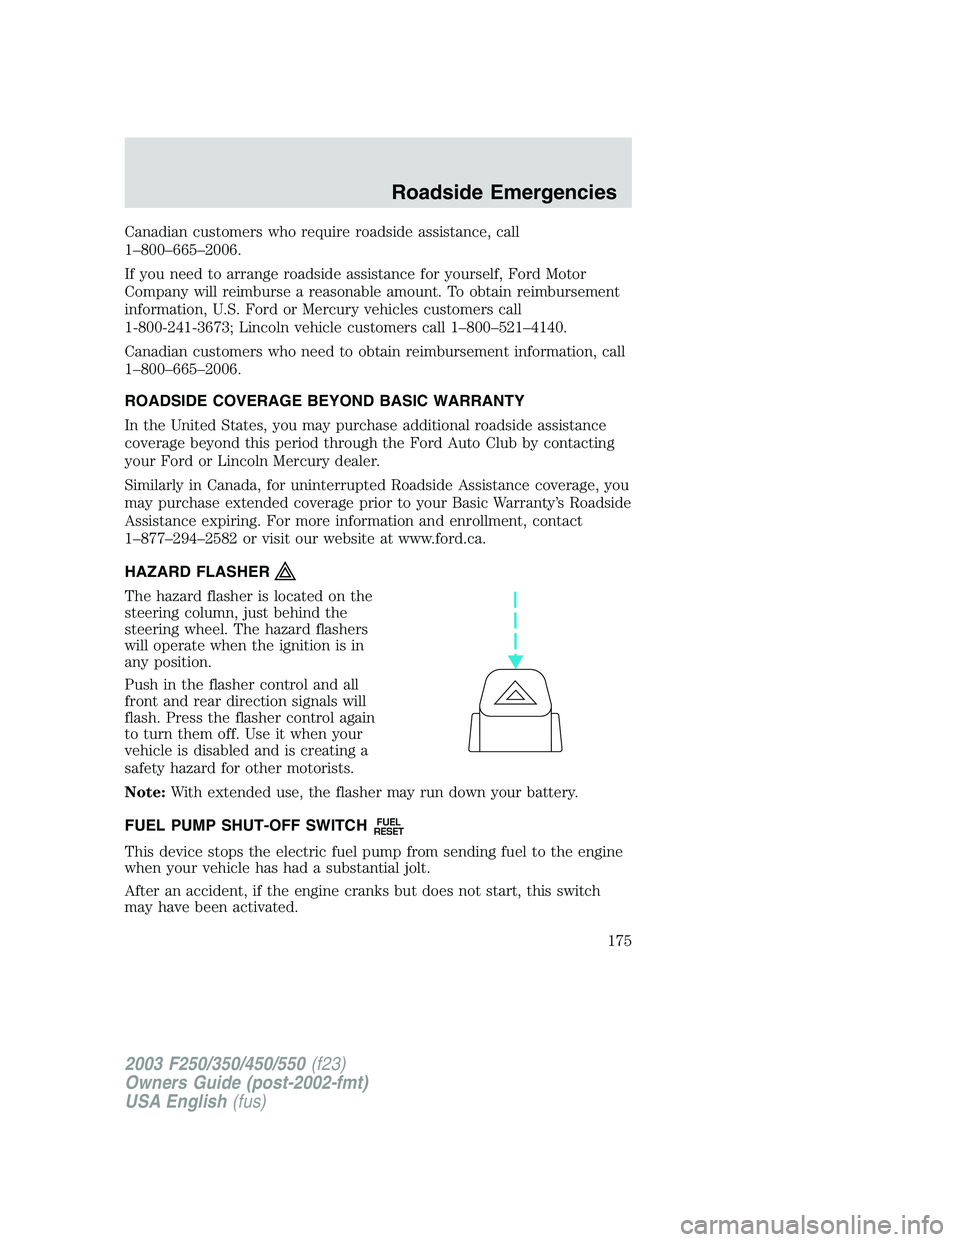
The hazard flasher is located on the
steering column, just behind the
steering wheel. The hazard flashers
will operate when the ignition is in
any position.
Push in the flasher control and all
front and rear direction signals will
flash. Press the flasher control again
to turn them off. Use it when your
vehicle is disabled and is creating a
safety hazard for other motorists.
Note:With extended use, the flasher may run down your battery.
FUEL PUMP SHUT-OFF SWITCH
FUEL
RESET
This device stops the electric fuel pump from sending fuel to the engine
when your vehicle has had a substantial jolt.
After an accident, if the engine cranks but does not start, this switch
may have been activated.
2003 F250/350/450/550(f23)
Owners Guide (post-2002-fmt)
USA English(fus)
Roadside Emergencies
175
Page 176 of 280
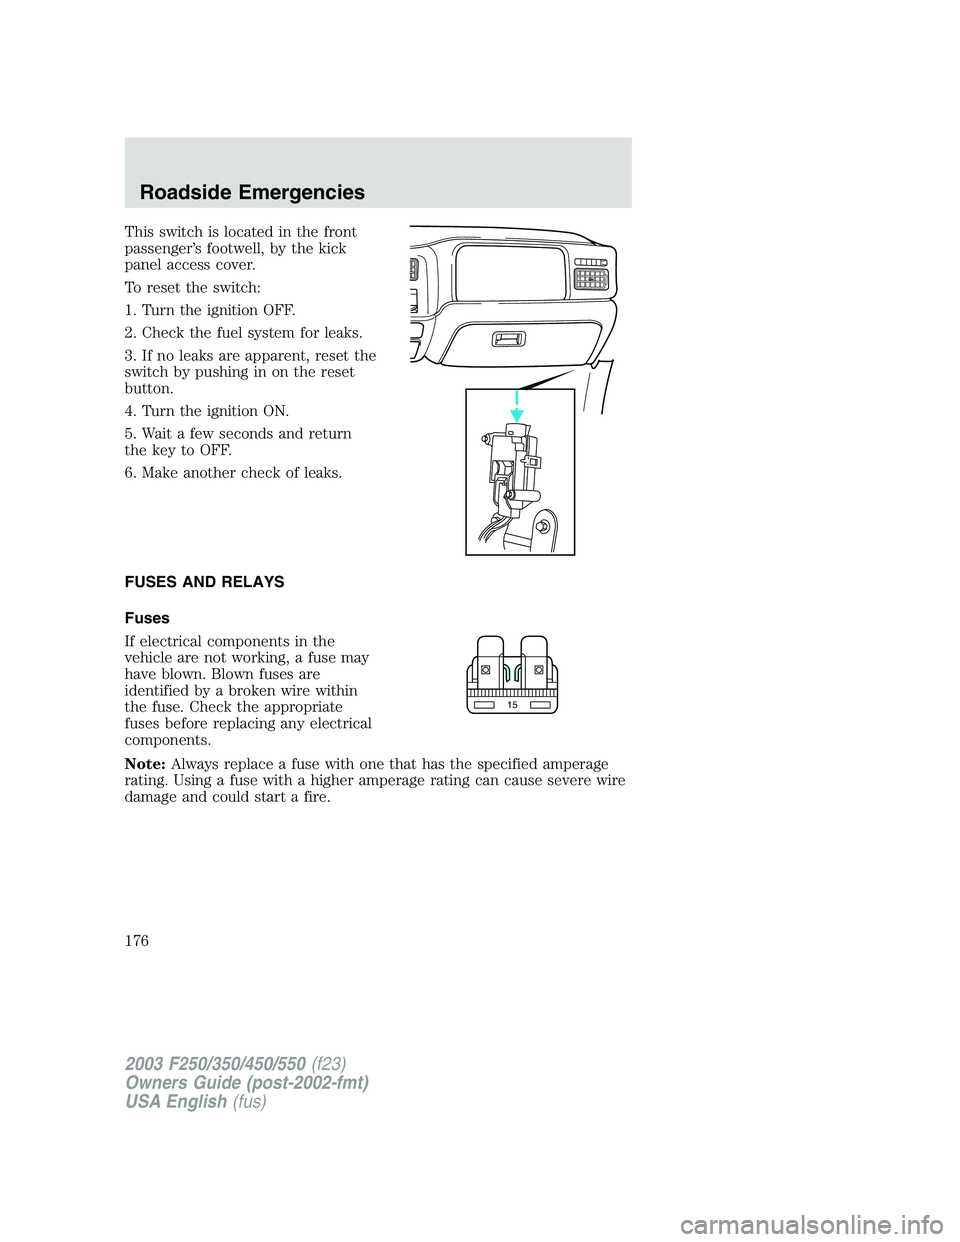
This switch is located in the front
passenger’s footwell, by the kick
panel access cover.
To reset the switch:
1. Turn the ignition OFF.
2. Check the fuel system for leaks.
3. If no leaks are apparent, reset the
switch by pushing in on the reset
button.
4. Turn the ignition ON.
5. Wait a few seconds and return
the key to OFF.
6. Make another check of leaks.
FUSES AND RELAYS
Fuses
If electrical components in the
vehicle are not working, a fuse may
have blown. Blown fuses are
identified by a broken wire within
the fuse. Check the appropriate
fuses before replacing any electrical
components.
Note:Always replace a fuse with one that has the specified amperage
rating. Using a fuse with a higher amperage rating can cause severe wire
damage and could start a fire.
15
2003 F250/350/450/550(f23)
Owners Guide (post-2002-fmt)
USA English(fus)
Roadside Emergencies
176
Page 179 of 280
Fuse/Relay
LocationFuse Amp
RatingPassenger Compartment Fuse
Panel Description
12 20A* Cigar lighter / OBD II
13 5A* Power mirrors/switches
14 15A* Daytime running lamps (DRL)
15—Not used
16—Not used
17 15A* Exterior lamps
18 20A* Turn lamps/Brake on-off switch
(high)
19 10A* Body security module/4x4 module
20 10A* Fuel Injection Control Module
(FICM) relay (Diesel engine only)
21—Not used
22 20A* Engine control
23 20A* Engine control (gasoline engine
only), Climate control (Diesel
engine only)
24 2A* Brake pressure switch/Speed
control
25 10A* 4-Wheel Anti-lock Brake System
(4WABS) module, Variable Fan
Control (VFC) (Diesel engine only)
26 10A* Air bags
27 15A* Ignition switch Run feed
28 10A* EATC module/Front blower relay
coil
29 10A* Customer access
30 15A* Highbeam headlamps
31 15A* Clutch interlock switch (manual
transmissions only), Transmission
range sensor (automatic
transmissions only) then to starter
relay coil (all transmissions), 4x4
2003 F250/350/450/550(f23)
Owners Guide (post-2002-fmt)
USA English(fus)
Roadside Emergencies
179