Page 13 of 272
Four wheel drive low
(if equipped):Illuminates when
four-wheel drive low is engaged.
Four wheel drive high
(if equipped):Illuminates when
four-wheel drive high is engaged.
Low Washer (if equipped):
Illuminates when the windshield
washer fluid is low.
Speed control:Illuminates when
the speed control is activated. Turns
off when the speed control system
is deactivated.
Turn signal:Illuminates when the
left or right turn signal or the
hazard lights are turned on. If the
indicators stay on or flash faster, check for a burned out bulb.
High beams:Illuminates when the
high beam headlamps are turned on.
Key-in-ignition warning chime:Sounds when the key is left in the
ignition in the OFF/LOCK or ACC position and the driver’s door is
opened.
Headlamps on warning chime:Sounds when the headlamps or parking
lamps are on, the ignition is off (and the key is not in the ignition) and
the driver’s door is opened.4x4
LOW
4x4
HIGH
LOW
WASH
Instrument Cluster
13
Page 18 of 272
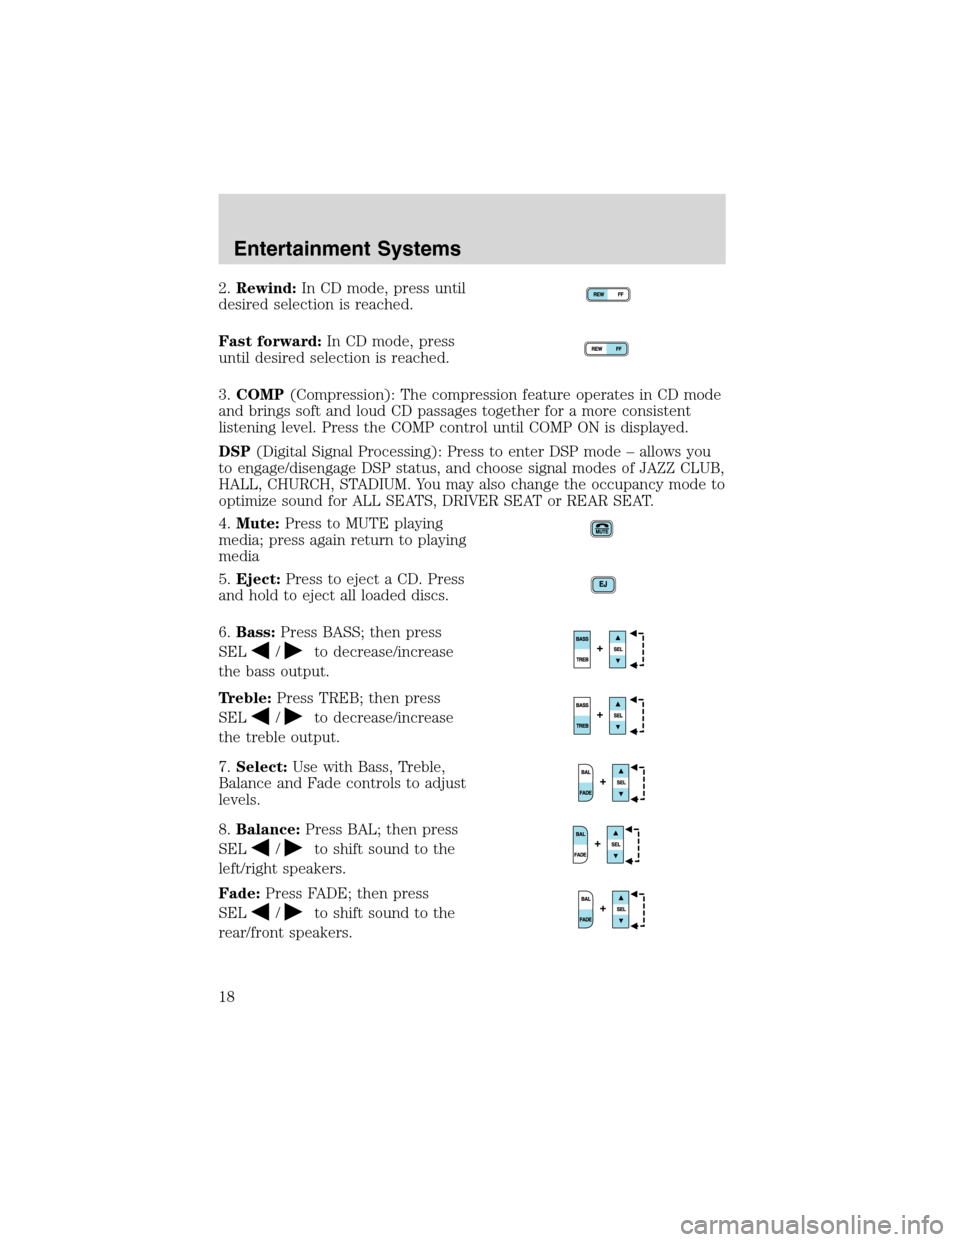
2.Rewind:In CD mode, press until
desired selection is reached.
Fast forward:In CD mode, press
until desired selection is reached.
3.COMP(Compression): The compression feature operates in CD mode
and brings soft and loud CD passages together for a more consistent
listening level. Press the COMP control until COMP ON is displayed.
DSP(Digital Signal Processing): Press to enter DSP mode–allows you
to engage/disengage DSP status, and choose signal modes of JAZZ CLUB,
HALL, CHURCH, STADIUM. You may also change the occupancy mode to
optimize sound for ALL SEATS, DRIVER SEAT or REAR SEAT.
4.Mute:Press to MUTE playing
media; press again return to playing
media
5.Eject:Press to eject a CD. Press
and hold to eject all loaded discs.
6.Bass:Press BASS; then press
SEL
/to decrease/increase
the bass output.
Treble:Press TREB; then press
SEL
/to decrease/increase
the treble output.
7.Select:Use with Bass, Treble,
Balance and Fade controls to adjust
levels.
8.Balance:Press BAL; then press
SEL
/to shift sound to the
left/right speakers.
Fade:Press FADE; then press
SEL
/to shift sound to the
rear/front speakers.
Entertainment Systems
18
Page 25 of 272
RADIO RECEPTION FACTORS
There are three factors that can effect radio reception:
•Distance/strength: The further you travel from an FM station, the
weaker the signal and the weaker the reception.
•Terrain: Hills, mountains, tall buildings, power lines, electric fences,
traffic lights and thunderstorms can interfere with your reception.
•Station overload: When you pass a broadcast tower, a stronger signal
may overtake a weaker one and play while the weak station frequency
is displayed.
CASSETTE/PLAYER CARE
Do:
•Use only cassettes that are 90 minutes long or less.
•Tighten very loose tapes by inserting a finger or pencil into the hole
and turning the hub.
•Remove loose labels before inserting tapes.
•Allow tapes which have been subjected to extreme heat, humidity or
cold to reach a moderate temperature before playing.
•Clean the cassette player head with a cassette cleaning cartridge after
10–12 hours of play to maintain good sound/operation.
Don’t:
•Expose tapes to direct sunlight, extreme humidity, heat or cold.
•Leave tapes in the cassette player for a long time when not being
played.
CD/CD PLAYER CARE
Do:
•Handle discs by their edges only. Never touch the playing surface.
•Inspect discs before playing. Clean only with an approved CD cleaner
and wipe from the center out.
Don’t:
•Expose discs to direct sunlight or heat sources for extended periods
of time.
•Insert more than one disc into each slot of the CD changer magazine.
•Clean using a circular motion.
Entertainment Systems
25
Page 36 of 272
3. Turn on the low beam headlamps.
The brightest part of the light
should be below the horizontal line
(4). If it is above the line the
headlamp will need to be adjusted.
4. Open the hood.
5. Locate the vertical adjuster for
each headlamp. Adjust the aim by
turning the adjuster control either
clockwise (to adjust down) or
counterclockwise (to adjust up).
Note:Usea4mmsocket or box
wrench to turn the vertical adjuster
control.
6. Horizontal aiming is not required
for this vehicle and is
non-adjustable.
TURN SIGNAL CONTROL
•Push down to activate the left
turn signal.
•Push up to activate the right turn
signal.
Lights
36
Page 40 of 272
Replacing front parking lamp/turn signal/sidemarker bulbs
1. Turn off the headlamp switch to
off.
2. Remove headlamp screw from the
bulb assembly.
3. Disengage lamp assembly.
4. Rotate the bulb socket
counterclockwise and remove it
from the lamp assembly.
5. Pull the bulb straight out.
Reverse steps to reinstall bulb(s).
Replacing tail/brake/turn/backup lamp bulbs
1. Turn the headlamp switch to OFF
and open the liftgate.
2. Remove the two screws from the
lamp assembly.
3. Remove the lamp assembly.
4. Rotate the bulb socket
counterclockwise and remove it
from the lamp assembly.
5. Pull the bulb straight out of the
socket.
Reverse steps to reinstall bulb(s).
Lights
40
Page 56 of 272
Do not let children play with the moon roof. They may seriously
hurt themselves.
HOMELINK�UNIVERSAL TRANSCEIVER (IF EQUIPPED)
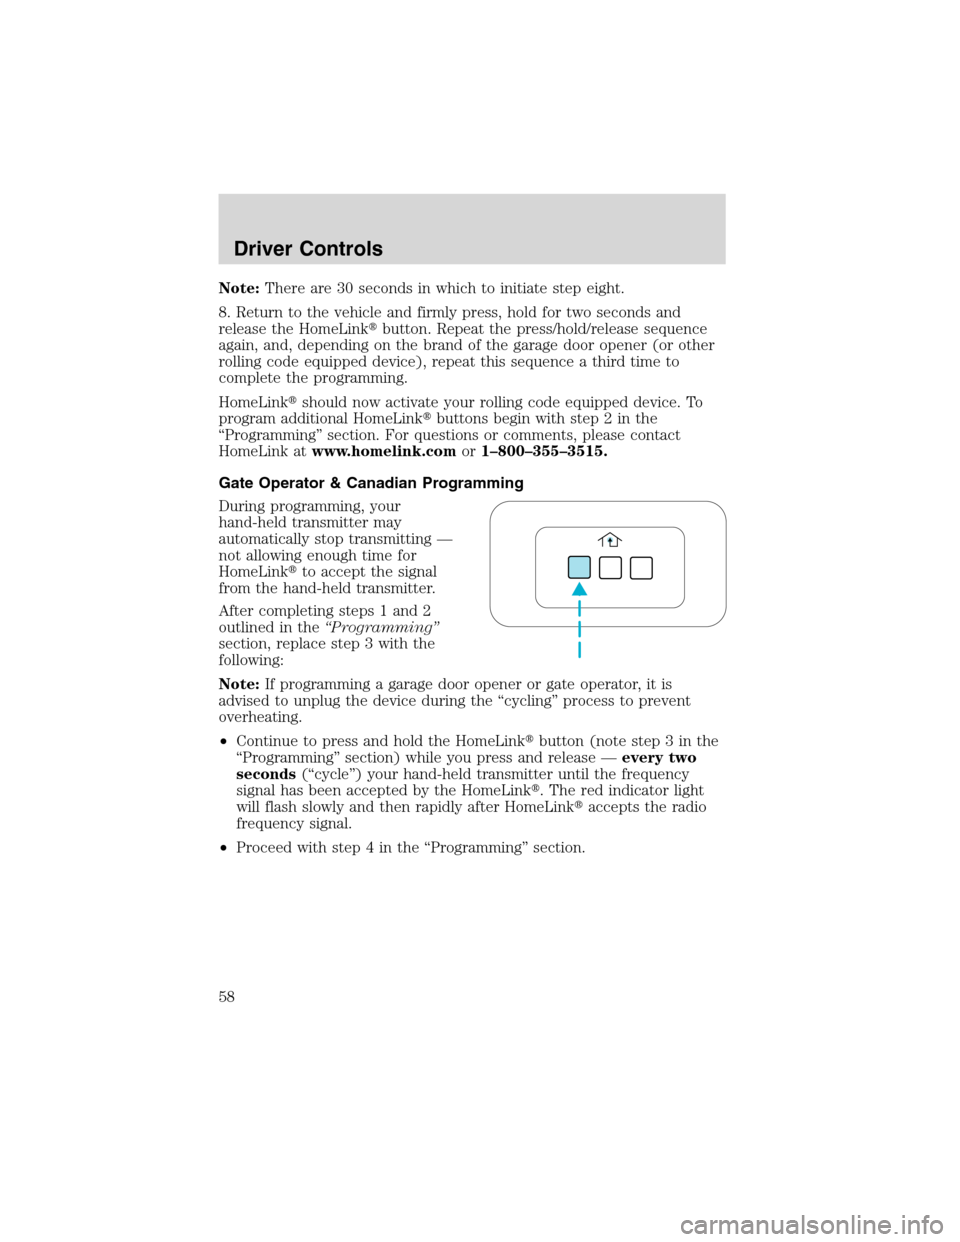
The HomeLink�Universal Transceiver, located on the overhead console,
provides a convenient way to replace up to three hand-held transmitters
with a single built-in device. This feature will learn the radio frequency
codes of most current transmitters to operate garage doors, entry gate
operators, security systems, entry door locks, and home or office lighting.
When programming your HomeLink�Universal Transceiver to a
garage door or gate, be sure that people and objects are out of
the way to prevent potential harm or damage.
Do not use the HomeLink�Universal Transceiver with any garage door
opener that lacks safety stop and reverse features as required by U.S.
federal safety standards (this includes any garage door opener model
manufactured before April 1, 1982). A garage door which cannot detect
an object, signaling the door to stop and reverse, does not meet current
U.S. federal safety standards. For more information, contact HomeLink�
at:www.homelink.comor1–800–355–3515.
Retain the original transmitter for use in other vehicles as well as for
future programming procedures (i.e. new HomeLink�equipped vehicle
purchase). It is also suggested that upon the sale of the vehicle, the
programmed Homelink�Universal Transceiver buttons be erased for
security purposes, refer toProgrammingin this section.
Programming
Do not program the HomeLink�Universal Transceiver with the
vehicle parked in the garage.
Note:Some vehicles may require the ignition switch to be turned to the
second (or“ACC”) position for programming and/or operation of the
HomeLink�. It is also recommended that a new battery be placed in the
hand-held transmitter of the device being programmed to HomeLink�for
quicker training and accurate transmission of the radio-frequency signal.
Driver Controls
56
Page 57 of 272
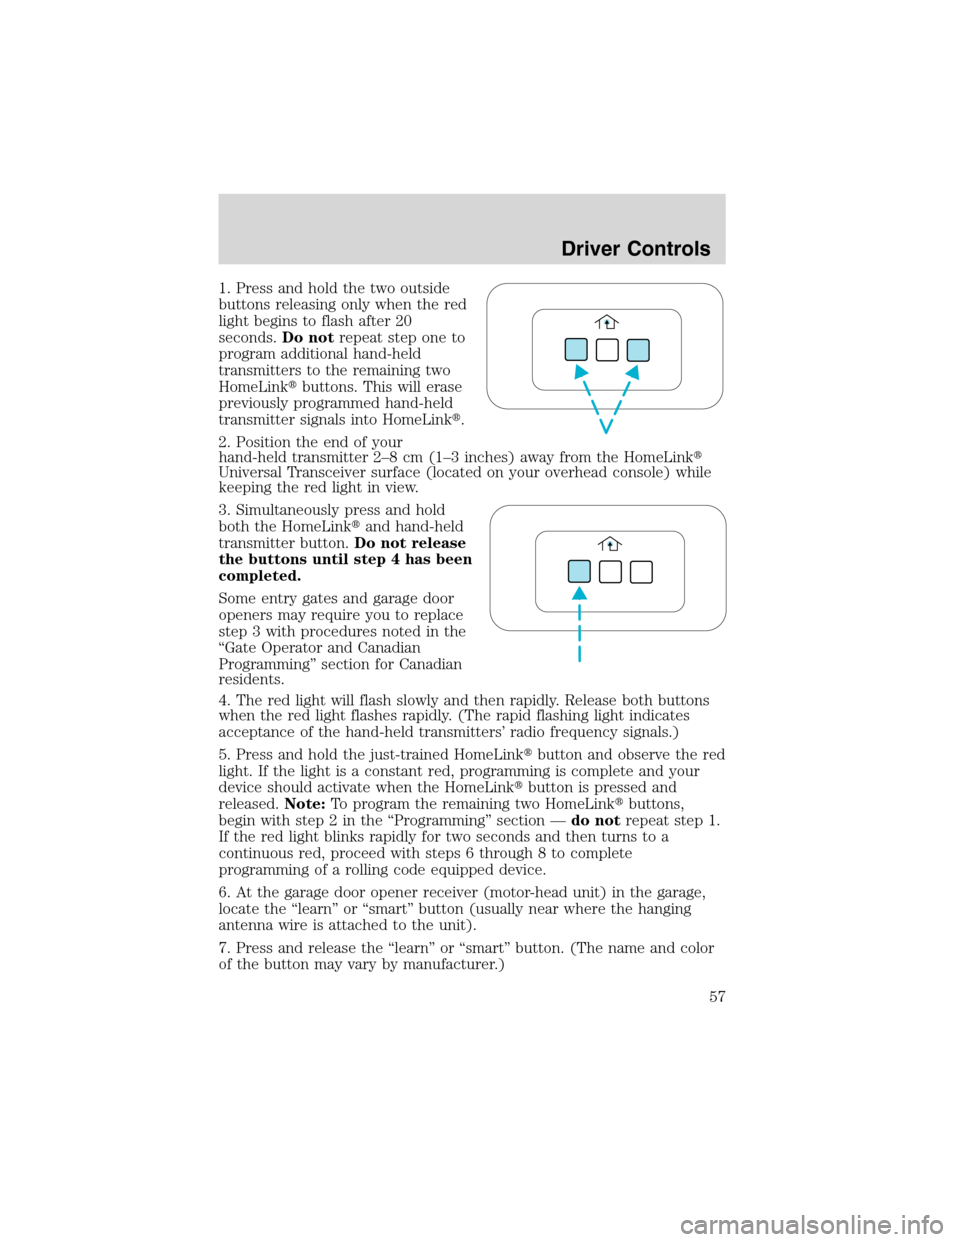
1. Press and hold the two outside
buttons releasing only when the red
light begins to flash after 20
seconds.Do notrepeat step one to
program additional hand-held
transmitters to the remaining two
HomeLink�buttons. This will erase
previously programmed hand-held
transmitter signals into HomeLink�.
2. Position the end of your
hand-held transmitter 2–8cm(1–3 inches) away from the HomeLink�
Universal Transceiver surface (located on your overhead console) while
keeping the red light in view.
3. Simultaneously press and hold
both the HomeLink�and hand-held
transmitter button.Do not release
the buttons until step 4 has been
completed.
Some entry gates and garage door
openers may require you to replace
step 3 with procedures noted in the
“Gate Operator and Canadian
Programming”section for Canadian
residents.
4. The red light will flash slowly and then rapidly. Release both buttons
when the red light flashes rapidly. (The rapid flashing light indicates
acceptance of the hand-held transmitters’radio frequency signals.)
5. Press and hold the just-trained HomeLink�button and observe the red
light. If the light is a constant red, programming is complete and your
device should activate when the HomeLink�button is pressed and
released.Note:To program the remaining two HomeLink�buttons,
begin with step 2 in the“Programming”section—do notrepeat step 1.
If the red light blinks rapidly for two seconds and then turns to a
continuous red, proceed with steps 6 through 8 to complete
programming of a rolling code equipped device.
6. At the garage door opener receiver (motor-head unit) in the garage,
locate the“learn”or“smart”button (usually near where the hanging
antenna wire is attached to the unit).
7. Press and release the“learn”or“smart”button. (The name and color
of the button may vary by manufacturer.)
Driver Controls
57
Page 58 of 272
Note:There are 30 seconds in which to initiate step eight.
8. Return to the vehicle and firmly press, hold for two seconds and
release the HomeLink�button. Repeat the press/hold/release sequence
again, and, depending on the brand of the garage door opener (or other
rolling code equipped device), repeat this sequence a third time to
complete the programming.
HomeLink�should now activate your rolling code equipped device. To
program additional HomeLink�buttons begin with step 2 in the
“Programming”section. For questions or comments, please contact
HomeLink atwww.homelink.comor1–800–355–3515.
Gate Operator & Canadian Programming
During programming, your
hand-held transmitter may
automatically stop transmitting—
not allowing enough time for
HomeLink�to accept the signal
from the hand-held transmitter.
After completing steps 1 and 2
outlined in the“Programming”
section, replace step 3 with the
following:
Note:If programming a garage door opener or gate operator, it is
advised to unplug the device during the“cycling”process to prevent
overheating.
•Continue to press and hold the HomeLink�button (note step 3 in the
“Programming”section) while you press and release—every two
seconds(“cycle”) your hand-held transmitter until the frequency
signal has been accepted by the HomeLink�. The red indicator light
will flash slowly and then rapidly after HomeLink�accepts the radio
frequency signal.
•Proceed with step 4 in the“Programming”section.
Driver Controls
58