2003 FORD E-150 ECO mode
[x] Cancel search: ECO modePage 76 of 232
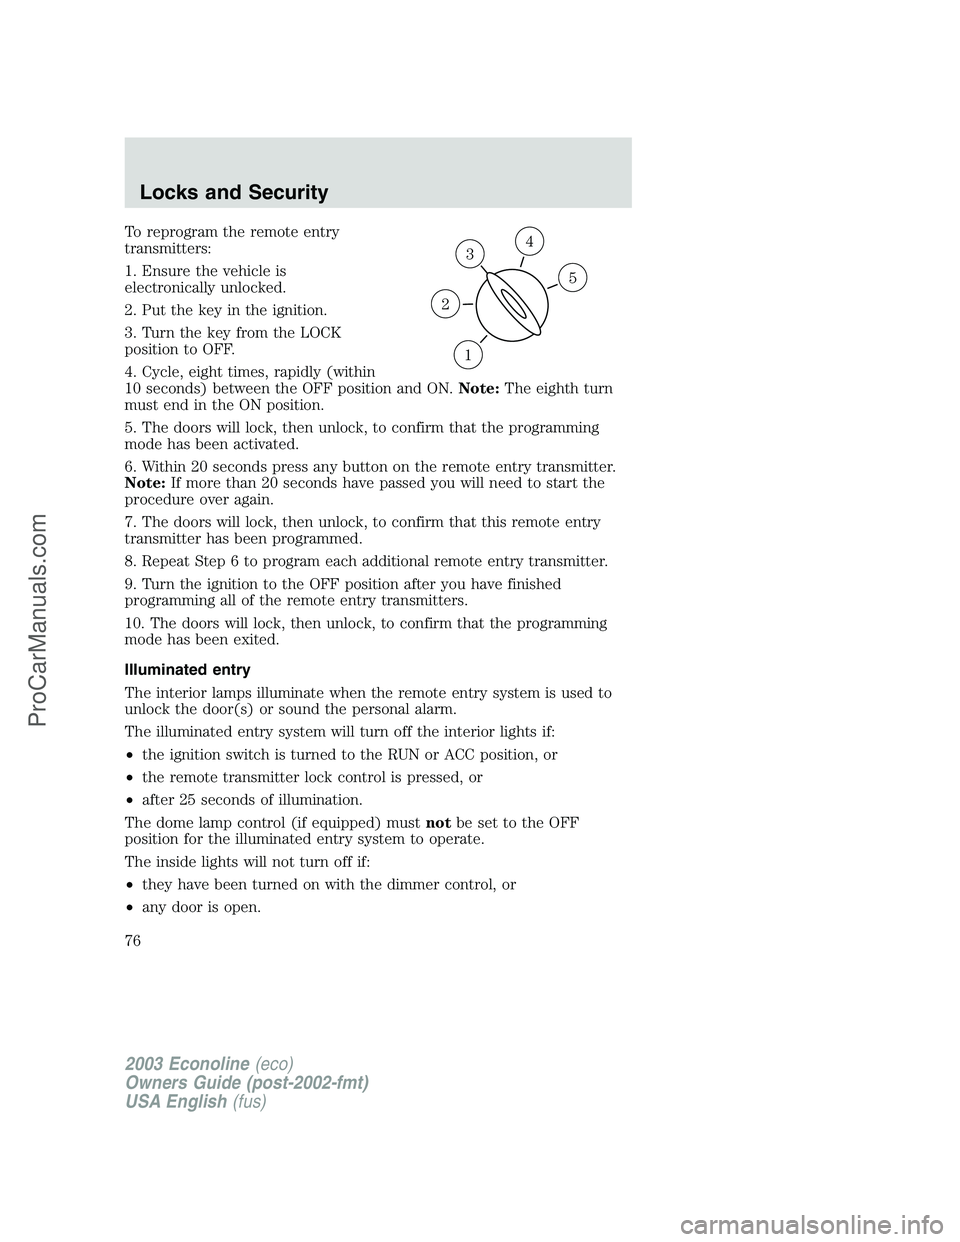
To reprogram the remote entry
transmitters:
1. Ensure the vehicle is
electronically unlocked.
2. Put the key in the ignition.
3. Turn the key from the LOCK
position to OFF.
4. Cycle, eight times, rapidly (within
10 seconds) between the OFF position and ON.Note:The eighth turn
must end in the ON position.
5. The doors will lock, then unlock, to confirm that the programming
mode has been activated.
6. Within 20 seconds press any button on the remote entry transmitter.
Note:If more than 20 seconds have passed you will need to start the
procedure over again.
7. The doors will lock, then unlock, to confirm that this remote entry
transmitter has been programmed.
8. Repeat Step 6 to program each additional remote entry transmitter.
9. Turn the ignition to the OFF position after you have finished
programming all of the remote entry transmitters.
10. The doors will lock, then unlock, to confirm that the programming
mode has been exited.
Illuminated entry
The interior lamps illuminate when the remote entry system is used to
unlock the door(s) or sound the personal alarm.
The illuminated entry system will turn off the interior lights if:
•the ignition switch is turned to the RUN or ACC position, or
•the remote transmitter lock control is pressed, or
•after 25 seconds of illumination.
The dome lamp control (if equipped) mustnotbe set to the OFF
position for the illuminated entry system to operate.
The inside lights will not turn off if:
•they have been turned on with the dimmer control, or
•any door is open.
3
1
2
5
4
2003 Econoline(eco)
Owners Guide (post-2002-fmt)
USA English(fus)
Locks and Security
76
ProCarManuals.com
Page 84 of 232

Safety belts and seats can become hot in a vehicle that has been
closed up in sunny weather; they could burn a small child. Check
seat covers and buckles before you place a child anywhere near them.
Combination lap and shoulder belts
1. Insert the belt tongue into the
proper buckle (the buckle closest to
the direction the tongue is coming
from) until you hear a snap and feel
it latch. Make sure the tongue is
securely fastened in the buckle.
2. To unfasten, push the release
button and remove the tongue from
the buckle.
The front outboard and rear outboard safety restraints in the vehicle are
combination lap and shoulder belts. The front outboard passenger and
rear seat outboard safety belts have two types of locking modes
described below:
Vehicle sensitive mode
This is the normal retractor mode, which allows free shoulder belt length
adjustment to your movements and locking in response to vehicle
movement. For example, if the driver brakes suddenly or turns a corner
sharply, or the vehicle receives an impact of approximately 8 km/h (5
mph) or more, the combination safety belts will lock to help reduce
forward movement of the driver and passengers.
Automatic locking mode
The automatic locking mode is not available on the driver safety belt.
2003 Econoline(eco)
Owners Guide (post-2002-fmt)
USA English(fus)
Seating and Safety Restraints
84
ProCarManuals.com
Page 85 of 232

When to use the automatic locking mode
In this mode, the shoulder belt is automatically pre-locked. The belt will
still retract to remove any slack in the shoulder belt. The automatic
locking mode is not available on the driver safety belt.
This mode should be usedany timea child safety seat is installed in a
passenger front or outboard rear seating position (if equipped). Children
12 years old and under should be properly restrained in the rear seat
whenever possible. Refer toSafety restraints for childrenorSafety
seats for childrenlater in this chapter.
How to use the automatic locking mode
•Buckle the combination lap and
shoulder belt.
•Grasp the shoulder portion and
pull downward until the entire
belt is pulled out.
•Allow the belt to retract. As the belt retracts, you will hear a clicking
sound. This indicates the safety belt is now in the automatic locking
mode.
How to disengage the automatic locking mode
Disconnect the combination lap/shoulder belt and allow it to retract
completely to disengage the automatic locking mode and activate the
vehicle sensitive (emergency) locking mode.
2003 Econoline(eco)
Owners Guide (post-2002-fmt)
USA English(fus)
Seating and Safety Restraints
85
ProCarManuals.com
Page 102 of 232
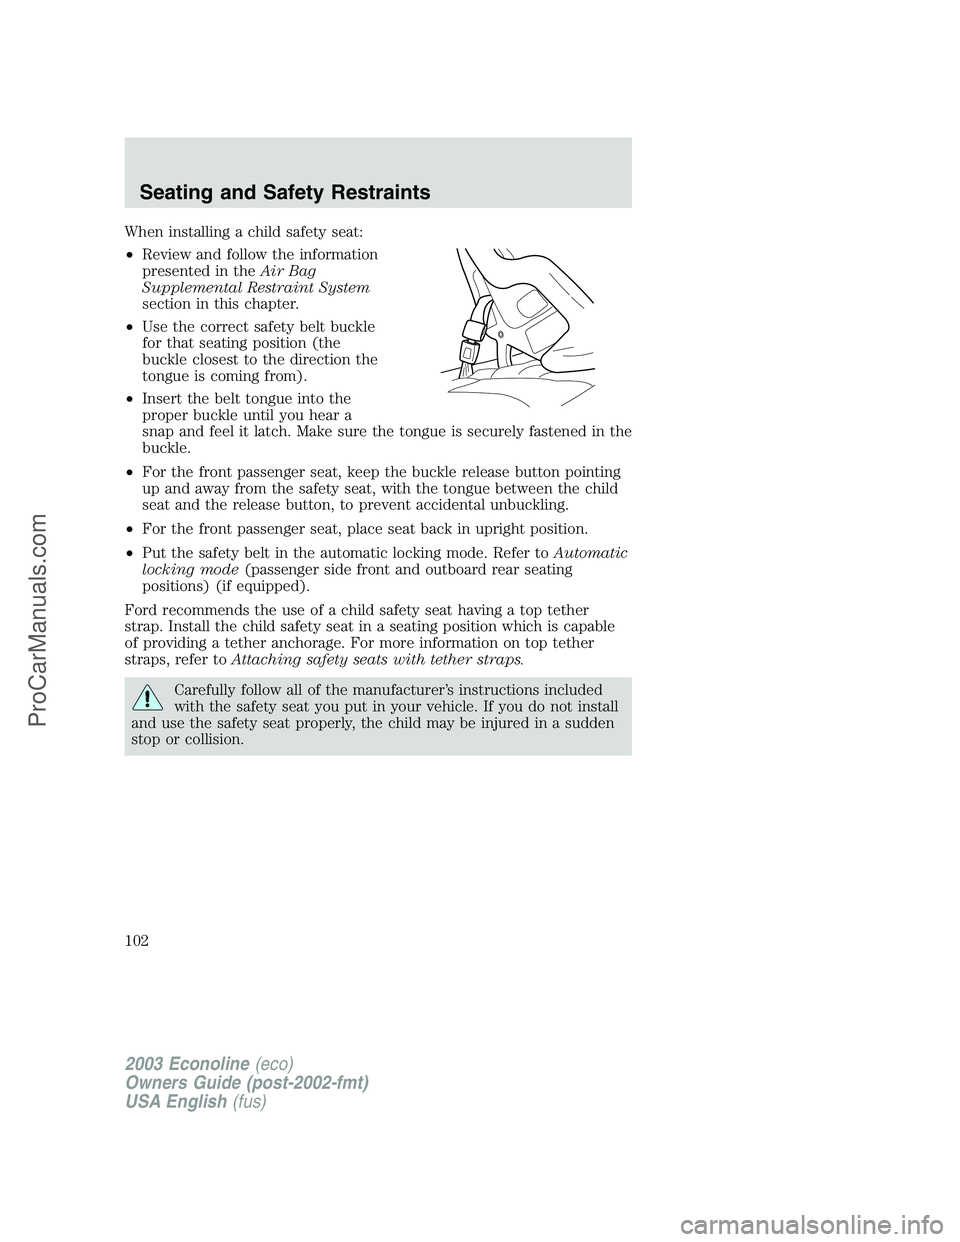
When installing a child safety seat:
•Review and follow the information
presented in theAir Bag
Supplemental Restraint System
section in this chapter.
•Use the correct safety belt buckle
for that seating position (the
buckle closest to the direction the
tongue is coming from).
•Insert the belt tongue into the
proper buckle until you hear a
snap and feel it latch. Make sure the tongue is securely fastened in the
buckle.
•For the front passenger seat, keep the buckle release button pointing
up and away from the safety seat, with the tongue between the child
seat and the release button, to prevent accidental unbuckling.
•For the front passenger seat, place seat back in upright position.
•Put the safety belt in the automatic locking mode. Refer toAutomatic
locking mode(passenger side front and outboard rear seating
positions) (if equipped).
Ford recommends the use of a child safety seat having a top tether
strap. Install the child safety seat in a seating position which is capable
of providing a tether anchorage. For more information on top tether
straps, refer toAttaching safety seats with tether straps.
Carefully follow all of the manufacturer’s instructions included
with the safety seat you put in your vehicle. If you do not install
and use the safety seat properly, the child may be injured in a sudden
stop or collision.
2003 Econoline(eco)
Owners Guide (post-2002-fmt)
USA English(fus)
Seating and Safety Restraints
102
ProCarManuals.com
Page 104 of 232
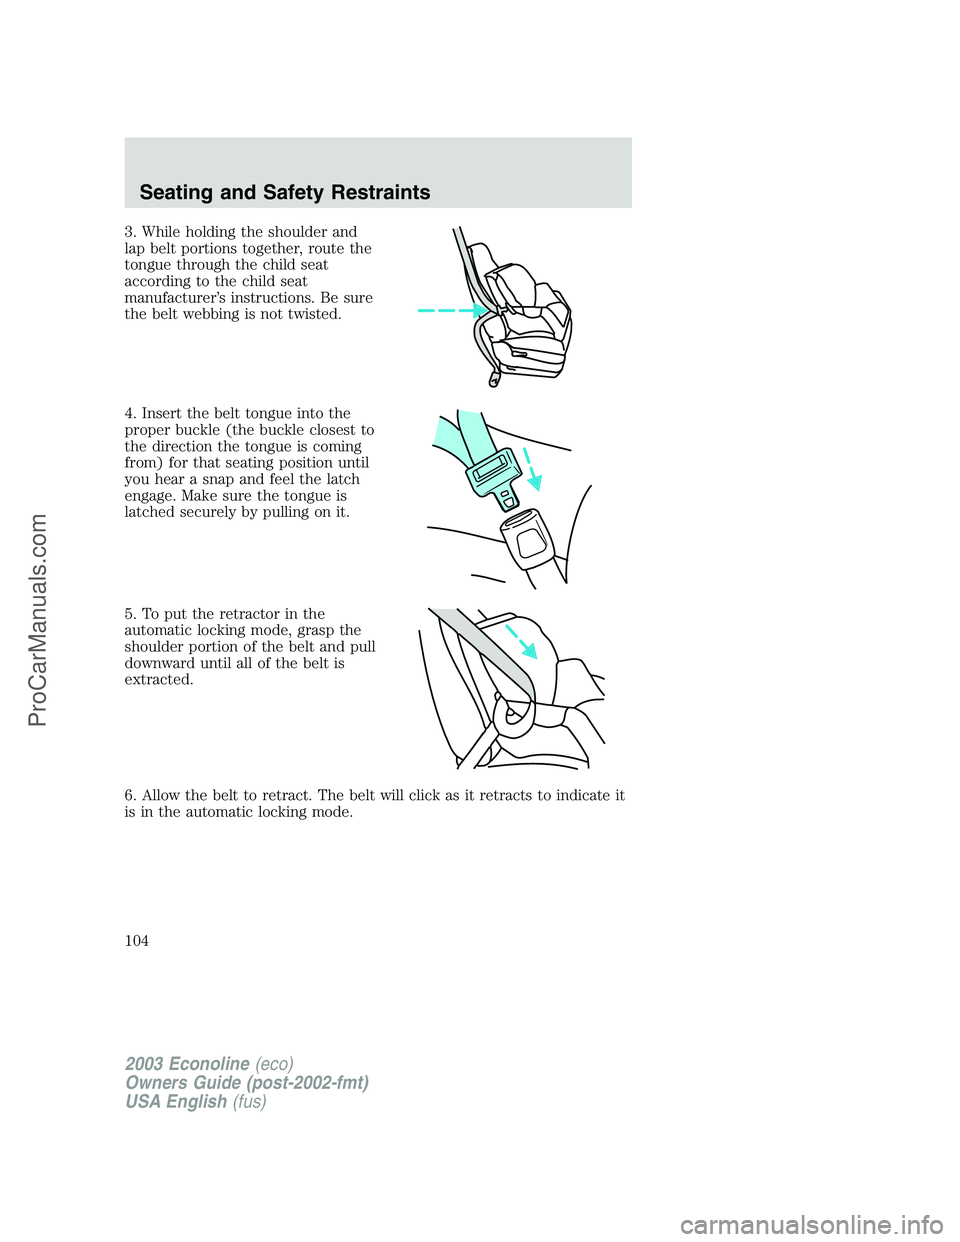
3. While holding the shoulder and
lap belt portions together, route the
tongue through the child seat
according to the child seat
manufacturer’s instructions. Be sure
the belt webbing is not twisted.
4. Insert the belt tongue into the
proper buckle (the buckle closest to
the direction the tongue is coming
from) for that seating position until
you hear a snap and feel the latch
engage. Make sure the tongue is
latched securely by pulling on it.
5. To put the retractor in the
automatic locking mode, grasp the
shoulder portion of the belt and pull
downward until all of the belt is
extracted.
6. Allow the belt to retract. The belt will click as it retracts to indicate it
is in the automatic locking mode.
2003 Econoline(eco)
Owners Guide (post-2002-fmt)
USA English(fus)
Seating and Safety Restraints
104
ProCarManuals.com
Page 105 of 232
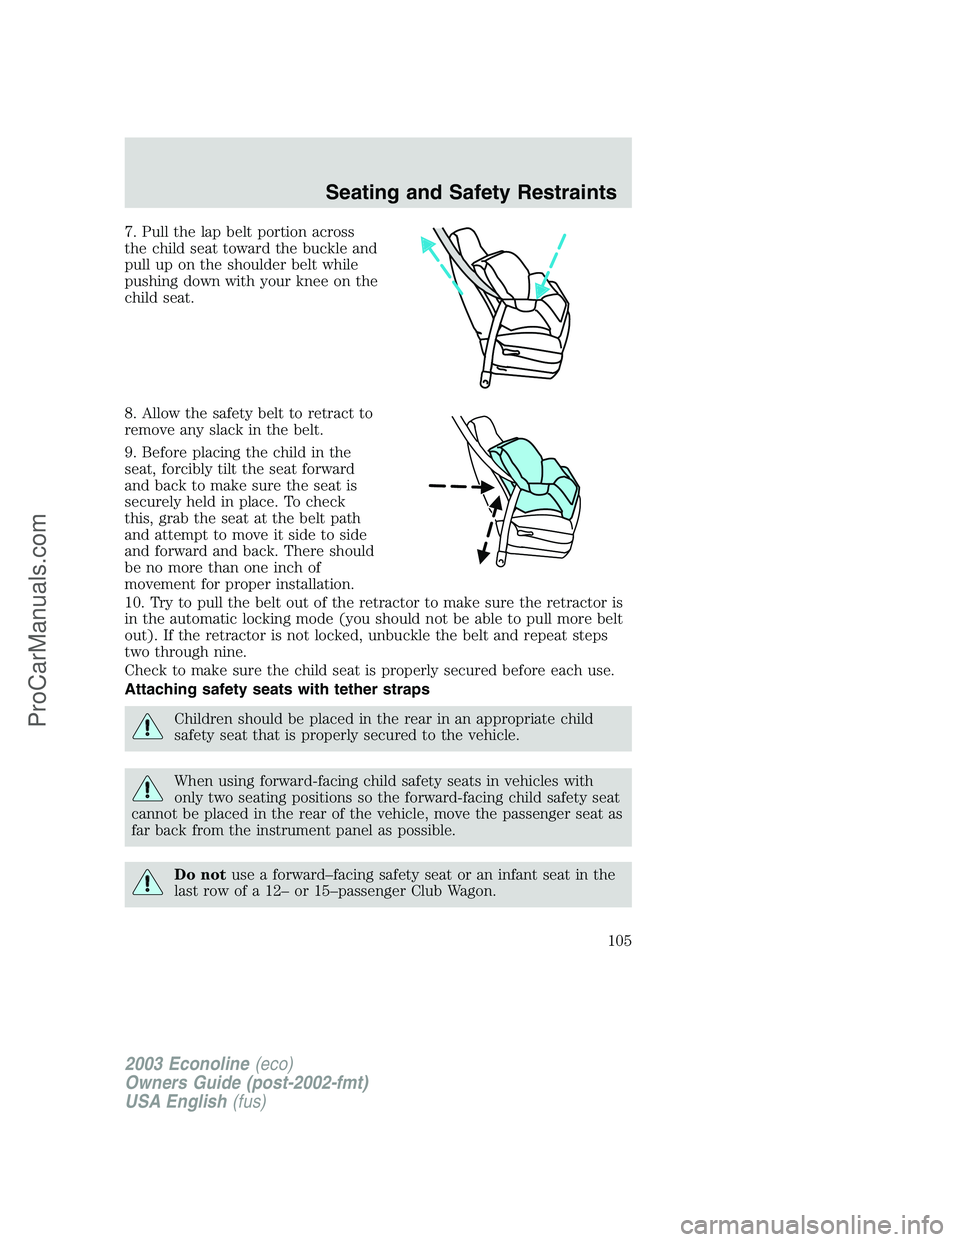
7. Pull the lap belt portion across
the child seat toward the buckle and
pull up on the shoulder belt while
pushing down with your knee on the
child seat.
8. Allow the safety belt to retract to
remove any slack in the belt.
9. Before placing the child in the
seat, forcibly tilt the seat forward
and back to make sure the seat is
securely held in place. To check
this, grab the seat at the belt path
and attempt to move it side to side
and forward and back. There should
be no more than one inch of
movement for proper installation.
10. Try to pull the belt out of the retractor to make sure the retractor is
in the automatic locking mode (you should not be able to pull more belt
out). If the retractor is not locked, unbuckle the belt and repeat steps
two through nine.
Check to make sure the child seat is properly secured before each use.
Attaching safety seats with tether straps
Children should be placed in the rear in an appropriate child
safety seat that is properly secured to the vehicle.
When using forward-facing child safety seats in vehicles with
only two seating positions so the forward-facing child safety seat
cannot be placed in the rear of the vehicle, move the passenger seat as
far back from the instrument panel as possible.
Do notuse a forward–facing safety seat or an infant seat in the
last row of a 12–or 15–passenger Club Wagon.
2003 Econoline(eco)
Owners Guide (post-2002-fmt)
USA English(fus)
Seating and Safety Restraints
105
ProCarManuals.com
Page 133 of 232
Using a step bumper (if equipped)
The rear bumper is equipped with an integral hitch and only requires a ball
with a 25.4 mm (one inch) shank diameter. The bumper has a 2,270 kg
(5,000 lb.) trailer weight and 227 kg (500 lb.) tongue weight capacity.
If it is necessary to relocate the trailer hitch ball position, a
frame-mounted trailer hitch must be installed.
Driving while you tow
When towing a trailer:
•Turn off the speed control. The speed control may shut off
automatically when you are towing on long, steep grades.
•Consult your local motor vehicle speed regulations for towing a trailer.
•To eliminate excessive shifting, use a lower gear. This will also assist
in transmission cooling.
•Anticipate stops and brake gradually.
When descending long, steep downhill grades, always use a lower gear to
provide engine braking to save wear on brakes. Use Drive (Overdrive
OFF) on moderately steep hills, Second (2) on steep hills, and First (1)
on very steep hills.Do not apply your brakes continuously, as they
may overheat and become less effective.
Servicing after towing
If you tow a trailer for long distances, your vehicle will require more
frequent service intervals. Refer to your scheduled maintenance guide for
more information.
Trailer towing tips
•Practice turning, stopping and backing up before starting on a trip to
get the feel of the vehicle trailer combination. When turning, make
wider turns so the trailer wheels will clear curbs and other obstacles.
•Allow more distance for stopping with a trailer attached.
•
The trailer tongue weight should be 10–15% of the loaded trailer weight.
•If you will be towing a trailer frequently in hot weather, hilly conditions,
at GCW, or any combination of these factors, consider refilling your rear
axle with synthetic gear lube. Refer to theMaintenance and
specificationschapter for the lubricant specification.
•After you have traveled 80 km (50 miles), thoroughly check your
hitch, electrical connections and trailer wheel lug nuts.
2003 Econoline(eco)
Owners Guide (post-2002-fmt)
USA English(fus)
Driving
133
ProCarManuals.com
Page 144 of 232
CHANGING A FLAT TIRE
If you get a flat tire while driving:
•do not brake heavily.
•gradually decrease the vehicle’s speed.
•hold the steering wheel firmly.
•slowly move to a safe place on the side of the road.
The use of tire sealants is not recommended and may
compromise the integrity of your tires.
Spare tire information
The spare tire for your vehicle is stowed under the rear of your vehicle
(except cutaway and stripped chassis models).
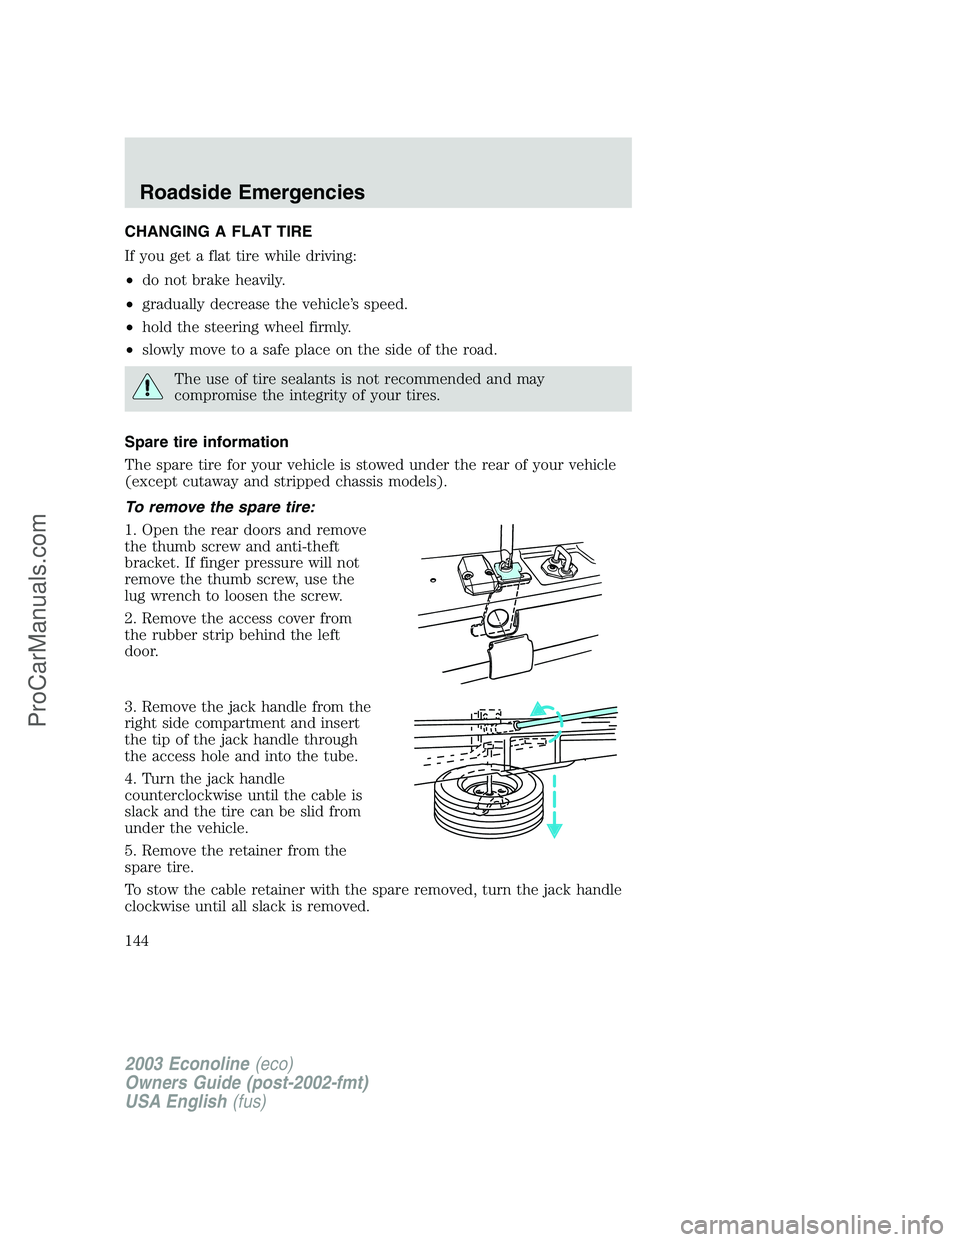
To remove the spare tire:
1. Open the rear doors and remove
the thumb screw and anti-theft
bracket. If finger pressure will not
remove the thumb screw, use the
lug wrench to loosen the screw.
2. Remove the access cover from
the rubber strip behind the left
door.
3. Remove the jack handle from the
right side compartment and insert
the tip of the jack handle through
the access hole and into the tube.
4. Turn the jack handle
counterclockwise until the cable is
slack and the tire can be slid from
under the vehicle.
5. Remove the retainer from the
spare tire.
To stow the cable retainer with the spare removed, turn the jack handle
clockwise until all slack is removed.
2003 Econoline(eco)
Owners Guide (post-2002-fmt)
USA English(fus)
Roadside Emergencies
144
ProCarManuals.com