Page 1 of 248
Introduction 4
Instrument Cluster 10
Warning and control lights 10
Gauges 16
Entertainment Systems 22
AM/FM stereo cassette with CD 22
AM/FM stereo cassette 31
AM/FM stereo 38
CD changer 42
Climate Controls 47
Manual heating and air conditioning 47
Electronic automatic temperature control 49
Lights 54
Headlamps 54
Turn signal control 56
Bulb replacement 56
Driver Controls 63
Windshield wiper/washer control 63
Steering wheel adjustment 64
Power windows 74
Mirrors 75
Speed control 77
Message center 86
Locks and Security 93
Keys 93
Locks 93
Anti-theft system 95
2003 Crown Victoria(cro)
Owners Guide (post-2002-fmt)
USA English(fus)
Table of Contents
Table of Contents
1
Page 10 of 248
WARNING LIGHTS AND CHIMES
Warning lights and gauges can alert you to a vehicle condition that may
become serious enough to cause expensive repairs. A warning light may
illuminate when a problem exists with one of your vehicle’s functions.
Many lights will illuminate when you start your vehicle to make sure the
bulb works.If any light remains on after starting the vehicle, have
the respective system inspected immediately.
Standard instrument cluster
Optional instrument cluster
Check engine
Illuminates briefly to ensure the
system is functional. If it comes on
after the engine is started, one of
the engine’s emission control
systems may be malfunctioning. The
light may illuminate without a driveability concern being noted and will
not require towing.
CHECK
ENGINE
2003 Crown Victoria(cro)
Owners Guide (post-2002-fmt)
USA English(fus)
Instrument Cluster
Instrument Cluster
10
Page 14 of 248

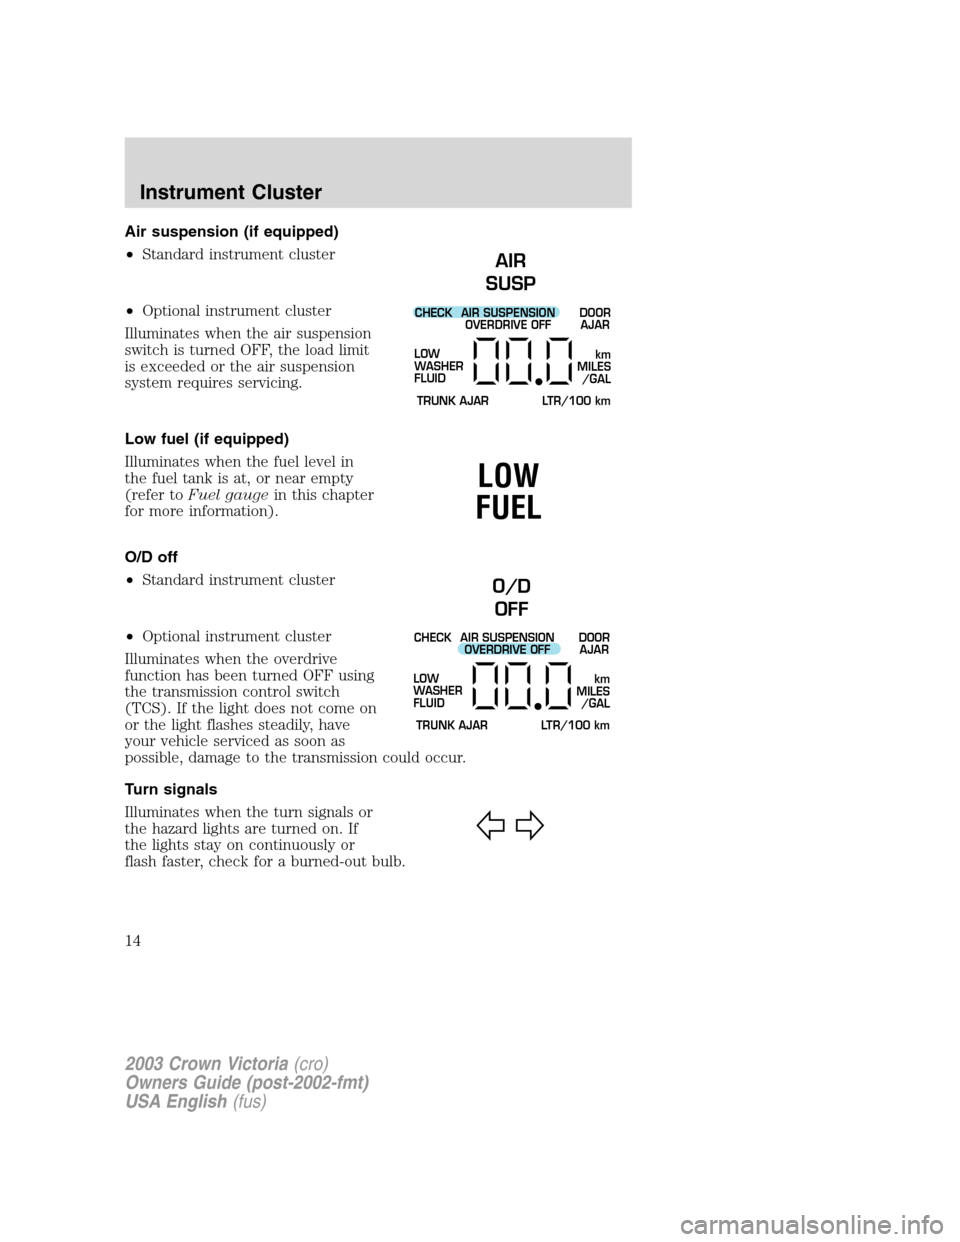
Air suspension (if equipped)
•Standard instrument cluster
•Optional instrument cluster
Illuminates when the air suspension
switch is turned OFF, the load limit
is exceeded or the air suspension
system requires servicing.
Low fuel (if equipped)
Illuminates when the fuel level in
the fuel tank is at, or near empty
(refer toFuel gaugein this chapter
for more information).
O/D off
•Standard instrument cluster
•Optional instrument cluster
Illuminates when the overdrive
function has been turned OFF using
the transmission control switch
(TCS). If the light does not come on
or the light flashes steadily, have
your vehicle serviced as soon as
possible, damage to the transmission could occur.
Turn signals
Illuminates when the turn signals or
the hazard lights are turned on. If
the lights stay on continuously or
flash faster, check for a burned-out bulb.
AIR
SUSP
CHECK
TRUNK AJAR LTR/100 kmAIR SUSPENSION
OVERDRIVE OFFDOOR
AJAR
LOW
WASHER
FLUID
km
MILES
/GAL
LOW
FUEL
O/D
OFF
CHECK
TRUNK AJAR LTR/100 kmAIR SUSPENSION
OVERDRIVE OFFDOOR
AJAR
LOW
WASHER
FLUID
km
MILES
/GAL
2003 Crown Victoria(cro)
Owners Guide (post-2002-fmt)
USA English(fus)
Instrument Cluster
14
Page 56 of 248
TURN SIGNAL CONTROL
•Push down to activate the left
turn signal.
•Push up to activate the right turn
signal.
The flash rate of the turn signal will speed up considerably if the left or
right turn lamp bulb (front or rear) is burned out.
MAP/COURTESY LAMPS
Without a moon roof
With a moon roof
To turn on the map lamps, press the
map lamp control.
BULBS
Replacing exterior bulbs
Check the operation of all the bulbs frequently.
2003 Crown Victoria(cro)
Owners Guide (post-2002-fmt)
USA English(fus)
Lights
56
Page 57 of 248

Using the right bulbs
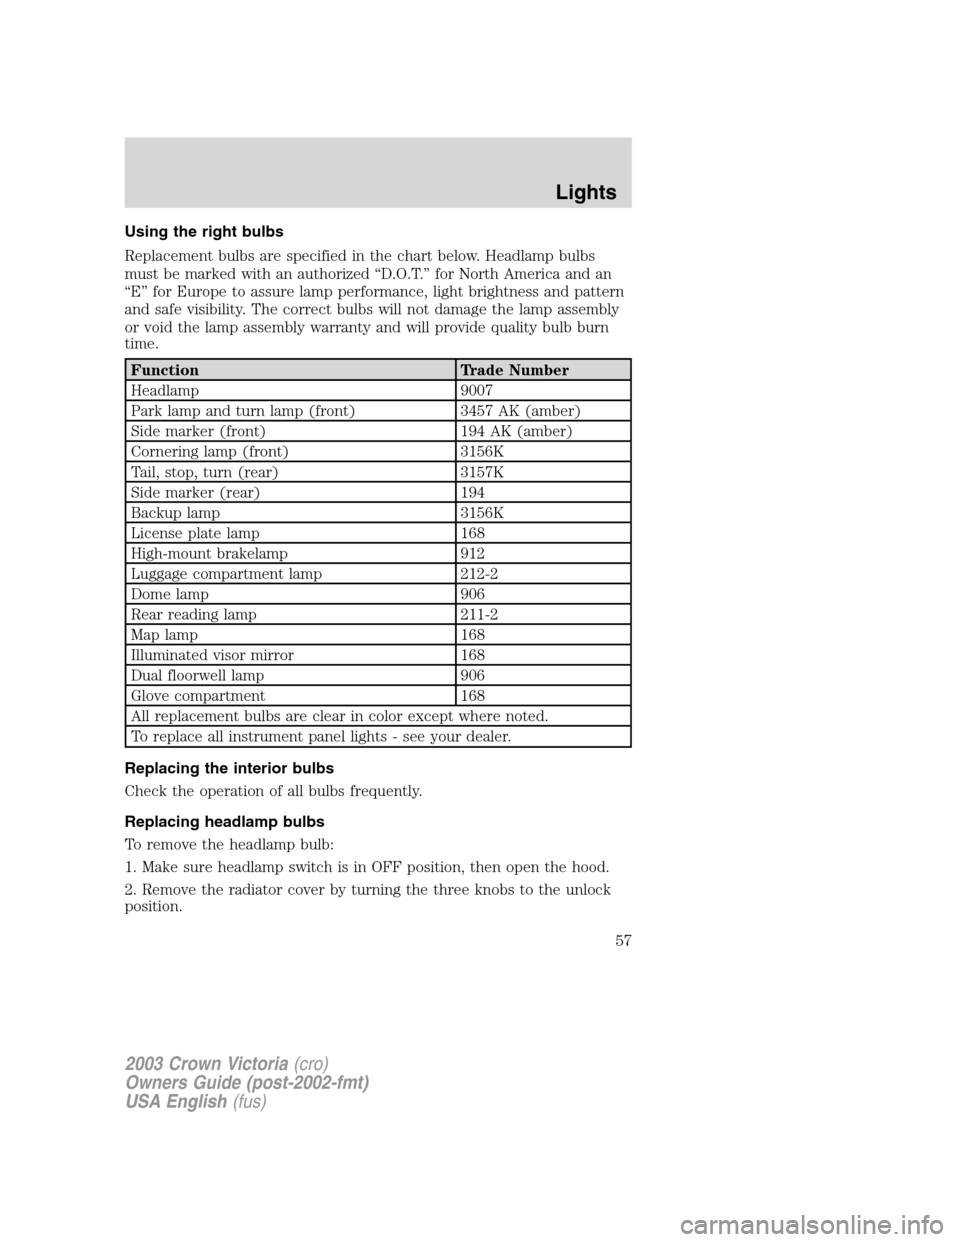
Replacement bulbs are specified in the chart below. Headlamp bulbs
must be marked with an authorized“D.O.T.”for North America and an
“E”for Europe to assure lamp performance, light brightness and pattern
and safe visibility. The correct bulbs will not damage the lamp assembly
or void the lamp assembly warranty and will provide quality bulb burn
time.
Function Trade Number
Headlamp 9007
Park lamp and turn lamp (front) 3457 AK (amber)
Side marker (front) 194 AK (amber)
Cornering lamp (front) 3156K
Tail, stop, turn (rear) 3157K
Side marker (rear) 194
Backup lamp 3156K
License plate lamp 168
High-mount brakelamp 912
Luggage compartment lamp 212-2
Dome lamp 906
Rear reading lamp 211-2
Map lamp 168
Illuminated visor mirror 168
Dual floorwell lamp 906
Glove compartment 168
All replacement bulbs are clear in color except where noted.
To replace all instrument panel lights - see your dealer.
Replacing the interior bulbs
Check the operation of all bulbs frequently.
Replacing headlamp bulbs
To remove the headlamp bulb:
1. Make sure headlamp switch is in OFF position, then open the hood.
2. Remove the radiator cover by turning the three knobs to the unlock
position.
2003 Crown Victoria(cro)
Owners Guide (post-2002-fmt)
USA English(fus)
Lights
57
Page 58 of 248

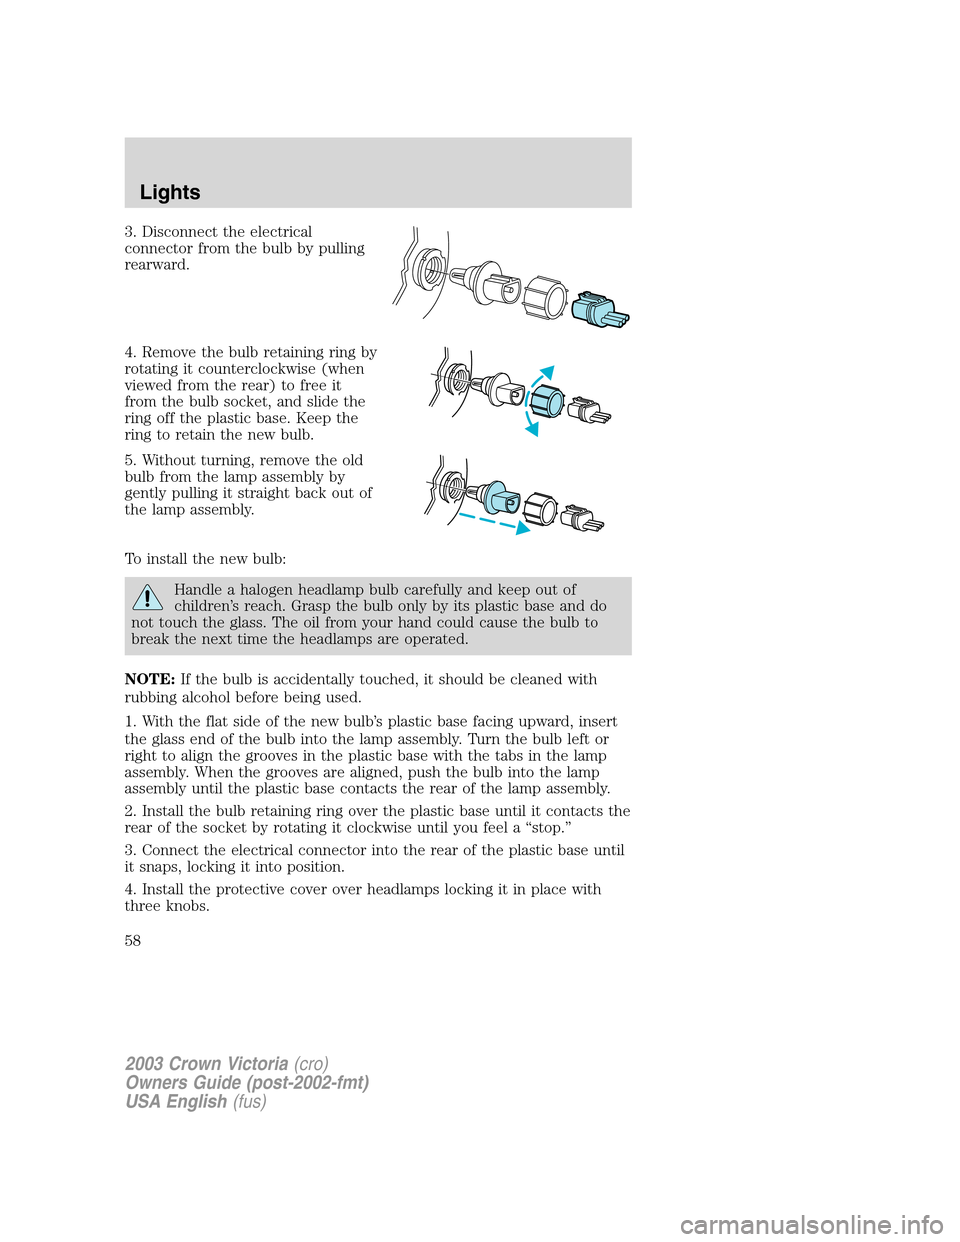
3. Disconnect the electrical
connector from the bulb by pulling
rearward.
4. Remove the bulb retaining ring by
rotating it counterclockwise (when
viewed from the rear) to free it
from the bulb socket, and slide the
ring off the plastic base. Keep the
ring to retain the new bulb.
5. Without turning, remove the old
bulb from the lamp assembly by
gently pulling it straight back out of
the lamp assembly.
To install the new bulb:
Handle a halogen headlamp bulb carefully and keep out of
children’s reach. Grasp the bulb only by its plastic base and do
not touch the glass. The oil from your hand could cause the bulb to
break the next time the headlamps are operated.
NOTE:If the bulb is accidentally touched, it should be cleaned with
rubbing alcohol before being used.
1. With the flat side of the new bulb’s plastic base facing upward, insert
the glass end of the bulb into the lamp assembly. Turn the bulb left or
right to align the grooves in the plastic base with the tabs in the lamp
assembly. When the grooves are aligned, push the bulb into the lamp
assembly until the plastic base contacts the rear of the lamp assembly.
2. Install the bulb retaining ring over the plastic base until it contacts the
rear of the socket by rotating it clockwise until you feel a“stop.”
3. Connect the electrical connector into the rear of the plastic base until
it snaps, locking it into position.
4. Install the protective cover over headlamps locking it in place with
three knobs.
2003 Crown Victoria(cro)
Owners Guide (post-2002-fmt)
USA English(fus)
Lights
58
Page 59 of 248

5. Turn the headlamps on and make sure they work properly. If the
headlamp was correctly aligned before you changed the bulb, you should
not need to align it again.
Replacing front parking lamp/turn signal bulbs
The park/turn lamp bulbs can be replaced with out removing the
headlamp assembly.
1. Make sure headlamp switch is in OFF position, then open the hood.
2. Remove the radiator cover by turning the three knobs to the unlock
position.
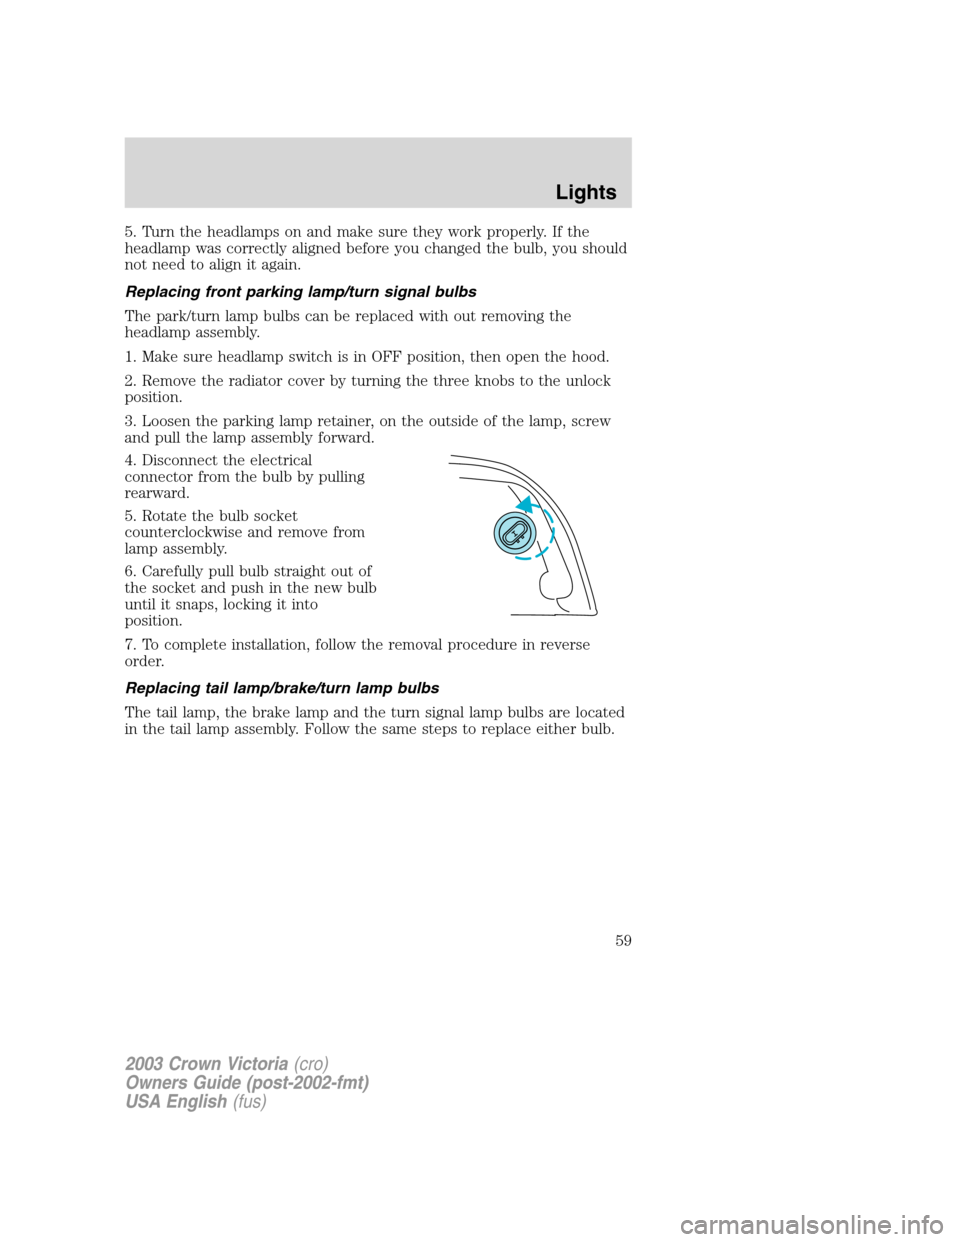
3. Loosen the parking lamp retainer, on the outside of the lamp, screw
and pull the lamp assembly forward.
4. Disconnect the electrical
connector from the bulb by pulling
rearward.
5. Rotate the bulb socket
counterclockwise and remove from
lamp assembly.
6. Carefully pull bulb straight out of
the socket and push in the new bulb
until it snaps, locking it into
position.
7. To complete installation, follow the removal procedure in reverse
order.
Replacing tail lamp/brake/turn lamp bulbs
The tail lamp, the brake lamp and the turn signal lamp bulbs are located
in the tail lamp assembly. Follow the same steps to replace either bulb.
2003 Crown Victoria(cro)
Owners Guide (post-2002-fmt)
USA English(fus)
Lights
59
Page 60 of 248
1. Make sure headlamp switch is in
OFF position, then open the trunk
and remove plastic retainer to
expose the lamp assembly hardware.
2. Carefully pull the carpet away to
expose the plastic retainer.
3. Remove three nut and washer
assemblies and the lamp assembly
from the vehicle.
4. Remove the bulb socket by
rotating it counterclockwise, then
pulling it out of the lamp assembly.
5. Pull the bulb from the socket and
push in the new bulb.
6. Install the bulb socket into the
lamp assembly by rotating it
clockwise.
7. Install the lamp assembly on the
vehicle with three nut and washer
assemblies ensuring the washers on
the nuts are flush with the body to prevent water from entering the
trunk.
8. Install the plastic retainer and carefully push the carpet back in to
place.
2003 Crown Victoria(cro)
Owners Guide (post-2002-fmt)
USA English(fus)
Lights
60