2003 CHEVROLET VENTURE tire pressure
[x] Cancel search: tire pressurePage 392 of 486
Tire Inspection and Rotation
Tires should be rotated every 7,500 miles (12 500 km).
Any time you notice unusual wear, rotate your tires
as soon as possible and check wheel alignment. Also
check for damaged tires or wheels. See
When It Is Time
for New Tires on page 5-63andWheel Replacement
on page 5-66for more information.
Make sure the spare tire is stored securely. Push, pull,
and then try to rotate or turn the tire, If it moves,
use the folding wrench to tighten the cable. See
Changing a Flat Tire on page 5-71.
The purpose of regular rotation is to achieve more
uniform wear for all tires on the vehicle. The ®rst rotation
is the most important. See ªPart A: Scheduled
Maintenance Services,º in Section 6, for scheduled
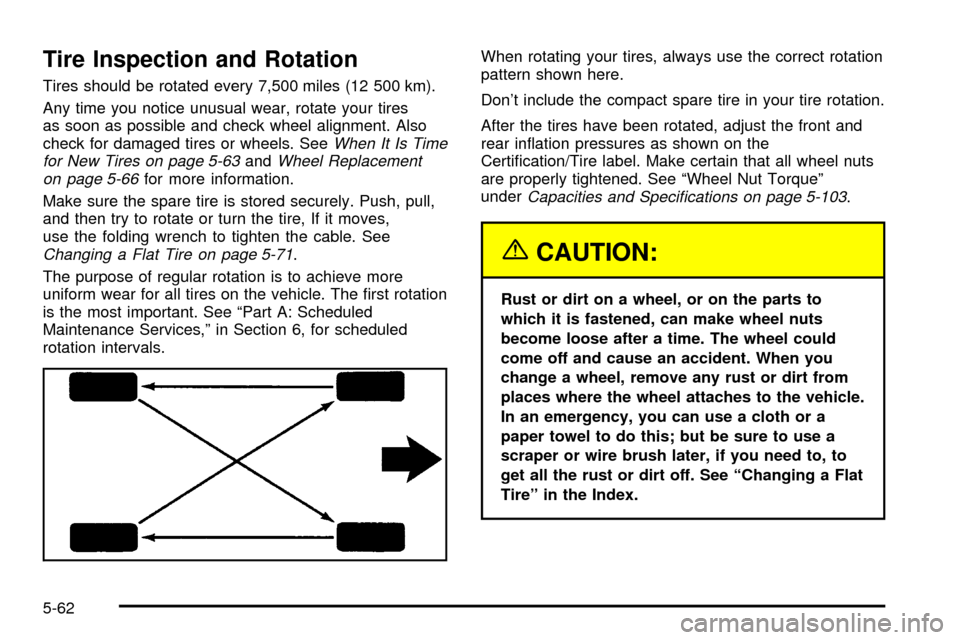
rotation intervals.When rotating your tires, always use the correct rotation
pattern shown here.
Don't include the compact spare tire in your tire rotation.
After the tires have been rotated, adjust the front and
rear in¯ation pressures as shown on the
Certi®cation/Tire label. Make certain that all wheel nuts
are properly tightened. See ªWheel Nut Torqueº
under
Capacities and Speci®cations on page 5-103.
{CAUTION:
Rust or dirt on a wheel, or on the parts to
which it is fastened, can make wheel nuts
become loose after a time. The wheel could
come off and cause an accident. When you
change a wheel, remove any rust or dirt from
places where the wheel attaches to the vehicle.
In an emergency, you can use a cloth or a
paper towel to do this; but be sure to use a
scraper or wire brush later, if you need to, to
get all the rust or dirt off. See ªChanging a Flat
Tireº in the Index.
5-62
Page 398 of 486
Accessory In¯ator
Your vehicle may have an accessory in¯ator. With it,
you can in¯ate things like air mattresses and
basketballs, and you can also use it to bring your tires
up to the proper pressure.
The accessory in¯ator is located in the rear
compartment on the driver's side. To remove the
protective cap, pull the tab on the cap.
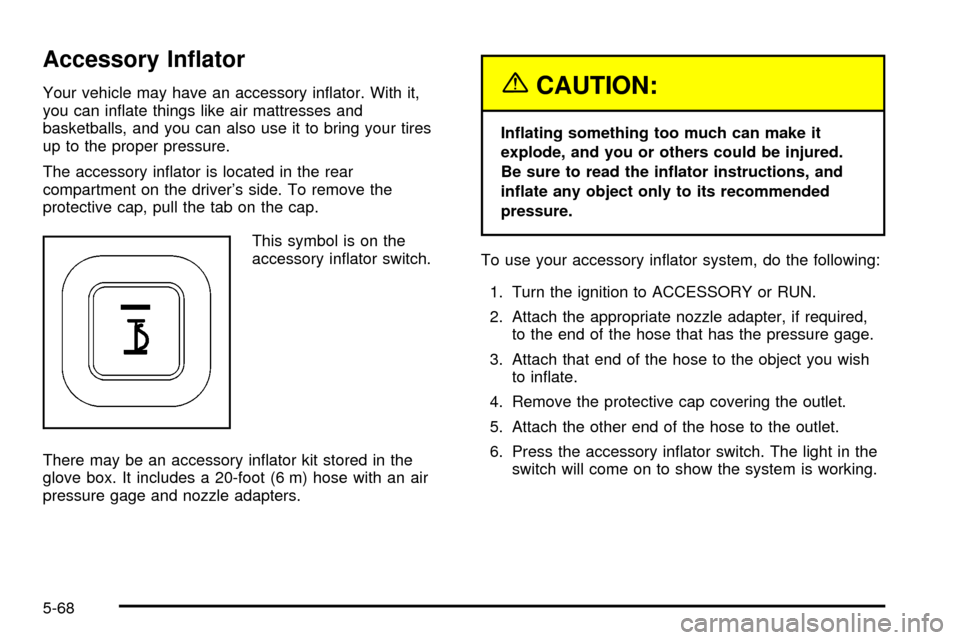
This symbol is on the
accessory in¯ator switch.
There may be an accessory in¯ator kit stored in the
glove box. It includes a 20-foot (6 m) hose with an air
pressure gage and nozzle adapters.{CAUTION:
In¯ating something too much can make it
explode, and you or others could be injured.
Be sure to read the in¯ator instructions, and
in¯ate any object only to its recommended
pressure.
To use your accessory in¯ator system, do the following:
1. Turn the ignition to ACCESSORY or RUN.
2. Attach the appropriate nozzle adapter, if required,
to the end of the hose that has the pressure gage.
3. Attach that end of the hose to the object you wish
to in¯ate.
4. Remove the protective cap covering the outlet.
5. Attach the other end of the hose to the outlet.
6. Press the accessory in¯ator switch. The light in the
switch will come on to show the system is working.
5-68
Page 413 of 486

Storing the Spare Tire and Tools
1. Lay the tire near the rear of the vehicle with the
valve stem down.
2. If the vehicle has aluminum wheels, remove the
small center cap by tapping the back of the cap
with the extension of the shaft.
3. Slide the cable retainer through the center of the
wheel and start to raise the tire.
Make sure the retainer is fully seated across the
underside of the wheel.
4. When the tire is almost in the stored position, turn
the tire so the valve is towards the rear of the
vehicle.
This will help when you check and maintain tire
pressure in the spare.
5. Raise the tire fully against the underside of the
vehicle. Continue turning the folding wrench until
you feel more than two clicks. This indicates that the
compact spare tire is secure and the cable is
tight. The spare tire hoist cannot be overtightened.A. Push and Pull
B. Turn Tire
6. Make sure the tire is stored securely. Push, pull,
and then try to turn the tire. If the tire moves, use
the folding wrench to tighten the cable.
5-83
Page 416 of 486

Compact Spare Tire
Although the compact spare tire was fully in¯ated when
your vehicle was new, it can lose air after a time.
Check the in¯ation pressure regularly. It should be
60 psi (420 kPa).
After installing the compact spare on your vehicle, you
should stop as soon as possible and make sure
your spare tire is correctly in¯ated. The compact spare
is made to perform well at speeds up to 65 mph
(105 km/h) for distances up to 3,000 miles (5 000 km),
so you can ®nish your trip and have your full-size
tire repaired or replaced where you want. Of course, it's
best to replace your spare with a full-size tire as
soon as you can. Your spare will last longer and be in
good shape in case you need it again.
Notice:When the compact spare is installed, don't
take your vehicle through an automatic car wash
with guide rails. The compact spare can get caught
on the rails. That can damage the tire and wheel,
and maybe other parts of your vehicle.
Don't use your compact spare on other vehicles.
And don't mix your compact spare tire or wheel with
other wheels or tires. They won't ®t. Keep your spare tire
and its wheel together.
Notice:Tire chains won't ®t your compact spare.
Using them can damage your vehicle and can
damage the chains too. Don't use tire chains on
your compact spare.
All-Wheel Drive
After installing a compact spare tire on a vehicle with
all-wheel drive you will need to drive with light to
moderate acceleration, for 10 seconds, in a straight line.
This action will allow the vehicle to detect the compact
spare tire and disable the all-wheel drive system.
The AWD DISABLE message will come on the
instrument panel cluster indicating that the all-wheel
drive system is off. You may detect a slight pull during
this time, but this is normal.
Notice:You may damage your vehicle's all-wheel
drive system if your vehicle is driven for an
extended period with a compact spare tire installed
and the all-wheel drive system in operation. See
ªAll-Wheel Drive Systemº and ªAWD Disable
Warning Messageº in the Index for more
information.
5-86
Page 443 of 486

82,500 Miles (137 500 km)
qRotate tires. SeeTire Inspection and Rotation on
page 5-62for proper rotation pattern and additional
information.(See footnote +.)
90,000 Miles (150 000 km)
qReplace passenger compartment air ®lter. If you
drive regularly under dusty conditions, the ®lter
may require replacement more often.
qReplace engine air cleaner ®lter. See
Engine Air
Cleaner/Filter on page 5-18for more information.An Emission Control Service.
qRotate tires. SeeTire Inspection and Rotation on
page 5-62for proper rotation pattern and additional
information.(See footnote +.)
97,500 Miles (162 500 km)
qRotate tires. SeeTire Inspection and Rotation on
page 5-62for proper rotation pattern and additional
information.(See footnote +.)
100,000 Miles (166 000 km)
qInspect spark plug wires.An Emission Control
Service.
qReplace spark plugs.An Emission Control Service.
qChange automatic transaxle ¯uid and ®lter if the
vehicle is mainly driven under one or more of
these conditions:
þ In heavy city traffic where the outside
temperature regularly reaches 90ÉF (32ÉC) or
higher.
þ In hilly or mountainous terrain.
þ When doing frequent trailer towing.
þ Uses such as found in taxi, police or delivery
service.
qIf you haven't used your vehicle under severe service
conditions listed previously and, therefore, haven't
changed your automatic transaxle ¯uid, change both
the ¯uid and ®lter.
150,000 Miles (240 000 km)
qDrain, ¯ush and re®ll cooling system (or every
60 months since last service, whichever occurs ®rst).
See
Engine Coolant on page 5-23for what to use.
Inspect hoses. Clean radiator, condenser, pressure
cap and neck. Pressure test the cooling system
and pressure cap.
An Emission Control Service.
qInspect engine accessory drive belt.An Emission
Control Service.
6-9
Page 444 of 486

Part B: Owner Checks and Services
Listed in this part are owner checks and services
which should be performed at the intervals speci®ed to
help ensure the safety, dependability and emission
control performance of your vehicle.
Be sure any necessary repairs are completed at once.
Whenever any ¯uids or lubricants are added to your
vehicle, make sure they are the proper ones, as shown
in Part D.
At Each Fuel Fill
It is important for you or a service station attendant to
perform these underhood checks at each fuel ®ll.
Engine Oil Level Check
Check the engine oil level and add the proper oil if
necessary. SeeEngine Oil on page 5-13for further
details.
Engine Coolant Level Check
Check the engine coolant level and add DEX-COOLž
coolant mixture if necessary. SeeEngine Coolant
on page 5-23for further details.
Windshield Washer Fluid Level Check
Check the windshield washer ¯uid level in the windshield
washer tank and add the proper ¯uid if necessary.
See
Windshield Washer Fluid on page 5-38for further
details.
At Least Once a Month
Tire In¯ation Check
Visually inspect your tires and make sure tires are
in¯ated to the correct pressures. Don't forget to check
your spare tire. See
Tires on page 5-60for further
details.
Cassette Tape Player Service
Clean cassette tape player. Cleaning should be done
every 50 hours of tape play. SeeAudio System(s)
on page 3-61for further details.
6-10
Page 445 of 486

At Least Twice a Year
Restraint System Check
Make sure the safety belt reminder light and all your
belts, buckles, latch plates, retractors and anchorages
are working properly. If your vehicle has a built-in
child restraint, also periodically make sure the harness
straps, latch plates, buckle, clip, child head restraint
and anchorages are working properly. Look for any other
loose or damaged safety belt and built-in child restraint
system parts. If you see anything that might keep a
safety belt or built-in child restraint system from doing
its job, have it repaired. Have any torn or frayed
safety belts or harness straps replaced.
Also look for any opened or broken air bag coverings,
and have them repaired or replaced. (The air bag
system does not need regular maintenance.)
Wiper Blade Check
Inspect wiper blades for wear or cracking. Replace
blade inserts that appear worn or damaged or that
streak or miss areas of the windshield. Also see
Cleaning the Outside of Your Vehicle on page 5-90.
Spare Tire Check
At least twice a year, after the monthly in¯ation check of
the spare tire determines that the spare is in¯ated to
the correct tire in¯ation pressure, make sure that
the spare tire is stored securely. Push, pull, and then try
to rotate or turn the tire. If it moves, use the folding
wrench to tighten the cable. See
Changing a Flat Tire
on page 5-71.
Weatherstrip Lubrication
Silicone grease on weatherstrips will make them last
longer, seal better, and not stick or squeak. Apply
silicone grease with a clean cloth. During very cold,
damp weather more frequent application may be
required. See
Part D: Recommended Fluids and
Lubricants on page 6-17.
Automatic Transaxle Check
Check the transaxle ¯uid level; add if needed. SeeAutomatic Transaxle Fluid on page 5-20. A ¯uid loss
may indicate a problem. Check the system and repair if
needed.
6-11
Page 476 of 486

Hood............................................................5-10
Checking Things Under................................5-10
Release.....................................................5-10
Horn............................................................... 3-7
How the System Works...................................3-23
How to Add Coolant to the Coolant
Recovery Tank............................................5-31
How to Add Coolant to the Radiator..................5-34
How to Add Fluid Automatic Transaxle Fluid.......5-22
How to Check Automatic
Transaxle Fluid...........................................5-20
How to Check Power Steering Fluid..................5-38
How to Check................................................5-61
How to Inspect the Engine Air Cleaner/Filter.......5-19
How to Use This Manual...................................... ii
How to Wear Safety Belts Properly...................1-35
Hydroplaning..................................................4-18
I
If No Steam Is Coming From Your Engine..........5-28
If Steam Is Coming From Your Engine...............5-27
If the Light Is Flashing.....................................3-46
If the Light Is On Steady.................................3-47
If You Are Stuck in Sand, Mud, Ice or Snow.......4-30
If You Do Decide To Pull A Trailer.....................4-37If You're Caught in a Blizzard...........................4-28
Ignition Positions.............................................2-31
Ignition Transaxle Lock Check..........................6-13
Infants and Young Children, Restraints...............1-58
In¯ation -- Tire Pressure..................................5-61
Inspection......................................................6-16
Brake System.............................................6-16
Engine Cooling System................................6-16
Exhaust System..........................................6-15
Fuel System...............................................6-16
Part C - Periodic Maintenance.......................6-15
Steering, Suspension and Front Drive Axle
Boot and Seal.........................................6-15
Throttle System...........................................6-16
Transfer Care (Power Transfer Unit) and
Carrier Assembly-Differential (Rear Drive
Module) All-Wheel Drive............................6-16
Instrument Panel Brightness.............................3-17
Instrument Panel Fuse Block............................5-97
Instrument Panel.............................................3-36
Cluster.......................................................3-36
Overview..................................................... 3-4
Switchbank.................................................3-21
Interior Lamps Control.....................................3-17
Interior Lamps Override...................................3-17
Interior Lamps................................................3-17
8