Page 356 of 436

7. Turn the wrench clockwise to raise the jack until it
lifts the end ®tting.
8. Continue raising the jack until the spare tire stops
moving upward and is held ®rmly in place. The
secondary latch has released and the spare tire is
balancing on the jack.
9. Lower the jack by turning the wheel wrench
counterclockwise. Keep lowering the jack until the
spare tire slides off the jack or is hanging by
the cable.
10. Disconnect the jack handle from the jack and
carefully remove the jack. Use one hand to push
against the spare while ®rmly pulling the jack out
from under the spare tire with the other hand.
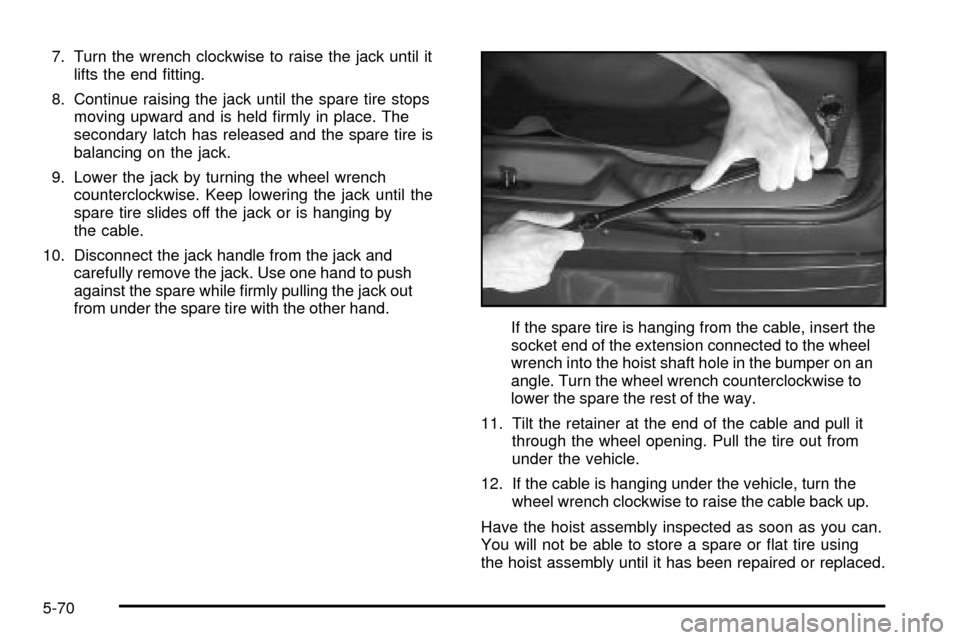
If the spare tire is hanging from the cable, insert the
socket end of the extension connected to the wheel
wrench into the hoist shaft hole in the bumper on an
angle. Turn the wheel wrench counterclockwise to
lower the spare the rest of the way.
11. Tilt the retainer at the end of the cable and pull it
through the wheel opening. Pull the tire out from
under the vehicle.
12. If the cable is hanging under the vehicle, turn the
wheel wrench clockwise to raise the cable back up.
Have the hoist assembly inspected as soon as you can.
You will not be able to store a spare or ¯at tire using
the hoist assembly until it has been repaired or replaced.
5-70
Page 357 of 436
Removing the Flat Tire and Installing
the Spare Tire
1. Using the wheel wrench, loosen all the wheel nuts.
Don't remove them yet.
2. Turn the jack adjusting knob clockwise by hand to
raise the jack lift head.
3. Place the handle, extension and wheel wrench onto
the jack.
Front
5-71
Page 359 of 436
5. Raise the vehicle by turning the jack handle
clockwise. Raise the vehicle far enough off the
ground so there is enough room for the spare
tire to ®t.
6. Remove all the wheel nuts and take off the ¯at tire.
7. Remove any rust or dirt
from the wheel bolts,
mounting surfaces
and spare wheel.
{CAUTION:
Rust or dirt on the wheel, or on the parts to
which it is fastened, can make the wheel nuts
become loose after a time. The wheel could
come off and cause an accident. When you
change a wheel, remove any rust or dirt from
the places where the wheel attaches to the
vehicle. In an emergency, you can use a cloth
or a paper towel to do this; but be sure to use
a scraper or wire brush later, if you need to, to
get all the rust or dirt off.
{CAUTION:
Never use oil or grease on studs or nuts. If
you do, the nuts might come loose. Your wheel
could fall off, causing a serious accident.
8. Place the spare on the wheel mounting surface.
5-73
Page 360 of 436
9. Put the nuts on by hand. Make sure the rounded
end is toward the wheel.
10. Tighten each nut by hand until the wheel is held
against the hub. If a nut can't be turned by hand,
use the wheel wrench and see your dealer as soon
as possible.11. Lower the vehicle by turning the jack handle
counterclockwise. Lower the jack completely.
12. Use the wrench to
tighten the wheel nuts
®rmly in a crisscross
sequence as shown.
5-74
Page 363 of 436

Follow this diagram to store the underbody-mounted
spare.
A. Wheel Wrench
B. Hoist Shaft
C. Extension(s)
D. Retainer
E. Spare or Flat Tire
(Valve Stem
Pointed Up)
1. Put the tire on the ground at the rear of the vehicle,
with the valve stem pointed up and to the rear.
2. Pull the retainer through the wheel.
3. Put the socket end of the extension, on an angle,
through the hole in the rear bumper and into the
hoist shaft.
4. Raise the tire fully against the underside of the
vehicle. Continue turning the wheel wrench
clockwise until you hear two clicks or feel it skip
twice. This indicates that the tire is secure and the
cable is tight. The spare tire hoist cannot be
overtightened.5. Make sure the tire is stored securely. Push, pull
and then try to turn the tire. If the tire moves, use
the wheel wrench and socket end of the extension
to tighten the cable.
Return the jack, wheel wrench and wheel blocks
to the proper location in the vehicle. Roll up
the instruction label and return it to the slot in the
tool kit.
5-77
Page:
< prev 1-8 9-16 17-24