Page 273 of 436

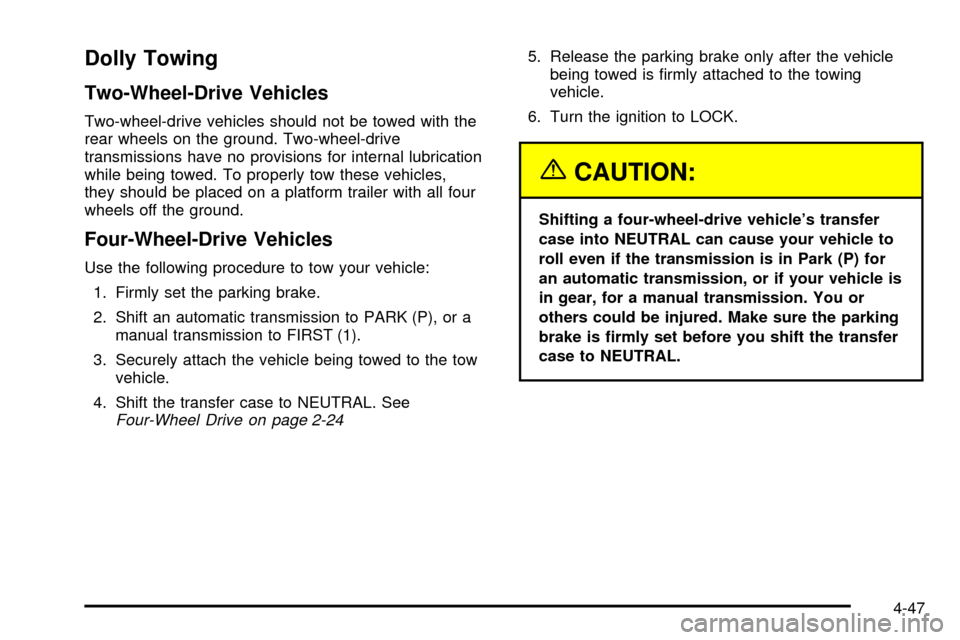
Dolly Towing
Two-Wheel-Drive Vehicles
Two-wheel-drive vehicles should not be towed with the
rear wheels on the ground. Two-wheel-drive
transmissions have no provisions for internal lubrication
while being towed. To properly tow these vehicles,
they should be placed on a platform trailer with all four
wheels off the ground.
Four-Wheel-Drive Vehicles
Use the following procedure to tow your vehicle:
1. Firmly set the parking brake.
2. Shift an automatic transmission to PARK (P), or a
manual transmission to FIRST (1).
3. Securely attach the vehicle being towed to the tow
vehicle.
4. Shift the transfer case to NEUTRAL. See
Four-Wheel Drive on page 2-24
5. Release the parking brake only after the vehicle
being towed is ®rmly attached to the towing
vehicle.
6. Turn the ignition to LOCK.
{CAUTION:
Shifting a four-wheel-drive vehicle's transfer
case into NEUTRAL can cause your vehicle to
roll even if the transmission is in Park (P) for
an automatic transmission, or if your vehicle is
in gear, for a manual transmission. You or
others could be injured. Make sure the parking
brake is ®rmly set before you shift the transfer
case to NEUTRAL.
4-47
Page 294 of 436
While refueling, hang the fuel cap by the tether using
the hook located on the inside of the ®ller door.
To remove the fuel cap, turn it slowly to the left
(counterclockwise). The fuel cap has a spring in it.
If you let go of the cap too soon, it will spring back to
the right.
{CAUTION:
If you get fuel on yourself and then something
ignites it, you could be badly burned. Fuel can
spray out on you if you open the fuel cap too
quickly. This spray can happen if your tank is
nearly full, and is more likely in hot weather.
Open the fuel cap slowly and wait for any
ªhissº noise to stop. Then unscrew the cap all
the way.
Be careful not to spill fuel. Clean fuel from painted
surfaces as soon as possible. See
Cleaning the Outside
of Your Vehicle on page 5-82. When ®lling the tank
do not over®ll by squeezing in much more fuel after the
pump shuts off.
5-8
Page 295 of 436

When you put the fuel cap back on, turn it to the right
(clockwise) until you hear a clicking sound. Make
sure you fully install the cap. The diagnostic system can
determine if the fuel cap has been left off or improperly
installed. This would allow fuel to evaporate into the
atmosphere. See
Malfunction Indicator Lamp on
page 3-43.
Notice:If you need a new fuel cap, be sure to get
the right type. Your dealer can get one for you.
If you get the wrong type, it may not ®t properly.
This may cause your malfunction indicator lamp
to light and may damage your fuel tank and
emissions system. See ªMalfunction Indicator
Lampº in the Index.
Filling a Portable Fuel Container
{CAUTION:
Never ®ll a portable fuel container while it is in
your vehicle. Static electricity discharge from
the container can ignite the gasoline vapor.
You can be badly burned and your vehicle
damaged if this occurs. To help avoid injury to
you and others:
·Dispense gasoline only into approved
containers.
·Do not ®ll a container while it is inside a
vehicle, in a vehicle's trunk, pickup bed or
on any surface other than the ground.
·Bring the ®ll nozzle in contact with the
inside of the ®ll opening before operating
the nozzle. Contact should be maintained
until the ®lling is complete.
·Do not smoke while pumping gasoline.
5-9
Page 299 of 436
A. Coolant Recovery Tank. SeeEngine Coolant on
page 5-24.
B. Engine Air Cleaner/Filter. See
Engine Air
Cleaner/Filter on page 5-20.
C. Windshield Washer Fluid Reservoir. See
Windshield
Washer Fluid on page 5-37.
D. Power Steering Fluid Reservoir. See
Power Steering
Fluid on page 5-36.
E. Automatic Transmission Dipstick. See
Automatic
Transmission Fluid on page 5-22.
F. Engine Oil Dipstick. See
Engine Oil on page 5-16.G. Radiator Pressure Cap. See
Radiator Pressure Cap
on page 5-26.
H. Engine Oil Fill Cap. See
Engine Oil on page 5-16.
I. Remote Negative (-) Terminal Marked GND.
See
Jump Starting on page 5-42.
J. Brake Master Cylinder. See
Brakes on page 5-38.
K. Battery. See
Battery on page 5-41.
L. Engine Compartment Fuse Block. See ªEngine
Compartment Fuse Blockº under
Fuses and Circuit
Breakers on page 5-89.
5-13
Page 301 of 436
A. Coolant Recovery Tank. SeeEngine Coolant on
page 5-24.
B. Engine Air Cleaner/Filter. See
Engine Air
Cleaner/Filter on page 5-20.
C. Windshield Washer Fluid Reservoir. See
Windshield
Washer Fluid on page 5-37.
D. Engine Oil Dipstick. See
Engine Oil on page 5-16.
E. Automatic Transmission Dipstick. See
Automatic
Transmission Fluid on page 5-22.
F. Engine Oil Fill Cap. See
Engine Oil on page 5-16.G. Radiator Pressure Cap. See
Radiator Pressure Cap
on page 5-26.
H. Remote Negative (-) Terminal Marked GND.
See
Jump Starting on page 5-42.
I. Power Steering Fluid Reservoir. See
Power Steering
Fluid on page 5-36.
J. Brake Master Cylinder. See
Brakes on page 5-38.
K. Engine Compartment Fuse Block. See ªEngine
Compartment Fuse blockº under
Fuses and Circuit
Breakers on page 5-89.
L. Battery. See
Battery on page 5-41.
5-15
Page 309 of 436

A cold ¯uid check can be made after the vehicle has
been sitting for eight hours or more with the engine off,
but this is used only as a reference. Let the engine
run at idle for ®ve minutes if outside temperatures are
50ÉF (10ÉC) or more. If it's colder than 50ÉF (10ÉC), you
may have to idle the engine longer. Should the ¯uid
level be low during this cold check, you
mustcheck the
¯uid hot before adding ¯uid. Checking the ¯uid hot
will give you a more accurate reading of the ¯uid level.
Checking the Fluid Level
Prepare your vehicle as follows:
·Park your vehicle on a level place. Keep the engine
running.
·With the parking brake applied, place the shift lever
in PARK (P).
·With your foot on the brake pedal, move the shift
lever through each gear range, pausing for about
three seconds in each range. Then, position the shift
lever in PARK (P).
·Let the engine run at idle for three minutes or more.Then, without shutting off the engine, follow these steps:
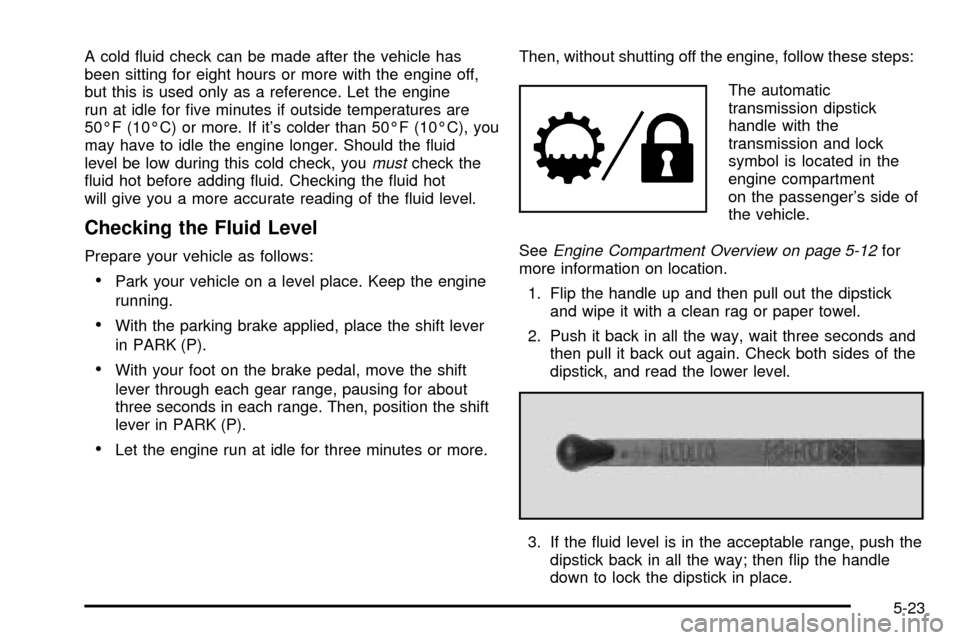
The automatic
transmission dipstick
handle with the
transmission and lock
symbol is located in the
engine compartment
on the passenger's side of
the vehicle.
See
Engine Compartment Overview on page 5-12for
more information on location.
1. Flip the handle up and then pull out the dipstick
and wipe it with a clean rag or paper towel.
2. Push it back in all the way, wait three seconds and
then pull it back out again. Check both sides of the
dipstick, and read the lower level.
3. If the ¯uid level is in the acceptable range, push the
dipstick back in all the way; then ¯ip the handle
down to lock the dipstick in place.
5-23
Page 310 of 436

How to Add Fluid
Refer to the Maintenance Schedule to determine
what kind of transmission ¯uid to use. See
Part D: Recommended Fluids and Lubricants on
page 6-18.
Add ¯uid only after checking the transmission ¯uid while
it is hot. (A cold check is used only as a reference.) If
the ¯uid level is low, add only enough of the proper
¯uid to bring the level up to the HOT area for a
hot check. It doesn't take much ¯uid, generally less
than one pint (0.5 L).
Don't over®ll.
Notice:
We recommend you use only ¯uid labeled
DEXRONž-III, because ¯uid with that label is
made especially for your automatic transmission.
Damage caused by ¯uid other than DEXRON
ž-III is
not covered by your new vehicle warranty.
·After adding ¯uid, recheck the ¯uid level as
described under ªHow to Check².
·When the correct ¯uid level is obtained, push the
dipstick back in all the way; then ¯ip the handle
down to lock the dipstick in place.
Engine Coolant
The cooling system in your vehicle is ®lled with
DEX-COOLžengine coolant. This coolant is designed
to remain in your vehicle for 5 years or 150,000 miles
(240 000 km), whichever occurs ®rst, if you add
only DEX-COOL
žextended life coolant.
The following explains your cooling system and how to
add coolant when it is low. If you have a problem
with engine overheating, see
Engine Overheating on
page 5-27.
A 50/50 mixture of clean, drinkable water and
DEX-COOL
žcoolant will:
·Give freezing protection down to-34ÉF (-37ÉC).
·Give boiling protection up to 265ÉF (129ÉC).
·Protect against rust and corrosion.
·Help keep the proper engine temperature.
·Let the warning lights and gages work as they
should.
Notice:Using coolant other than DEX-COOLžmay
cause premature engine, heater core or radiator
corrosion. In addition, the engine coolant may
require changing sooner, at 30,000 miles (50 000 km)
or 24 months, whichever occurs ®rst. Any repairs
would not be covered by your warranty. Always use
DEX-COOL
ž(silicate-free) coolant in your vehicle.
5-24
Page 319 of 436
How to Add Coolant to the Radiator
1. You can remove the radiator pressure cap when
the cooling system, including the radiator pressure
cap and upper radiator hose, is no longer hot.
Turn the pressure cap slowly counterclockwise
about one full turn.
If you hear a hiss, wait for that to stop. A hiss
means there is still some pressure left.2. Then keep turning the pressure cap. Remove the
pressure cap.
5-33