2003 CHEVROLET TRAIL BLAZER mirror
[x] Cancel search: mirrorPage 1 of 436

Seats and Restraint Systems........................... 1-1
Front Seats
............................................... 1-2
Rear Seats
............................................... 1-6
Safety Belts
.............................................. 1-8
Child Restraints
.......................................1-28
Air Bag Systems
......................................1-49
Restraint System Check
............................1-59
Features and Controls..................................... 2-1
Keys
........................................................ 2-3
Doors and Locks
....................................... 2-8
Windows
.................................................2-14
Theft-Deterrent Systems
............................2-16
Starting and Operating Your Vehicle
...........2-18
Mirrors
....................................................2-34
OnStar
žSystem
......................................2-38
HomeLinkžTransmitter
.............................2-39
Storage Areas
.........................................2-43
Sunroof
..................................................2-50
Vehicle Personalization
.............................2-50
Instrument Panel............................................. 3-1
Instrument Panel Overview
.......................... 3-4
Climate Controls
......................................3-21
Warning Lights, Gages and Indicators
.........3-35
Driver Information Center (DIC)
..................3-51Audio System(s)
.......................................3-64
Driving Your Vehicle....................................... 4-1
Your Driving, the Road, and Your Vehicle
..... 4-2
Towing
...................................................4-44
Service and Appearance Care.......................... 5-1
Service
..................................................... 5-3
Fuel
......................................................... 5-4
Checking Things Under the Hood
...............5-10
Rear Axle
...............................................5-47
Four-Wheel Drive
.....................................5-48
Bulb Replacement
....................................5-50
Windshield Wiper Blade Replacement
.........5-51
Tires
......................................................5-54
Appearance Care
.....................................5-79
Vehicle Identi®cation
.................................5-87
Electrical System
......................................5-88
Capacities and Speci®cations
...................5-100
Normal Maintenance Replacement Parts
....5-102
Maintenance Schedule..................................... 6-1
Maintenance Schedule
................................ 6-2
Customer Assistance Information.................... 7-1
Customer Assistance Information
.................. 7-2
Reporting Safety Defects
............................ 7-8
Index................................................................ 1
2003 Chevrolet TrailBlazerM
Page 68 of 436

Mirrors...........................................................2-34
Automatic Dimming Rearview Mirror with
OnStar
žand Compass...............................2-34
Outside Manual Mirrors..................................2-36
Outside Power Mirrors...................................2-36
Outside Curb View Assist Mirror.....................2-36
Outside Convex Mirror...................................2-37
Outside Heated Mirrors..................................2-37
OnStar
žSystem.............................................2-38
HomeLinkžTransmitter...................................2-39
Programming the HomeLinkžTransmitter.........2-40Storage Areas................................................2-43
Glove Box...................................................2-43
Overhead Console........................................2-43
Front Storage Area.......................................2-44
Table..........................................................2-47
Luggage Carrier...........................................2-47
Rear Floor Storage Lid..................................2-48
Convenience Net..........................................2-49
Cargo Cover................................................2-49
Sunroof.........................................................2-50
Vehicle Personalization...................................2-50
Memory Seat...............................................2-50
Section 2 Features and Controls
2-2
Page 81 of 436

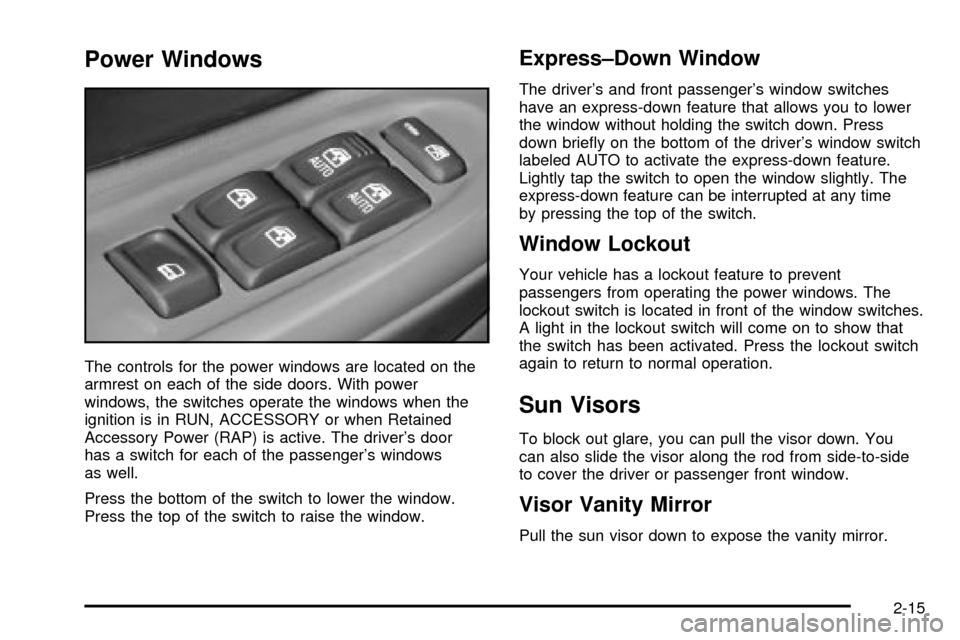
Power Windows
The controls for the power windows are located on the
armrest on each of the side doors. With power
windows, the switches operate the windows when the
ignition is in RUN, ACCESSORY or when Retained
Accessory Power (RAP) is active. The driver's door
has a switch for each of the passenger's windows
as well.
Press the bottom of the switch to lower the window.
Press the top of the switch to raise the window.
Express±Down Window
The driver's and front passenger's window switches
have an express-down feature that allows you to lower
the window without holding the switch down. Press
down brie¯y on the bottom of the driver's window switch
labeled AUTO to activate the express-down feature.
Lightly tap the switch to open the window slightly. The
express-down feature can be interrupted at any time
by pressing the top of the switch.
Window Lockout
Your vehicle has a lockout feature to prevent
passengers from operating the power windows. The
lockout switch is located in front of the window switches.
A light in the lockout switch will come on to show that
the switch has been activated. Press the lockout switch
again to return to normal operation.
Sun Visors
To block out glare, you can pull the visor down. You
can also slide the visor along the rod from side-to-side
to cover the driver or passenger front window.
Visor Vanity Mirror
Pull the sun visor down to expose the vanity mirror.
2-15
Page 82 of 436

Lighted Visor Vanity Mirror
Your vehicle may have this feature. Pull the sun visor
down and lift the mirror cover to turn on the lamps.
The lamps will turn off when the cover is closed.
Theft-Deterrent Systems
Vehicle theft is big business, especially in some cities.
Although your vehicle has a number of theft-deterrent
features, we know that nothing we put on it can make
it impossible to steal. However, there are ways you
can help.
Content Theft-Deterrent
Your vehicle may be equipped with a content
theft-deterrent alarm system.Here's how to operate the system:
1. Open the door.
2. Lock the door with the power door lock switch or
the remote keyless entry transmitter. The
SECURITY light should ¯ash.
3. Close all doors. The SECURITY light should turn off
after approximately 30 seconds. The alarm is not
armed until the SECURITY light turns off.
If a locked door is opened without the key or the remote
keyless entry transmitter, the alarm will go off. The
headlamps and parking lamps will ¯ash for two minutes,
and the horn will sound for 30 seconds, then will turn
off to save the battery power.
Remember, the theft-deterrent system won't activate if
you lock the doors with a key or use the manual
door lock. It activates only if you use a power door lock
switch with the door open, or with the remote keyless
entry transmitter. You should also remember that
you can start your vehicle with the correct ignition key if
the alarm has been set off.
United States
Canada
2-16
Page 100 of 436

Mirrors
Automatic Dimming Rearview Mirror
with OnStar
žand Compass
Your vehicle may have an automatic-dimming rearview
mirror with a compass and the OnStaržsystem.
There are three additional buttons for the OnStar
ž
system. See your dealer for more information on the
system and how to subscribe to OnStarž. SeeOnStarž
System on page 2-38for more information about the
services OnStaržprovides.
Mirror Operation
When turned on, this mirror automatically dims to the
proper level to minimize glare from any headlamps
behind you after dark.
O(On/Off): This is the on/off button for the automatic
dimming feature and compass. Press the far left button,
located below the the mirror face, for up to three
seconds to turn the feature on and off. A light on the
mirror will be lit while the feature is turned on.
Compass Operation
Press the on/off button once to turn the compass on
or off.
There is a compass display in the window in the upper
right corner of the mirror face. The compass displays
a maximum of two characters. For example, ªNEº
is displayed for north-east.
2-34
Page 101 of 436

Compass Calibration
Press and hold the on/off button down for nine seconds
to activate the compass calibration mode. CAL will
be displayed in the compass window on the mirror.
The compass can be calibrated by driving the vehicle in
circles at 5 mph (8 km/h) or less until the display
reads a direction.
Compass Variance
Compass variance is the difference between earth's
magnetic north and true geographic north. The mirror is
set to zone eight upon leaving the factory. It will be
necessary to adjust the compass to compensate
for compass variance if you live outside zone eight.
Under certain circumstances, such as during a
long distance cross-country trip, it will be necessary to
adjust for compass variance. If not adjusted to
account for compass variance, your compass could give
false readings.
To adjust for compass variance, do the following:
1. Find your current location and variance zone
number on the map.2. Press and hold the on/off button for six seconds.
Release the button when ZONE is displayed. The
number shown is the current zone number.
3. Scroll through the zone numbers that appear in the
compass/temperature window on the mirror by
pressing the on/off button. Once you ®nd your
zone number, release the button. After about
four seconds, the mirror will return to the compass
display, and the new zone number will be set.
2-35
Page 102 of 436

Outside Manual Mirrors
Adjust your outside mirrors so you can see a little of the
side of your vehicle.
Fold the mirrors in before entering a car wash. To do
this, pull the mirrors in toward the vehicle. Push the
mirrors back out when ®nished.
Outside Power Mirrors
Your vehicle may have this feature.
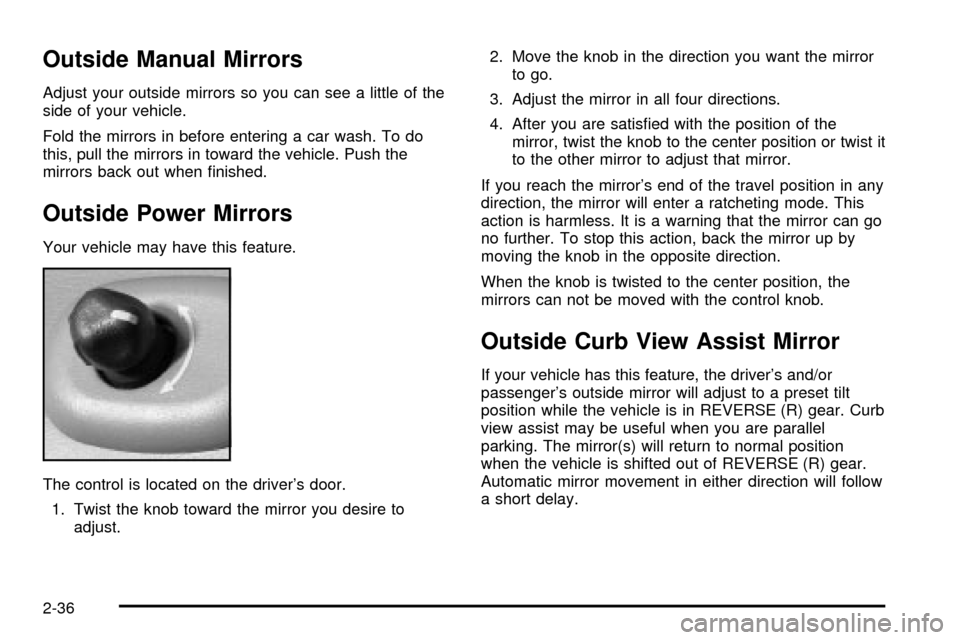
The control is located on the driver's door.
1. Twist the knob toward the mirror you desire to
adjust.2. Move the knob in the direction you want the mirror
to go.
3. Adjust the mirror in all four directions.
4. After you are satis®ed with the position of the
mirror, twist the knob to the center position or twist it
to the other mirror to adjust that mirror.
If you reach the mirror's end of the travel position in any
direction, the mirror will enter a ratcheting mode. This
action is harmless. It is a warning that the mirror can go
no further. To stop this action, back the mirror up by
moving the knob in the opposite direction.
When the knob is twisted to the center position, the
mirrors can not be moved with the control knob.
Outside Curb View Assist Mirror
If your vehicle has this feature, the driver's and/or
passenger's outside mirror will adjust to a preset tilt
position while the vehicle is in REVERSE (R) gear. Curb
view assist may be useful when you are parallel
parking. The mirror(s) will return to normal position
when the vehicle is shifted out of REVERSE (R) gear.
Automatic mirror movement in either direction will follow
a short delay.
2-36
Page 103 of 436

To ®rst activate this feature, perform the following steps:
1. Press the Personalization button, located on the
steering wheel, until ªTilt Mirror in REVERSE (R)º
is displayed on the DIC display.
2. Press the Select button once to select the
passenger's side mirror, twice for the driver's side
mirror and three times for both mirrors. Then
press the Personalization button repeatedly until the
display goes blank.
3. With the engine running, engage the parking brake,
press the brake pedal and place the vehicle in
REVERSE (R) gear.
4. Adjust the passenger's side and then the driver's
side outside mirrors to the desired tilt positions.
These positions will be stored into memory once the
vehicle is shifted out of REVERSE (R).
When the vehicle is placed in PARK (P) or in any
forward gear, the mirror(s) will return to normal
driving position, following a short delay.
To change the tilt position, adjust the mirror while the
vehicle is in REVERSE (R) gear with the engine running,
the parking brake engaged and the brake pedal
pressed. The new position will be saved into memory
once the vehicle is shifted out of REVERSE (R).Outside Convex Mirror
A convex mirror's surface is curved so you can see
more from the driver's seat.
{CAUTION:
A convex mirror can make things (like other
vehicles) look farther away than they really are.
If you cut too sharply into the right or left lane,
you could hit a vehicle. Check your inside
mirror or glance over your shoulder before
changing lanes.
Outside Heated Mirrors
Your vehicle may have this feature.
When you operate the rear window defogger, a defogger
also warms the heated driver's and passenger's
outside rearview mirrors to help clear them of ice, snow
and condensation.
2-37