Page 233 of 372

SeeEngine Compartment Overview on page 5-12for
more information on location.
Turn off the engine and give the oil several minutes to
drain back into the oil pan. If you don't, the oil
dipstick might not show the actual level.
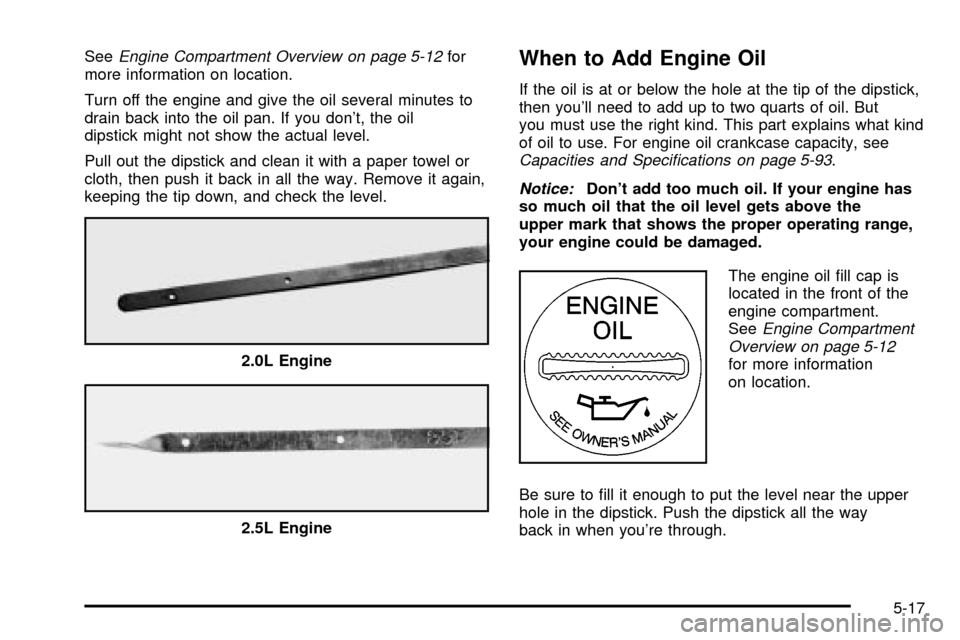
Pull out the dipstick and clean it with a paper towel or
cloth, then push it back in all the way. Remove it again,
keeping the tip down, and check the level.When to Add Engine Oil
If the oil is at or below the hole at the tip of the dipstick,
then you'll need to add up to two quarts of oil. But
you must use the right kind. This part explains what kind
of oil to use. For engine oil crankcase capacity, see
Capacities and Speci®cations on page 5-93.
Notice:Don't add too much oil. If your engine has
so much oil that the oil level gets above the
upper mark that shows the proper operating range,
your engine could be damaged.
The engine oil ®ll cap is
located in the front of the
engine compartment.
See
Engine Compartment
Overview on page 5-12
for more information
on location.
Be sure to ®ll it enough to put the level near the upper
hole in the dipstick. Push the dipstick all the way
back in when you're through. 2.0L Engine
2.5L Engine
5-17
Page 309 of 372
Capacities and Speci®cations
The following approximate capacities are given in English and metric conversions.
Capacities and Speci®cations
ApplicationCapacities
English Metric
Air Conditioning Refrigerant R134a and Polyalkylene
Glycol (PAG) refrigerant oil with dye0.9 lbs. 0.4 kg
Automatic Transmission
Drain and Re®ll2.6 quarts 2.5 L*
Cooling System
2.0L Engine
2.5L Engine6.9 quarts
8.5 quarts6.5 L
8.0 L
Differential
Front
Rear1.1 quarts
2.3 quarts1.0 L*
2.2 L*
Engine Oil with Filter
2.0L Engine
2.5L Engine5.5 quarts
5.8 quarts5.2 L**
5.5 L**
Fuel Tank
Two-Door Convertible
Four-Door Hardtop14.8 gallons
16.9 gallons56 L
64 L
5-93
Page 310 of 372
Capacities and Speci®cations (cont'd)
ApplicationCapacities
English Metric
Manual Transmission
Four-Wheel Drive
Two-Wheel Drive1.6 quarts
2.0 quarts1.5 L*
1.9 L*
Transfer Case 1.8 quarts 1.7 L
Wheels and Tires
Wheel Nut Torque
Plastic Wheel Nut Cap Torque73 lb-ft
Tighten by hand plus
one half turn with
wheel wrench100Y
*Recheck ¯uid level after ®lling. See
Automatic Transmission Fluid on page 5-23orManual Transmission Fluid
on page 5-26.
**When changing the oil ®lter, additional oil may be needed. Recheck the oil level after ®lling. SeeEngine Oil on
page 5-16.
Engine Speci®cations
Engine VIN Code Transmission Spark Plug Gap Firing Order
2.0L L4 CAutomatic and
Manual0.043 inch (1.1 mm) 1±3±4±2
2.5L V6 4 Automatic 0.043 inch (1.1 mm) 1±6±5±4±3±2
5-94
Page 360 of 372

Brake............................................................2-27
Parking......................................................2-27
System Inspection.......................................6-29
System Warning Light..................................3-28
Brakes..........................................................5-42
Braking in Emergencies...................................4-10
Braking........................................................... 4-7
Break-In, New Vehicle.....................................2-14
Bulb Replacement...........................................5-55
Front Turn Signal and Parking Lamps.............5-57
Halogen Bulbs............................................5-55
Headlamps.................................................5-55
Rear Combination Lamps.............................5-58
Replacement Bulbs......................................5-59
Sidemarker Lamps.......................................5-57
Buying New Tires...........................................5-62
CCalifornia Fuel.................................................. 5-5
Canada ± Customer Assistance.......................... 7-4
Canadian Owners................................................ ii
Canadian Roadside Assistance........................... 7-7
Canceling a Rear Door Security Lock................2-10
Capacities and Speci®cations............................5-93
Carbon Monoxide...................4-40, 4-53, 2-11, 2-32
Care of.........................................................5-82
Safety Belts................................................5-82
Your CD Player...........................................3-43
Your CDs ...................................................3-43Cargo Cover..................................................2-38
Cargo Lamp...................................................3-16
Center Passenger Position, Safety Belts.............1-26
Chains, Tires..................................................5-66
Charging System Light....................................3-28
Checking Brake Fluid......................................5-43
Checking Coolant............................................5-29
Checking Engine Oil........................................5-16
Checking Things Under the Hood....................... 5-9
Checking Your Restraint Systems......................1-61
Check...........................................................3-31
Engine Light...............................................3-31
Chemical Paint Spotting...................................5-86
Child Restraints..............................................1-37
Child Restraint Systems...............................1-37
Infants and Young Children...........................1-34
Lower Anchorages and Top Tethers for
Children (LATCH System)..........................1-44
Older Children.............................................1-31
Securing a Child Restraint Designed for
the LATCH System...................................1-46
Securing a Child Restraint in a Center
Rear Seat Position...................................1-49
Securing a Child Restraint in a Rear
Outside Seat Position...............................1-46
Securing a Child Restraint in the Right
Front Seat Position...................................1-51
Top Strap Anchor Location............................1-43
Top Strap...................................................1-41
Where to Put the Restraint...........................1-40
2