Page 188 of 552

Outlet Adjustment
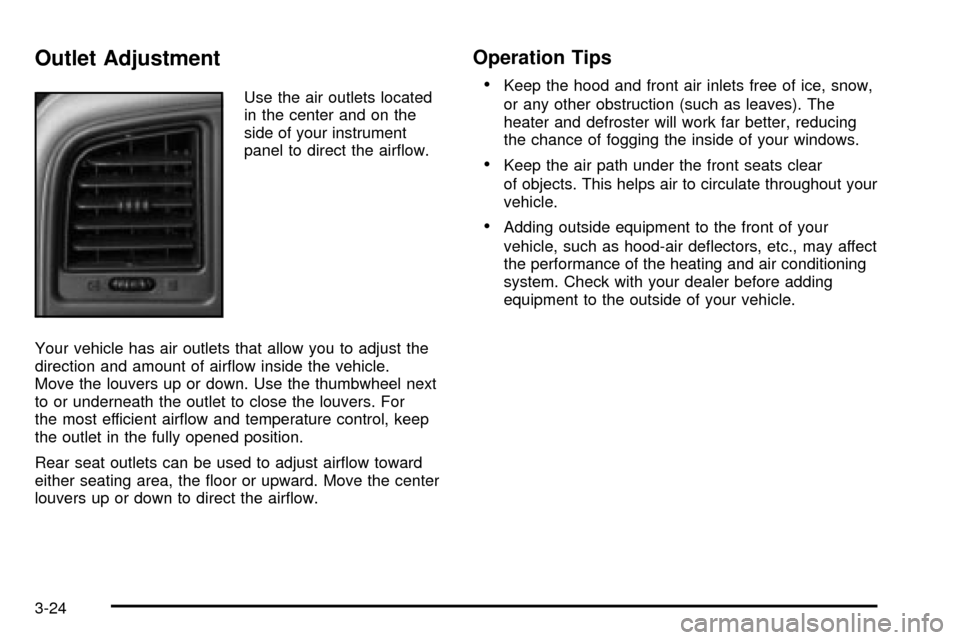
Use the air outlets located
in the center and on the
side of your instrument
panel to direct the air¯ow.
Your vehicle has air outlets that allow you to adjust the
direction and amount of air¯ow inside the vehicle.
Move the louvers up or down. Use the thumbwheel next
to or underneath the outlet to close the louvers. For
the most efficient air¯ow and temperature control, keep
the outlet in the fully opened position.
Rear seat outlets can be used to adjust air¯ow toward
either seating area, the ¯oor or upward. Move the center
louvers up or down to direct the air¯ow.
Operation Tips
·
Keep the hood and front air inlets free of ice, snow,
or any other obstruction (such as leaves). The
heater and defroster will work far better, reducing
the chance of fogging the inside of your windows.
·Keep the air path under the front seats clear
of objects. This helps air to circulate throughout your
vehicle.
·Adding outside equipment to the front of your
vehicle, such as hood-air de¯ectors, etc., may affect
the performance of the heating and air conditioning
system. Check with your dealer before adding
equipment to the outside of your vehicle.
3-24
Page 195 of 552

Operation Tips
·
Keep the hood and front air inlets free of ice, snow,
or any other obstruction (such as leaves). The
heater and defroster will work far better, reducing
the chance of fogging the inside of your windows.
·Keep the air path under the front seats clear
of objects. This helps air to circulate throughout your
vehicle.
·Adding outside equipment to the front of your
vehicle, such as hood-air de¯ectors, etc., may affect
the performance of the heating and air conditioning
system. Check with your dealer before adding
equipment to the outside of your vehicle.
Rear Air Conditioning System
If your vehicle is equipped with the optional rear air
conditioner it has two rear air conditioning fan speed
selectors. One fan speed selector is located in the
overhead console and the other is located in the
headliner above the second row seats.
To increase and decrease the ¯ow of cooled air to the
rear vents, turn the knob to the fan speed you want.
The knob has three speed positions. To increase
the ¯ow of cooled air, turn the knob clockwise. To
decrease the ¯ow of cooled air, turn it counterclockwise.
To turn the fan off, turn the knob to the off position.
To operate the rear system using the front control, just
turn the knob to the fan position you want.Front Control
3-31
Page 196 of 552
To use the rear control, ®rst turn the front control to the
AUX position. Then, the rear control can be used to
increase and decrease the air¯ow.
Rear Air Conditioning and Heating
System
If your vehicle is equipped with this system, there are
two rear heat and air conditioning controls. One control
is located in the overhead console and the other is
located in the headliner above the second row seats.
The system can be controlled from the front controls as
well as the rear controls.
The front control has three knobs that control air¯ow
speed, temperature and air¯ow location. Rear Control
Front Control
3-32
Page 357 of 552

And, if you do have a heavy load, you should spread
it out.
{CAUTION:
Do not load your vehicle any heavier than the
GVWR, or either the maximum front or rear
GAWR. If you do, parts on your vehicle can
break, and it can change the way your vehicle
handles. These could cause you to lose
control and crash. Also, overloading can
shorten the life of your vehicle.
Notice:Your warranty does not cover parts or
components that fail because of overloading.
The label will help you decide how much cargo and
installed equipment your truck can carry.
Using heavier suspension components to get added
durability might not change your weight ratings. Ask your
dealer to help you load your vehicle the right way.
If you put things inside your vehicle ± like suitcases,
tools, packages, or anything else ± they go as fast
as the vehicle goes. If you have to stop or turn quickly,
or if there is a crash, they'll keep going.
{CAUTION:
Things you put inside your vehicle can strike
and injure people in a sudden stop or turn, or
in a crash.
·Put things in the trunk of your vehicle. In a
trunk, put them as far forward as you can.
Try to spread the weight evenly.
·Never stack heavier things, like suitcases,
inside the vehicle so that some of them
are above the tops of the seats.
·Don't leave an unsecured child restraint in
your vehicle.
·When you carry something inside the
vehicle, secure it whenever you can.
There's also important loading information for off-road
driving in this manual. See²Loading Your Vehicle
for Off-Road Driving²in the Index.
4-63
Page 465 of 552

{CAUTION:
Incorrect wheel nuts or improperly tightened
wheel nuts can cause the wheel to come loose
and even come off. This could lead to an
accident. Be sure to use the correct wheel
nuts. If you have to replace them, be sure to
get new GM original equipment wheel nuts.
Stop somewhere as soon as you can and have
the nuts tightened with a torque wrench to the
proper torque speci®cation. See ªCapacities
and Speci®cationsº in the Index for wheel nut
torque speci®cation.
Notice:Improperly tightened wheel nuts can lead
to brake pulsation and rotor damage. To avoid
expensive brake repairs, evenly tighten the wheel
nuts in the proper sequence and to the proper
torque speci®cation. See ªCapacities and
Speci®cationsº in the index for the wheel nut torque
speci®cation.
When you reinstall the regular wheel and tire, you must
also reinstall the center cap. Place the cap on the wheel
and tap it into place until it seats ¯ush with the wheel. The
cap only goes on one way. Be sure to line up the tab on
the center cap with the indentation on the wheel.
5-89
Page 486 of 552
Fuses Usage
RR Wiper Rear Window Wiper Switch
SEO ACCYSpecial Equipment Option
Accessory
WS WPR Windshield Wipers
TBC ACCYTruck Body Controller
Accessory
IGN 3 Ignition, Heated Seats
4WDFour-Wheel Drive System,
Auxiliary Battery
HTR A/C Climate Control System
LOCKPower Door Lock Relay
(Lock Function)
HVAC 1Inside Rearview Mirror,
Climate Control System
L DOORDriver's Door Harness
Connection
CRUISE Cruise Control
5-110
Page 491 of 552

*1Ð Gasoline Engine and Fuel Injection Rail #2.
*2Ð Gasoline Engine and Fuel Injection Rail #1.
*3Ð Gasoline Engine; Oxygen Sensors.
*4Ð Gasoline Engine; Oxygen Sensors.
*5Ð PCM Ignition
Fuses Usage
GLOW PLUG Not Used
CUST FEED Gasoline Accessory Power
STUD #1Auxiliary Power (Single
Battery and Diesels
Only)/Dual Battery (TP2) Do
not install fuse.
MBECMid Bussed Electrical Center
Power Feed, Front Seats,
Right Doors
BLOWER Front Climate Control Fan
LBECLeft Bussed Electrical Center,
Door Modules, Door Locks,
Auxiliary Power OutletÐRear
Cargo Area and Instrument
Panel
Fuses Usage
STUD 2Accessory Power/Trailer
Wiring Brake Feed
ABS Anti-Lock Brakes
VSES/ECAS Vehicle Stability
IGN A Ignition Power
IGN B Ignition Power
LBEC 1Left Bussed Electrical Center,
Left Doors, Truck Body
Controller, Flasher Module
TRL PARK Parking Lamps Trailer Wiring
RR PARKRight Rear Parking and
Sidemarker Lamps
LR PARKLeft Rear Parking and
Sidemarker Lamps
PARK LP Parking Lamps Relay
STARTER Starter Relay
INTPARK Interior Lamps
STOP LP Stoplamps
TBC BATTTruck Body Controller
Battery Feed
5-115
Page 493 of 552
Fuses Usage
HVAC/ECAS Climate Control Controller
CIG LTR Cigarette Lighter
HI HDLP-RT High Beam Headlamp-Right
HDLP-LOW Headlamp Low Beam Relay
A/C COMP Air Conditioning Compressor
A/C COMPAir Conditioning Compressor
Relay
RR WPR Rear Wiper/Washer
RADIO Audio System
SEO B1Mid Bussed Electrical Center,
HomeLink, Rear Heated
Seats
LO HDLP-LT Headlamp Low Beam-Left
BTSIBrake Transmission Shift
Interlock System
CRANK Starting System
LO HDLP-RT Headlamp Low Beam-RightFuses Usage
FOG LP Fog Lamp Relay
FOG LP Fog Lamps
HORN Horn Fuse
HORN Horn Relay
W/S WASHWindshield and Rear Window
Washer Pump Relay
W/S WASHWindshield and Rear Window
Washer Pump
INFOOnStar/Rear Seat
Entertainment
RADIO AMP Radio Ampli®er
RH HID Not Used
EAP Electric Adjustable Pedals
TREC All-Wheel Drive Module
SBA Supplemental Brake Assist
5-117