2003 CHEVROLET SILVERADO buttons
[x] Cancel search: buttonsPage 95 of 556

Resynchronization
Resynchronization may be necessary due to the
security method used by this system. The transmitter
does not send the same signal twice to the receiver. The
receiver will not respond to a signal that has been
sent previously. This prevents anyone from recording
and playing back the signal from the transmitter.
To resynchronize your transmitter, stand close to your
vehicle and press and hold the LOCK and UNLOCK
buttons on the transmitter at the same time for 15
seconds. The door locks should cycle to con®rm
synchronization. If the locks do not cycle, see your
dealer for service.
Doors and Locks
Door Locks
{CAUTION:
Unlocked doors can be dangerous.
·Passengers Ð especially children Ð can
easily open the doors and fall out of a
moving vehicle. When a door is locked, the
handle will not open it. You increase the
chance of being thrown out of the vehicle
in a crash if the doors are not locked. So,
wear safety belts properly and lock the
doors whenever you drive.
·Young children who get into unlocked
vehicles may be unable to get out. A child
can be overcome by extreme heat and can
suffer permanent injuries or even death
from heat stroke. Always lock your vehicle
whenever you leave it.
·Outsiders can easily enter through an
unlocked door when you slow down or
stop your vehicle. Locking your doors can
help prevent this from happening.
2-7
Page 125 of 556

Automatic Transfer Case
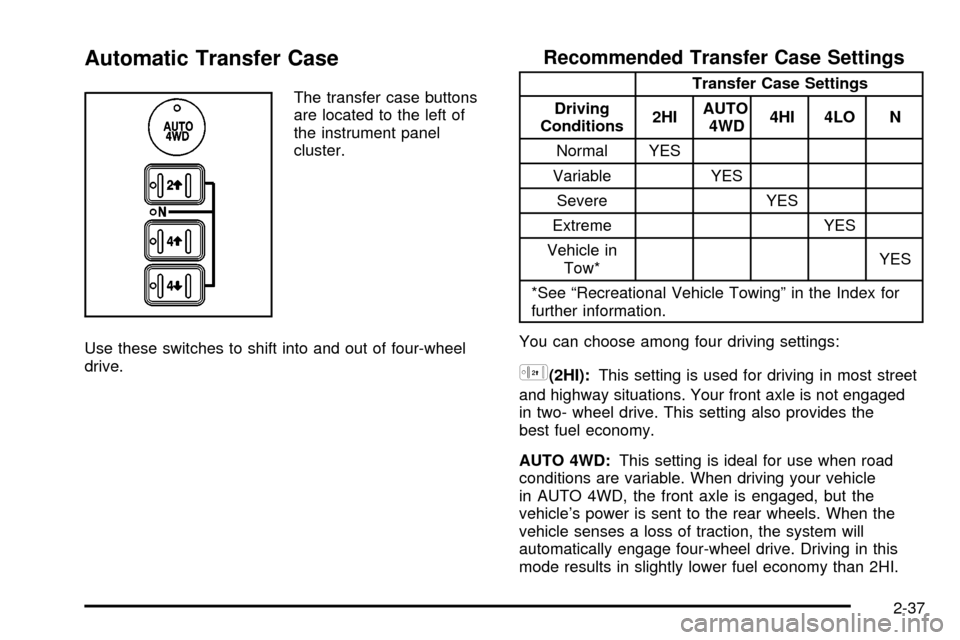
The transfer case buttons
are located to the left of
the instrument panel
cluster.
Use these switches to shift into and out of four-wheel
drive.
Recommended Transfer Case Settings
Transfer Case Settings
Driving
Conditions2HIAUTO
4WD4HI 4LO N
Normal YES
Variable YES
Severe YES
Extreme YES
Vehicle in
Tow*YES
*See ªRecreational Vehicle Towingº in the Index for
further information.
You can choose among four driving settings:
h(2HI):This setting is used for driving in most street
and highway situations. Your front axle is not engaged
in two- wheel drive. This setting also provides the
best fuel economy.
AUTO 4WD:This setting is ideal for use when road
conditions are variable. When driving your vehicle
in AUTO 4WD, the front axle is engaged, but the
vehicle's power is sent to the rear wheels. When the
vehicle senses a loss of traction, the system will
automatically engage four-wheel drive. Driving in this
mode results in slightly lower fuel economy than 2HI.
2-37
Page 128 of 556

Shifting into NEUTRAL
To shift the transfer case to NEUTRAL do the following:
1. Make sure the vehicle is parked so that it will
not roll.
2. Set the parking brake.
3. Start the vehicle or turn the ignition to RUN.
4. Connect the vehicle to the towing vehicle.
5. Put the transmission in NEUTRAL (N).
6. Shift the transfer case to 2HI.
7. Simultaneously press and hold the 2HI and 4LO
buttons for 10 seconds. The red NEUTRAL light
will come on when the transfer case shift to
NEUTRAL is complete.
8. Shift the transmission to REVERSE (R) for one
second, then shift the transmission to DRIVE (D)
for one second.
9. Turn the ignition to OFF.
10. Place the transmission shift lever in PARK (P).
11. Release the parking brake prior to towing.
Shifting Out of NEUTRAL
To shift out of NEUTRAL:
1. Set the parking brake and apply the regular brake
pedal.
2. Shift the transmission to NEUTRAL (N) and turn the
ignition to RUN with the engine off.
3. Press the button for the desired transfer case shift
position (2HI, 4HI, AUTO 4WD or 4LO).
4. After the transfer case has shifted out of NEUTRAL
the red light will go out.
5. Release the parking brake.
6. You may start the engine and shift the transmission
to the desired position.
Excessively shifting the transfer case into or out of the
different modes may cause the transfer case to
enter the shift protection mode. This will protect the
transfer case from possible damage and will only allow
the transfer case to respond to one shift per 10
seconds. The transfer case may stay in this mode for
up to three minutes.
2-40
Page 131 of 556

Notice:Shifting the transmission into gear before
the 4LO indicator light has stopped ¯ashing
could damage the transfer case. To help avoid
damaging your vehicle, always wait for the 4LO
indicator light to stop ¯ashing before shifting your
transmission into gear.
If the 4LO switch is pressed when your vehicle is in
gear and/or moving, the 4LO indicator light will ¯ash for
30 seconds and not complete the shift unless your
vehicle is moving slower than 3 mph (4.8 km/h) and the
transmission is in NEUTRAL (N). The transfer case
will shift to 4HI while waiting to complete the shift.
Shifting from 4LO to 4HI or 2HI
To shift from 4LO to 4HI or 2HI, your vehicle must be
stopped or moving less than 3 mph (4.8 km/h) with
the transmission in NEUTRAL (N). The preferred method
for shifting out of 4LO is to have your vehicle moving
1 to 2 mph (1.6 to 3.2 km/h). Press and release the 4HI
switch. You must wait for the 4HI indicator light to
stop ¯ashing and remain illuminated before shifting your
transmission into gear.
If the 4HI switch is pressed when your vehicle is in gear
and/or moving, the 4HI indicator light will ¯ash for
30 seconds but will not complete the shift unless the
vehicle is moving slower than 3 mph (4.8 km/h) and the
transmission is in NEUTRAL (N).
Shifting into NEUTRAL
To shift the transfer case to NEUTRAL, ®rst make sure
the vehicle is parked so that it will not roll:
1. Set the parking brake.
2. Start the vehicle or turn the ignition to RUN.
3. Connect the vehicle to the towing vehicle.
4. Put the transmission in NEUTRAL (N).
5. Shift the transfer case to 2HI.
6. Simultaneously press and hold the 2HI and
4LO buttons for 10 seconds. The red NEUTRAL
light will come on when the transfer case shift
to NEUTRAL is complete.
7. Shift the transmission to REVERSE (R) for one
second, then shift the transmission to DRIVE (D)
for one second.
8. Turn the ignition to OFF.
9. Place the transmission shift lever in PARK (P).
10. Release the parking brake prior to towing.
2-43
Page 144 of 556

Compass Calibration
The compass may need calibration if one of the
following occurs:
·After approximately ®ve seconds, the display does
not show a compass heading (N for North, for
example), there may be a strong magnetic ®eld
interfering with the compass. Such interference may
be caused by a magnetic antenna mount, magnetic
note pad holder or a similar magnetic item.
·The compass does not display the correct heading
and the compass zone variance is set correctly.
In order to calibrate, CAL must be displayed in the
mirror compass windows. If CAL is not displayed, push
the on/off button for approximately 12 seconds or
until CAL is displayed.
The compass can be calibrated by driving the vehicle in
circles at 5 mph (8 km/h) or less until the display
reads a direction.
Passenger Air Bag Indicator
Your vehicle may be equipped with a passenger air bag
indicator, on the mirror glass, just above the buttons.
If your vehicle has this feature, the mirror will display the
word ON, or an air bag symbol in Canada, when the
passenger air bag is enabled. For more information, see
Passenger Sensing System on page 1-76.
Cleaning the Mirror
When cleaning the mirror, use a paper towel or similar
material dampened with glass cleaner. Do not spray
glass cleaner directly on the mirror as that may cause
the liquid cleaner to enter the mirror housing.
Automatic Dimming Rearview Mirror
with Compass and Temperature
Display
If your vehicle is equipped with an electrochromic mirror,
it will, when on, automatically dim to the proper level to
minimize glare from lights behind you after dark.
The mirror also includes a display in the upper right
corner of the mirror face. The compass reading and the
outside temperature will both appear in the display at
the same time. The dual display can be turned on or off
by brie¯y pressing either the TEMP or the COMP
button.
Temperature Display
The temperature can be displayed by pressing the
TEMP button. Pressing the TEMP button once brie¯y,
will toggle the temperature reading on and off. To
alternate the temperature reading between Fahrenheit
and Celsius, press and hold the TEMP button for
approximately four seconds until the display blinks ÉF
2-56
Page 146 of 556

Compass Variance
The mirror is set in zone eight upon leaving the factory.
It will be necessary to adjust the compass to
compensate for compass variance if you live outside
zone eight. Under certain circumstances, as during
a long distance cross-country trip, it will be necessary to
adjust for compass variance. Compass variance is
the difference between earth's magnetic north and true
geographic north. If not adjusted to account for
compass variance, your compass could give false
readings.
To adjust for compass variance:
1. Find your current location and variance zone
number on the following zone map.
2. Press and hold the COMP button for ®ve seconds
until a zone number appears in the display.
3. Press the COMP button on the bottom of the mirror
until the new zone number appears in the display.
After you stop pressing the button, the display
will show a compass direction within a few seconds.
Passenger Air Bag Indicator
Your mirror may be equipped with a passenger air bag
indicator on the mirror glass, just above the buttons.
If you have this feature the mirror will display the word
ON, or an airbag symbol in Canada, when the
passenger air bag is enabled. For more information see
Passenger Sensing System on page 1-76
2-58
Page 152 of 556

OnStaržSteering Wheel Controls
g
: If your vehicle is
equipped with the steering
wheel control buttons
you can use them
to interact with the OnStar
ž
system.
See the OnStar
žmanual provided with your vehicle for
more information.
Storage Areas
Your vehicle includes a number of storage
compartments for storage of often-used items.
Some vehicles have storage areas in the instrument
panel. Use these spaces for items such as gloves
or small books.
Some models have a storage pocket on each of the
front doors.
Some vehicles have a storage area behind the seat.
Glove Box
To open your glove box, pull the lever upward and pull
the door downward.
Cupholder(s)
Your vehicle may have cupholders located in the front
console, or in the fold-down armrest.
2-64
Page 154 of 556

Vehicle Personalization
Memory Seat
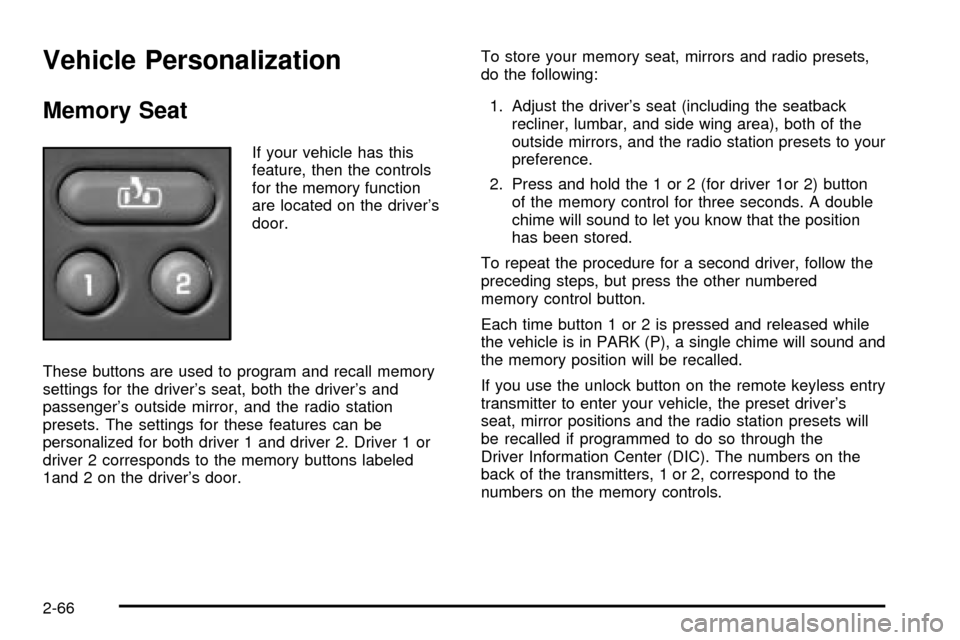
If your vehicle has this
feature, then the controls
for the memory function
are located on the driver's
door.
These buttons are used to program and recall memory
settings for the driver's seat, both the driver's and
passenger's outside mirror, and the radio station
presets. The settings for these features can be
personalized for both driver 1 and driver 2. Driver 1 or
driver 2 corresponds to the memory buttons labeled
1and 2 on the driver's door.To store your memory seat, mirrors and radio presets,
do the following:
1. Adjust the driver's seat (including the seatback
recliner, lumbar, and side wing area), both of the
outside mirrors, and the radio station presets to your
preference.
2. Press and hold the 1 or 2 (for driver 1or 2) button
of the memory control for three seconds. A double
chime will sound to let you know that the position
has been stored.
To repeat the procedure for a second driver, follow the
preceding steps, but press the other numbered
memory control button.
Each time button 1 or 2 is pressed and released while
the vehicle is in PARK (P), a single chime will sound and
the memory position will be recalled.
If you use the unlock button on the remote keyless entry
transmitter to enter your vehicle, the preset driver's
seat, mirror positions and the radio station presets will
be recalled if programmed to do so through the
Driver Information Center (DIC). The numbers on the
back of the transmitters, 1 or 2, correspond to the
numbers on the memory controls.
2-66