2003 CHEVROLET S10 bulb
[x] Cancel search: bulbPage 1 of 432

Seats and Restraint Systems........................... 1-1
Front Seats
............................................... 1-3
Rear Seats
............................................... 1-9
Safety Belts
.............................................1-10
Child Restraints
.......................................1-30
Air Bag System
.......................................1-55
Restraint System Check
............................1-65
Features and Controls..................................... 2-1
Keys
........................................................ 2-3
Doors and Locks
....................................... 2-8
Windows
.................................................2-14
Theft-Deterrent Systems
............................2-17
Starting and Operating Your Vehicle
...........2-19
Mirrors
....................................................2-39
Storage Areas
.........................................2-41
Sunroof
..................................................2-51
Vehicle Personalization
.............................2-53
Instrument Panel............................................. 3-1
Instrument Panel Overview
.......................... 3-2
Climate Controls
......................................3-18
Warning Lights, Gages and Indicators
.........3-22
Audio System(s)
.......................................3-40
Driving Your Vehicle....................................... 4-1
Your Driving, the Road, and Your Vehicle
..... 4-2
Towing
...................................................4-44Service and Appearance Care.......................... 5-1
Service
..................................................... 5-3
Fuel
......................................................... 5-4
Checking Things Under
the Hood
.............................................5-10
Rear Axle
...............................................5-51
Four-Wheel Drive
.....................................5-52
Front Axle
...............................................5-53
Bulb Replacement
....................................5-54
Windshield Wiper Blade Replacement
.........5-60
Tires
......................................................5-62
Appearance Care
.....................................5-83
Vehicle Identi®cation
.................................5-92
Electrical System
......................................5-93
Capacities and Speci®cations
.....................5-99
Normal Maintenance Replacement Parts
....5-101
Maintenance Schedule..................................... 6-1
Maintenance Schedule
................................ 6-2
Customer Assistance Information.................... 7-1
Customer Assistance Information
.................. 7-2
Reporting Safety Defects
............................ 7-9
Index................................................................ 1
2003 Chevrolet S10 Pickup Owner ManualM
Page 132 of 432

Turn Signal/Multifunction Lever
The lever on the left side of the steering column
includes the following:
·Turn and Lane-Change Signals
·Headlamp High/Low-Beam Changer
·Flash-to-Pass Feature
·Windshield Wipers
·Windshield Washer
·Cruise Control (If Equipped)
Turn and Lane-Change Signals
The turn signal has two upward (for right) and two
downward (for left) positions. These positions allow you
to signal a turn or a lane change.
To signal a turn, move the lever all the way up or down.
When the turn is ®nished, the lever will return
automatically.
An arrow on the instrument
panel cluster will ¯ash in
the direction of the
turn or lane change.
To signal a lane change, just raise or lower the lever
until the arrow starts to ¯ash. Hold it there until you
complete your lane change. The lever will return by itself
when you release it.
As you signal a turn or a lane change, if the arrows
don't ¯ash but just stay on, a signal bulb may be burned
out and other drivers won't see your turn signal.
If a bulb is burned out, replace it to help avoid an
accident. If the arrows don't go on at all when you signal
a turn, check the fuse (see
Fuses and Circuit Breakers
on page 5-93) and for burned-out bulbs.
3-6
Page 263 of 432

Following Distance
Stay at least twice as far behind the vehicle ahead as
you would when driving your vehicle without a trailer.
This can help you avoid situations that require
heavy braking and sudden turns.
Passing
You'll need more passing distance up ahead when
you're towing a trailer. And, because you're a good deal
longer, you'll need to go much farther beyond the
passed vehicle before you can return to your lane.
Backing Up
Hold the bottom of the steering wheel with one hand.
Then, to move the trailer to the left, just move that hand
to the left. To move the trailer to the right, move your
hand to the right. Always back up slowly and, if possible,
have someone guide you.
Making Turns
Notice:Making very sharp turns while trailering
could cause the trailer to come in contact with the
vehicle. Your vehicle could be damaged. Avoid
making very sharp turns while trailering.When you're turning with a trailer, make wider turns
than normal. Do this so your trailer won't strike
soft shoulders, curbs, road signs, trees or other objects.
Avoid jerky or sudden maneuvers. Signal well in
advance.
Turn Signals When Towing a Trailer
When you tow a trailer, your vehicle has to have extra
wiring and a heavy-duty turn signal ¯asher.
The arrows on your instrument panel will ¯ash whenever
you signal a turn or lane change. Properly hooked up,
the trailer lamps will also ¯ash, telling other drivers
you're about to turn, change lanes or stop.
When towing a trailer, the arrows on your instrument
panel will ¯ash for turns even if the bulbs on the trailer
are burned out. Thus, you may think drivers behind
you are seeing your signal when they are not. It's
important to check occasionally to be sure the trailer
bulbs are still working.
4-61
Page 267 of 432

Service............................................................5-3
Doing Your Own Service Work.........................5-3
Adding Equipment to the Outside of Your
Vehicle......................................................5-4
Fuel................................................................5-4
Gasoline Octane............................................5-4
Gasoline Speci®cations....................................5-5
California Fuel...............................................5-5
Additives.......................................................5-6
Fuels in Foreign Countries...............................5-6
Filling Your Tank............................................5-7
Filling a Portable Fuel Container.......................5-9
Checking Things Under
the Hood....................................................5-10
Hood Release..............................................5-10
Engine Compartment Overview.......................5-12
Engine Oil...................................................5-15
Engine Air Cleaner/Filter................................5-19
Automatic Transmission Fluid.........................5-22
Manual Transmission Fluid.............................5-25
Hydraulic Clutch...........................................5-26
Engine Coolant.............................................5-27Radiator Pressure Cap..................................5-29
Engine Overheating.......................................5-30
Cooling System............................................5-32
Engine Fan Noise.........................................5-39
Power Steering Fluid.....................................5-39
Windshield Washer Fluid................................5-40
Brakes........................................................5-41
Battery........................................................5-45
Jump Starting...............................................5-46
Rear Axle.......................................................5-51
Four-Wheel Drive............................................5-52
Front Axle......................................................5-53
Bulb Replacement..........................................5-54
Halogen Bulbs..............................................5-54
Headlamps..................................................5-54
One-Piece Front Turn Signal Lamps................5-56
Two-Piece Front Turn Signal Lamps................5-57
Center High-Mounted Stoplamp (CHMSL).........5-58
Taillamps.....................................................5-59
Replacement Bulbs.......................................5-59
Windshield Wiper Blade Replacement..............5-60
Section 5 Service and Appearance Care
5-1
Page 320 of 432

Bulb Replacement
SeeReplacement Bulbs on page 5-59for the proper
types of bulbs to use. For any bulb changing procedure
not listed in this section, contact your GM dealer's
service department.
Halogen Bulbs
{CAUTION:
Halogen bulbs have pressurized gas inside and
can burst if you drop or scratch the bulb. You or
others could be injured. Be sure to read and
follow the instructions on the bulb package.
Headlamps
One-Piece Composite Headlamp
System
1. Open the hood.
2. Remove the black retainer clips by lifting up.
3. Pull the headlamp assembly out.
4. Unplug the electrical connector.
5-54
Page 321 of 432

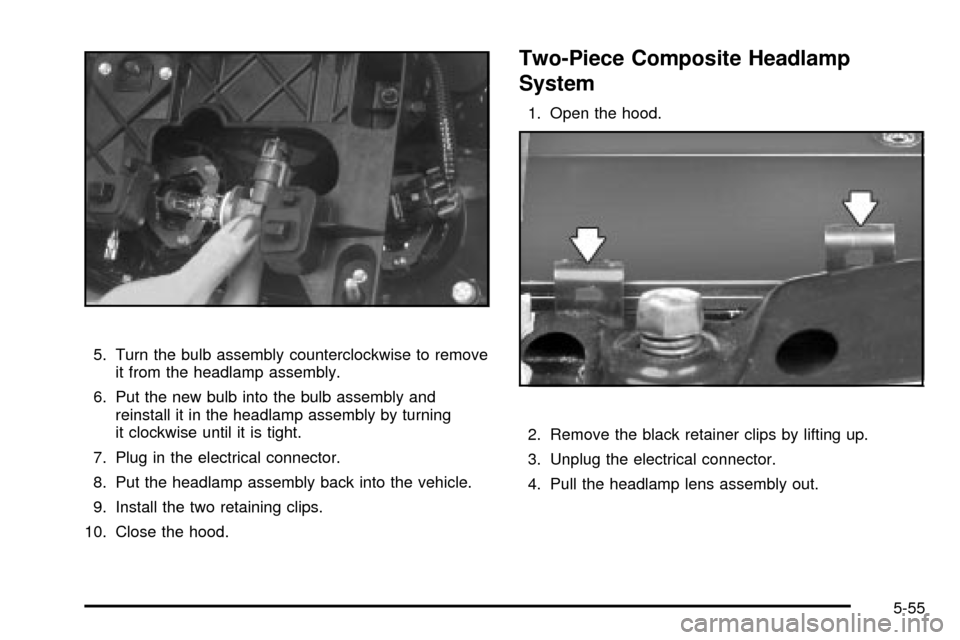
5. Turn the bulb assembly counterclockwise to remove
it from the headlamp assembly.
6. Put the new bulb into the bulb assembly and
reinstall it in the headlamp assembly by turning
it clockwise until it is tight.
7. Plug in the electrical connector.
8. Put the headlamp assembly back into the vehicle.
9. Install the two retaining clips.
10. Close the hood.
Two-Piece Composite Headlamp
System
1. Open the hood.
2. Remove the black retainer clips by lifting up.
3. Unplug the electrical connector.
4. Pull the headlamp lens assembly out.
5-55
Page 322 of 432

5. Turn the bulb assembly counterclockwise to remove
it from the headlamp assembly.
6. Put the new bulb into the bulb assembly and
reinstall it in the headlamp assembly by turning
it clockwise until it is tight.
7. Plug in the electrical connector.
8. Put the headlamp lens assembly back into the
vehicle.
9. Install the two retaining clips.
10. Close the hood.
One-Piece Front Turn Signal Lamps
1. Remove the headlamp assembly as shown in
ªOne-Piece Composite Headlamp Systemº
under
Headlamps on page 5-54.
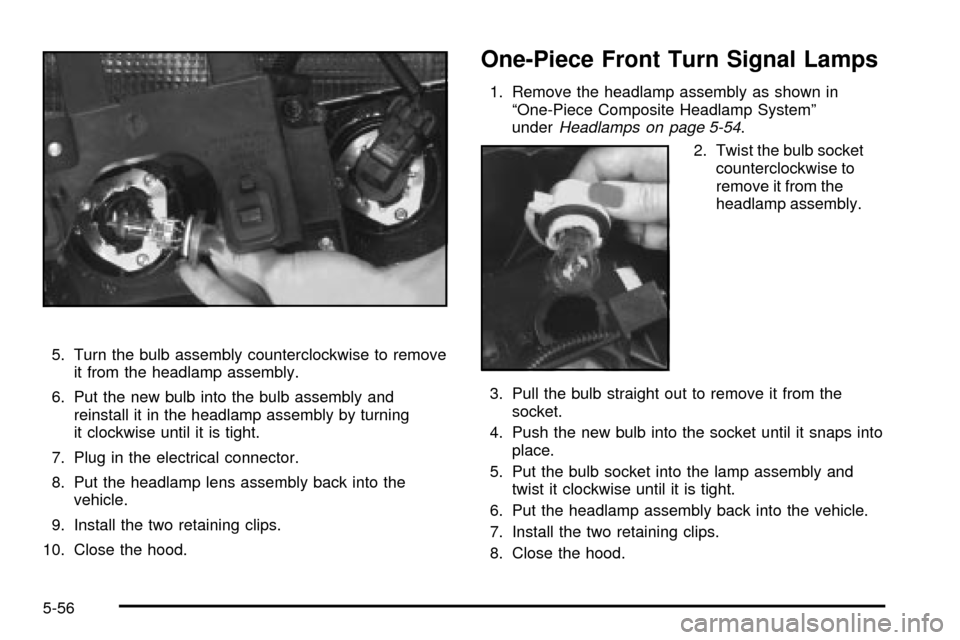
2. Twist the bulb socket
counterclockwise to
remove it from the
headlamp assembly.
3. Pull the bulb straight out to remove it from the
socket.
4. Push the new bulb into the socket until it snaps into
place.
5. Put the bulb socket into the lamp assembly and
twist it clockwise until it is tight.
6. Put the headlamp assembly back into the vehicle.
7. Install the two retaining clips.
8. Close the hood.
5-56
Page 323 of 432

Two-Piece Front Turn Signal Lamps
1. Remove the headlamp assembly as shown in
ªTwo±Piece Composite Headlamp Systemº
under
Headlamps on page 5-54
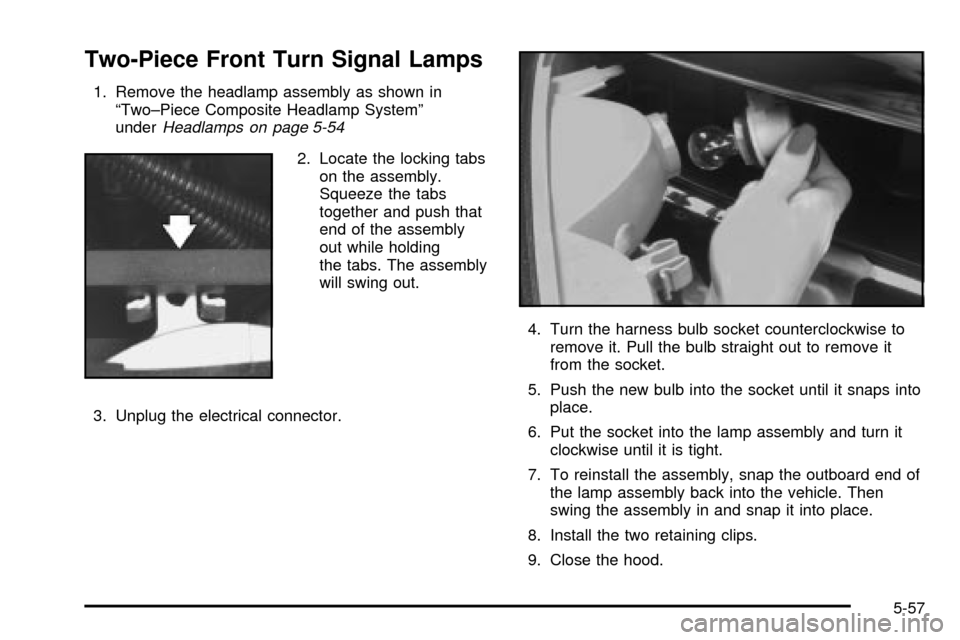
2. Locate the locking tabs
on the assembly.
Squeeze the tabs
together and push that
end of the assembly
out while holding
the tabs. The assembly
will swing out.
3. Unplug the electrical connector.4. Turn the harness bulb socket counterclockwise to
remove it. Pull the bulb straight out to remove it
from the socket.
5. Push the new bulb into the socket until it snaps into
place.
6. Put the socket into the lamp assembly and turn it
clockwise until it is tight.
7. To reinstall the assembly, snap the outboard end of
the lamp assembly back into the vehicle. Then
swing the assembly in and snap it into place.
8. Install the two retaining clips.
9. Close the hood.
5-57