2003 CHEVROLET S10 light
[x] Cancel search: lightPage 102 of 432

Electronic Transfer Case
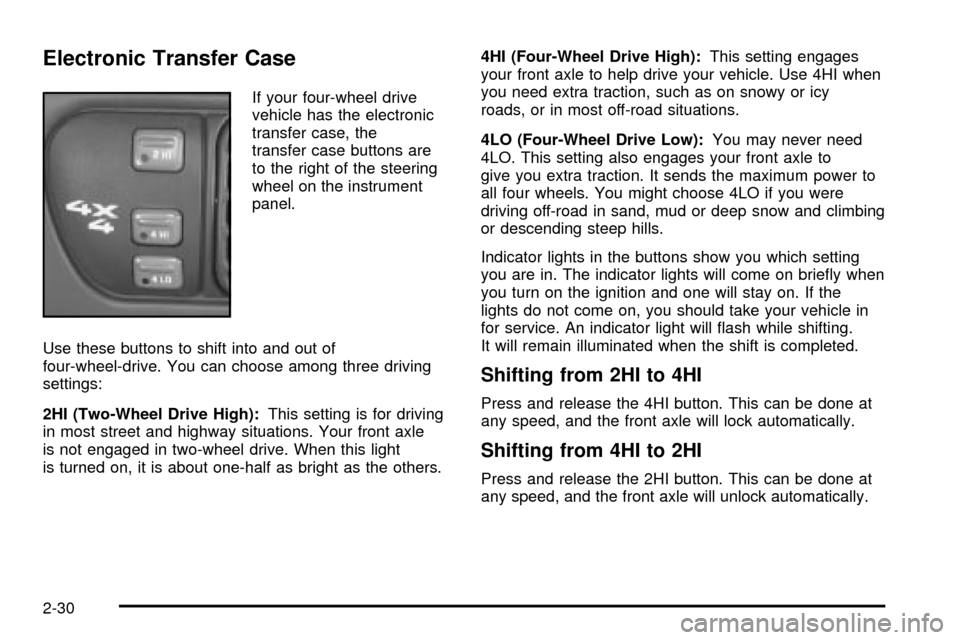
If your four-wheel drive
vehicle has the electronic
transfer case, the
transfer case buttons are
to the right of the steering
wheel on the instrument
panel.
Use these buttons to shift into and out of
four-wheel-drive. You can choose among three driving
settings:
2HI (Two-Wheel Drive High):This setting is for driving
in most street and highway situations. Your front axle
is not engaged in two-wheel drive. When this light
is turned on, it is about one-half as bright as the others.4HI (Four-Wheel Drive High):This setting engages
your front axle to help drive your vehicle. Use 4HI when
you need extra traction, such as on snowy or icy
roads, or in most off-road situations.
4LO (Four-Wheel Drive Low):You may never need
4LO. This setting also engages your front axle to
give you extra traction. It sends the maximum power to
all four wheels. You might choose 4LO if you were
driving off-road in sand, mud or deep snow and climbing
or descending steep hills.
Indicator lights in the buttons show you which setting
you are in. The indicator lights will come on brie¯y when
you turn on the ignition and one will stay on. If the
lights do not come on, you should take your vehicle in
for service. An indicator light will ¯ash while shifting.
It will remain illuminated when the shift is completed.
Shifting from 2HI to 4HI
Press and release the 4HI button. This can be done at
any speed, and the front axle will lock automatically.
Shifting from 4HI to 2HI
Press and release the 2HI button. This can be done at
any speed, and the front axle will unlock automatically.
2-30
Page 103 of 432

Shifting from 2HI or 4HI to 4LO
To shift from 2HI or 4HI to 4LO, the vehicle must be
stopped or moving less than 3 mph (4.8 km/h) with the
transmission in NEUTRAL (N) in vehicles equipped
with an automatic transmission or the clutch pedal
engaged in vehicles equipped with a manual
transmission. The preferred method for shifting into 4LO
is to have your vehicle moving 1 to 2 mph (1.6 to
3.2 km/h). Press and release the 4LO button. You must
wait for the 4LO indicator light to stop ¯ashing and
remain illuminated before shifting your transmission into
gear or releasing the clutch pedal.
If the 4LO button is pressed when your vehicle is in
gear and/or moving, the 4LO indicator light will ¯ash for
30 seconds and not complete the shift unless your
vehicle is moving slower than 3 mph (4.8 km/h) and the
transmission is in NEUTRAL (N) or the clutch pedal
engaged.
On automatic transmission equipped vehicles, if your
transfer case does not shift into 4LO, your transmission
indicator switch may require adjustment. With your
transmission in NEUTRAL (N), press and release the
4LO button. While the 4LO indicator light is ¯ashing, shift
your transmission into PARK (P). Wait until the 4LO
indicator light remains illuminated before shifting
your transmission into gear. This will get you into 4LO,
but you should take your vehicle in for service to
restore normal operation.
Shifting from 4LO to 4HI or 2HI
To shift from 4LO to 4HI or 2HI, your vehicle must be
stopped or moving less than 3 mph (4.8 km/h) with
the transmission in NEUTRAL (N) or the clutch pedal
engaged. The preferred method for shifting out of 4LO is
to have your vehicle moving 1 to 2 mph (1.6 to
3.2 km/h). Press and release the 4HI button. You must
wait for the 4HI indicator light to stop ¯ashing and
remain illuminated before shifting your transmission into
gear or releasing the clutch pedal.
If the 4HI button is pressed when your vehicle is in gear
and/or moving, the 4HI indicator light will ¯ash for
30 seconds but not complete the shift unless the vehicle
is moving slower than 3 mph (4.8 km/h) and the
transmission is in NEUTRAL (N) or the clutch pedal
engaged.
On automatic transmission equipped vehicles, if your
transfer case does not shift into 4HI, your transmission
indicator switch may require adjustment. With your
transmission in NEUTRAL (N), press and release the
4HI button. While the 4HI indicator light is ¯ashing, shift
your transmission into PARK (P). Wait until the 4HI
indicator light remains illuminated before shifting your
transmission into gear. This will get you into 4HI, but you
should take your vehicle in for service to restore
normal operation.
2-31
Page 104 of 432

Parking Brake
The parking brake is located near the bottom of the
instrument panel on the driver's side of the vehicle.
To set the parking brake, hold the regular brake pedal
down with your right foot. Push down the parking
brake pedal with your left foot. If the ignition is on, the
brake system warning light will come on.
Notice:Driving with the parking brake on can
cause your rear brakes to overheat. You may have
to replace them, and you could also damage
other parts of your vehicle.
To release the parking brake, hold the regular brake
pedal down. Pull the BRAKE RELEASE lever fully. It is
located on the bottom off the instrument panel on
the driver's side of the vehicle.If you are towing a trailer and you must park on a hill,
see
Towing a Trailer on page 4-54. That section
shows what to do ®rst to keep the trailer from moving.
2-32
Page 111 of 432

Mirrors
Manual Rearview Mirror
Pull the tab under the mirror toward you to reduce the
glare from headlamps behind you after dark. Push
the tab away from you for normal daytime operation.
Automatic Dimming Rearview Mirror
If your vehicle has this feature, the mirror automatically
changes to reduce glare from headlamps behind
you. A photocell on the back of the mirror senses when
it is becoming dark outside. Another photocell built
into the mirror surface senses when headlamps
are behind you.
At night, when the glare is too high, the mirror will
gradually darken to reduce glare. This change may take
a few seconds. The mirror will return to its clear
daytime state when the vehicle is put into REVERSE (R)
or when the glare is reduced.AUTO (Automatic Dimming):This button is located at
the base of the mirror. Use it to turn on the automatic
feature. The button has an indicator light to show it is on.
OFF:Press this button to turn the automatic feature off.
Time Delay
The automatic mirror has a time delay feature which
prevents unnecessary switching from the night back to
the day position. This delay prevents rapid changing
of the mirror as you drive under lights and through traffic.
Cleaning the Photocells
Use a cotton swab and glass cleaner to clean the
photocells and mirror face when necessary.
Cleaning the Mirror
When cleaning the mirror, use a paper towel or similar
material dampened with glass cleaner. Do not spray
glass cleaner directly on the mirror as that may cause
the liquid cleaner to enter the mirror housing.
2-39
Page 113 of 432

Outside Heated Mirrors
Your vehicle may be equipped with heated outside
rearview mirrors.
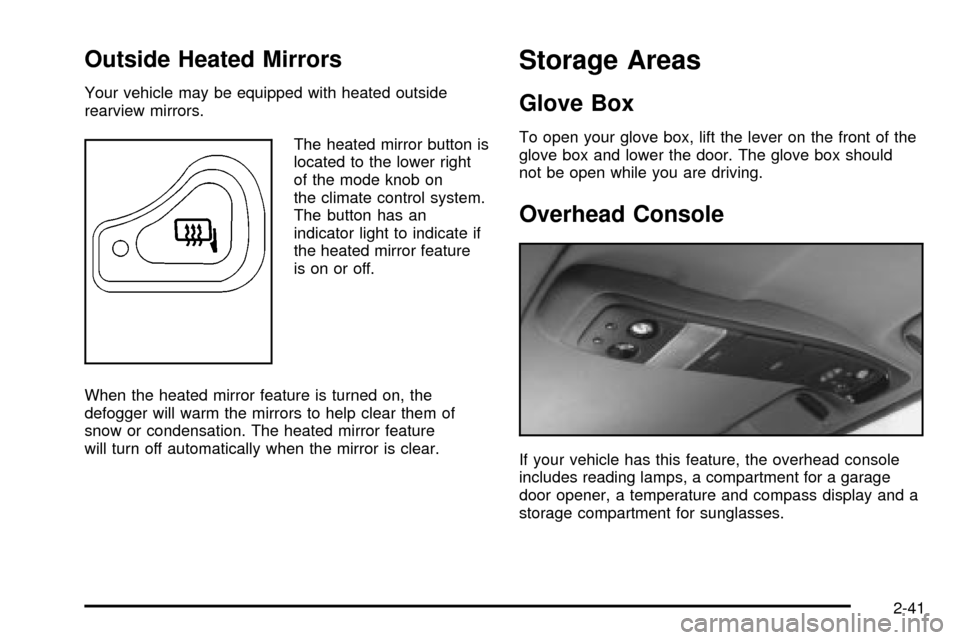
The heated mirror button is
located to the lower right
of the mode knob on
the climate control system.
The button has an
indicator light to indicate if
the heated mirror feature
is on or off.
When the heated mirror feature is turned on, the
defogger will warm the mirrors to help clear them of
snow or condensation. The heated mirror feature
will turn off automatically when the mirror is clear.
Storage Areas
Glove Box
To open your glove box, lift the lever on the front of the
glove box and lower the door. The glove box should
not be open while you are driving.
Overhead Console
If your vehicle has this feature, the overhead console
includes reading lamps, a compartment for a garage
door opener, a temperature and compass display and a
storage compartment for sunglasses.
2-41
Page 115 of 432

4. The pegs inside the compartment door are used to
make sure the button on the compartment door will
contact the control button on the garage door
opener.
5. Add one peg at a time until the garage door opener
operates with the compartment door closed when
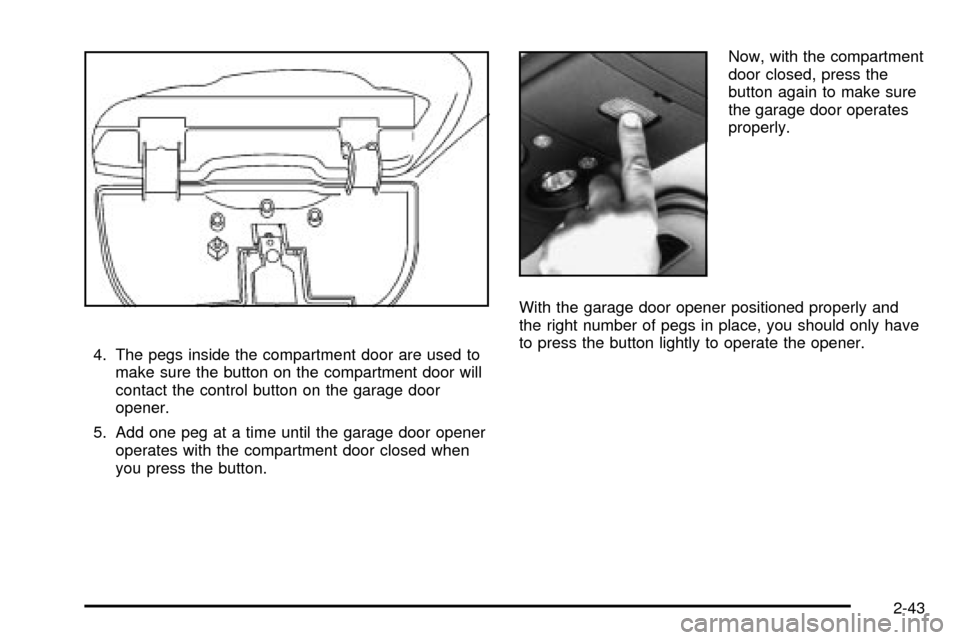
you press the button.Now, with the compartment
door closed, press the
button again to make sure
the garage door operates
properly.
With the garage door opener positioned properly and
the right number of pegs in place, you should only have
to press the button lightly to operate the opener.
2-43
Page 127 of 432

Instrument Panel Overview...............................3-2
Hazard Warning Flashers................................3-4
Other Warning Devices...................................3-5
Horn.............................................................3-5
Tilt Wheel.....................................................3-5
Turn Signal/Multifunction Lever.........................3-6
Exterior Lamps.............................................3-12
Interior Lamps..............................................3-15
Accessory Power Outlets...............................3-17
Ashtrays and Cigarette Lighter........................3-18
Climate Controls............................................3-18
Climate Control System.................................3-18
Outlet Adjustment.........................................3-21
Warning Lights, Gages and Indicators.............3-22
Instrument Panel Cluster................................3-23
Speedometer and Odometer...........................3-25
Trip Odometer..............................................3-25
Tachometer.................................................3-26
Safety Belt Reminder Light.............................3-26
Air Bag Readiness Light................................3-27
Air Bag Off Light..........................................3-28
Charging System Light..................................3-29
Voltmeter Gage............................................3-30
Up-Shift Light...............................................3-30
Brake System Warning Light..........................3-31
Anti-Lock Brake System Warning Light.............3-32Engine Coolant Temperature Gage..................3-32
Malfunction Indicator Lamp.............................3-33
Oil Pressure Gage........................................3-36
Security Light...............................................3-37
Service Four-Wheel Drive Warning Light..........3-37
Check Gages Warning Light...........................3-38
Fuel Gage...................................................3-38
Low Fuel Warning Light.................................3-39
Audio System(s).............................................3-40
Setting the Time for Radios without Radio
Data Systems (RDS)..................................3-40
Setting the Time for Radios with Radio Data
Systems (RDS).........................................3-41
AM-FM Radio...............................................3-41
Radio with CD..............................................3-44
Radio with Cassette and CD..........................3-52
Radio with Six-Disc CD.................................3-62
Theft-Deterrent Feature
(Non-RDS Radios).....................................3-74
Theft-Deterrent Feature
(RDS Radios)...........................................3-74
Understanding Radio Reception......................3-74
Care of Your Cassette Tape Player.................3-75
Care of Your CDs.........................................3-76
Care of Your CD Player................................3-76
Fixed Mast Antenna......................................3-76
Section 3 Instrument Panel
3-1
Page 133 of 432

Turn Signal On Chime
If your turn signal is left on for more than 3/4 of a mile
(1.2 km), a chime will sound at each ¯ash of the
turn signal. To turn off the chime, move the turn signal
lever to the off position.
Headlamp High/Low-Beam Changer
To change the headlamps from low to high beam or high
to low beam, pull the multifunction lever all the way
toward you until you hear a click. Then release it.
When the high-beam
headlamps are on, this
indicator light on the
instrument panel cluster
will also be on.
Flash-To-Pass Feature
This feature lets you use your high-beam headlamps to
signal a driver in front of you that you want to pass.
It works even if your headlamps are in the automatic
position.
To use it, pull the turn signal lever toward you, but not
so far that you hear a click.
If your headlamps are in the automatic position or on
low beam, your high-beam headlamps will turn on.
They'll stay on as long as you hold the lever toward you
and the high-beam indicator on the dash will come
on. Release the lever to return to normal operation.
3-7