2003 CHEVROLET MALIBU change wheel
[x] Cancel search: change wheelPage 229 of 326

Properly torqued wheel nuts are necessary to help
prevent brake pulsation. When tires are rotated, inspect
brake pads for wear and evenly tighten wheel nuts in
the proper sequence to GM torque speci®cations.
Your rear drum brakes don't have wear indicators, but if
you ever hear a rear brake rubbing noise, have the
rear brake linings inspected immediately. Also, the rear
brake drums should be removed and inspected each
time the tires are removed for rotation or changing.
When you have the front brake pads replaced, have the
rear brakes inspected, too.
Brake linings should always be replaced as complete
axle sets.
See
Brake System Inspection on page 6-20.
Brake Pedal Travel
See your dealer if the brake pedal does not return to
normal height, or if there is a rapid increase in
pedal travel. This could be a sign of brake trouble.
Brake Adjustment
Every time you make a moderate brake stop, your disc
brakes adjust for wear. If you rarely make a moderate or
heavier stop, then your brakes might not adjust correctly.
If you drive in that way, then Ð very carefully Ð make a
few moderate brake stops about every 1,000 miles
(1 600 km), so your brakes will adjust properly.If your brake pedal goes down farther than normal, your
rear drum brakes may need adjustment. Adjust them
by pumping the brake pedal repeatedly while the engine
is running with the shift lever in PARK (P).
Replacing Brake System Parts
The braking system on a vehicle is complex. Its many
parts have to be of top quality and work well together if
the vehicle is to have really good braking. Your
vehicle was designed and tested with top-quality GM
brake parts. When you replace parts of your braking
system Ð for example, when your brake linings
wear down and you need new ones put in Ð be sure
you get new approved replacement parts. If you
don't, your brakes may no longer work properly. For
example, if someone puts in brake linings that are wrong
for your vehicle, the balance between your front and
rear brakes can change Ð for the worse. The braking
performance you've come to expect can change in
many other ways if someone puts in the wrong
replacement brake parts.
5-35
Page 245 of 326

{CAUTION:
Rust or dirt on a wheel, or on the parts to
which it is fastened, can make wheel nuts
become loose after a time. The wheel could
come off and cause an accident. When you
change a wheel, remove any rust or dirt from
places where the wheel attaches to the vehicle.
In an emergency, you can use a cloth or a
paper towel to do this; but be sure to use a
scraper or wire brush later, if you need to,
to get all the rust or dirt off. See ªChanging a
Flat Tireº in the Index.
When It Is Time for New Tires
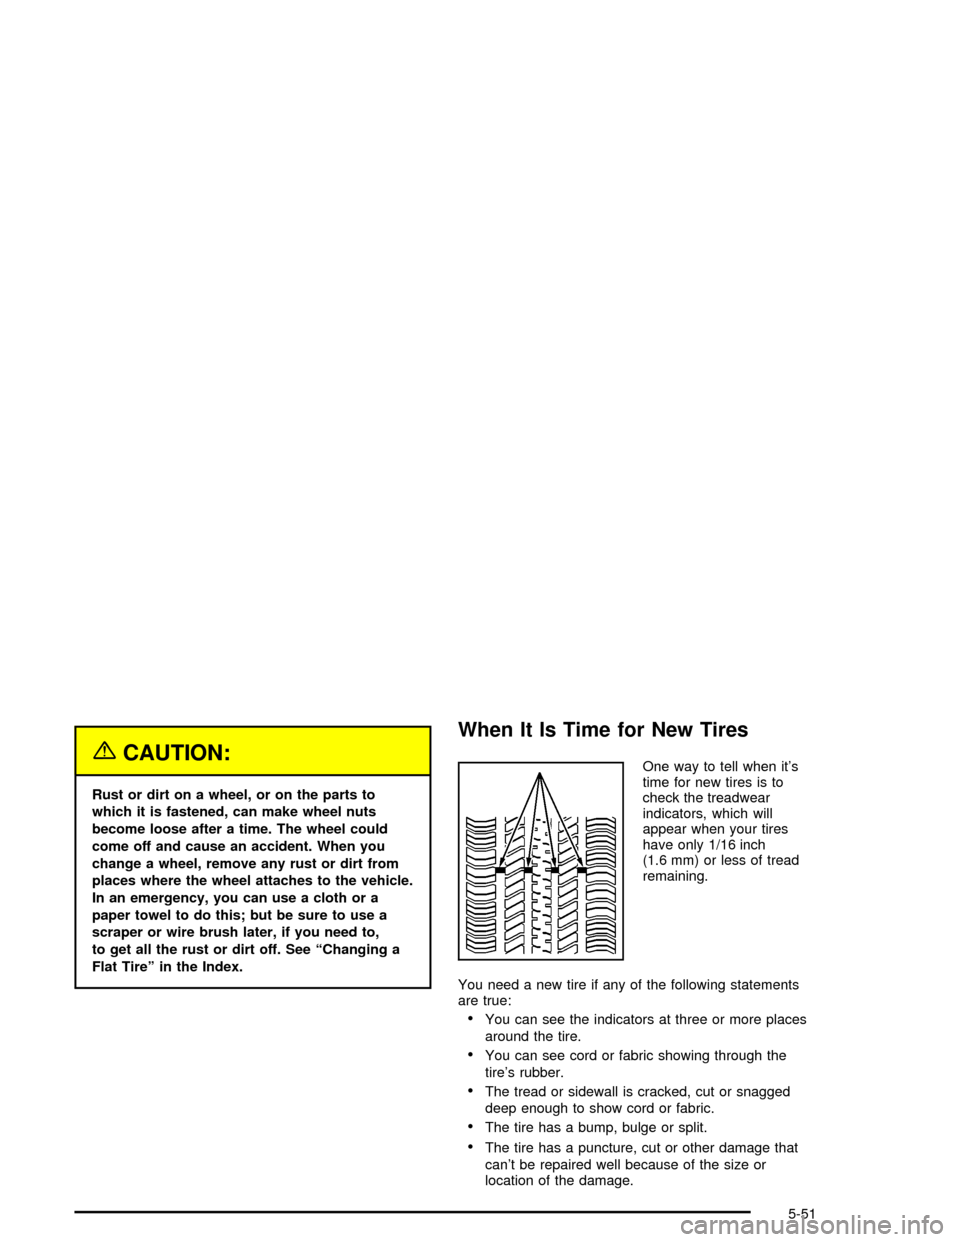
One way to tell when it's
time for new tires is to
check the treadwear
indicators, which will
appear when your tires
have only 1/16 inch
(1.6 mm) or less of tread
remaining.
You need a new tire if any of the following statements
are true:
·You can see the indicators at three or more places
around the tire.
·You can see cord or fabric showing through the
tire's rubber.
·The tread or sidewall is cracked, cut or snagged
deep enough to show cord or fabric.
·The tire has a bump, bulge or split.
·The tire has a puncture, cut or other damage that
can't be repaired well because of the size or
location of the damage.
5-51
Page 250 of 326

If a Tire Goes Flat
It's unusual for a tire to ªblowoutº while you're driving,
especially if you maintain your tires properly. If air goes
out of a tire, it's much more likely to leak out slowly.
But if you should ever have a ªblowout,º here are a few
tips about what to expect and what to do:
If a front tire fails, the ¯at tire will create a drag that
pulls the vehicle toward that side. Take your foot off the
accelerator pedal and grip the steering wheel ®rmly.
Steer to maintain lane position, and then gently brake to
a stop well out of the traffic lane.
A rear blowout, particularly on a curve, acts much like a
skid and may require the same correction you'd use
in a skid. In any rear blowout, remove your foot from the
accelerator pedal. Get the vehicle under control by
steering the way you want the vehicle to go. It may be
very bumpy and noisy, but you can still steer. Gently
brake to a stop, well off the road if possible.{CAUTION:
Lifting a vehicle and getting under it to do
maintenance or repairs is dangerous without
the appropriate safety equipment and training.
The jack provided with your vehicle is
designed only for changing a ¯at tire. If it is
used for anything else, you or others could be
badly injured or killed if the vehicle slips off
the jack. Use the jack provided with your
vehicle only for changing a ¯at tire.
If a tire goes ¯at, the next part shows how to use your
jacking equipment to change a ¯at tire safely.
5-56
Page 251 of 326

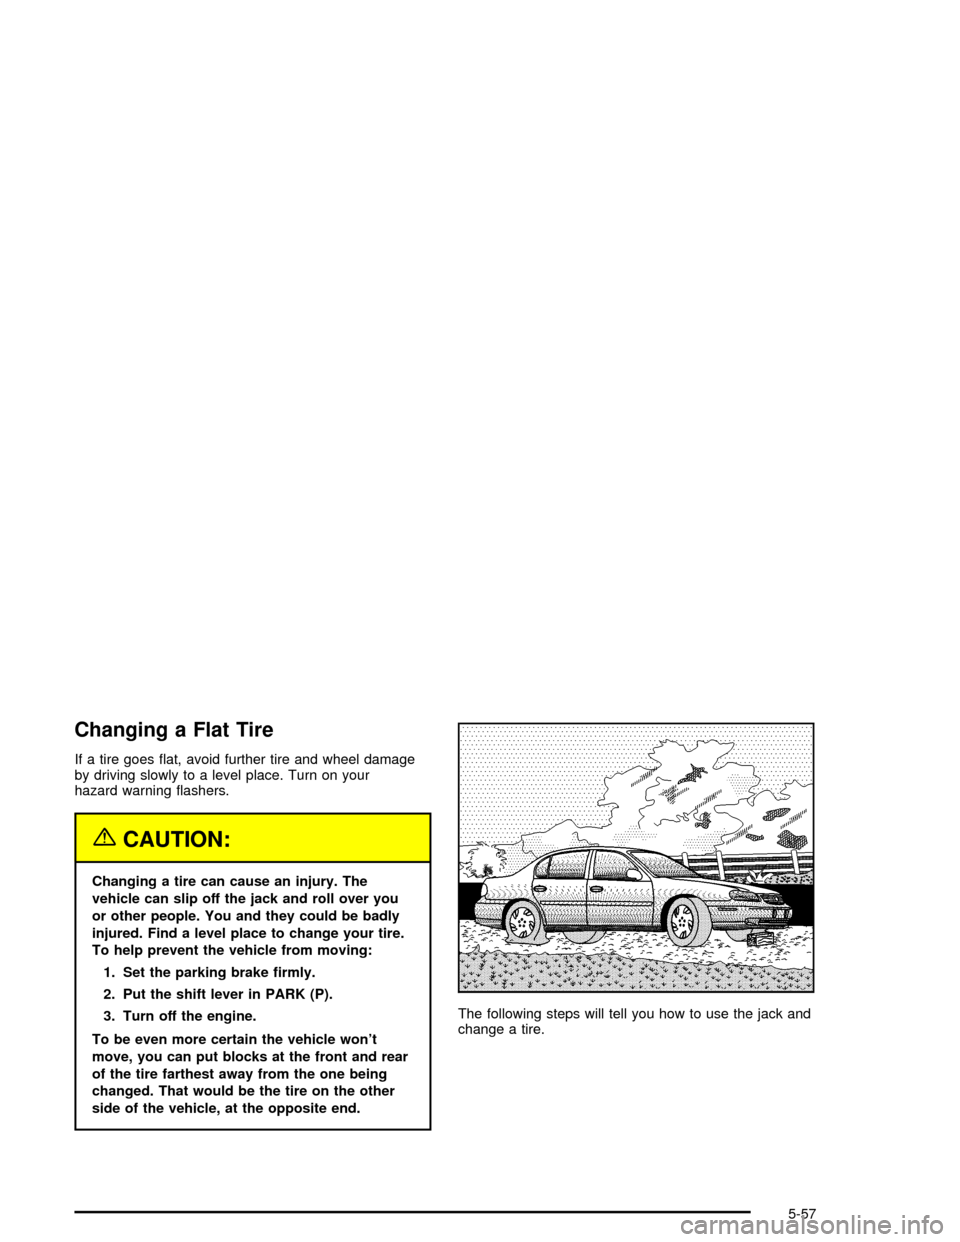
Changing a Flat Tire
If a tire goes ¯at, avoid further tire and wheel damage
by driving slowly to a level place. Turn on your
hazard warning ¯ashers.
{CAUTION:
Changing a tire can cause an injury. The
vehicle can slip off the jack and roll over you
or other people. You and they could be badly
injured. Find a level place to change your tire.
To help prevent the vehicle from moving:
1. Set the parking brake ®rmly.
2. Put the shift lever in PARK (P).
3. Turn off the engine.
To be even more certain the vehicle won't
move, you can put blocks at the front and rear
of the tire farthest away from the one being
changed. That would be the tire on the other
side of the vehicle, at the opposite end.The following steps will tell you how to use the jack and
change a tire.
5-57
Page 256 of 326

5. Raise the vehicle by turning the wrench clockwise.
Raise the vehicle far enough off the ground so there
is enough room for the compact spare tire to ®t.
6. Remove all of the wheel nuts.
7. Then take off the ¯at tire.
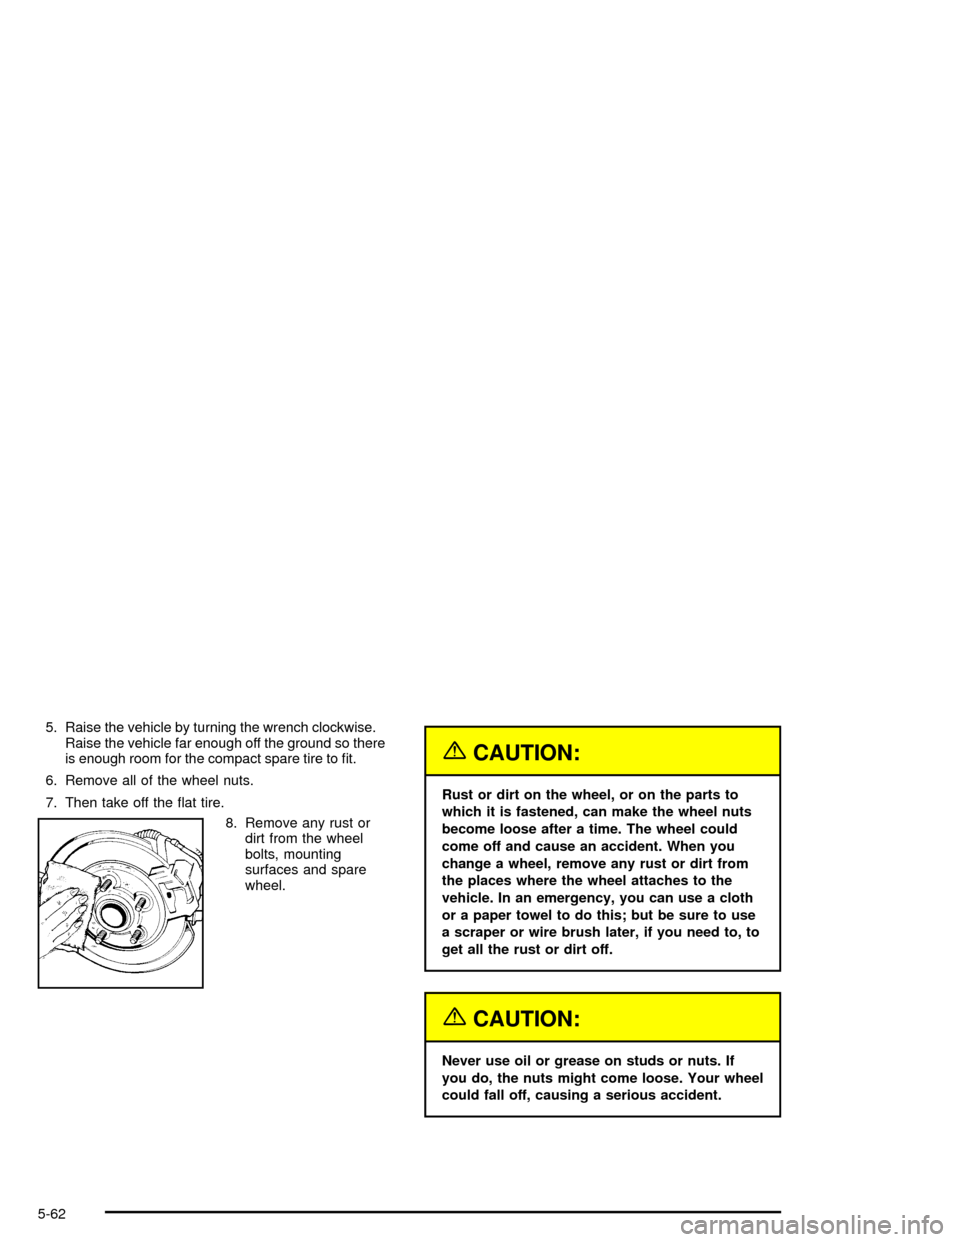
8. Remove any rust or
dirt from the wheel
bolts, mounting
surfaces and spare
wheel.
{CAUTION:
Rust or dirt on the wheel, or on the parts to
which it is fastened, can make the wheel nuts
become loose after a time. The wheel could
come off and cause an accident. When you
change a wheel, remove any rust or dirt from
the places where the wheel attaches to the
vehicle. In an emergency, you can use a cloth
or a paper towel to do this; but be sure to use
a scraper or wire brush later, if you need to, to
get all the rust or dirt off.
{CAUTION:
Never use oil or grease on studs or nuts. If
you do, the nuts might come loose. Your wheel
could fall off, causing a serious accident.
5-62
Page 325 of 326

Theft-Deterrent Systems...................................2-15
Passlockž...................................................2-16
Throttle System Inspection...............................6-20
Tilt Wheel........................................................ 3-5
Tire In¯ation Check.........................................6-15
Tires.............................................................5-48
Buying New Tires........................................5-52
Chains.......................................................5-55
Changing a Flat Tire....................................5-57
Compact Spare Tire.....................................5-66
If a Tire Goes Flat.......................................5-56
In¯ation -- Tire Pressure...............................5-49
Inspection and Rotation................................5-50
Uniform Tire Quality Grading.........................5-53
Wheel Alignment and Tire Balance.................5-54
Wheel Replacement.....................................5-54
When It Is Time for New Tires......................5-51
To Use the Engine Coolant Heater....................2-19
Top Strap Anchor Location...............................1-39
Top Strap......................................................1-38
Torque Lock...................................................2-25
Total Weight on Your Vehicle's Tires..................4-36
Towing..........................................................4-28
Recreational Vehicle.....................................4-28
Towing a Trailer..........................................4-34
Your Vehicle...............................................4-28
Trailer Brakes.................................................4-37
Transaxle Operation, Automatic.........................2-20Transaxle.......................................................5-18
Fluid, Automatic...........................................5-18
Transmission, Transaxle, Transfer Case
Unit Repair Manual......................................7-10
Transportation Options...................................... 7-7
Trap-Resistant Trunk Kit...................................2-13
Trip Odometer................................................3-24
Trunk............................................................2-11
Trunk Lamp...................................................3-15
Turn and Lane-Change Signals.......................... 3-6
Turn Signal/Multifunction Lever........................... 3-5
Turn Signals When Towing a Trailer..................4-38
U
Underbody Flushing Service.............................6-18
Understanding Radio Reception........................3-57
Uniform Tire Quality Grading............................5-53
United States ± Customer Assistance.................. 7-4
Used Replacement Wheels..............................5-55
Using Cleaner on Fabric..................................5-68
Using RDS............................................3-44, 3-50
V
Vehicle Identi®cation........................................5-75
Number (VIN).............................................5-75
Service Parts Identi®cation Label...................5-75
13
Page 326 of 326

Vehicle Storage..............................................5-36
Vehicle............................................................ 4-5
Control........................................................ 4-5
Damage Warnings........................................... iv
Loading......................................................4-32
Service Soon Light......................................3-35
Symbols......................................................... iv
Ventilation Adjustment......................................3-21
Visors...........................................................2-15
W
Warning Lights, Gages and Indicators................3-22
Warnings......................................................... 3-4
Hazard Warning Flashers............................... 3-4
Other Warning Devices.................................. 3-4
Safety and Symbols......................................... iii
Vehicle Damage.............................................. iv
Washer Fluid, Low Warning Light......................3-34
Washing Your Vehicle......................................5-71
Weatherstrip Lubrication...................................6-16
Weight of the Trailer Tongue.............................4-36
Weight of the Trailer........................................4-35
What Kind of Engine Oil to Use........................5-14
What to Do with Used Oil................................5-17
What to Use..........................................5-20, 5-31
Wheels..........................................................5-54
Alignment and Tire Balance..........................5-54
Replacement...............................................5-54When to Add Engine Oil..................................5-14
When to Change Engine Oil.............................5-16
When to Check Power Steering Fluid................5-30
When to Check..............................................5-50
When to Inspect the Engine Air Cleaner/Filter.....5-17
When You Are Ready to Leave After
Parking on a Hill.........................................4-40
Where to Put the Restraint...............................1-38
Why Safety Belts Work..................................... 1-8
Window Lockout.............................................2-15
Windows.......................................................2-14
Manual......................................................2-14
Power........................................................2-15
Windshield Washer Fluid Level Check................6-15
Windshield Washer.........................................5-31
Fluid..........................................................5-31
Windshield Wiper............................................5-48
Blade Replacement......................................5-48
Fuses........................................................5-76
Windshield Wipers............................................ 3-8
Winshield Washer............................................. 3-9
Winter Driving................................................4-23
Wiper Blade Check.........................................6-16
Y
Your Vehicle and the Environment....................... 6-2
14