2003 CHEVROLET IMPALA brake light
[x] Cancel search: brake lightPage 225 of 408
Traction Control System (TCS)
(3800 V6 Engine)
Your vehicle may have a traction control system that
limits wheel spin. This is especially useful in slippery road
conditions. The system operates only if it senses that one
or both of the front wheels are spinning or beginning to
lose traction. When this happens, the system reduces
engine power and may also upshift the transaxle and
apply the front brakes to limit wheel spin.
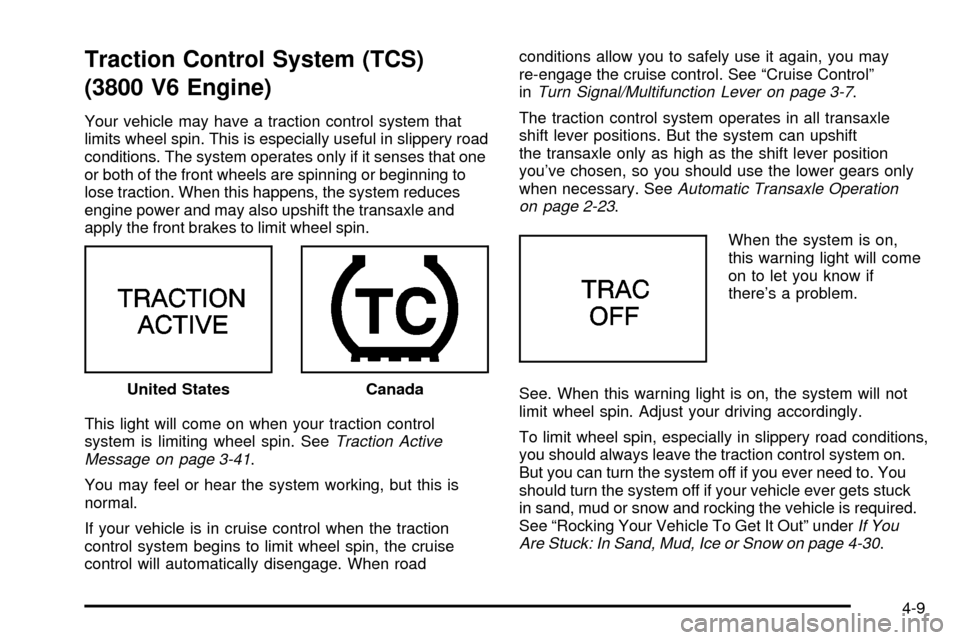
This light will come on when your traction control
system is limiting wheel spin. See
Traction Active
Message on page 3-41.
You may feel or hear the system working, but this is
normal.
If your vehicle is in cruise control when the traction
control system begins to limit wheel spin, the cruise
control will automatically disengage. When roadconditions allow you to safely use it again, you may
re-engage the cruise control. See ªCruise Controlº
in
Turn Signal/Multifunction Lever on page 3-7.
The traction control system operates in all transaxle
shift lever positions. But the system can upshift
the transaxle only as high as the shift lever position
you've chosen, so you should use the lower gears only
when necessary. See
Automatic Transaxle Operation
on page 2-23.
When the system is on,
this warning light will come
on to let you know if
there's a problem.
See. When this warning light is on, the system will not
limit wheel spin. Adjust your driving accordingly.
To limit wheel spin, especially in slippery road conditions,
you should always leave the traction control system on.
But you can turn the system off if you ever need to. You
should turn the system off if your vehicle ever gets stuck
in sand, mud or snow and rocking the vehicle is required.
See ªRocking Your Vehicle To Get It Outº under
If You
Are Stuck: In Sand, Mud, Ice or Snow on page 4-30. United States
Canada
4-9
Page 234 of 408
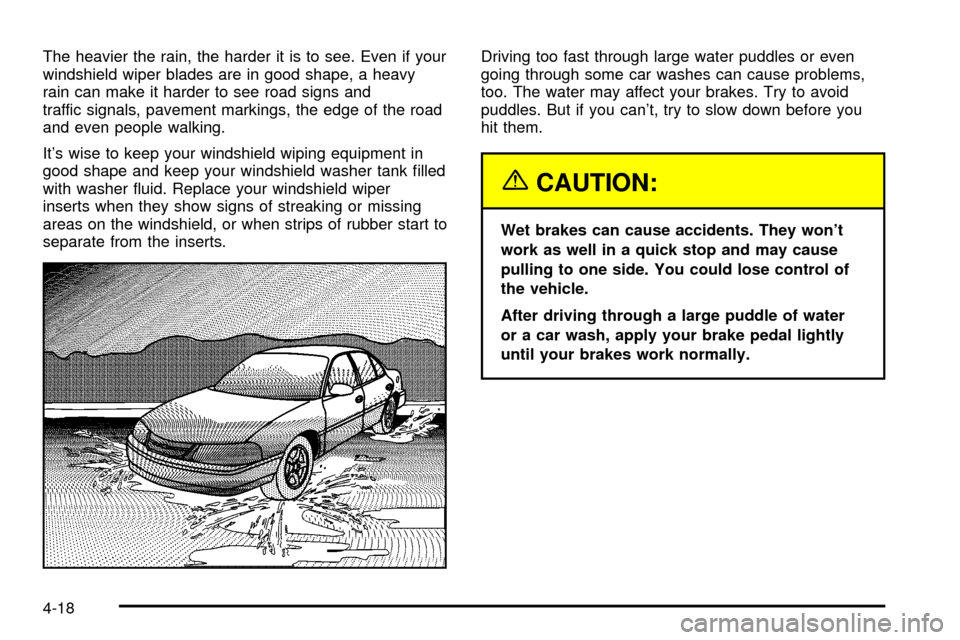
The heavier the rain, the harder it is to see. Even if your
windshield wiper blades are in good shape, a heavy
rain can make it harder to see road signs and
traffic signals, pavement markings, the edge of the road
and even people walking.
It's wise to keep your windshield wiping equipment in
good shape and keep your windshield washer tank ®lled
with washer ¯uid. Replace your windshield wiper
inserts when they show signs of streaking or missing
areas on the windshield, or when strips of rubber start to
separate from the inserts.Driving too fast through large water puddles or even
going through some car washes can cause problems,
too. The water may affect your brakes. Try to avoid
puddles. But if you can't, try to slow down before you
hit them.
{CAUTION:
Wet brakes can cause accidents. They won't
work as well in a quick stop and may cause
pulling to one side. You could lose control of
the vehicle.
After driving through a large puddle of water
or a car wash, apply your brake pedal lightly
until your brakes work normally.
4-18
Page 302 of 408
There are only two reasons why the brake ¯uid level in
the reservoir might go down. The ®rst is that the
brake ¯uid goes down to an acceptable level during
normal brake lining wear. When new linings are put in,
the ¯uid level goes back up. The other reason is
that ¯uid is leaking out of the brake system. If it is, you
should have your brake system ®xed, since a leak
means that sooner or later your brakes won't work well,
or won't work at all.
So, it isn't a good idea to ªtop offº your brake ¯uid.
Adding brake ¯uid won't correct a leak. If you add ¯uid
when your linings are worn, then you'll have too
much ¯uid when you get new brake linings. You should
add (or remove) brake ¯uid, as necessary, only when
work is done on the brake hydraulic system.
{CAUTION:
If you have too much brake ¯uid, it can spill on
the engine. The ¯uid will burn if the engine is
hot enough. You or others could be burned,
and your vehicle could be damaged. Add brake
¯uid only when work is done on the brake
hydraulic system.When your brake ¯uid falls to a low level, your brake
warning light will come on. See
Brake System Warning
Light on page 3-34.
What to Add
When you do need brake ¯uid, use only DOT-3 brake
¯uid. Use new brake ¯uid from a sealed container
only. See
Part D: Recommended Fluids and Lubricants
on page 6-16.
Always clean the brake ¯uid reservoir cap and the area
around the cap before removing it. This will help
keep dirt from entering the reservoir.
{CAUTION:
With the wrong kind of ¯uid in your brake
system, your brakes may not work well, or
they may not even work at all. This could
cause a crash. Always use the proper brake
¯uid.
5-46
Page 303 of 408
Notice:
·Using the wrong ¯uid can badly damage brake
system parts. For example, just a few drops of
mineral-based oil, such as engine oil, in your
brake system can damage brake system
parts so badly that they'll have to be replaced.
Don't let someone put in the wrong kind of ¯uid.
·If you spill brake ¯uid on your vehicle's painted
surfaces, the paint ®nish can be damaged. Be
careful not to spill brake ¯uid on your vehicle. If
you do, wash it off immediately. See
ªAppearance Careº in the Index.
Brake Wear
Your vehicle has four-wheel disc brakes.
Disc brake pads have built-in wear indicators that make
a high-pitched warning sound when the brake pads
are worn and new pads are needed. The sound
may come and go or be heard all the time your vehicle
is moving (except when you are pushing on the
brake pedal ®rmly).
{CAUTION:
The brake wear warning sound means that
soon your brakes won't work well. That could
lead to an accident. When you hear the brake
wear warning sound, have your vehicle
serviced.
Notice:Continuing to drive with worn-out brake
pads could result in costly brake repair.
Some driving conditions or climates may cause a brake
squeal when the brakes are ®rst applied or lightly
applied. This does not mean something is wrong with
your brakes.
Properly torqued wheel nuts are necessary to help
prevent brake pulsation. When tires are rotated, inspect
brake pads for wear and evenly tighten wheel nuts in
the proper sequence to GM torque speci®cations.
Brake linings should always be replaced as complete
axle sets.
See
Brake System Inspection on page 6-15.
5-47
Page 306 of 408
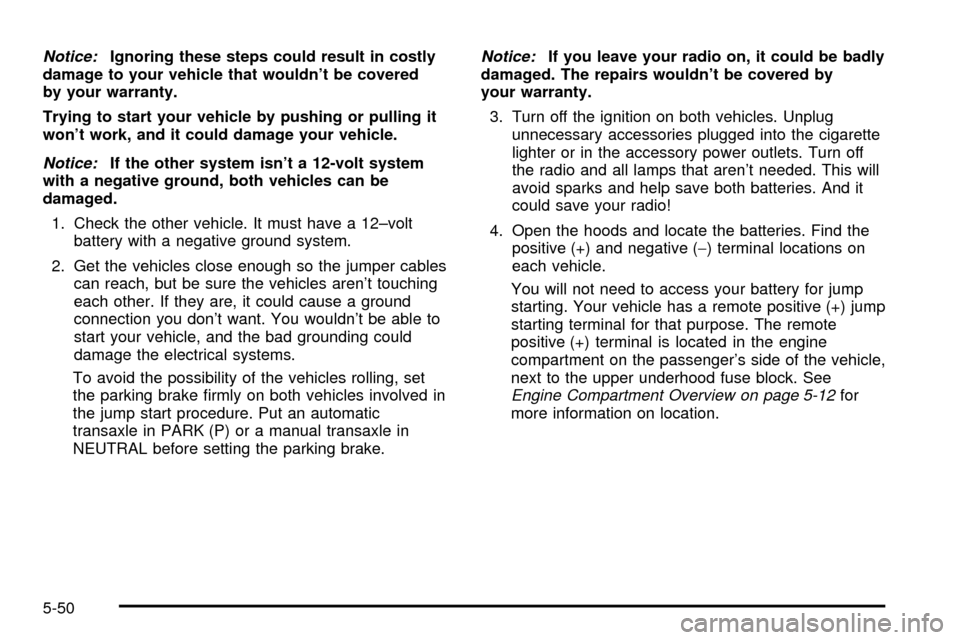
Notice:Ignoring these steps could result in costly
damage to your vehicle that wouldn't be covered
by your warranty.
Trying to start your vehicle by pushing or pulling it
won't work, and it could damage your vehicle.
Notice:If the other system isn't a 12-volt system
with a negative ground, both vehicles can be
damaged.
1. Check the other vehicle. It must have a 12±volt
battery with a negative ground system.
2. Get the vehicles close enough so the jumper cables
can reach, but be sure the vehicles aren't touching
each other. If they are, it could cause a ground
connection you don't want. You wouldn't be able to
start your vehicle, and the bad grounding could
damage the electrical systems.
To avoid the possibility of the vehicles rolling, set
the parking brake ®rmly on both vehicles involved in
the jump start procedure. Put an automatic
transaxle in PARK (P) or a manual transaxle in
NEUTRAL before setting the parking brake.
Notice:If you leave your radio on, it could be badly
damaged. The repairs wouldn't be covered by
your warranty.
3. Turn off the ignition on both vehicles. Unplug
unnecessary accessories plugged into the cigarette
lighter or in the accessory power outlets. Turn off
the radio and all lamps that aren't needed. This will
avoid sparks and help save both batteries. And it
could save your radio!
4. Open the hoods and locate the batteries. Find the
positive (+) and negative (-) terminal locations on
each vehicle.
You will not need to access your battery for jump
starting. Your vehicle has a remote positive (+) jump
starting terminal for that purpose. The remote
positive (+) terminal is located in the engine
compartment on the passenger's side of the vehicle,
next to the upper underhood fuse block. See
Engine Compartment Overview on page 5-12for
more information on location.
5-50
Page 353 of 408
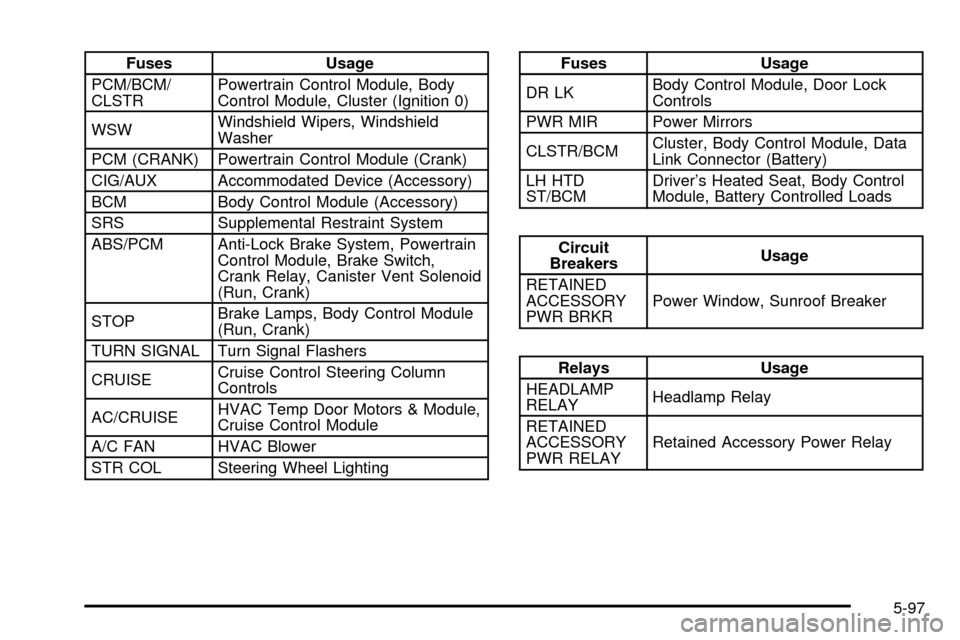
Fuses Usage
PCM/BCM/
CLSTRPowertrain Control Module, Body
Control Module, Cluster (Ignition 0)
WSWWindshield Wipers, Windshield
Washer
PCM (CRANK) Powertrain Control Module (Crank)
CIG/AUX Accommodated Device (Accessory)
BCM Body Control Module (Accessory)
SRS Supplemental Restraint System
ABS/PCM Anti-Lock Brake System, Powertrain
Control Module, Brake Switch,
Crank Relay, Canister Vent Solenoid
(Run, Crank)
STOPBrake Lamps, Body Control Module
(Run, Crank)
TURN SIGNAL Turn Signal Flashers
CRUISECruise Control Steering Column
Controls
AC/CRUISEHVAC Temp Door Motors & Module,
Cruise Control Module
A/C FAN HVAC Blower
STR COL Steering Wheel LightingFuses Usage
DR LKBody Control Module, Door Lock
Controls
PWR MIR Power Mirrors
CLSTR/BCMCluster, Body Control Module, Data
Link Connector (Battery)
LH HTD
ST/BCMDriver's Heated Seat, Body Control
Module, Battery Controlled Loads
Circuit
BreakersUsage
RETAINED
ACCESSORY
PWR BRKRPower Window, Sunroof Breaker
Relays Usage
HEADLAMP
RELAYHeadlamp Relay
RETAINED
ACCESSORY
PWR RELAYRetained Accessory Power Relay
5-97
Page 355 of 408
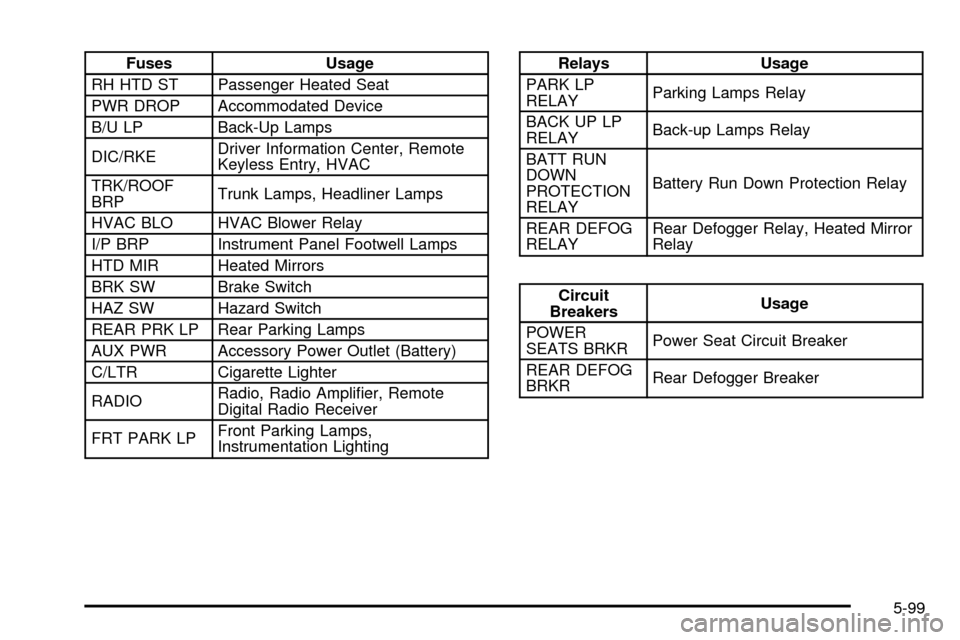
Fuses Usage
RH HTD ST Passenger Heated Seat
PWR DROP Accommodated Device
B/U LP Back-Up Lamps
DIC/RKEDriver Information Center, Remote
Keyless Entry, HVAC
TRK/ROOF
BRPTrunk Lamps, Headliner Lamps
HVAC BLO HVAC Blower Relay
I/P BRP Instrument Panel Footwell Lamps
HTD MIR Heated Mirrors
BRK SW Brake Switch
HAZ SW Hazard Switch
REAR PRK LP Rear Parking Lamps
AUX PWR Accessory Power Outlet (Battery)
C/LTR Cigarette Lighter
RADIORadio, Radio Ampli®er, Remote
Digital Radio Receiver
FRT PARK LPFront Parking Lamps,
Instrumentation LightingRelays Usage
PARK LP
RELAYParking Lamps Relay
BACK UP LP
RELAYBack-up Lamps Relay
BATT RUN
DOWN
PROTECTION
RELAYBattery Run Down Protection Relay
REAR DEFOG
RELAYRear Defogger Relay, Heated Mirror
Relay
Circuit
BreakersUsage
POWER
SEATS BRKRPower Seat Circuit Breaker
REAR DEFOG
BRKRRear Defogger Breaker
5-99
Page 393 of 408
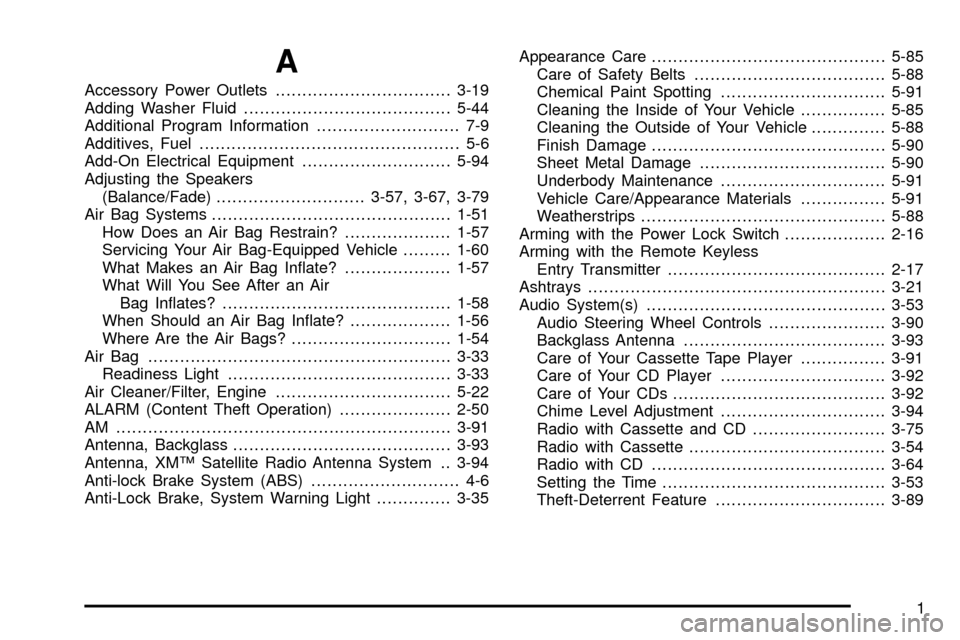
A
Accessory Power Outlets.................................3-19
Adding Washer Fluid.......................................5-44
Additional Program Information........................... 7-9
Additives, Fuel................................................. 5-6
Add-On Electrical Equipment............................5-94
Adjusting the Speakers
(Balance/Fade)............................3-57, 3-67, 3-79
Air Bag Systems.............................................1-51
How Does an Air Bag Restrain?....................1-57
Servicing Your Air Bag-Equipped Vehicle.........1-60
What Makes an Air Bag In¯ate?....................1-57
What Will You See After an Air
Bag In¯ates?...........................................1-58
When Should an Air Bag In¯ate?...................1-56
Where Are the Air Bags?..............................1-54
Air Bag .........................................................3-33
Readiness Light..........................................3-33
Air Cleaner/Filter, Engine.................................5-22
ALARM (Content Theft Operation).....................2-50
AM ...............................................................3-91
Antenna, Backglass.........................................3-93
Antenna, XMŸ Satellite Radio Antenna System . . 3-94
Anti-lock Brake System (ABS)............................ 4-6
Anti-Lock Brake, System Warning Light..............3-35Appearance Care............................................5-85
Care of Safety Belts....................................5-88
Chemical Paint Spotting...............................5-91
Cleaning the Inside of Your Vehicle................5-85
Cleaning the Outside of Your Vehicle..............5-88
Finish Damage............................................5-90
Sheet Metal Damage...................................5-90
Underbody Maintenance...............................5-91
Vehicle Care/Appearance Materials................5-91
Weatherstrips..............................................5-88
Arming with the Power Lock Switch...................2-16
Arming with the Remote Keyless
Entry Transmitter.........................................2-17
Ashtrays........................................................3-21
Audio System(s).............................................3-53
Audio Steering Wheel Controls......................3-90
Backglass Antenna......................................3-93
Care of Your Cassette Tape Player................3-91
Care of Your CD Player...............................3-92
Care of Your CDs........................................3-92
Chime Level Adjustment...............................3-94
Radio with Cassette and CD.........................3-75
Radio with Cassette.....................................3-54
Radio with CD............................................3-64
Setting the Time..........................................3-53
Theft-Deterrent Feature................................3-89
1