2003 CHEVROLET EXPRESS CARGO VAN coolant level
[x] Cancel search: coolant levelPage 151 of 386
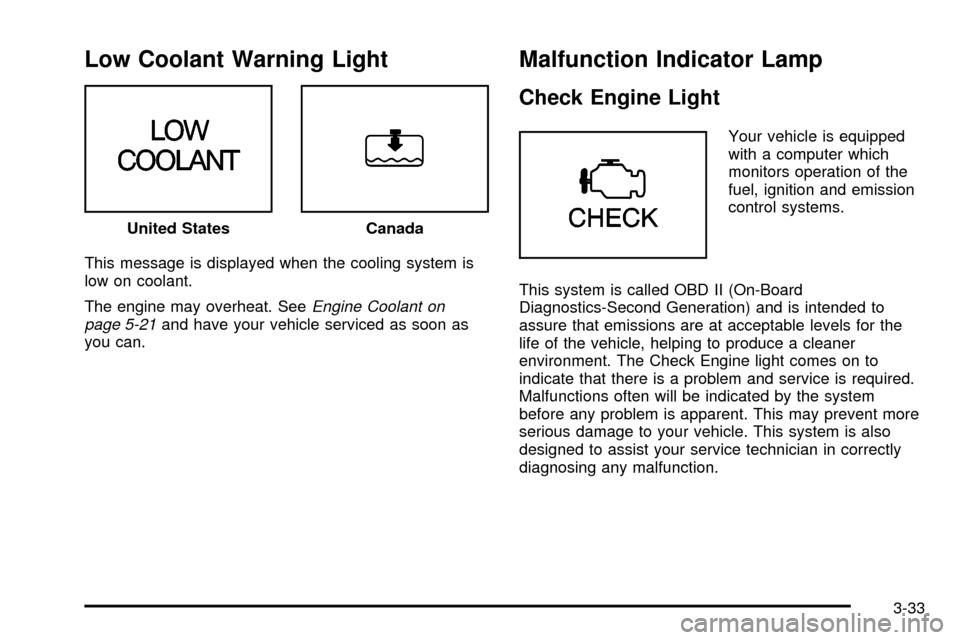
Low Coolant Warning Light
This message is displayed when the cooling system is
low on coolant.
The engine may overheat. See
Engine Coolant on
page 5-21and have your vehicle serviced as soon as
you can.
Malfunction Indicator Lamp
Check Engine Light
Your vehicle is equipped
with a computer which
monitors operation of the
fuel, ignition and emission
control systems.
This system is called OBD II (On-Board
Diagnostics-Second Generation) and is intended to
assure that emissions are at acceptable levels for the
life of the vehicle, helping to produce a cleaner
environment. The Check Engine light comes on to
indicate that there is a problem and service is required.
Malfunctions often will be indicated by the system
before any problem is apparent. This may prevent more
serious damage to your vehicle. This system is also
designed to assist your service technician in correctly
diagnosing any malfunction. United States
Canada
3-33
Page 236 of 386

Passing
You'll need more passing distance up ahead when
you're towing a trailer. And, because you're a good deal
longer, you'll need to go much farther beyond the
passed vehicle before you can return to your lane.
Backing Up
Hold the bottom of the steering wheel with one hand.
Then, to move the trailer to the left, just move that hand
to the left. To move the trailer to the right, move your
hand to the right. Always back up slowly and, if possible,
have someone guide you.
Making Turns
Notice:Making very sharp turns while trailering
could cause the trailer to come in contact with the
vehicle. Your vehicle could be damaged. Avoid
making very sharp turns while trailering.
When you're turning with a trailer, make wider turns than
normal. Do this so your trailer won't strike soft shoulders,
curbs, road signs, trees or other objects. Avoid jerky or
sudden maneuvers. Signal well in advance.
Turn Signals When Towing a Trailer
When you tow a trailer, your vehicle has to have extra
wiring and a heavy-duty turn signal ¯asher (included
in the optional trailering package).The arrows on your instrument panel will ¯ash whenever
you signal a turn or lane change. Properly hooked up,
the trailer lamps will also ¯ash, telling other drivers
you're about to turn, change lanes or stop.
When towing a trailer, the arrows on your instrument
panel will ¯ash for turns even if the bulbs on the trailer
are burned out. Thus, you may think drivers behind
you are seeing your signal when they are not. It's
important to check occasionally to be sure the trailer
bulbs are still working.
Driving On Grades
Reduce speed and shift to a lower gearbeforeyou start
down a long or steep downgrade. If you don't shift
down, you might have to use your brakes so much that
they would get hot and no longer work well.
When towing at high altitude on steep uphill grades,
consider the following: Engine coolant will boil at a lower
temperature than at normal altitudes. If you turn your
engine off immediately after towing at high altitude
on steep uphill grades, your vehicle may show signs
similar to engine overheating. To avoid this, let the
engine run while parked (preferably on level ground)
with the automatic transmission in PARK (P) for a
few minutes before turning the engine off. If you do get
the overheat warning, see
Engine Overheating on
page 5-24.
4-42
Page 248 of 386

qRotate tires. SeeTire Inspection and Rotation on
page 5-58for proper rotation pattern and additional
information.(See footnote +.)
97,500 Miles (162 500 km)
qCheck rear/front axle ¯uid level and add ¯uid as
needed. Check constant velocity joints and axle seals
for leaking.
qRotate tires. See
Tire Inspection and Rotation on
page 5-58for proper rotation pattern and additional
information.(See footnote +.)
100,000 Miles (166 000 km)
qInspect spark plug wires.An Emission Control
Service.
qReplace spark plugs.An Emission Control Service.
qChange automatic transmission ¯uid and ®lter if
the vehicle's GVWR is over 8600 lbs or if the vehicle
is mainly driven under one or more of these
conditions:
þ In heavy city traffic where the outside
temperature regularly reaches 90ÉF (32ÉC) or
higher.þ In hilly or mountainous terrain.
þ When doing frequent trailer towing.
þ Uses such as found in taxi, police or delivery
service.
qIf you haven't used your vehicle under severe service
conditions listed previously and, therefore, haven't
changed your automatic transmission ¯uid, change
both the ¯uid and ®lter.
qInspect Positive Crankcase Ventilation (PCV) valve.
An Emission Control Service.
150,000 Miles (240 000 km)
qDrain, ¯ush and re®ll cooling system (or every
60 months since last service, whichever occurs ®rst).
See
Engine Coolant on page 5-21for what to use.
Inspect hoses. Clean radiator, condenser, pressure
cap and neck. Pressure test the cooling system
and pressure cap.
An Emission Control Service.
qInspect engine accessory drive belt.An Emission
Control Service.
6-10
Page 249 of 386

Part B: Owner Checks and Services
Listed in this part are owner checks and services
which should be performed at the intervals speci®ed to
help ensure the safety, dependability and emission
control performance of your vehicle.
Be sure any necessary repairs are completed at once.
Whenever any ¯uids or lubricants are added to your
vehicle, make sure they are the proper ones, as shown
in Part D.
At the First 100, 1,000 and 6,000
Miles (160, 1 600 and 10 000km)
For vehicles with dual wheels, check dual wheel nut
torque. For proper torque, seeCapacities and
Speci®cations on page 5-97.
At Each Fuel Fill
It is important for you or a service station attendant to
perform these underhood checks at each fuel ®ll.
Engine Oil Level Check
Check the engine oil level and add the proper oil if
necessary. SeeEngine Oil on page 5-13for further
details.
Engine Coolant Level Check
Check the engine coolant level and add DEX-COOLž
coolant mixture if necessary. SeeEngine Coolant
on page 5-21for further details.
Windshield Washer Fluid Level Check
Check the windshield washer ¯uid level in the windshield
washer tank and add the proper ¯uid if necessary.
See
Windshield Washer Fluid on page 5-35for further
details.
At Least Once a Month
Tire In¯ation Check
Visually inspect your tires and make sure tires are
in¯ated to the correct pressures. Don't forget to check
your spare tire. See
Tires on page 5-56for further
details.
6-11
Page 283 of 386
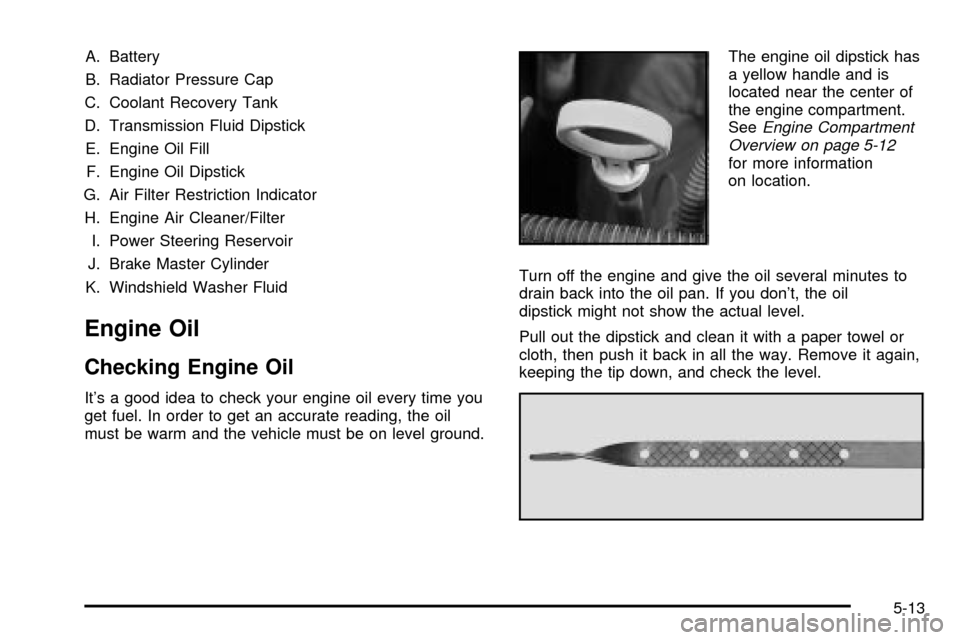
A. Battery
B. Radiator Pressure Cap
C. Coolant Recovery Tank
D. Transmission Fluid Dipstick
E. Engine Oil Fill
F. Engine Oil Dipstick
G. Air Filter Restriction Indicator
H. Engine Air Cleaner/Filter
I. Power Steering Reservoir
J. Brake Master Cylinder
K. Windshield Washer Fluid
Engine Oil
Checking Engine Oil
It's a good idea to check your engine oil every time you
get fuel. In order to get an accurate reading, the oil
must be warm and the vehicle must be on level ground.The engine oil dipstick has
a yellow handle and is
located near the center of
the engine compartment.
See
Engine Compartment
Overview on page 5-12
for more information
on location.
Turn off the engine and give the oil several minutes to
drain back into the oil pan. If you don't, the oil
dipstick might not show the actual level.
Pull out the dipstick and clean it with a paper towel or
cloth, then push it back in all the way. Remove it again,
keeping the tip down, and check the level.
5-13
Page 284 of 386
When to Add Engine Oil
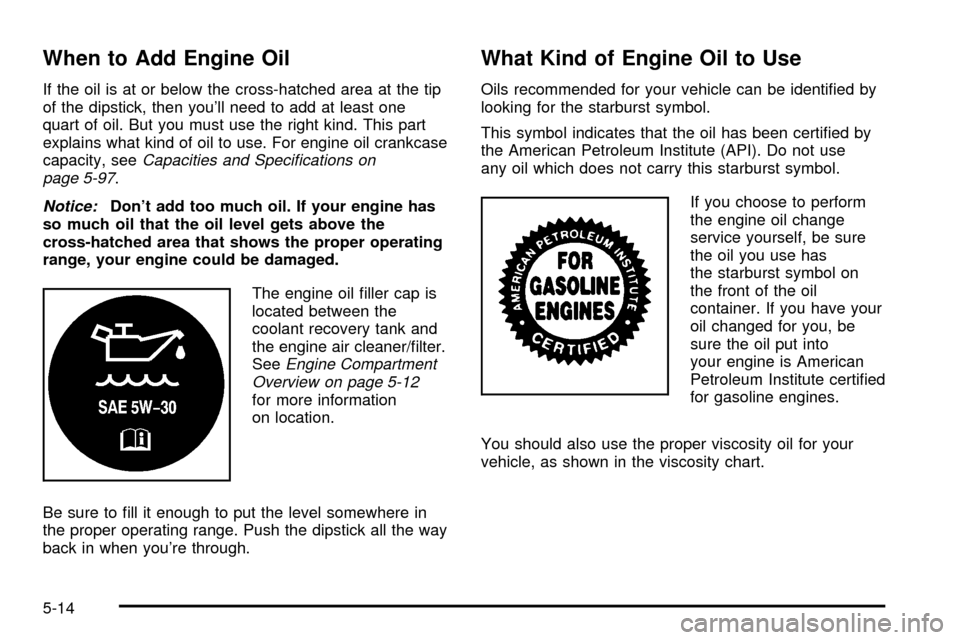
If the oil is at or below the cross-hatched area at the tip
of the dipstick, then you'll need to add at least one
quart of oil. But you must use the right kind. This part
explains what kind of oil to use. For engine oil crankcase
capacity, see
Capacities and Speci®cations on
page 5-97.
Notice:Don't add too much oil. If your engine has
so much oil that the oil level gets above the
cross-hatched area that shows the proper operating
range, your engine could be damaged.
The engine oil ®ller cap is
located between the
coolant recovery tank and
the engine air cleaner/®lter.
See
Engine Compartment
Overview on page 5-12
for more information
on location.
Be sure to ®ll it enough to put the level somewhere in
the proper operating range. Push the dipstick all the way
back in when you're through.
What Kind of Engine Oil to Use
Oils recommended for your vehicle can be identi®ed by
looking for the starburst symbol.
This symbol indicates that the oil has been certi®ed by
the American Petroleum Institute (API). Do not use
any oil which does not carry this starburst symbol.
If you choose to perform
the engine oil change
service yourself, be sure
the oil you use has
the starburst symbol on
the front of the oil
container. If you have your
oil changed for you, be
sure the oil put into
your engine is American
Petroleum Institute certi®ed
for gasoline engines.
You should also use the proper viscosity oil for your
vehicle, as shown in the viscosity chart.
5-14
Page 291 of 386
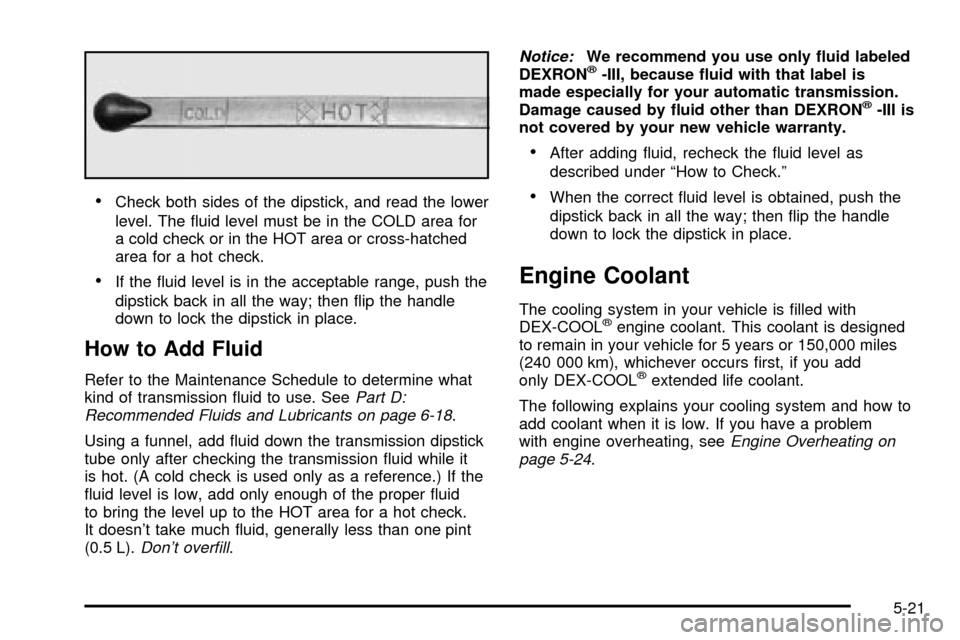
·Check both sides of the dipstick, and read the lower
level. The ¯uid level must be in the COLD area for
a cold check or in the HOT area or cross-hatched
area for a hot check.
·If the ¯uid level is in the acceptable range, push the
dipstick back in all the way; then ¯ip the handle
down to lock the dipstick in place.
How to Add Fluid
Refer to the Maintenance Schedule to determine what
kind of transmission ¯uid to use. SeePart D:
Recommended Fluids and Lubricants on page 6-18.
Using a funnel, add ¯uid down the transmission dipstick
tube only after checking the transmission ¯uid while it
is hot. (A cold check is used only as a reference.) If the
¯uid level is low, add only enough of the proper ¯uid
to bring the level up to the HOT area for a hot check.
It doesn't take much ¯uid, generally less than one pint
(0.5 L).
Don't over®ll.
Notice:We recommend you use only ¯uid labeled
DEXRONž-III, because ¯uid with that label is
made especially for your automatic transmission.
Damage caused by ¯uid other than DEXRON
ž-III is
not covered by your new vehicle warranty.
·After adding ¯uid, recheck the ¯uid level as
described under ªHow to Check.º
·When the correct ¯uid level is obtained, push the
dipstick back in all the way; then ¯ip the handle
down to lock the dipstick in place.
Engine Coolant
The cooling system in your vehicle is ®lled with
DEX-COOLžengine coolant. This coolant is designed
to remain in your vehicle for 5 years or 150,000 miles
(240 000 km), whichever occurs ®rst, if you add
only DEX-COOL
žextended life coolant.
The following explains your cooling system and how to
add coolant when it is low. If you have a problem
with engine overheating, see
Engine Overheating on
page 5-24.
5-21
Page 293 of 386
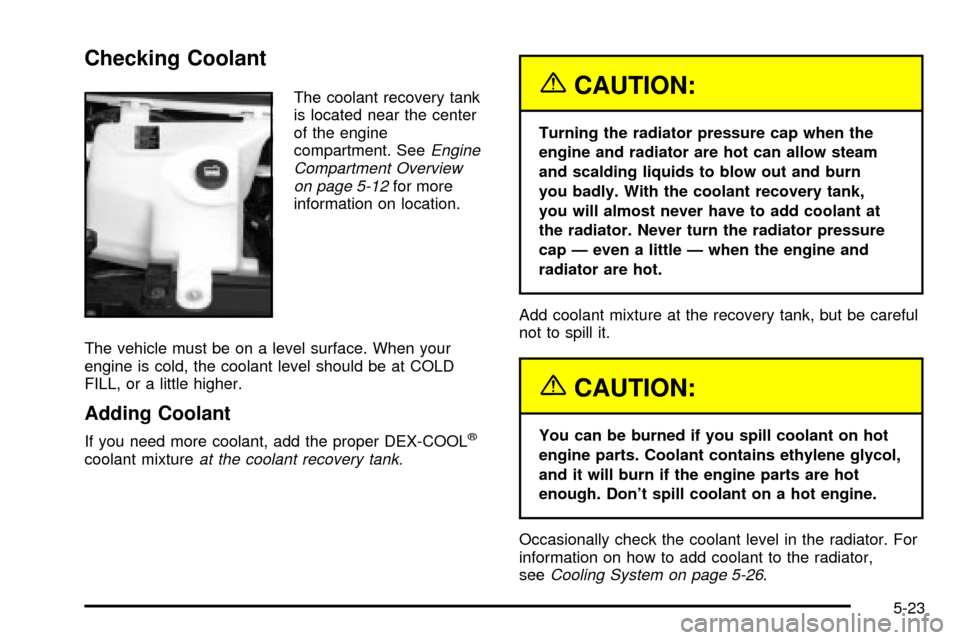
Checking Coolant
The coolant recovery tank
is located near the center
of the engine
compartment. See
Engine
Compartment Overview
on page 5-12
for more
information on location.
The vehicle must be on a level surface. When your
engine is cold, the coolant level should be at COLD
FILL, or a little higher.
Adding Coolant
If you need more coolant, add the proper DEX-COOLž
coolant mixtureat the coolant recovery tank.
{CAUTION:
Turning the radiator pressure cap when the
engine and radiator are hot can allow steam
and scalding liquids to blow out and burn
you badly. With the coolant recovery tank,
you will almost never have to add coolant at
the radiator. Never turn the radiator pressure
cap Ð even a little Ð when the engine and
radiator are hot.
Add coolant mixture at the recovery tank, but be careful
not to spill it.
{CAUTION:
You can be burned if you spill coolant on hot
engine parts. Coolant contains ethylene glycol,
and it will burn if the engine parts are hot
enough. Don't spill coolant on a hot engine.
Occasionally check the coolant level in the radiator. For
information on how to add coolant to the radiator,
see
Cooling System on page 5-26.
5-23