2003 CHEVROLET CORVETTE brake light
[x] Cancel search: brake lightPage 86 of 368

If your vehicle is a Z06, do not downshift into a gear
shown below at a speed greater than shown in the table:
FIRST (1) 48 mph (77 km/h)
SECOND (2) 69 mph (111 km/h)
THIRD (3) 100 mph (161 km/h)
FOURTH (4) 143 mph (230 km/h)
Notice:If you skip more than one gear when you
downshift, or if you race the engine when you
release the clutch pedal while downshifting, you
could damage the engine, clutch, driveshaft or the
transmission.
The six-speed transmission has a spring that centers
the gearshift lever near THIRD (3) and FOURTH (4).
This spring helps you know which gear you are in when
you are shifting. Be careful when shifting from
FIRST (1) to SECOND (2) or downshifting from
SIXTH (6) to FIFTH (5). The spring will try to pull the
gearshift lever toward FOURTH (4) and THIRD (3).
Make sure you move the lever into SECOND (2)
or FIFTH (5). If you let the gearshift lever move in the
direction of the pulling, you may end up shifting
from FIRST (1) to FOURTH (4) or from SIXTH (6) to
THIRD (3).
Parking Brake
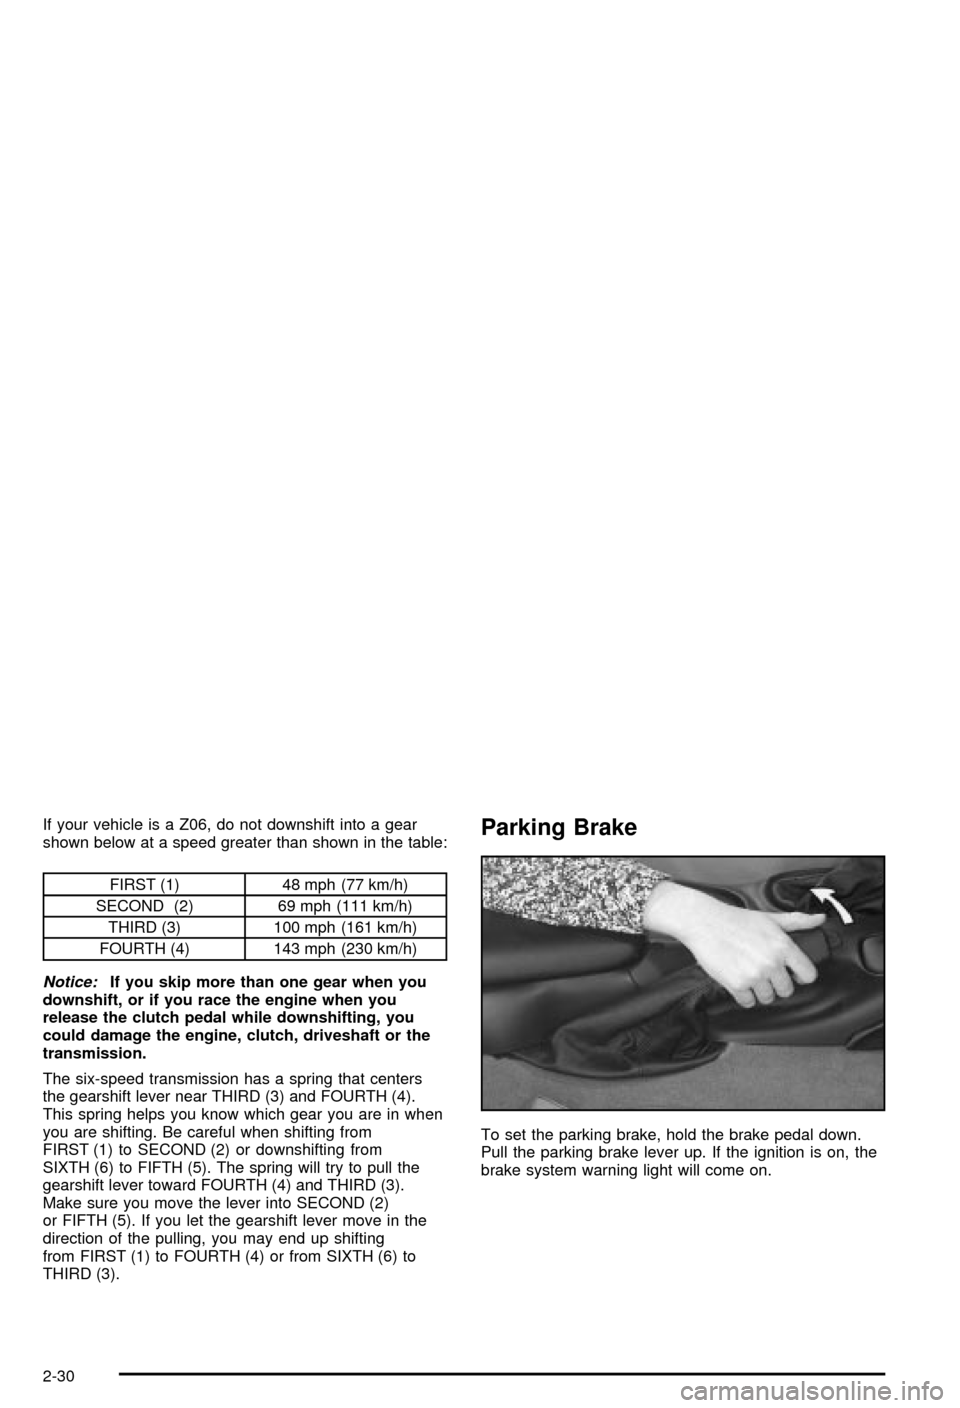
To set the parking brake, hold the brake pedal down.
Pull the parking brake lever up. If the ignition is on, the
brake system warning light will come on.
2-30
Page 87 of 368

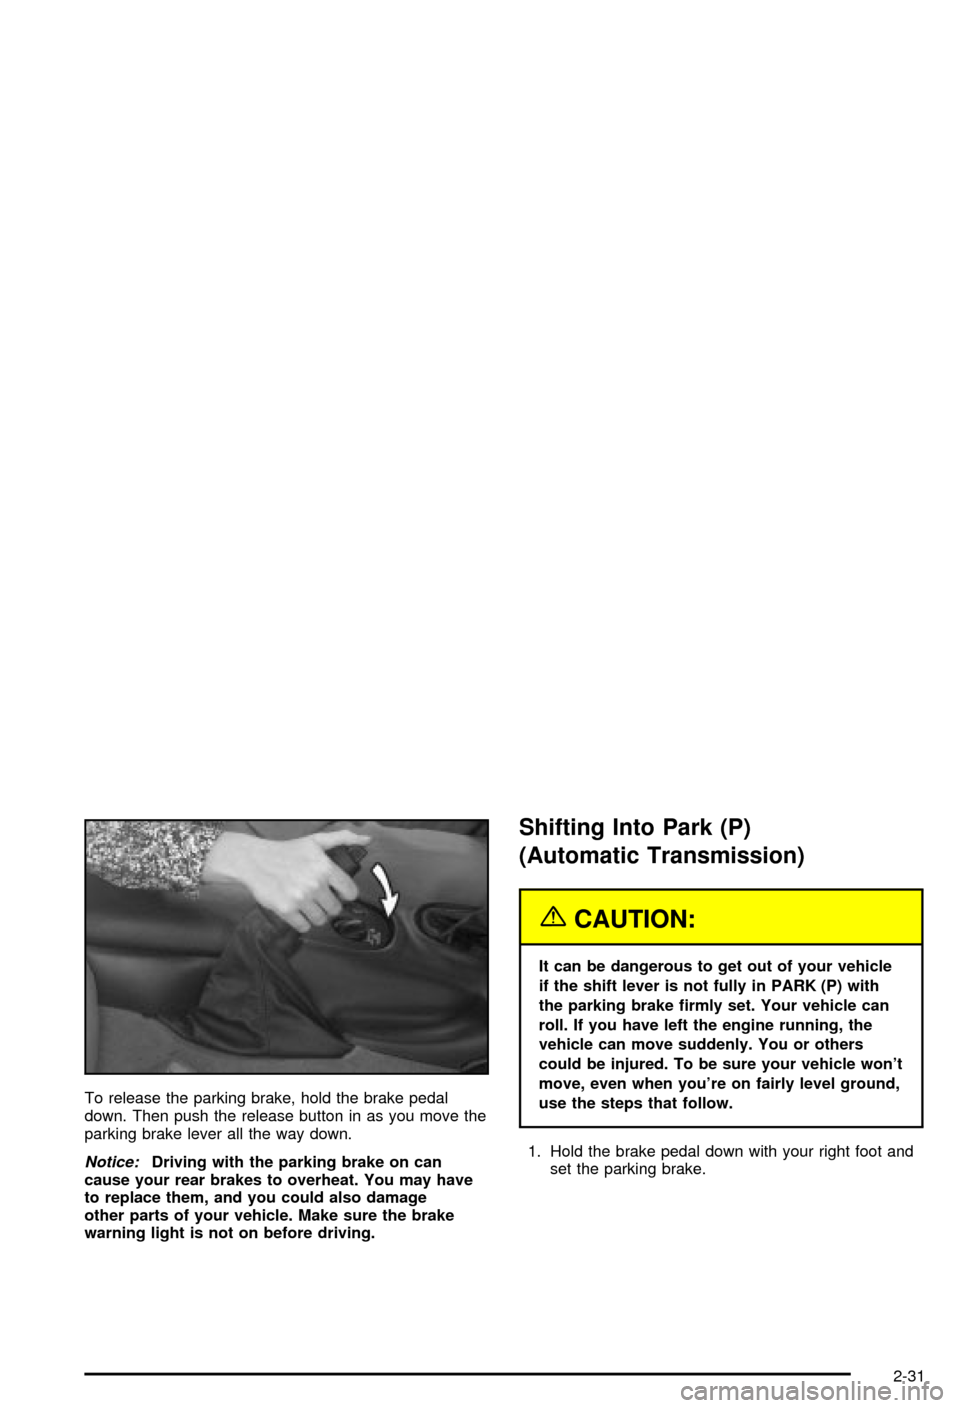
To release the parking brake, hold the brake pedal
down. Then push the release button in as you move the
parking brake lever all the way down.
Notice:Driving with the parking brake on can
cause your rear brakes to overheat. You may have
to replace them, and you could also damage
other parts of your vehicle. Make sure the brake
warning light is not on before driving.
Shifting Into Park (P)
(Automatic Transmission)
{CAUTION:
It can be dangerous to get out of your vehicle
if the shift lever is not fully in PARK (P) with
the parking brake ®rmly set. Your vehicle can
roll. If you have left the engine running, the
vehicle can move suddenly. You or others
could be injured. To be sure your vehicle won't
move, even when you're on fairly level ground,
use the steps that follow.
1. Hold the brake pedal down with your right foot and
set the parking brake.
2-31
Page 113 of 368

Instrument Panel Overview...............................3-2
Hazard Warning Flashers................................3-4
Other Warning Devices...................................3-4
Horn.............................................................3-5
Tilt Wheel.....................................................3-5
Turn Signal/Multifunction Lever.........................3-6
Exterior Lamps.............................................3-12
Interior Lamps..............................................3-15
Head-Up Display (HUD).................................3-17
Accessory Power Outlets...............................3-20
Ashtrays and Cigarette Lighter........................3-21
Climate Controls............................................3-22
Dual Automatic Climate Control System...........3-22
Outlet Adjustment.........................................3-28
Warning Lights, Gages and Indicators.............3-29
Instrument Panel Cluster................................3-30
Speedometer and Odometer...........................3-31
Tachometer.................................................3-31
Safety Belt Reminder Light.............................3-31
Air Bag Readiness Light................................3-32
Air Bag Off Light..........................................3-33
Voltmeter Gage............................................3-34
Brake System Warning Light..........................3-35
Anti-Lock Brake System Warning Light.............3-36
Traction Control System (TCS) Warning Light . . .3-36Active Handling System Light.........................3-37
Engine Coolant Temperature Gage..................3-38
Malfunction Indicator Lamp.............................3-38
Engine Oil Pressure Gage.............................3-41
Security Light...............................................3-42
Check Gages Warning Light...........................3-42
Fuel Gage...................................................3-42
Driver Information Center (DIC).......................3-44
DIC Controls and Displays.............................3-45
DIC Warnings and Messages.........................3-53
Other Messages...........................................3-61
Audio System(s).............................................3-62
Setting the Time...........................................3-62
Radio with Cassette......................................3-63
Radio with CD..............................................3-67
Trunk-Mounted CD Changer...........................3-71
Theft-Deterrent Feature..................................3-75
Understanding Radio Reception......................3-77
Care of Your Cassette Tape Player.................3-78
Care of Your CDs.........................................3-79
Care of Your CD Player................................3-79
Fixed Mast Antenna (Z06)..............................3-79
Power Antenna Mast Care (Convertible)...........3-79
Integrated Windshield and Rear Window
Antennas (Coupe).....................................3-80
Section 3 Instrument Panel
3-1
Page 115 of 368

The main components of your instrument panel are the
following:
A. Instrument Panel Brightness Control
B. Head-Up Display Controls
C. Turn Signal/Multifunction Lever
D. Driver Information Center (DIC) (Located in the
Instrument Cluster)
E. Instrument Panel Cluster
F. Windshield Wiper/Washer Lever
G. Driver Information Center (DIC) Buttons
H. Hazard Warning Flasher Button
I. Center Air Outlets
J. Audio System
K. Climate Controls
L. Fog Lamp Button
M. Remote Hatch Release Button (Coupe) or Remote
Trunk Release Button (Convertible/Z06)N. Ignition Switch
O. Shift Lever (Automatic Shown)
P. Active Handling Button
Q. Accessory Power Outlet (Located in the Center
Console)
R. Selective Ride Control Switch
S. Air Bag Off Light
T. Instrument Panel Cupholder
U. Remote Fuel Door Release Button (Located in the
Center Console)
V. Ashtray and Cigarette Lighter
W. Parking Brake
X. Glove Box
Y. Instrument Panel Fuse Block (Located Behind the
Toe-Board)
Z. Air Bag Off Switch (Located in Glove Box)
3-3
Page 123 of 368

Reducing Speed While Using Cruise
Control
There are two ways to reduce speed while using cruise
control:
·Press in the SET button at the end of the lever until
you reach the lower speed you want, then release it.
·To slow down in very small amounts, press the SET
button brie¯y. Each time you do this, you'll go about
1 mph (1.6 km/h) slower.
The Driver Information Center (DIC) will display the
cruise set speed.
Passing Another Vehicle While Using
Cruise Control
Use the accelerator pedal to increase speed. When you
take your foot off the pedal, the vehicle will slow
down to the cruise control speed you set earlier.
Using Cruise Control on Hills
How well your cruise control will work on hills depends
upon your speed, load and the steepness of the
hills. When going downhill, you may have to brake or
shift to a lower gear to keep your speed down. Of
course, applying the brake takes you out of cruise
control. Many drivers ®nd this to be too much trouble
and don't use cruise control on steep hills.
Ending Cruise Control
There are two ways to turn off the cruise control:
·Step lightly on the brake pedal or push the clutch
pedal, if you have a manual transmission vehicle.
·Move the cruise switch to OFF.
The Driver Information Center (DIC) will display the
message CRUISE DISENGAGED.
Erasing Speed Memory
When you turn off the cruise control or the ignition,
cruise control set speed memory is erased.
3-11
Page 127 of 368

Make sure your instrument panel brightness control is in
full bright position. See ªInstrument Panel Brightness
Controlº under
Interior Lamps on page 3-15.
With Twilight Sentinel
žturned on, you can idle the
vehicle with the lamps off, even when it's dark outside.
First set the parking brake while the ignition is in
OFF. Then start the vehicle. The lamps will stay off until
you release the parking brake.
Twilight Sentinel
žalso provides exterior illumination as
you leave the vehicle. If Twilight Sentinelžhas turned
on the lamps when you turn off the ignition, your lamps
will remain on until:
·The exterior lamp switch is moved from OFF to the
parking lamp position, or
·a delay time that you select has elapsed.
See
Driver Information Center (DIC) on page 3-44to
select the delay time that you want. You can also select
no delay time.
If you turn off the ignition with the exterior lamp switch
in the parking lamp or headlamp position, the Twilight
Sentinel
ždelay will not occur. The lamps will turn off as
soon as the switch is turned off.
As with any vehicle, you should turn on the regular
headlamp system when you need it.
Interior Lamps
Instrument Panel Brightness
The knob for this feature is
located on the left side of
the instrument panel.
Push and release the knob and it will pop out. Turn the
knob clockwise to brighten the lights or counterclockwise
to dim them.
Be sure not to have this knob turned all the way down
with the lamps on during the day. Your Driver
Information Center (DIC) may not be visible.
3-15
Page 147 of 368

Brake System Warning Light
Your vehicle's hydraulic brake system is divided into two
parts. If one part isn't working, the other part can still
work and stop you. For good braking, though, you need
both parts working well.
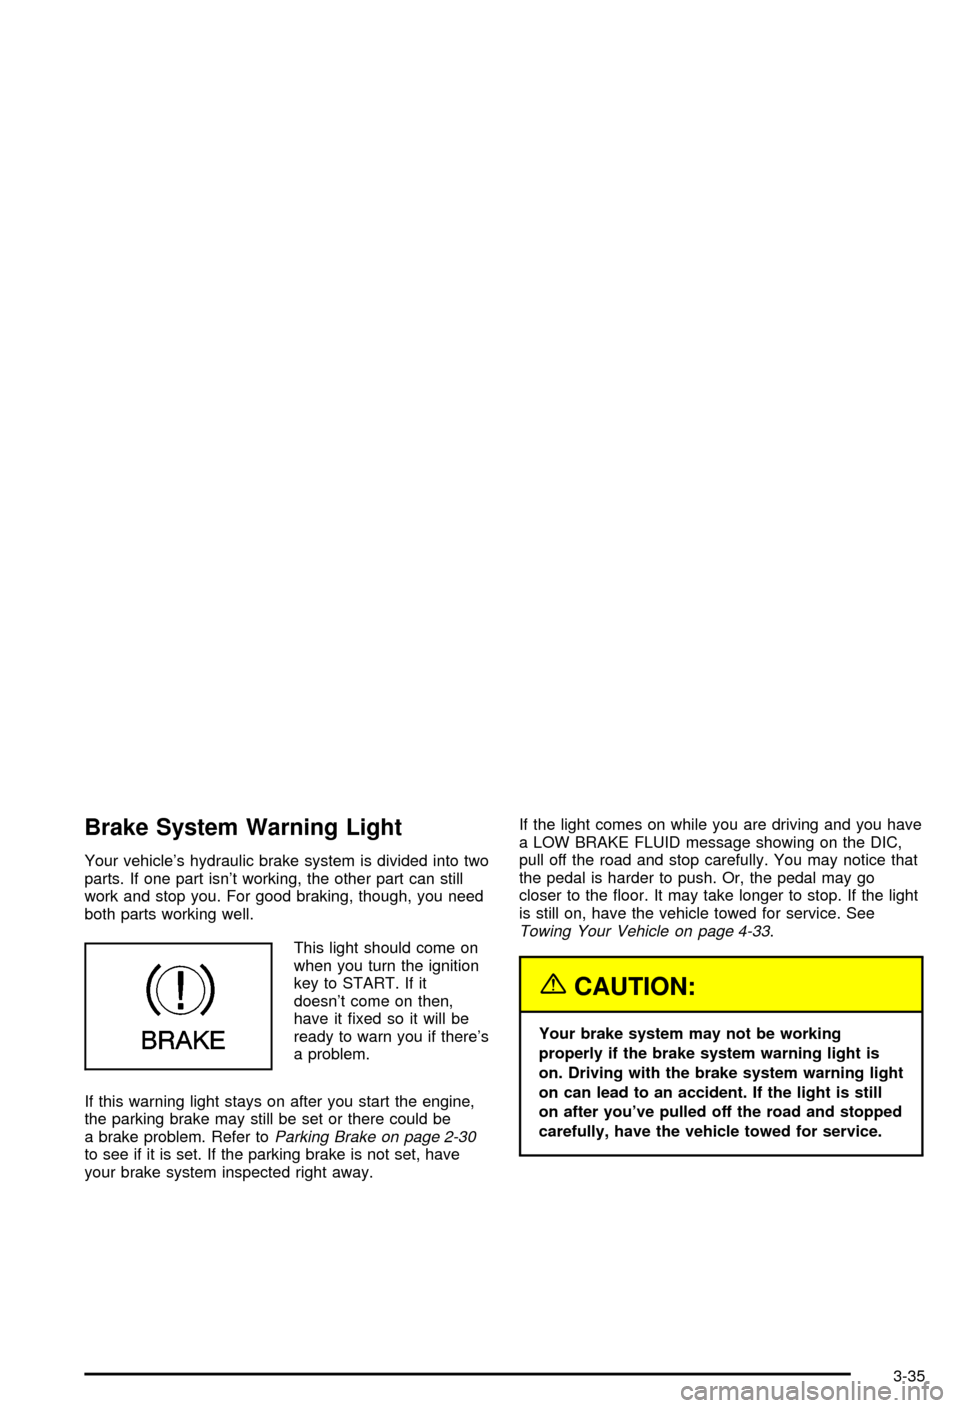
This light should come on
when you turn the ignition
key to START. If it
doesn't come on then,
have it ®xed so it will be
ready to warn you if there's
a problem.
If this warning light stays on after you start the engine,
the parking brake may still be set or there could be
a brake problem. Refer to
Parking Brake on page 2-30to see if it is set. If the parking brake is not set, have
your brake system inspected right away.If the light comes on while you are driving and you have
a LOW BRAKE FLUID message showing on the DIC,
pull off the road and stop carefully. You may notice that
the pedal is harder to push. Or, the pedal may go
closer to the ¯oor. It may take longer to stop. If the light
is still on, have the vehicle towed for service. See
Towing Your Vehicle on page 4-33.
{CAUTION:
Your brake system may not be working
properly if the brake system warning light is
on. Driving with the brake system warning light
on can lead to an accident. If the light is still
on after you've pulled off the road and stopped
carefully, have the vehicle towed for service.
3-35
Page 148 of 368

Anti-Lock Brake System
Warning Light
With the anti-lock brake
system, the light will come
on when your engine is
started and may stay on for
several seconds. That's
normal.
If the light stays on, turn the ignition to OFF. Or, if the
light comes on when you're driving, stop as soon
as possible and turn the ignition off. Then start the
engine again to reset the system. If the light still stays
on, or comes on again while you're driving, your vehicle
needs service. If the regular brake system warning
light isn't on, you still have brakes, but you don't have
anti-lock brakes. If the regular brake system warning
light is also on, you don't have anti-lock brakes
and there's a problem with your regular brakes. See
Brake System Warning Light on page 3-35. Also
see ªService ABSº underDIC Warnings and Messages
on page 3-53.
The anti-lock brake system warning light will come on
brie¯y when you turn the ignition key to ON. This is
normal. If the light doesn't come on then, have it ®xed
so it will be ready to warn you if there is a problem.
Traction Control System (TCS)
Warning Light
This light should come on
brie¯y as you start the
engine. If the light doesn't
come on then, have it
®xed so it will be ready to
warn you if there's a
problem.
If it stays on, or comes on and the DIC shows a
SERVICE TRACTION SYSTEM message when you're
driving, there's a problem with your TCS system
and your vehicle needs service. When this light is on,
the system will not limit wheel spin. Adjust your
driving accordingly. If the driver turns off the Traction
Control System by pressing the button on the console,
the TCS system light will come on and the TRACTION
SYSTEM OFF message will show on the DIC.
3-36