2003 CHEVROLET BLAZER four wheel drive
[x] Cancel search: four wheel drivePage 265 of 420

Service............................................................5-3
Doing Your Own Service Work.........................5-3
Adding Equipment to the Outside of Your
Vehicle......................................................5-4
Fuel................................................................5-4
Gasoline Octane............................................5-4
Gasoline Speci®cations....................................5-5
California Fuel...............................................5-5
Additives.......................................................5-5
Fuels in Foreign Countries...............................5-6
Filling Your Tank............................................5-6
Filling a Portable Fuel Container.......................5-8
Checking Things Under
the Hood......................................................5-8
Hood Release................................................5-9
Engine Compartment Overview.......................5-10
Engine Oil...................................................5-11
Engine Air Cleaner/Filter................................5-15
Automatic Transmission Fluid.........................5-17
Manual Transmission Fluid.............................5-20
Hydraulic Clutch...........................................5-21
Engine Coolant.............................................5-22
Radiator Pressure Cap..................................5-25
Engine Overheating.......................................5-25
Cooling System............................................5-27
Engine Fan Noise.........................................5-34Power Steering Fluid.....................................5-35
Windshield Washer Fluid................................5-36
Brakes........................................................5-37
Battery........................................................5-40
Jump Starting...............................................5-41
Rear Axle.......................................................5-45
Four-Wheel Drive............................................5-45
Front Axle......................................................5-46
Bulb Replacement..........................................5-47
Halogen Bulbs..............................................5-47
Headlamps..................................................5-48
One-Piece Front Turn Signal Lamps................5-50
Two-Piece Front Turn Signal Lamps................5-50
Taillamps.....................................................5-51
Replacement Bulbs.......................................5-52
Windshield Wiper Blade Replacement..............5-52
Tires..............................................................5-54
In¯ation -- Tire Pressure................................5-55
Tire Inspection and Rotation...........................5-56
When It Is Time for New Tires.......................5-57
Buying New Tires.........................................5-58
Uniform Tire Quality Grading..........................5-59
Wheel Alignment and Tire Balance..................5-60
Wheel Replacement......................................5-60
Tire Chains..................................................5-62
Section 5 Service and Appearance Care
5-1
Page 279 of 420
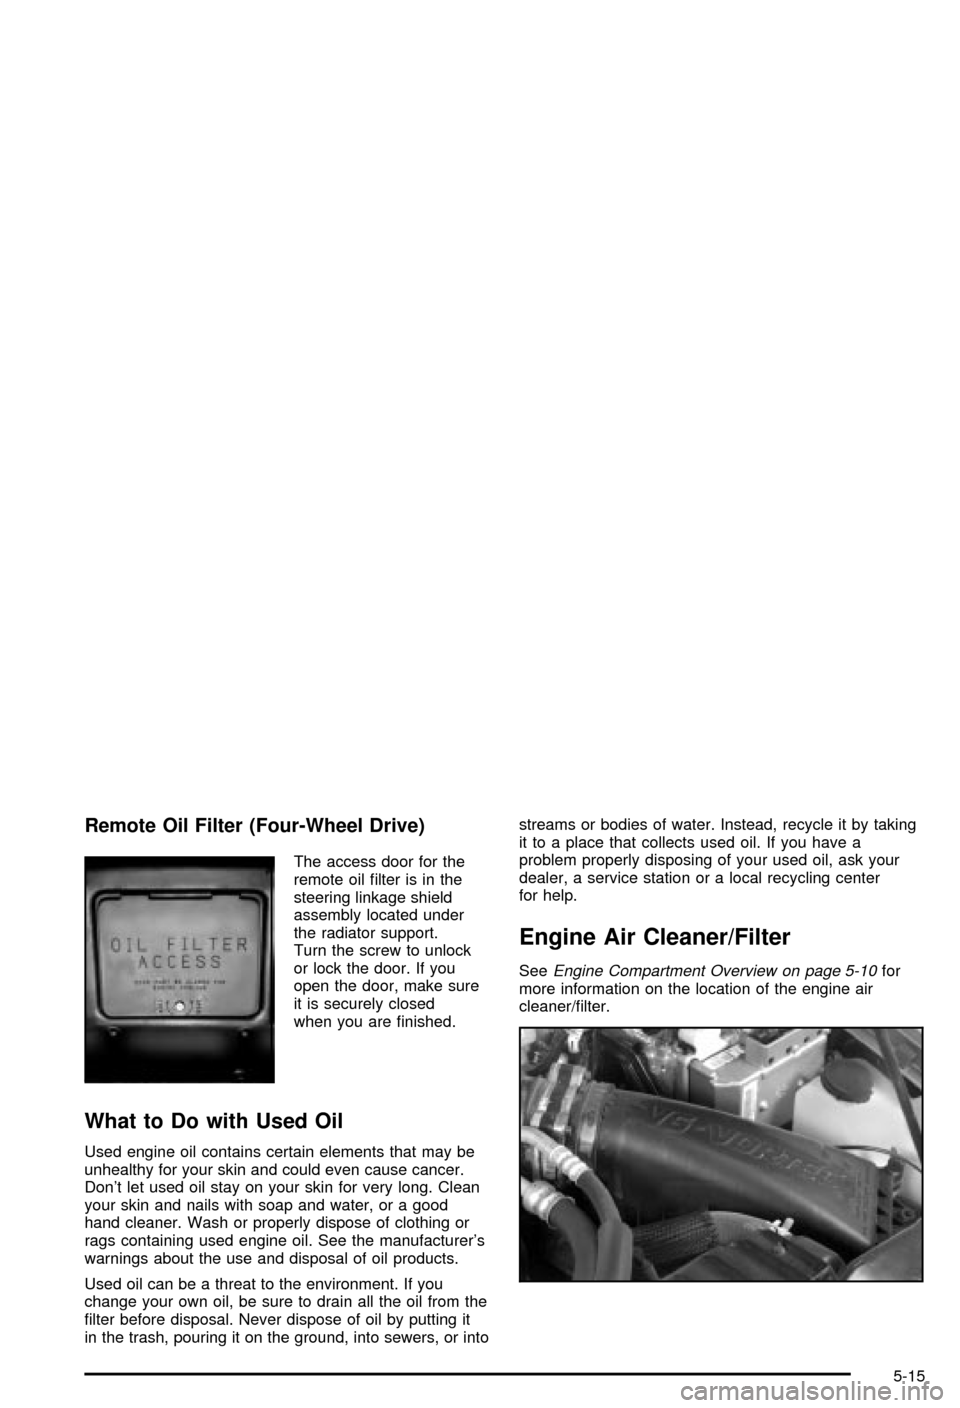
Remote Oil Filter (Four-Wheel Drive)
The access door for the
remote oil ®lter is in the
steering linkage shield
assembly located under
the radiator support.
Turn the screw to unlock
or lock the door. If you
open the door, make sure
it is securely closed
when you are ®nished.
What to Do with Used Oil
Used engine oil contains certain elements that may be
unhealthy for your skin and could even cause cancer.
Don't let used oil stay on your skin for very long. Clean
your skin and nails with soap and water, or a good
hand cleaner. Wash or properly dispose of clothing or
rags containing used engine oil. See the manufacturer's
warnings about the use and disposal of oil products.
Used oil can be a threat to the environment. If you
change your own oil, be sure to drain all the oil from the
®lter before disposal. Never dispose of oil by putting it
in the trash, pouring it on the ground, into sewers, or intostreams or bodies of water. Instead, recycle it by taking
it to a place that collects used oil. If you have a
problem properly disposing of your used oil, ask your
dealer, a service station or a local recycling center
for help.
Engine Air Cleaner/Filter
SeeEngine Compartment Overview on page 5-10for
more information on the location of the engine air
cleaner/®lter.
5-15
Page 303 of 420

Brake Wear
If you have four-wheel drive, your vehicle has four-wheel
disc brakes. If not, your vehicle has front disc brakes
and rear drum brakes.
Disc brake pads have built-in wear indicators that make
a high-pitched warning sound when the brake pads
are worn and new pads are needed. The sound
may come and go or be heard all the time your vehicle
is moving (except when you are pushing on the
brake pedal ®rmly).
{CAUTION:
The brake wear warning sound means that
soon your brakes won't work well. That could
lead to an accident. When you hear the brake
wear warning sound, have your vehicle
serviced.
Notice:Continuing to drive with worn-out brake
pads could result in costly brake repair.
Some driving conditions or climates may cause a brake
squeal when the brakes are ®rst applied or lightly
applied. This does not mean something is wrong with
your brakes.Properly torqued wheel nuts are necessary to help
prevent brake pulsation. When tires are rotated, inspect
brake pads for wear and evenly tighten wheel nuts in
the proper sequence to GM torque speci®cations.
If you have rear drum brakes, they don't have wear
indicators, but if you ever hear a rear brake rubbing
noise, have the rear brake linings inspected immediately.
Also, the rear brake drums should be removed and
inspected each time the tires are removed for rotation or
changing. When you have the front brake pads
replaced, have the rear brakes inspected, too.
Brake linings should always be replaced as complete
axle sets.
See
Brake System Inspection on page 6-32.
Brake Pedal Travel
See your dealer if the brake pedal does not return to
normal height, or if there is a rapid increase in
pedal travel. This could be a sign of brake trouble.
Brake Adjustment
Every time you make a brake stop, your disc brakes
adjust for wear.
If you don't have four-wheel drive and your brake pedal
goes down farther than normal, your rear drum
brakes may need adjustment. Adjust them by backing
up and ®rmly applying the brakes a few times.
5-39
Page 305 of 420
Jump Starting
If your battery has run down, you may want to use
another vehicle and some jumper cables to start your
vehicle. Be sure to follow the steps below to do it safely.
{CAUTION:
Batteries can hurt you. They can be dangerous
because:
·They contain acid that can burn you.
·They contain gas that can explode or
ignite.
·They contain enough electricity to
burn you.
If you don't follow these steps exactly, some
or all of these things can hurt you.
Notice:Ignoring these steps could result in costly
damage to your vehicle that wouldn't be covered
by your warranty.
Trying to start your vehicle by pushing or pulling it
won't work, and it could damage your vehicle.
1. Check the other vehicle. It must have a 12±volt
battery with a negative ground system.
Notice:If the other system isn't a 12-volt system
with a negative ground, both vehicles can be
damaged.
2. Get the vehicles close enough so the jumper cables
can reach, but be sure the vehicles aren't touching
each other. If they are, it could cause a ground
connection you don't want. You wouldn't be able to
start your vehicle, and the bad grounding could
damage the electrical systems.
To avoid the possibility of the vehicles rolling, set
the parking brake ®rmly on both vehicles involved in
the jump start procedure. Put an automatic
transmission in PARK (P) or a manual transmission
in NEUTRAL before setting the parking brake. If
you have a four-wheel-drive vehicle, be sure
the transfer case is not in NEUTRAL (N).
Notice:If you leave your radio on, it could be badly
damaged. The repairs wouldn't be covered by
your warranty.
3. Turn off the ignition on both vehicles. Unplug
unnecessary accessories plugged into the cigarette
lighter or in the accessory power outlets. Turn off
the radio and all lamps that aren't needed. This will
avoid sparks and help save both batteries. And it
could save your radio!
5-41
Page 309 of 420
Rear Axle
When to Check and Change Lubricant
Refer to the Maintenance Schedule to determine
how often to check the lubricant and when to change it.
See
Part A: Scheduled Maintenance Services on
page 6-4.
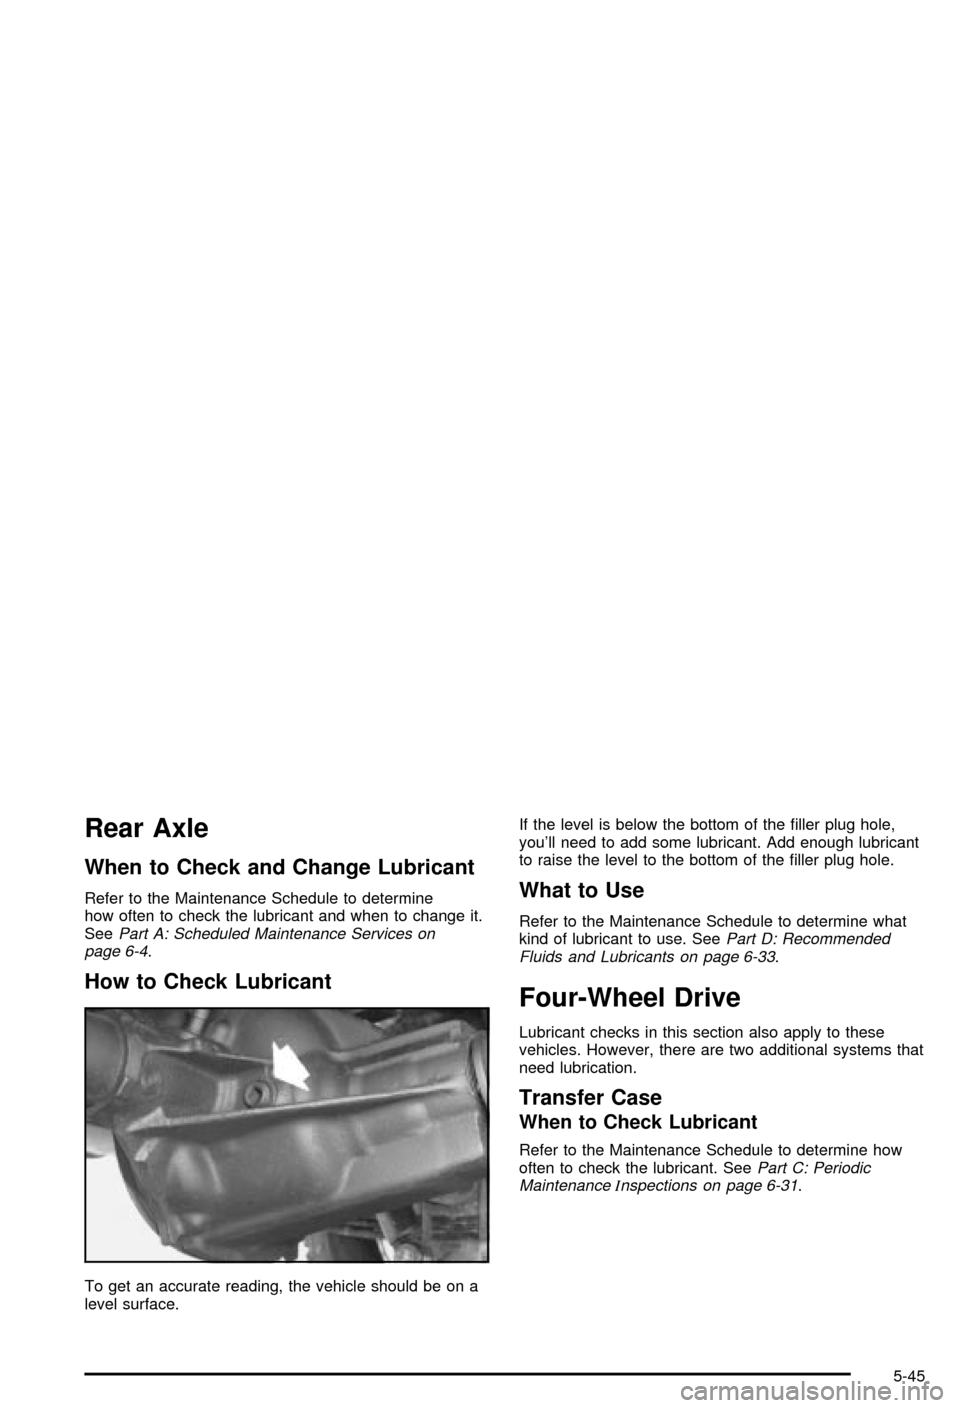
How to Check Lubricant
To get an accurate reading, the vehicle should be on a
level surface.If the level is below the bottom of the ®ller plug hole,
you'll need to add some lubricant. Add enough lubricant
to raise the level to the bottom of the ®ller plug hole.
What to Use
Refer to the Maintenance Schedule to determine what
kind of lubricant to use. SeePart D: Recommended
Fluids and Lubricants on page 6-33.
Four-Wheel Drive
Lubricant checks in this section also apply to these
vehicles. However, there are two additional systems that
need lubrication.
Transfer Case
When to Check Lubricant
Refer to the Maintenance Schedule to determine how
often to check the lubricant. SeePart C: Periodic
MaintenanceInspections on page 6-31.
5-45
Page 354 of 420

Fuse Usage
PARKLP Parking Lamps
LR PRK Left Rear Parking Lamps
LIFTGLASS Liftglass
IGN C Starter Solenoid, Fuel Pump,
PRNDL
HTDSEAT Heated Seat
HVAC Heating,Ventilation, Air Cooling
System
TRCHMSL Trailer Center High Mount Stop Light
RRDFOG Rear Defogger
TBC Truck Body ComputerFuse Usage
CRANK Clutch Switch, NSBU Switch
CHMSL Center High Mounted Stoplamp
HAZLP Hazard Lamps
VECHMSL Vehicle Center High-Mounted Stop
Lamp
RR DEFOG Rear Defogger
HTDMIR Heated Mirror
ATC Transfer Case (Four-Wheel Drive)
STOPLP Stop Lamps
RR W/W Rear Window Wiper
5-90
Page 357 of 420

Maintenance Schedule......................................6-2
Introduction...................................................6-2
Your Vehicle and the Environment....................6-2
Maintenance Requirements..............................6-2
How This Section is Organized.........................6-3
Part A: Scheduled Maintenance Services...........6-4
Using Your Maintenance Schedule....................6-4
Selecting the Right Schedule...........................6-5
Short Trip/City Scheduled Maintenance..............6-6
Long Trip/Highway Scheduled Maintenance......6-18
Part B: Owner Checks and Services................6-26
At Each Fuel Fill..........................................6-26
At Least Once a Month.................................6-26
At Least Twice a Year...................................6-27At Least Once a Year...................................6-28
Part C: Periodic MaintenanceInspections.........6-31
Steering, Suspension and Front Drive Axle
Boot and Seal Inspection............................6-31
Exhaust System Inspection............................6-31
Fuel System Inspection..................................6-31
Engine Cooling System Inspection...................6-31
Throttle System Inspection.............................6-32
Transfer Case and Front Axle (Four-Wheel
Drive) Inspection.......................................6-32
Brake System Inspection................................6-32
Part D: Recommended Fluids and Lubricants. . . .6-33
Part E: Maintenance Record...........................6-35
Section 6 Maintenance Schedule
6-1
Page 360 of 420

Part A: Scheduled Maintenance
Services
In this part are scheduled maintenance services which
are to be performed at the mileage intervals speci®ed.
Using Your Maintenance Schedule
We at General Motors want to help you keep your
vehicle in good working condition. But we don't know
exactly how you'll drive it. You may drive very short
distances only a few times a week. Or you may drive
long distances all the time in very hot, dusty weather.
You may use your vehicle in making deliveries. Or
you may drive it to work, to do errands or in many
other ways.
Because of all the different ways people use their
vehicles, maintenance needs vary. You may need more
frequent checks and replacements. So please read
the following and note how you drive. If you have any
questions on how to keep your vehicle in good condition,
see your dealer.This part tells you the maintenance services you should
have done and when to schedule them.
When you go to your dealer for your service needs,
you'll know that GM-trained and supported service
people will perform the work using genuine GM parts.
The proper ¯uids and lubricants to use are listed in
Part D. Make sure whoever services your vehicle uses
these. All parts should be replaced and all necessary
repairs done before you or anyone else drives the
vehicle.
These schedules are for vehicles that:
·carry passengers and cargo within recommended
limits. You will ®nd these limits on your vehicle's
Certi®cation/Tire label. See
Loading Your Vehicle on
page 4-52.
·are driven on reasonable road surfaces within legal
driving limits.
·are driven off-road in the recommended manner.
See
Off-Road Driving with Your Four-Wheel-Drive
Vehicle on page 4-15.
·use the recommended fuel. SeeGasoline Octane
on page 5-4
.
6-4