2003 CHEVROLET AVALANCHE air condition
[x] Cancel search: air conditionPage 317 of 492

A hydraulic pump inside each rear shock absorber
raises the rear of the vehicle to the proper height, based
on inputs from the road surface, while the vehicle is
being driven. It take approximately 2 miles (3.2 km) of
driving for the leveling to complete, depending on
the road surface conditions.
If the loaded vehicle is not moved for approximately
12 hours, the leveling system may bleed down to a lower
height. This can be especially apparent if a trailer is
left attached to a parked vehicle for long periods of time.
The vehicle must be driven to re-level the vehicle.
If a self-equalizing hitch is being used, the vehicle
should be driven approximately 2 miles (3.2 km) with the
trailer prior to adjusting (leveling) the hitch.
Adding a Snow Plow or Similar
Equipment
Before installing a snow plow on your vehicle, here are
some things you'll need to know:
Notice:If your vehicle doesn't have the snow plow
prep package, adding a plow can damage your
vehicle, and the repairs wouldn't be covered
by warranty. Unless your vehicle was built to carry
a snow plow, don't add one to your vehicle. If
your vehicle has the snow plow option called RPO
VYU (snow plow prep package), then the payloadyour vehicle can carry will be reduced when a snow
plow is installed. Your vehicle can be damaged if
either the front or rear axle ratings, or the GVW, are
exceeded.
Q:How do I know if my vehicle can handle a snow
plow?
A:Some vehicles are built with a special package,
called RPO VYU (snow plow prep package). If
your vehicle has this option, you can add a plow to
it, provided certain weights, such as the weights
on the vehicle's axles and the GVW, aren't
exceeded.
Q:How heavy can a snow plow safely be?
A:The plow your vehicle can carry depends on many
things, such as:
·The options your vehicle came with, and the weight
of those options,
·The weight and number of passengers you intend
to carry,
·The weight of items you've added to your vehicle,
like a tool box or truck cap,
·The total weight of any additional cargo you intend
to carry.
4-54
Page 339 of 492

California Fuel
If your vehicle is certi®ed to meet California Emission
Standards (see the underhood emission control label), it
is designed to operate on fuels that meet California
speci®cations. If this fuel is not available in states
adopting California emissions standards, your vehicle
will operate satisfactorily on fuels meeting federal
speci®cations, but emission control system performance
may be affected. The malfunction indicator lamp may
turn on (see
Malfunction Indicator Lamp on page 3-41)
and your vehicle may fail a smog-check test. If this
occurs, return to your authorized GM dealer for
diagnosis. If it is determined that the condition is caused
by the type of fuel used, repairs may not be covered
by your warranty.
Additives
To provide cleaner air, all gasolines in the United States
are now required to contain additives that will help
prevent engine and fuel system deposits from forming,
allowing your emission control system to work
properly. You should not have to add anything to your
fuel. Gasolines containing oxygenates, such as
ethers and ethanol, and reformulated gasolines may be
available in your area to contribute to clean air.General Motors recommends that you use these
gasolines, particularly if they comply with the
speci®cations described earlier.
Notice:Your vehicle was not designed for fuel that
contains methanol. Don't use fuel containing
methanol. It can corrode metal parts in your fuel
system and also damage the plastic and rubber
parts. That damage wouldn't be covered under your
warranty.
Some gasolines that are not reformulated for low
emissions may contain an octane-enhancing additive
called methylcyclopentadienyl manganese tricarbonyl
(MMT); ask the attendant where you buy gasoline
whether the fuel contains MMT. General Motors does
not recommend the use of such gasolines. Fuels
containing MMT can reduce the life of spark plugs and
the performance of the emission control system may
be affected. The malfunction indicator lamp may turn on.
If this occurs, return to your authorized GM dealer for
service.
5-6
Page 353 of 492
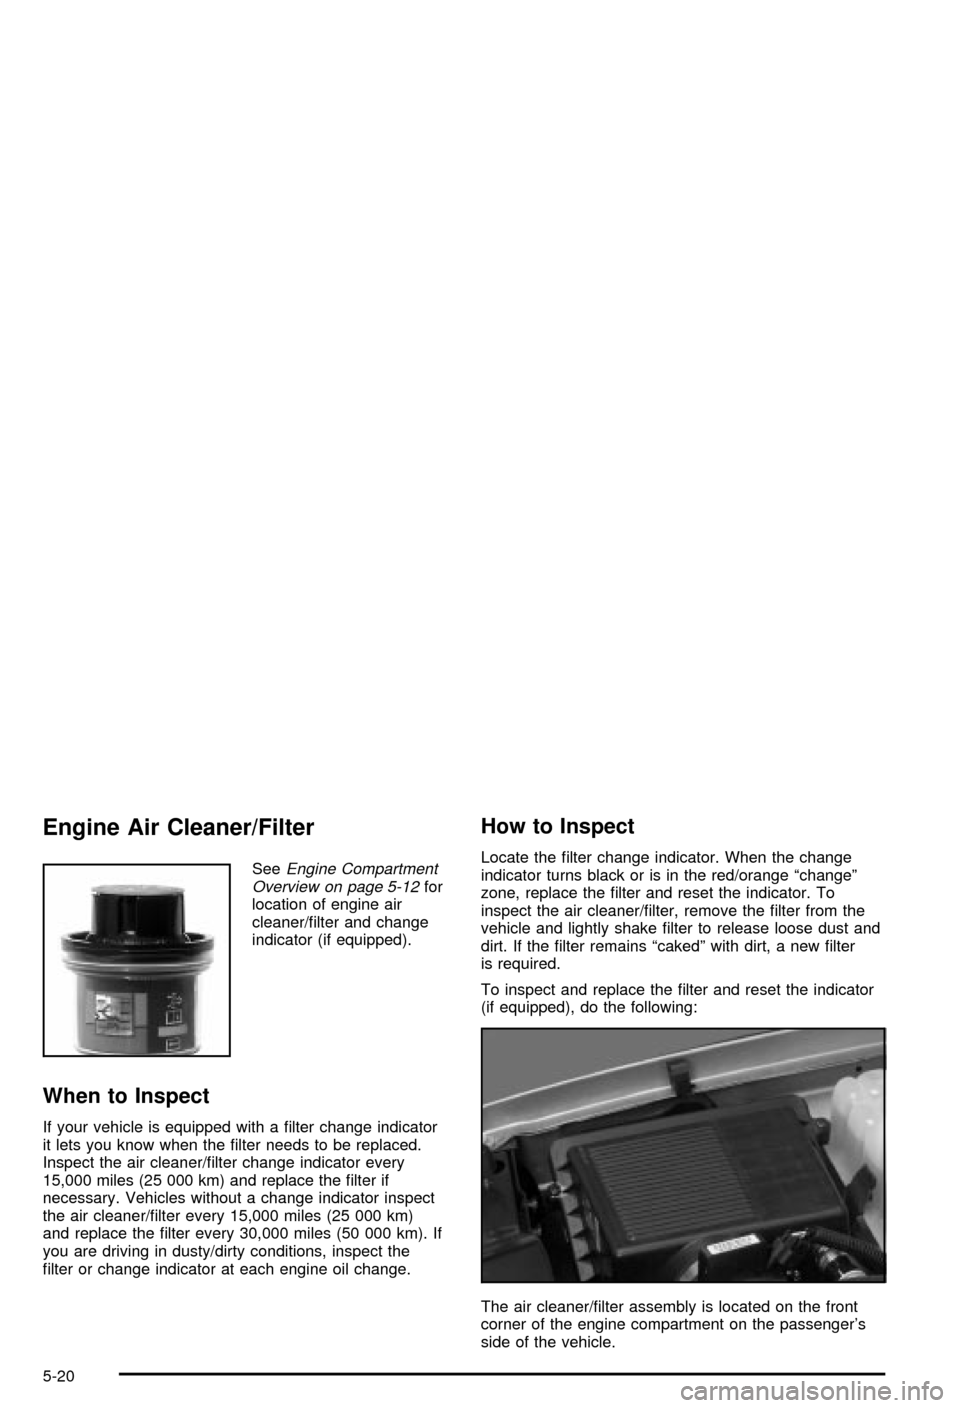
Engine Air Cleaner/Filter
SeeEngine Compartment
Overview on page 5-12for
location of engine air
cleaner/®lter and change
indicator (if equipped).
When to Inspect
If your vehicle is equipped with a ®lter change indicator
it lets you know when the ®lter needs to be replaced.
Inspect the air cleaner/®lter change indicator every
15,000 miles (25 000 km) and replace the ®lter if
necessary. Vehicles without a change indicator inspect
the air cleaner/®lter every 15,000 miles (25 000 km)
and replace the ®lter every 30,000 miles (50 000 km). If
you are driving in dusty/dirty conditions, inspect the
®lter or change indicator at each engine oil change.
How to Inspect
Locate the ®lter change indicator. When the change
indicator turns black or is in the red/orange ªchangeº
zone, replace the ®lter and reset the indicator. To
inspect the air cleaner/®lter, remove the ®lter from the
vehicle and lightly shake ®lter to release loose dust and
dirt. If the ®lter remains ªcakedº with dirt, a new ®lter
is required.
To inspect and replace the ®lter and reset the indicator
(if equipped), do the following:
The air cleaner/®lter assembly is located on the front
corner of the engine compartment on the passenger's
side of the vehicle.
5-20
Page 360 of 492
{CAUTION:
You can be burned if you spill coolant on hot
engine parts. Coolant contains ethylene glycol,
and it will burn if the engine parts are hot
enough. Don't spill coolant on a hot engine.
When replacing the pressure cap, make sure it is
hand-tight.
Coolant Surge Tank Pressure Cap
The coolant surge tank pressure cap must be fully
installed on the coolant surge tank. SeeEngine
Compartment Overview on page 5-12for more
information on location.
Notice:Your pressure cap is a pressure-type cap
and must be tightly installed to prevent coolant loss
and possible engine damage from overheating.
See ªCapacities and Speci®cationsº for more
information.
Engine Overheating
You will ®nd a coolant temperature gage on your
vehicle's instrument panel. SeeEngine Coolant
Temperature Gage on page 3-39. In addition, you will
®nd a LOW COOLANT, ENGINE COOLANT HOT,
ENGINE OVERHEATED and a REDUCED ENGINE
POWER message in the DIC on the instrument panel.
See
DIC Warnings and Messages on page 3-57.
Overheated Engine Protection
Operating Mode
If an overheated engine condition exists and the
REDUCED ENGINE POWER message is displayed, an
overheat protection mode which alternates ®ring
groups of cylinders helps prevent engine damage. In
this mode, you will notice a loss in power and engine
performance. This operating mode allows your vehicle to
be driven to a safe place in an emergency. Driving
extended miles (km) and/or towing a trailer in the
overheat protection mode should be avoided.
Notice:After driving in the overheated engine
protection operating mode, to avoid engine damage,
allow the engine to cool before attempting any
repair. The engine oil will be severely degraded.
Repair the cause of coolant loss, change the oil and
reset the oil life system. See ªEngine Oilº in the
Index.
5-27
Page 369 of 492
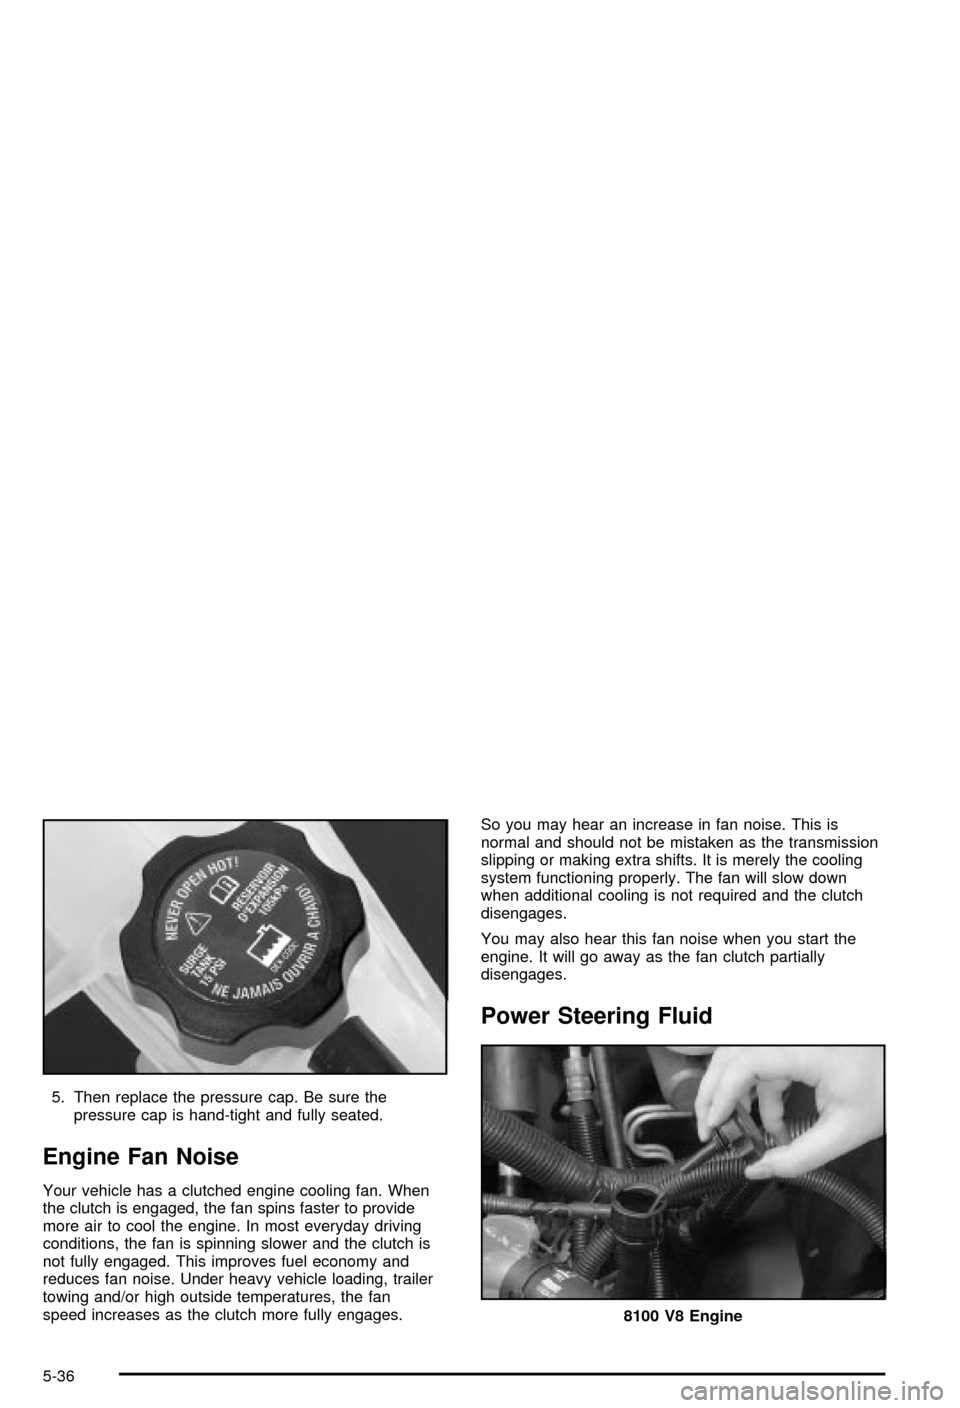
5. Then replace the pressure cap. Be sure the
pressure cap is hand-tight and fully seated.
Engine Fan Noise
Your vehicle has a clutched engine cooling fan. When
the clutch is engaged, the fan spins faster to provide
more air to cool the engine. In most everyday driving
conditions, the fan is spinning slower and the clutch is
not fully engaged. This improves fuel economy and
reduces fan noise. Under heavy vehicle loading, trailer
towing and/or high outside temperatures, the fan
speed increases as the clutch more fully engages.So you may hear an increase in fan noise. This is
normal and should not be mistaken as the transmission
slipping or making extra shifts. It is merely the cooling
system functioning properly. The fan will slow down
when additional cooling is not required and the clutch
disengages.
You may also hear this fan noise when you start the
engine. It will go away as the fan clutch partially
disengages.
Power Steering Fluid
8100 V8 Engine
5-36
Page 374 of 492
Notice:
·Using the wrong ¯uid can badly damage brake
system parts. For example, just a few drops of
mineral-based oil, such as engine oil, in your
brake system can damage brake system
parts so badly that they'll have to be replaced.
Don't let someone put in the wrong kind of ¯uid.
·If you spill brake ¯uid on your vehicle's painted
surfaces, the paint ®nish can be damaged. Be
careful not to spill brake ¯uid on your vehicle. If
you do, wash it off immediately. See
ªAppearance Careº in the Index.
Brake Wear
Your vehicle has four-wheel disc brakes.
Disc brake pads have built-in wear indicators that make
a high-pitched warning sound when the brake pads
are worn and new pads are needed. The sound
may come and go or be heard all the time your vehicle
is moving (except when you are pushing on the
brake pedal ®rmly).
{CAUTION:
The brake wear warning sound means that
soon your brakes won't work well. That could
lead to an accident. When you hear the brake
wear warning sound, have your vehicle
serviced.
Notice:Continuing to drive with worn-out brake
pads could result in costly brake repair.
Some driving conditions or climates may cause a brake
squeal when the brakes are ®rst applied or lightly
applied. This does not mean something is wrong with
your brakes.
Properly torqued wheel nuts are necessary to help
prevent brake pulsation. When tires are rotated, inspect
brake pads for wear and evenly tighten wheel nuts in
the proper sequence to GM torque speci®cations.
Brake linings should always be replaced as complete
axle sets.
See
Brake System Inspection on page 6-16.
5-41
Page 400 of 492

Wheel Alignment and Tire Balance
The wheels on your vehicle were aligned and balanced
carefully at the factory to give you the longest tire life
and best overall performance.
Scheduled wheel alignment and wheel balancing are
not needed. However, if you notice unusual tire wear or
your vehicle pulling one way or the other, the alignment
may need to be reset. If you notice your vehicle
vibrating when driving on a smooth road, your wheels
may need to be rebalanced.
Wheel Replacement
Replace any wheel that is bent, cracked or badly rusted
or corroded. If wheel nuts keep coming loose, the
wheel, wheel bolts and wheel nuts should be replaced.
If the wheel leaks air, replace it (except some
aluminum wheels, which can sometimes be repaired).
See your dealer if any of these conditions exist.
Your dealer will know the kind of wheel you need.Each new wheel should have the same load-carrying
capacity, diameter, width, offset and be mounted
the same way as the one it replaces.
If you need to replace any of your wheels, wheel bolts
or wheel nuts, replace them only with new GM
original equipment parts. This way, you will be sure to
have the right wheel, wheel bolts and wheel nuts
for your vehicle.
{CAUTION:
Using the wrong replacement wheels, wheel
bolts or wheel nuts on your vehicle can be
dangerous. It could affect the braking and
handling of your vehicle, make your tires lose
air and make you lose control. You could have
a collision in which you or others could be
injured. Always use the correct wheel, wheel
bolts and wheel nuts for replacement.
5-67
Page 427 of 492
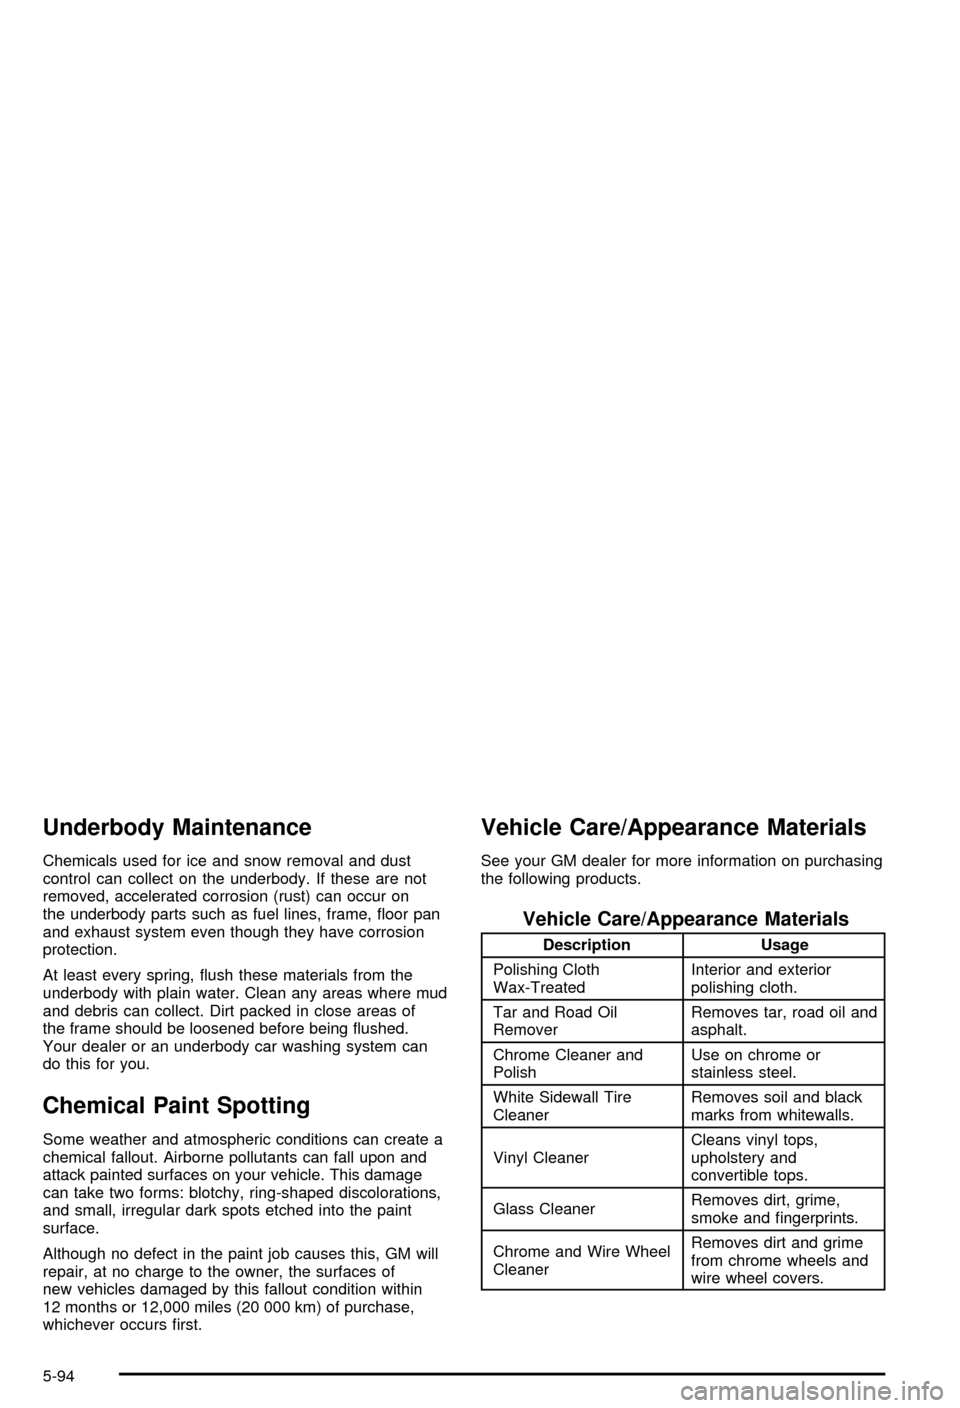
Underbody Maintenance
Chemicals used for ice and snow removal and dust
control can collect on the underbody. If these are not
removed, accelerated corrosion (rust) can occur on
the underbody parts such as fuel lines, frame, ¯oor pan
and exhaust system even though they have corrosion
protection.
At least every spring, ¯ush these materials from the
underbody with plain water. Clean any areas where mud
and debris can collect. Dirt packed in close areas of
the frame should be loosened before being ¯ushed.
Your dealer or an underbody car washing system can
do this for you.
Chemical Paint Spotting
Some weather and atmospheric conditions can create a
chemical fallout. Airborne pollutants can fall upon and
attack painted surfaces on your vehicle. This damage
can take two forms: blotchy, ring-shaped discolorations,
and small, irregular dark spots etched into the paint
surface.
Although no defect in the paint job causes this, GM will
repair, at no charge to the owner, the surfaces of
new vehicles damaged by this fallout condition within
12 months or 12,000 miles (20 000 km) of purchase,
whichever occurs ®rst.
Vehicle Care/Appearance Materials
See your GM dealer for more information on purchasing
the following products.
Vehicle Care/Appearance Materials
Description Usage
Polishing Cloth
Wax-TreatedInterior and exterior
polishing cloth.
Tar and Road Oil
RemoverRemoves tar, road oil and
asphalt.
Chrome Cleaner and
PolishUse on chrome or
stainless steel.
White Sidewall Tire
CleanerRemoves soil and black
marks from whitewalls.
Vinyl CleanerCleans vinyl tops,
upholstery and
convertible tops.
Glass CleanerRemoves dirt, grime,
smoke and ®ngerprints.
Chrome and Wire Wheel
CleanerRemoves dirt and grime
from chrome wheels and
wire wheel covers.
5-94