2003 CHEVROLET AVALANCHE light
[x] Cancel search: lightPage 348 of 492
A. Engine Air Cleaner/Filter. SeeEngine Air
Cleaner/Filter on page 5-20.
B. Coolant Surge Tank. See
Cooling System on
page 5-30andCoolant Surge Tank Pressure Cap
on page 5-27.
C. Air Filter Restriction Indicator (If Equipped). See
Engine Air Cleaner/Filter on page 5-20.
D. Engine Oil Dipstick. See
Engine Oil on page 5-15.
E. Automatic Transmission Dipstick. See
Automatic
Transmission Fluid on page 5-22.
F. Engine Oil Fill. See
Engine Oil on page 5-15.
G. Fan. See
Cooling System on page 5-30andEngine
Fan Noise on page 5-36.
H. Remote Negative (-) Terminal (GND). See
Jump
Starting on page 5-43.
I. Remote Positive (+) Terminal. See
Jump Starting on
page 5-43.
J. Power Steering Fluid Reservoir. See
Power Steering
Fluid on page 5-36.
K. Brake Fluid Reservoir. See
Brakes on page 5-39.
L. Underhood Fuse Block. See ªUnderhood Fuse Blockº
under
Fuses and Circuit Breakers on page 5-97.
M. Battery. See
Battery on page 5-42.
N. Windshield Washer Fluid Reservoir. See
Windshield
Washer Fluid on page 5-38.
Engine Oil
If the CHECK OIL LEVEL light appears on the
instrument cluster, it means you need to check your
engine oil level right away.
For more information, see ªCHECK OIL LEVELº under
DIC Warnings and Messages on page 3-57.
You should check your engine oil level regularly; this is
an added reminder.
Checking Engine Oil
It's a good idea to check your engine oil every time you
get fuel. In order to get an accurate reading, the oil
must be warm and the vehicle must be on level ground.
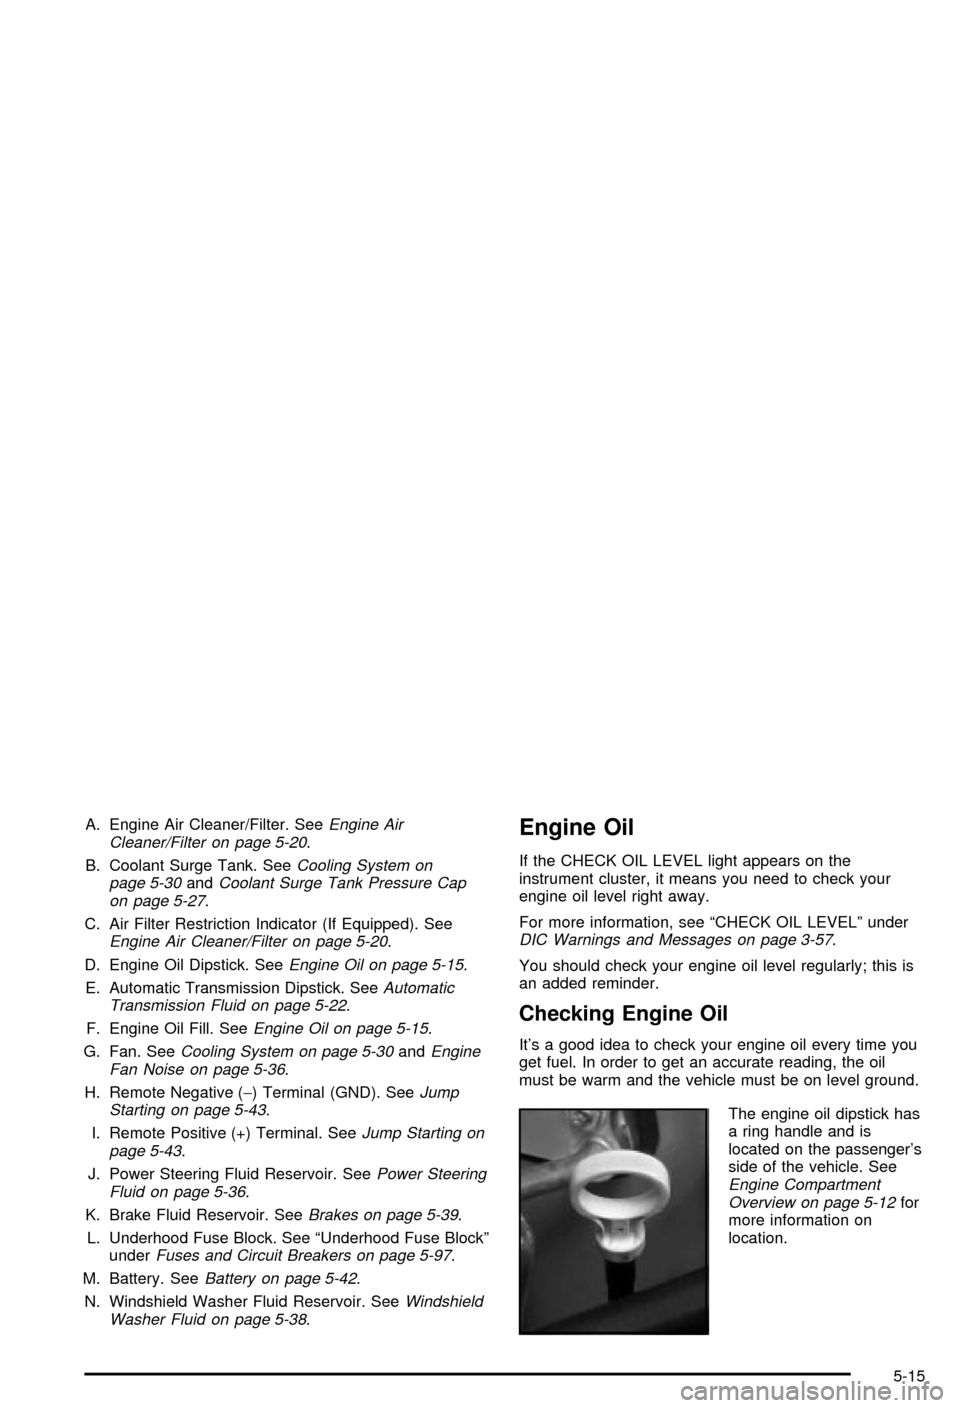
The engine oil dipstick has
a ring handle and is
located on the passenger's
side of the vehicle. See
Engine Compartment
Overview on page 5-12for
more information on
location.
5-15
Page 353 of 492
Engine Air Cleaner/Filter
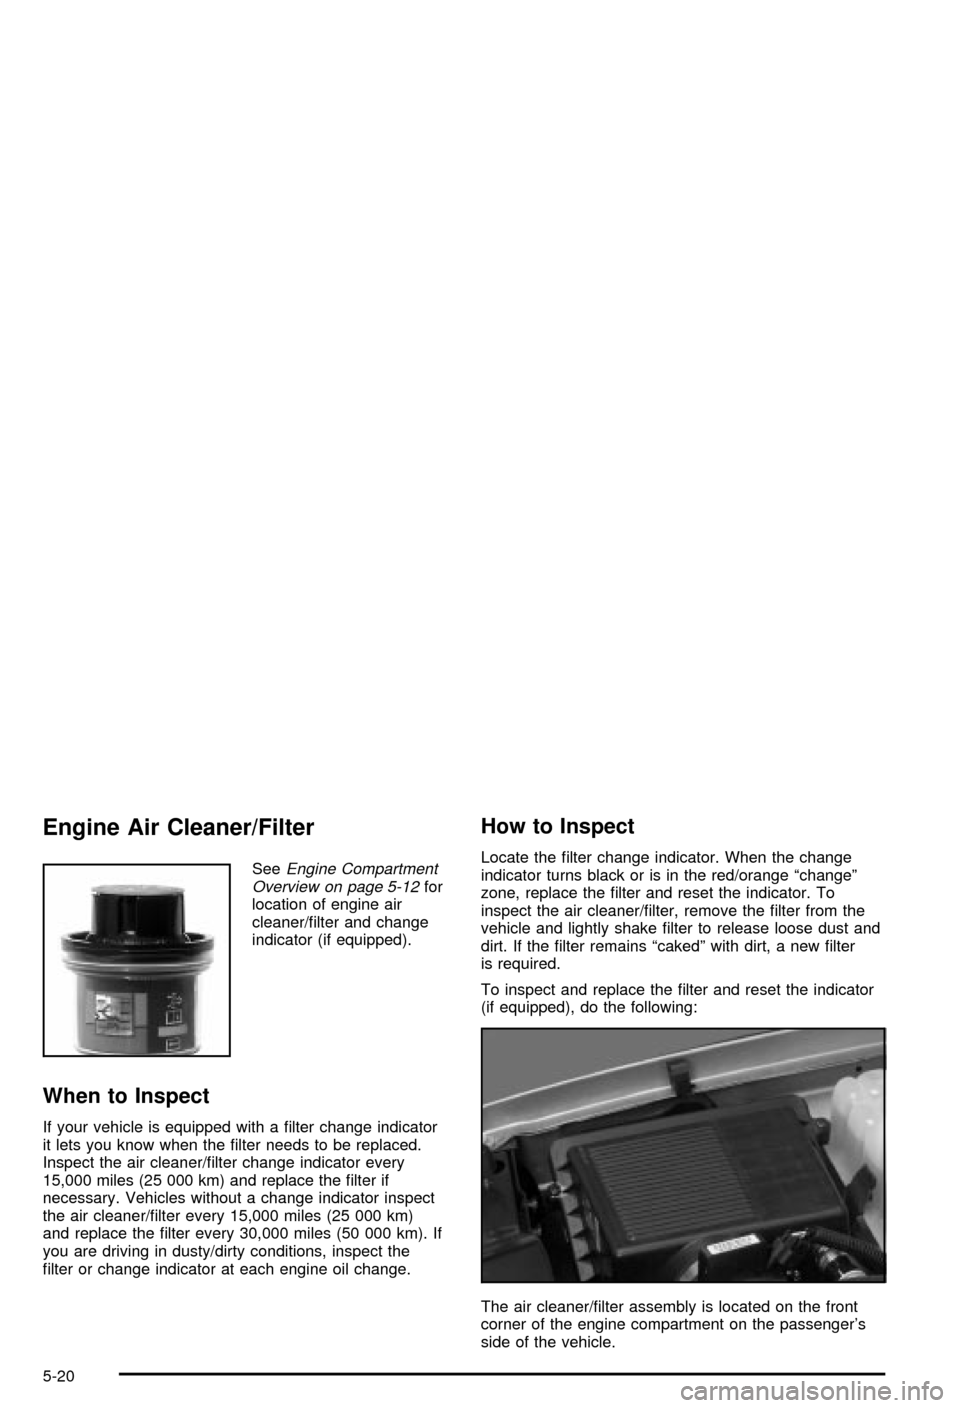
SeeEngine Compartment
Overview on page 5-12for
location of engine air
cleaner/®lter and change
indicator (if equipped).
When to Inspect
If your vehicle is equipped with a ®lter change indicator
it lets you know when the ®lter needs to be replaced.
Inspect the air cleaner/®lter change indicator every
15,000 miles (25 000 km) and replace the ®lter if
necessary. Vehicles without a change indicator inspect
the air cleaner/®lter every 15,000 miles (25 000 km)
and replace the ®lter every 30,000 miles (50 000 km). If
you are driving in dusty/dirty conditions, inspect the
®lter or change indicator at each engine oil change.
How to Inspect
Locate the ®lter change indicator. When the change
indicator turns black or is in the red/orange ªchangeº
zone, replace the ®lter and reset the indicator. To
inspect the air cleaner/®lter, remove the ®lter from the
vehicle and lightly shake ®lter to release loose dust and
dirt. If the ®lter remains ªcakedº with dirt, a new ®lter
is required.
To inspect and replace the ®lter and reset the indicator
(if equipped), do the following:
The air cleaner/®lter assembly is located on the front
corner of the engine compartment on the passenger's
side of the vehicle.
5-20
Page 358 of 492
A 50/50 mixture of clean, drinkable water and
DEX-COOLžcoolant will:
·Give freezing protection down to-34ÉF (-37ÉC).
·Give boiling protection up to 265ÉF (129ÉC).
·Protect against rust and corrosion.
·Help keep the proper engine temperature.
·Let the warning lights and gages work as they
should.
Notice:When adding coolant, it is important that
you use only DEX-COOLž(silicate-free) coolant.
If coolant other than DEX-COOLžis added to
the system, premature engine, heater core or
radiator corrosion may result. In addition, the engine
coolant will require change sooner -- at 30,000 miles
(50,000 km) or 24 months, whichever occurs ®rst.
Damage caused by the use of coolant other
than DEX-COOL
žis not covered by your new vehicle
warranty.
What to Use
Use a mixture of one-halfclean, drinkable waterand
one-half DEX-COOLžcoolant which won't damage
aluminum parts. If you use this coolant mixture,
you don't need to add anything else.
{CAUTION:
Adding only plain water to your cooling
system can be dangerous. Plain water, or
some other liquid such as alcohol, can boil
before the proper coolant mixture will. Your
vehicle's coolant warning system is set for the
proper coolant mixture. With plain water or the
wrong mixture, your engine could get too hot
but you wouldn't get the overheat warning.
Your engine could catch ®re and you or others
could be burned. Use a 50/50 mixture of clean,
drinkable water and DEX-COOL
žcoolant.
Notice:If you use an improper coolant mixture,
your engine could overheat and be badly damaged.
The repair cost wouldn't be covered by your
warranty. Too much water in the mixture can freeze
and crack the engine, radiator, heater core and
other parts.
If you have to add coolant more than four times a year,
have your dealer check your cooling system.
Notice:If you use the proper coolant, you don't
have to add extra inhibitors or additives which claim
to improve the system. These can be harmful.
5-25
Page 374 of 492
Notice:
·Using the wrong ¯uid can badly damage brake
system parts. For example, just a few drops of
mineral-based oil, such as engine oil, in your
brake system can damage brake system
parts so badly that they'll have to be replaced.
Don't let someone put in the wrong kind of ¯uid.
·If you spill brake ¯uid on your vehicle's painted
surfaces, the paint ®nish can be damaged. Be
careful not to spill brake ¯uid on your vehicle. If
you do, wash it off immediately. See
ªAppearance Careº in the Index.
Brake Wear
Your vehicle has four-wheel disc brakes.
Disc brake pads have built-in wear indicators that make
a high-pitched warning sound when the brake pads
are worn and new pads are needed. The sound
may come and go or be heard all the time your vehicle
is moving (except when you are pushing on the
brake pedal ®rmly).
{CAUTION:
The brake wear warning sound means that
soon your brakes won't work well. That could
lead to an accident. When you hear the brake
wear warning sound, have your vehicle
serviced.
Notice:Continuing to drive with worn-out brake
pads could result in costly brake repair.
Some driving conditions or climates may cause a brake
squeal when the brakes are ®rst applied or lightly
applied. This does not mean something is wrong with
your brakes.
Properly torqued wheel nuts are necessary to help
prevent brake pulsation. When tires are rotated, inspect
brake pads for wear and evenly tighten wheel nuts in
the proper sequence to GM torque speci®cations.
Brake linings should always be replaced as complete
axle sets.
See
Brake System Inspection on page 6-16.
5-41
Page 377 of 492

2. Get the vehicles close enough so the jumper cables
can reach, but be sure the vehicles aren't touching
each other. If they are, it could cause a ground
connection you don't want. You wouldn't be able to
start your vehicle, and the bad grounding could
damage the electrical systems.
To avoid the possibility of the vehicles rolling, set
the parking brake ®rmly on both vehicles involved in
the jump start procedure. Put an automatic
transmission in PARK (P) or a manual transmission
in NEUTRAL before setting the parking brake.
Notice:If you leave your radio on, it could be badly
damaged. The repairs wouldn't be covered by
your warranty.
3. Turn off the ignition on both vehicles. Unplug
unnecessary accessories plugged into the cigarette
lighter or accessory power outlets. Turn off the
radio and all lamps that aren't needed. This
will avoid sparks and help save both batteries. And
it could save your radio!4. Open the hoods and locate the positive (+) and
negative (-) terminal locations of the other vehicle.
Your vehicle has a remote positive (+) jump
starting terminal and a remote negative (-) jump
starting terminal. You should always use these
remote terminals instead of the terminals on the
battery.
The remote positive (+)
terminal is located under a
red plastic cover near
the engine accessory drive
bracket. To access the
remote positive (+)
terminal, open the red
plastic cover.
5-44
Page 379 of 492
{CAUTION:
Using a match near a battery can cause battery
gas to explode. People have been hurt doing
this, and some have been blinded. Use a
¯ashlight if you need more light.
Be sure the battery has enough water. You
don't need to add water to the ACDelco
ž
battery installed in your new vehicle. But if a
battery has ®ller caps, be sure the right
amount of ¯uid is there. If it is low, add water
to take care of that ®rst. If you don't, explosive
gas could be present.
Battery ¯uid contains acid that can burn you.
Don't get it on you. If you accidentally get it in
your eyes or on your skin, ¯ush the place with
water and get medical help immediately.5. Check that the jumper cables don't have loose or
missing insulation. If they do, you could get a
shock. The vehicles could be damaged too.
Before you connect the cables, here are some
basic things you should know. Positive (+) will go to
positive (+) or to a remote positive terminal (+) if
the vehicle has one. Negative (-) will go to a heavy,
unpainted metal engine part or to a remote
negative (-) terminal, if the vehicle has one.
Don't connect positive (+) to negative (-) or you'll
get a short that would damage the battery and
maybe other parts too.
{CAUTION:
Fans or other moving engine parts can injure
you badly. Keep your hands away from moving
parts once the engine is running.
5-46
Page 399 of 492

While the tires available on General Motors passenger
cars and light trucks may vary with respect to these
grades, they must also conform to federal safety
requirements and additional General Motors Tire
Performance Criteria (TPC) standards.
Treadwear
The treadwear grade is a comparative rating based on
the wear rate of the tire when tested under controlled
conditions on a speci®ed government test course.
For example, a tire graded 150 would wear one and
a half (1.5) times as well on the government course as
a tire graded 100. The relative performance of tires
depends upon the actual conditions of their use,
however, and may depart signi®cantly from the norm
due to variations in driving habits, service practices and
differences in road characteristics and climate.
Traction ± AA, A, B, C
The traction grades, from highest to lowest, are AA, A,
B, and C. Those grades represent the tire's ability
to stop on wet pavement as measured under controlled
conditions on speci®ed government test surfaces of
asphalt and concrete. A tire marked C may have poor
traction performance. Warning: The traction grade
assigned to this tire is based on straight-ahead braking
traction tests, and does not include acceleration,
cornering, hydroplaning, or peak traction characteristics.
Temperature ± A, B, C
The temperature grades are A (the highest), B, and C,
representing the tire's resistance to the generation
of heat and its ability to dissipate heat when tested
under controlled conditions on a speci®ed indoor
laboratory test wheel. Sustained high temperature can
cause the material of the tire to degenerate and
reduce tire life, and excessive temperature can lead to
sudden tire failure. The grade C corresponds to a
level of performance which all passenger car tires must
meet under the Federal Motor Vehicle Safety Standard
No. 109. Grades B and A represent higher levels of
performance on the laboratory test wheel than the
minimum required by law.
Warning: The temperature grade for this tire is
established for a tire that is properly in¯ated and not
overloaded. Excessive speed, underin¯ation, or
excessive loading, either separately or in combination,
can cause heat buildup and possible tire failure.
5-66
Page 428 of 492
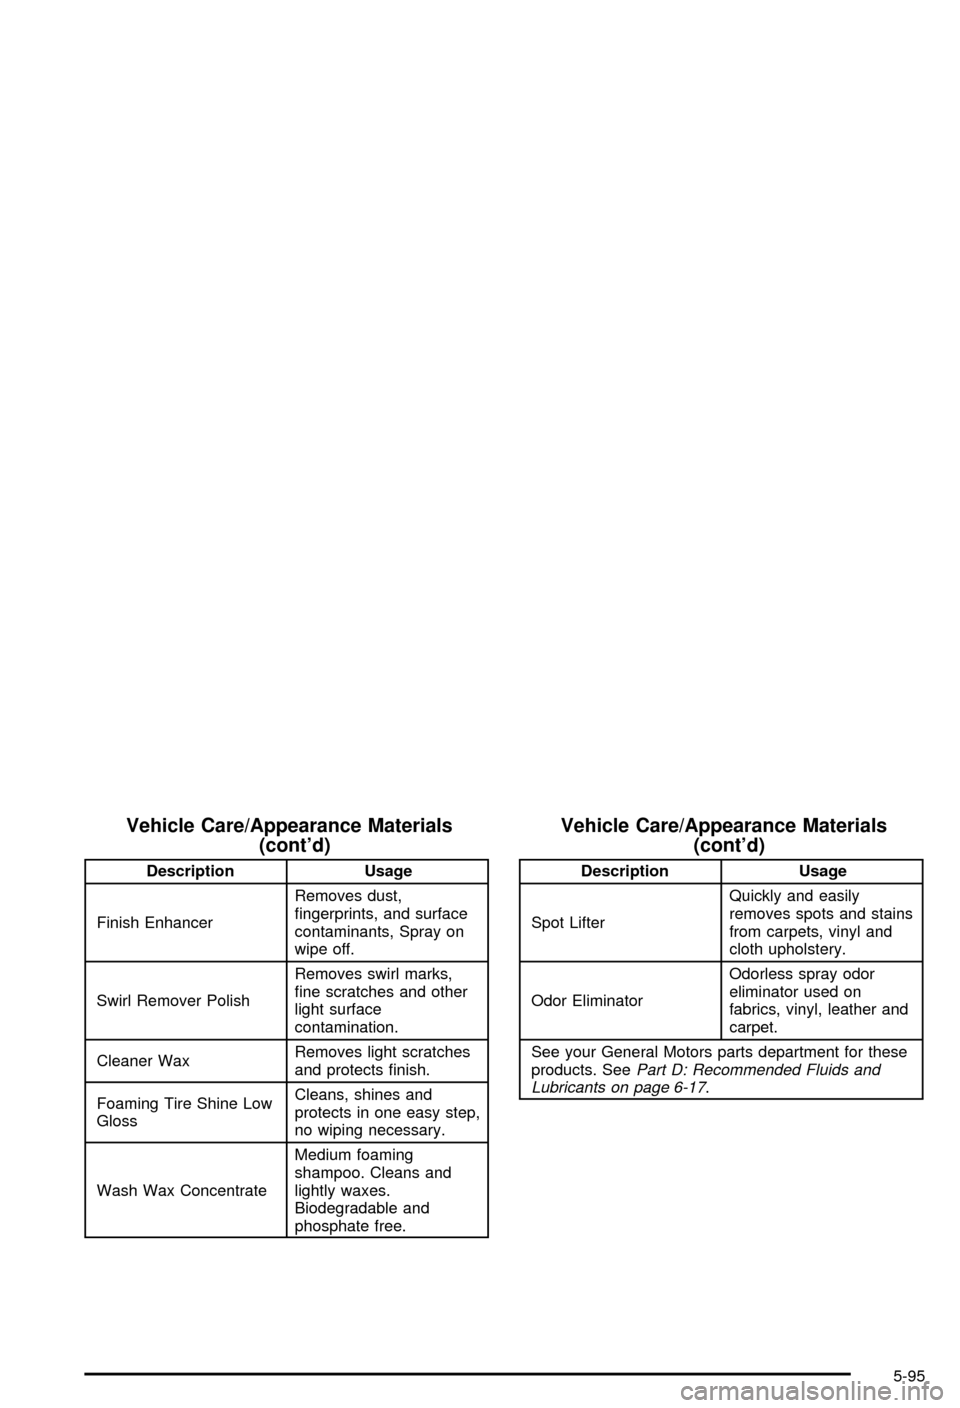
Vehicle Care/Appearance Materials
(cont'd)
Description Usage
Finish EnhancerRemoves dust,
®ngerprints, and surface
contaminants, Spray on
wipe off.
Swirl Remover PolishRemoves swirl marks,
®ne scratches and other
light surface
contamination.
Cleaner WaxRemoves light scratches
and protects ®nish.
Foaming Tire Shine Low
GlossCleans, shines and
protects in one easy step,
no wiping necessary.
Wash Wax ConcentrateMedium foaming
shampoo. Cleans and
lightly waxes.
Biodegradable and
phosphate free.
Vehicle Care/Appearance Materials
(cont'd)
Description Usage
Spot LifterQuickly and easily
removes spots and stains
from carpets, vinyl and
cloth upholstery.
Odor EliminatorOdorless spray odor
eliminator used on
fabrics, vinyl, leather and
carpet.
See your General Motors parts department for these
products. See
Part D: Recommended Fluids and
Lubricants on page 6-17.
5-95