2003 CHEVROLET ASTRO CARGO VAN fuel pressure
[x] Cancel search: fuel pressurePage 125 of 382

Instrument Panel Overview...............................3-2
Hazard Warning Flashers................................3-4
Other Warning Devices...................................3-5
Horn.............................................................3-5
Tilt Wheel.....................................................3-5
Turn Signal/Multifunction Lever.........................3-6
Exterior Lamps.............................................3-12
Interior Lamps..............................................3-15
Accessory Power Outlets...............................3-16
Ashtrays and Cigarette Lighter........................3-17
Climate Controls............................................3-18
Climate Control System.................................3-18
Rear Heating System....................................3-19
Rear Air Conditioning System.........................3-20
Rear Climate Control System.........................3-21
Warning Lights, Gages and Indicators.............3-23
Instrument Panel Cluster................................3-24
Speedometer and Odometer...........................3-25
Safety Belt Reminder Light.............................3-26
Air Bag Readiness Light................................3-26
Charging System Light..................................3-27
Voltmeter Gage............................................3-28
Brake System Warning Light..........................3-28Anti-Lock Brake System Warning Light.............3-29
Engine Coolant Temperature Gage..................3-30
Malfunction Indicator Lamp.............................3-30
Oil Pressure Gage........................................3-34
Security Light...............................................3-35
Service All-Wheel Drive Light.........................3-35
Tow/Haul Mode Light....................................3-36
Check Gages Warning Light...........................3-36
Fuel Gage...................................................3-36
Low Fuel Warning Light.................................3-37
Audio System(s).............................................3-38
Setting the Time for Radios with
the Set Button..........................................3-38
Setting the Time for Radios with
HR and MN Buttons..................................3-38
AM-FM Radio...............................................3-39
Radio with CD..............................................3-41
Rear Seat Audio (RSA).................................3-46
Theft-Deterrent Feature..................................3-47
Understanding Radio Reception......................3-50
Care of Your CDs.........................................3-50
Care of Your CD Player................................3-50
Fixed Mast Antenna......................................3-50
Section 3 Instrument Panel
3-1
Page 160 of 382

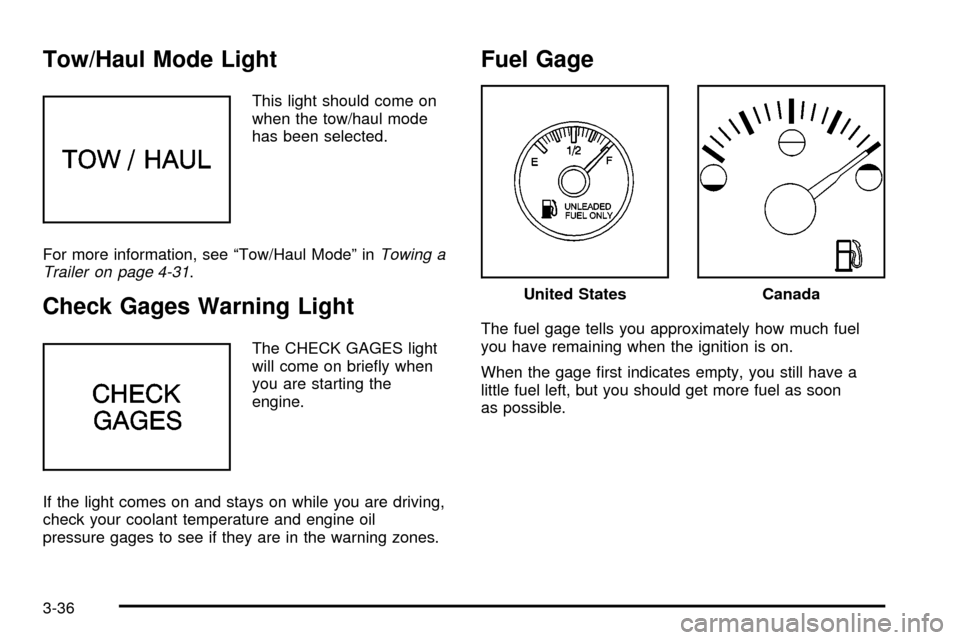
Tow/Haul Mode Light
This light should come on
when the tow/haul mode
has been selected.
For more information, see ªTow/Haul Modeº in
Towing a
Trailer on page 4-31.
Check Gages Warning Light
The CHECK GAGES light
will come on brie¯y when
you are starting the
engine.
If the light comes on and stays on while you are driving,
check your coolant temperature and engine oil
pressure gages to see if they are in the warning zones.
Fuel Gage
The fuel gage tells you approximately how much fuel
you have remaining when the ignition is on.
When the gage ®rst indicates empty, you still have a
little fuel left, but you should get more fuel as soon
as possible.
United StatesCanada
3-36
Page 195 of 382

The exit ramp can be curved, sometimes quite sharply.
The exit speed is usually posted.
Reduce your speed according to your speedometer, not
to your sense of motion. After driving for any distance
at higher speeds, you may tend to think you are
going slower than you actually are.
Before Leaving on a Long Trip
Make sure you're ready. Try to be well rested. If you
must start when you're not fresh Ð such as after a day's
work Ð don't plan to make too many miles that ®rst
part of the journey. Wear comfortable clothing and shoes
you can easily drive in.
Is your vehicle ready for a long trip? If you keep it
serviced and maintained, it's ready to go. If it needs
service, have it done before starting out. Of course,
you'll ®nd experienced and able service experts in
GM dealerships all across North America. They'll be
ready and willing to help if you need it.Here are some things you can check before a trip:
·Windshield Washer Fluid:Is the reservoir full? Are
all windows clean inside and outside?
·Wiper Blades:Are they in good shape?
·Fuel, Engine Oil, Other Fluids:Have you checked
all levels?
·Lamps:Are they all working? Are the lenses clean?
·Tires:They are vitally important to a safe,
trouble-free trip. Is the tread good enough for
long-distance driving? Are the tires all in¯ated to the
recommended pressure?
·Weather Forecasts:What's the weather outlook
along your route? Should you delay your trip a
short time to avoid a major storm system?
·Maps:Do you have up-to-date maps?
4-21
Page 203 of 382

Towing
Towing Your Vehicle
Consult your dealer or a professional towing service if
you need to have your disabled vehicle towed. See
Roadside Assistance Program on page 7-6.
If you want to tow your vehicle behind another vehicle
for recreational purposes (such as behind a motorhome),
see ªRecreational Vehicle Towingº following.
Recreational Vehicle Towing
Recreational vehicle towing means towing your vehicle
behind another vehicle Ð such as behind a motorhome.
The two most common types of recreational vehicle
towing are known as ªdinghy towingº (towing your vehicle
with all four wheels on the ground) and ªdolly towingº
(towing your vehicle with two wheels on the ground and
two wheels up on a device known as a ªdollyº).
Your vehicle was not designed to be towed with any of
its wheels on the ground. If your vehicle must be
towed, see
Towing Your Vehicle on page 4-29.
Notice:Towing an all-wheel-drive vehicle with all
four wheels on the ground, or even with only two of
its wheels on the ground, will damage drivetrain
components. Don't tow an all-wheel-drive vehicle if
any of its wheels will be on the ground.
Loading Your Vehicle
The Certi®cation/Tire label in your vehicle will look
similar to this example.
The Certi®cation/Tire label is found on the rear edge of
the driver's door. The label shows the size of your
original tires and the in¯ation pressures needed to obtain
the gross weight capacity of your vehicle.
This is called the Gross Vehicle Weight Rating (GVWR).
The GVWR includes the weight of the vehicle, all
occupants, fuel, cargo and tongue weight, if pulling
a trailer.
4-29
Page 217 of 382

Service............................................................5-3
Doing Your Own Service Work.........................5-3
Adding Equipment to the Outside
of Your Vehicle...........................................5-4
Fuel................................................................5-5
Gasoline Octane............................................5-5
Gasoline Speci®cations....................................5-5
California Fuel...............................................5-6
Additives.......................................................5-6
Fuels in Foreign Countries...............................5-7
Filling Your Tank............................................5-8
Filling a Portable Fuel Container.....................5-10
Checking Things Under the Hood....................5-11
Hood Release..............................................5-11
Engine Compartment Overview.......................5-14
Engine Oil...................................................5-15
Engine Cover...............................................5-20
Engine Air Cleaner/Filter................................5-24
Automatic Transmission Fluid.........................5-25
Engine Coolant.............................................5-28
Radiator Pressure Cap..................................5-30
Engine Overheating.......................................5-31Cooling System............................................5-33
Engine Fan Noise.........................................5-39
Power Steering Fluid.....................................5-40
Windshield Washer Fluid................................5-41
Brakes........................................................5-42
Battery........................................................5-46
Jump Starting...............................................5-47
All-Wheel Drive..............................................5-52
Rear Axle.......................................................5-53
Front Axle......................................................5-54
Bulb Replacement..........................................5-55
Halogen Bulbs..............................................5-55
Headlamps..................................................5-55
Front Turn Signal Lamps...............................5-59
Taillamps.....................................................5-60
Replacement Bulbs.......................................5-61
Windshield Wiper Blade Replacement..............5-62
Tires..............................................................5-63
In¯ation Ð Tire Pressure...............................5-64
Tire Inspection and Rotation...........................5-64
When It Is Time for New Tires.......................5-66
Section 5 Service and Appearance Care
5-1
Page 255 of 382

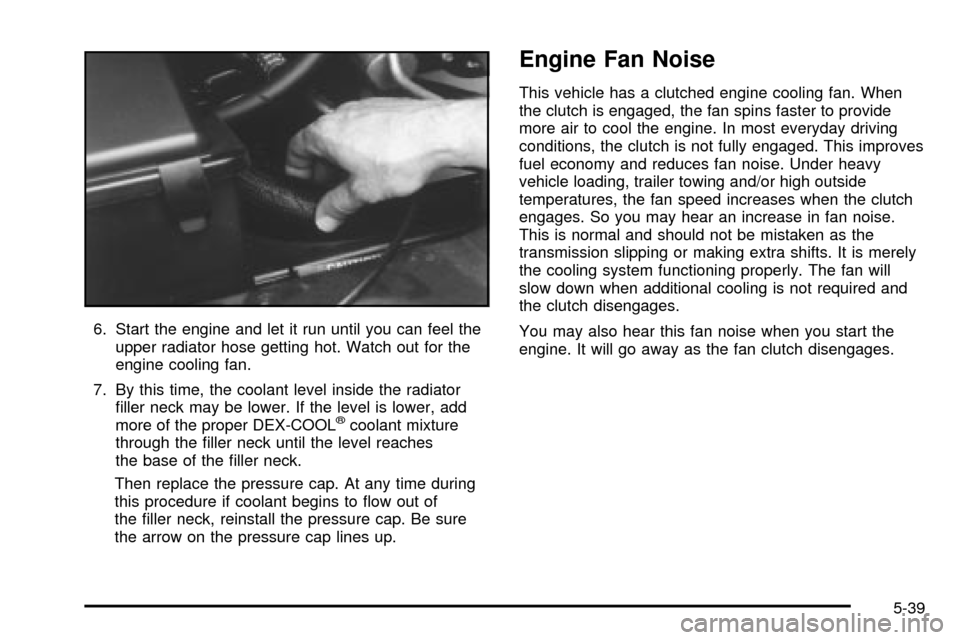
6. Start the engine and let it run until you can feel the
upper radiator hose getting hot. Watch out for the
engine cooling fan.
7. By this time, the coolant level inside the radiator
®ller neck may be lower. If the level is lower, add
more of the proper DEX-COOL
žcoolant mixture
through the ®ller neck until the level reaches
the base of the ®ller neck.
Then replace the pressure cap. At any time during
this procedure if coolant begins to ¯ow out of
the ®ller neck, reinstall the pressure cap. Be sure
the arrow on the pressure cap lines up.
Engine Fan Noise
This vehicle has a clutched engine cooling fan. When
the clutch is engaged, the fan spins faster to provide
more air to cool the engine. In most everyday driving
conditions, the clutch is not fully engaged. This improves
fuel economy and reduces fan noise. Under heavy
vehicle loading, trailer towing and/or high outside
temperatures, the fan speed increases when the clutch
engages. So you may hear an increase in fan noise.
This is normal and should not be mistaken as the
transmission slipping or making extra shifts. It is merely
the cooling system functioning properly. The fan will
slow down when additional cooling is not required and
the clutch disengages.
You may also hear this fan noise when you start the
engine. It will go away as the fan clutch disengages.
5-39
Page 280 of 382

In¯ation Ð Tire Pressure
The Certi®cation/Tire label, which is on the rear edge of
the driver's door, shows the correct in¯ation pressures
for your tires when they're cold. ªColdº means your
vehicle has been sitting for at least three hours or driven
no more than 1 mile (1.6 km).
Notice:Don't let anyone tell you that underin¯ation
or overin¯ation is all right. It's not. If your tires
don't have enough air (underin¯ation), you can get
the following:
·Too much ¯exing
·Too much heat
·Tire overloading
·Bad wear
·Bad handling
·Bad fuel economy
If your tires have too much air (overin¯ation), you
can get the following:
·Unusual wear
·Bad handling
·Rough ride
·Needless damage from road hazards
When to Check
Check your tires once a month or more.
Don't forget your compact spare tire. It should be at
60 psi (420 kPa).
How to Check
Use a good quality pocket-type gage to check tire
pressure. You can't tell if your tires are properly in¯ated
simply by looking at them. Radial tires may look
properly in¯ated even when they're underin¯ated.
Be sure to put the valve caps back on the valve stems.
They help prevent leaks by keeping out dirt and
moisture.
Tire Inspection and Rotation
Tires should be rotated every 6,000 to 8,000 miles
(10 000 to 13 000 km).
Any time you notice unusual wear, rotate your tires as
soon as possible and check wheel alignment. Also
check for damaged tires or wheels. See
When It Is Time
for New Tires on page 5-66andWheel Replacement
on page 5-69for more information.
5-64
Page 313 of 382

Relays Usage
A/C Relay
(Rear Heat and
A/C)Rear/Heat and Air Conditioning
Up®tter-ACCY
RelayUp®tter Accessory
Starter Enable
RelayStarter
A/C Enable
RelayAir Conditioning
Headlamps
RelayHeadlamps
Fuel Pump
RelayFuel Pump
Fuse/Circuit
BreakerUsage
UPFITTER-BATTUp®tter Battery Power Stud, Trailer
Wiring Harness
UPFITTER-ACCY Up®tter Accessory Relay
Spare Not used
Spare Not used
Spare Not usedFuse/Circuit
BreakerUsage
ECM-1BFuel Pump Relay and Motor, VCM,
Oil Pressure Switch/Sender
HORN Horn Relay and Horn
A/C COMPAir Conditioning Enable Relay and
Compressor
RR HTR/AC Rear Heater and Air Conditioning
ATC Active Transfer Case-L Van
FRT HVAC Front Heater and Air Conditioning
ENG-IOxygen Sensors, Camshaft Position
Sensor, Mass Air Flow Sensor,
Evaporative Emission Canister Vent
Solenoid
IGN-E Air Conditioning Enable Relay Coil
ECM-IFuel Injectors 1±6, Crankshaft
Position Sensot, VCM, Coil Driver
Module (EST), Ignition Coil
Blank Not Used
RH HDLMP Right Headlamp
LH Headlamp Left Headlamp
Blank Not Used
Blank Not Used
5-97