2003 CADILLAC SEVILLE maintenance schedule
[x] Cancel search: maintenance schedulePage 1 of 408

Seats and Restraint Systems........................... 1-1
Front Seats
............................................... 1-2
Safety Belts
.............................................. 1-6
Child Restraints
.......................................1-24
Supplemental In¯atable Restraint (SIR)
........1-44
Restraint System Check
............................1-52
Features and Controls..................................... 2-1
Keys
........................................................ 2-3
Doors and Locks
....................................... 2-9
Windows
.................................................2-15
Theft-Deterrent Systems
............................2-19
Starting and Operating Your Vehicle
...........2-23
Mirrors
....................................................2-37
OnStar
žSystem
......................................2-42
HomeLinkžTransmitter
.............................2-44
Storage Areas
.........................................2-48
Sunroof
..................................................2-50
Vehicle Personalization
.............................2-51
Instrument Panel............................................. 3-1
Instrument Panel Overview
.......................... 3-4
Climate Controls
......................................3-28
Warning Lights, Gages and Indicators
.........3-37
Driver Information Center (DIC)
..................3-53Trip Computer
.........................................3-77
Audio System(s)
.......................................3-78
Driving Your Vehicle....................................... 4-1
Your Driving, the Road, and Your Vehicle
..... 4-2
Towing
...................................................4-31
Service and Appearance Care.......................... 5-1
Service
..................................................... 5-3
Fuel
......................................................... 5-4
Checking Things Under the Hood
...............5-10
Headlamp Aiming
.....................................5-51
Bulb Replacement
....................................5-55
Windshield Wiper Blade Replacement
.........5-62
Tires
......................................................5-63
Appearance Care
.....................................5-83
Vehicle Identi®cation
.................................5-91
Electrical System
......................................5-92
Capacities and Speci®cations
...................5-100
Normal Maintenance Replacement Parts
....5-101
Maintenance Schedule..................................... 6-1
Maintenance Schedule
................................ 6-2
Customer Assistance Information.................... 7-1
Customer Assistance Information
.................. 7-2
Reporting Safety Defects
............................ 7-9
Index................................................................ 1
2003 Cadillac Seville Owner ManualM
Page 141 of 408

When your vehicle is ®rst started, the display will show
the driver's temperature setting, the fan speed and
the air delivery mode.
When the ENG/MET (English/metric) button on the
Driver Information Center (DIC) is pressed, the display
will show readings in Fahrenheit or Celsius. Use the
ENG/MET button to toggle between them.
Manual Operation
SMODET:Pressing the MODE switch and changing
the mode cancels automatic operation and places the
system in manual mode. Press AUTO to return to
automatic operation.
To change the current mode, select one of the following:
G(Vent):This mode directs air to the instrument
panel outlets.
+(Bi-Level):This mode directs approximately half of
the air to the instrument panel outlets, and then
directs most of the remaining air to the ¯oor outlets.
Some air may be directed toward the windshield.
In automatic operation, cooler air is directed to the upper
outlets and warmer air to the ¯oor outlets.
8(Floor):This mode directs most of the air to the
¯oor outlets with some air directed to the outboard
outlets (for the side windows) a little air directed to the
windshield.
The MODE switch can also be used to select the
¯oor/defog mode. Information on defogging and
defrosting can be found later in this section.
y9z(Fan):Press this switch to increase or
decrease the fan speed. Pressing this switch cancels
automatic operation and places the system in manual
mode. Press AUTO to return to automatic operation.
If the air¯ow seems low when the fan speed is at
the highest setting, the passenger compartment air ®lter
may need to be replaced. For more information, see
Passenger Compartment Air Filter on page 3-35andPart A: Scheduled Maintenance Services on
page 6-4.
?(Recirculation):This mode keeps outside air
from coming in the vehicle. It can be used to prevent
outside air and odors from entering your vehicle or
to help heat or cool the air inside your vehicle more
quickly. Press this button to turn the recirculation mode
on or off. When the button is pressed, an indicator
light will come on. The air-conditioning compressor also
comes on.
3-29
Page 145 of 408

Outlet Adjustment
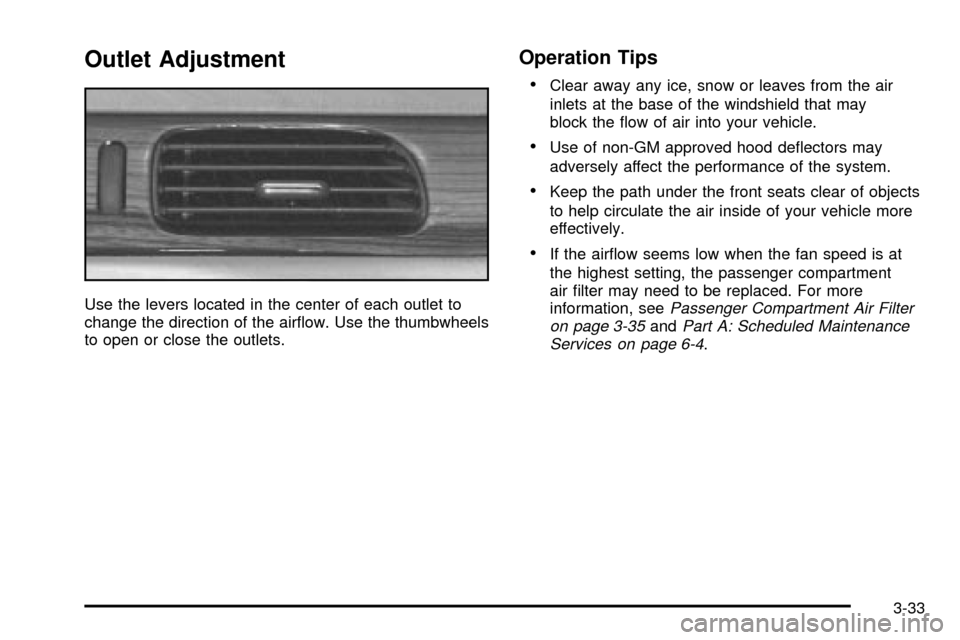
Use the levers located in the center of each outlet to
change the direction of the air¯ow. Use the thumbwheels
to open or close the outlets.
Operation Tips
·
Clear away any ice, snow or leaves from the air
inlets at the base of the windshield that may
block the ¯ow of air into your vehicle.
·Use of non-GM approved hood de¯ectors may
adversely affect the performance of the system.
·Keep the path under the front seats clear of objects
to help circulate the air inside of your vehicle more
effectively.
·If the air¯ow seems low when the fan speed is at
the highest setting, the passenger compartment
air ®lter may need to be replaced. For more
information, see
Passenger Compartment Air Filter
on page 3-35andPart A: Scheduled Maintenance
Services on page 6-4.
3-33
Page 147 of 408

Passenger Compartment Air Filter
Passenger compartment air, both outside air and
recirculated air, is routed through a passenger
compartment ®lter. The ®lter removes certain
contaminants from the air, including pollen and
dust particles.
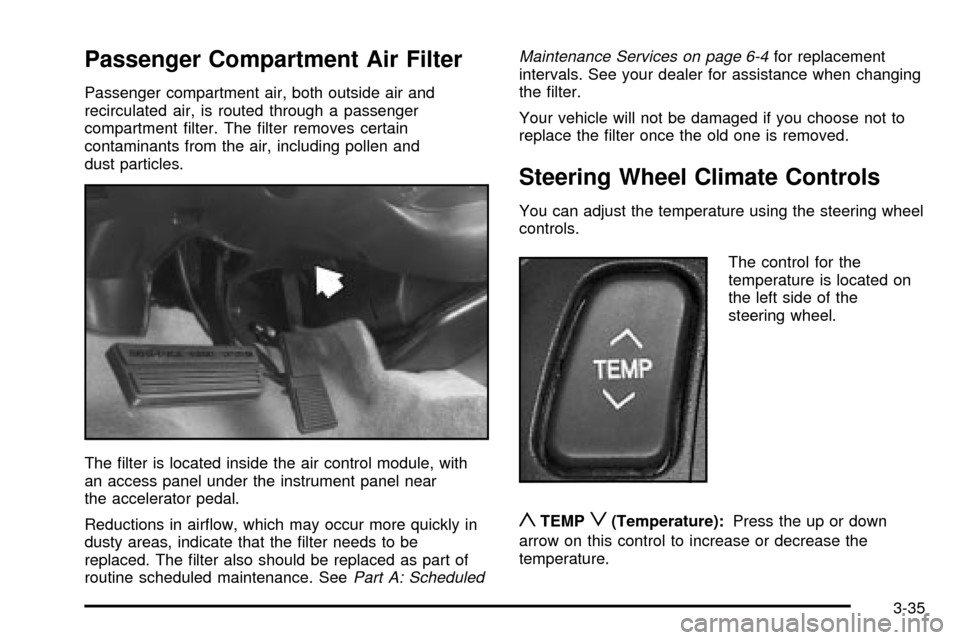
The ®lter is located inside the air control module, with
an access panel under the instrument panel near
the accelerator pedal.
Reductions in air¯ow, which may occur more quickly in
dusty areas, indicate that the ®lter needs to be
replaced. The ®lter also should be replaced as part of
routine scheduled maintenance. See
Part A: ScheduledMaintenance Services on page 6-4
for replacement
intervals. See your dealer for assistance when changing
the ®lter.
Your vehicle will not be damaged if you choose not to
replace the ®lter once the old one is removed.
Steering Wheel Climate Controls
You can adjust the temperature using the steering wheel
controls.
The control for the
temperature is located on
the left side of the
steering wheel.
yTEMPz(Temperature):Press the up or down
arrow on this control to increase or decrease the
temperature.
3-35
Page 166 of 408

·AVG MPH (Average Miles per Hour):This
message shows the average speed you have
traveled at since the last time you reset the value.
To reset the value, press the INFO button to
display AVG MPH then press and hold the INFO
RESET button until 0.0 AVG MPH is displayed.
·TIMER:This feature is like a stopwatch, in that you
can clock the time it takes to get from one point to
another.
To operate, press the INFO button to display
TIMER. Each of the ®elds for the hours, minutes
and seconds are two numeric digits.
Once TIMER 00:00:00 is displayed, press the
ON/OFF button to start the timing feature. Press
the ON/OFF button again to stop it. If you will
be starting and stopping your vehicle, during a trip
for instance, the TIMER feature will automatically
start timing where it left off when you last stopped.
To reset it, press and hold the INFO RESET
button until the display reads TIMER 00:00:00.
Press the INFO button to exit from the TIMER
display.
·ENGINE OIL LIFE:Press the INFO button to
display ENGINE OIL LIFE, then press and hold the
INFO RESET button until 100% ENGINE OIL
LIFE is displayed. (This only needs to be reset after
you have had the oil changed.)
·TRANSMISSION FLUID LIFE MONITOR:Under
normal conditions, the rate of deterioration of the
transmission ¯uid is slow. See
Part A: Scheduled
Maintenance Services on page 6-4for proper
¯uid and change intervals. To reset the transmission
¯uid life, press the INFO button to display TRANS
FLUID LIFE, then press and hold the INFO
RESET button until 100% TRANS FLUID LIFE is
displayed. (This only needs to be reset after
you have had the ¯uid changed.)
ON/OFF:Pressing this button turns the Personalization
Features on and off. (FEATURE PROGRAMMING
must be displayed on the DIC to begin actual
programming.) This button also starts and stops
the timer.
3-54
Page 169 of 408

CHANGE ENGINE OIL ± 82:This means that the life
of the engine oil has expired and it should be changed
within 200 miles. After an oil change, the Oil Life
Indicator must be reset. See
Oil Life Indicator on
page 3-77. SeeEngine Oil on page 5-13.
CHANGE TRANS FLUID ± 47:This message will
appear when it is time to change the transaxle ¯uid. See
Part A: Scheduled Maintenance Services on page 6-4for the proper ¯uid and change intervals.
CHECK BRAKE FLUID ± 37:This message will
display if the ignition is in ON to inform the driver that
the brake ¯uid level is low. Have the brake system
serviced by a technician as soon as possible. See
Brake
System Warning and Parking Brake Indicator Light on
page 3-43
.
CHECK COOLANT LEVEL ± 2:This message will
appear when there is a low level of engine coolant. Have
the cooling system serviced by a technician as soon
as possible. See
Engine Coolant on page 5-25.CHECK FUEL GAGE ± 50:This message will appear
when the fuel supply is less than 5 gallons (18.9 L)
and the display is turned off. A single chime will also
sound when this message is displayed.
CHECK GAS CAP ± 61:This message will appear if
the gas cap has not been fully tightened. You should
recheck your gas cap to ensure that it's on properly.
CHECK OIL LEVEL ± 36:For correct operation of the
low oil sensing system, your vehicle should be on a
level surface. A false CHECK OIL LEVEL message may
appear if the vehicle is parked on a grade. The oil
level sensing system does not check for actual oil level
if the engine has been off for a short period of time,
and the oil level is never checked while the engine is
running. If the CHECK OIL LEVEL message appears,
and your vehicle has been parked on level ground
with the engine off for at least 30 minutes, the oil level
should be checked by observing the oil dipstick. Prior to
checking the oil level, be sure the engine has been
off for a few minutes and your vehicle is on a level
surface. Then check the dipstick and add oil if
necessary. See
Engine Oil on page 5-13.
3-57
Page 189 of 408

Trip Computer
Oil Life Indicator
This feature lets you know when to change the engine
oil. It's based on the engine oil temperatures and
your driving patterns.To see the display, press the INFO button several times
until ENGINE OIL LIFE appears. If you see 99%
ENGINE OIL LIFE, 99 percent of your current oil life
remains.
The DIC may display a CHANGE ENGINE OIL
message. For more information, see
Scheduled
Maintenance on page 6-4. If you see CHANGE ENGINE
OIL, it means the oil life is gone and you should
change the oil right away. The system doesn't check
how much oil you have, so you'll still have to check for
that. To see how, see
Engine Oil on page 5-13.
When the oil is changed, you'll need to reset the system.
See
Engine Oil on page 5-13. Always keep a written
record of the mileage and date when you changed
your oil.
3-77
Page 260 of 408

When You Are Ready to Leave After
Parking on a Hill:
1. Apply your regular brakes and hold the pedal down
while you:
·start your engine,
·shift into a gear, and
·make sure the parking brake has released.
2. Let up on the brake pedal.
3. Drive slowly until the trailer is clear of the chocks.
4. Stop and have someone pick up and store the
chocks.
Maintenance When Trailer Towing
Your vehicle will need service more often when you're
pulling a trailer. See the Maintenance Schedule for more
on this. Things that are especially important in trailer
operation are automatic transaxle ¯uid (don't over®ll),
engine oil, drive belt, cooling system and brake system.
Each of these is covered in this manual, and the
Index will help you ®nd them quickly. If you're trailering,
it's a good idea to review this information before you
start your trip.
Check periodically to see that all hitch nuts and bolts
are tight.
Engine Cooling When Trailer Towing
Your cooling system may temporarily overheat during
severe operating conditions. SeeEngine Overheating on
page 5-28.
4-42