2003 CADILLAC SEVILLE seat adjustment
[x] Cancel search: seat adjustmentPage 8 of 408
Front Seats
Power Seats
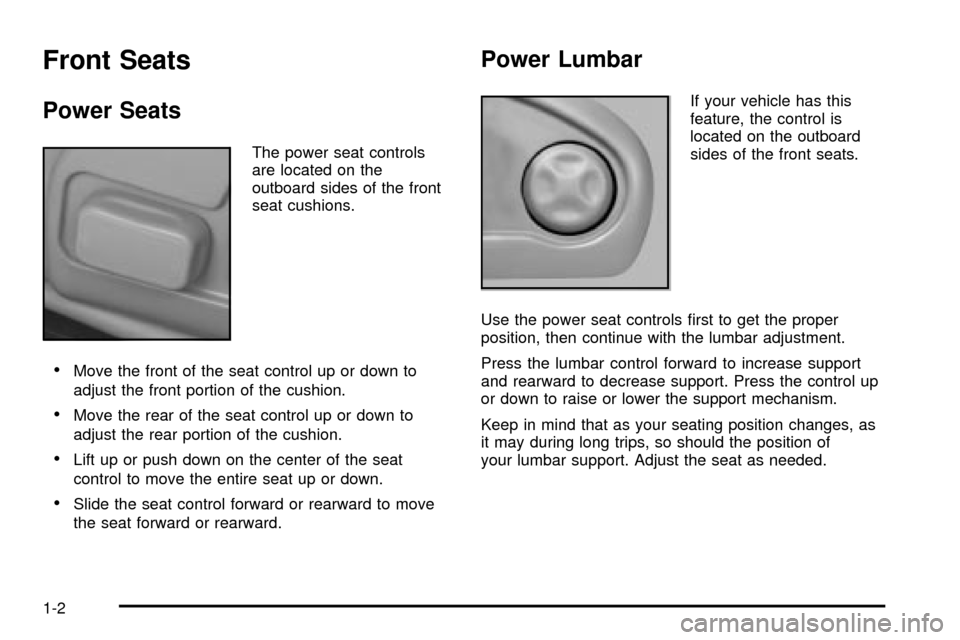
The power seat controls
are located on the
outboard sides of the front
seat cushions.
·Move the front of the seat control up or down to
adjust the front portion of the cushion.
·Move the rear of the seat control up or down to
adjust the rear portion of the cushion.
·Lift up or push down on the center of the seat
control to move the entire seat up or down.
·Slide the seat control forward or rearward to move
the seat forward or rearward.
Power Lumbar
If your vehicle has this
feature, the control is
located on the outboard
sides of the front seats.
Use the power seat controls ®rst to get the proper
position, then continue with the lumbar adjustment.
Press the lumbar control forward to increase support
and rearward to decrease support. Press the control up
or down to raise or lower the support mechanism.
Keep in mind that as your seating position changes, as
it may during long trips, so should the position of
your lumbar support. Adjust the seat as needed.
1-2
Page 101 of 408
Outside Automatic Dimming Mirror
If your vehicle is equipped with this feature, the
driver's side mirror will adjust for the glare of headlamps
behind you. This feature is controlled by the on and
off settings on the automatic dimming rearview mirror.
See
Automatic Dimming Rearview Mirror with OnStarž
on page 2-37.
Outside Curb View Assist Mirror
If your vehicle is equipped with memory mirrors, it will
also be capable of performing the curb view assist mirror
feature. This feature will cause the passenger's mirror
to tilt to a factory programmed position when the vehicle
is in REVERSE (R). This feature may be useful in
allowing you to view the curb when you are parallel
parking.
When the vehicle is shifted out of REVERSE (R) and a
®ve-second delay has occurred, the passenger's
mirror will return to its original position.
If further adjustment is needed after the mirror is tilted,
the mirror switch may be used.
This feature can be enabled/disabled through the Driver
Information Center (DIC). See
DIC Vehicle
Personalization on page 3-64for more information.
Outside Convex Mirror
Your passenger's side mirror is convex. A convex
mirror's surface is curved so you can see more from the
driver's seat. This mirror does not have a dimming
feature.
{CAUTION:
A convex mirror can make things (like other
vehicles) look farther away than they really are.
If you cut too sharply into the right lane, you
could hit a vehicle on your right. Check your
inside mirror or glance over your shoulder
before changing lanes.
Outside Heated Mirrors
When you operate the rear window defogger, it also
warms both outside mirrors to help clear them of fog or
ice. See
Dual Climate Control System on page 3-28for more information.
2-41
Page 111 of 408
Vehicle Personalization
Memory Seat, Mirrors and Steering
Wheel
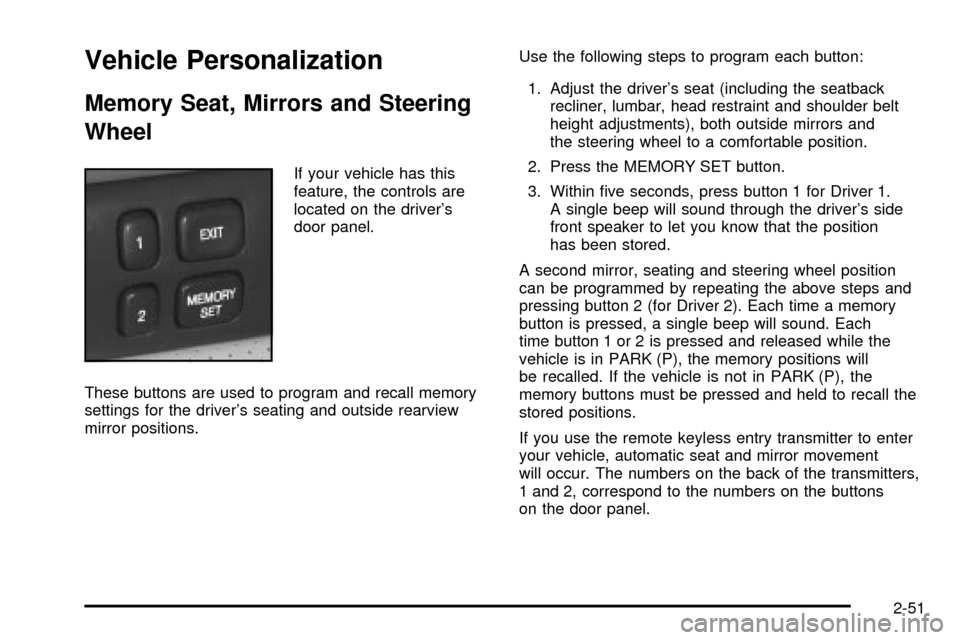
If your vehicle has this
feature, the controls are
located on the driver's
door panel.
These buttons are used to program and recall memory
settings for the driver's seating and outside rearview
mirror positions.Use the following steps to program each button:
1. Adjust the driver's seat (including the seatback
recliner, lumbar, head restraint and shoulder belt
height adjustments), both outside mirrors and
the steering wheel to a comfortable position.
2. Press the MEMORY SET button.
3. Within ®ve seconds, press button 1 for Driver 1.
A single beep will sound through the driver's side
front speaker to let you know that the position
has been stored.
A second mirror, seating and steering wheel position
can be programmed by repeating the above steps and
pressing button 2 (for Driver 2). Each time a memory
button is pressed, a single beep will sound. Each
time button 1 or 2 is pressed and released while the
vehicle is in PARK (P), the memory positions will
be recalled. If the vehicle is not in PARK (P), the
memory buttons must be pressed and held to recall the
stored positions.
If you use the remote keyless entry transmitter to enter
your vehicle, automatic seat and mirror movement
will occur. The numbers on the back of the transmitters,
1 and 2, correspond to the numbers on the buttons
on the door panel.
2-51
Page 117 of 408

The main components of the instrument panel are the following:
A. Air Outlets. See
Outlet Adjustment on page 3-33.
B. Driver Information Center (DIC) Buttons. See
DIC Controls and Displays on page 3-53.
C. Turn Signal/Multifunction Lever. See
Turn
Signal/Multifunction Lever on page 3-9.
D. Climate Controls and OnStaržSteering Wheel
Controls (or Cellular Telephone Controls, If
Equipped).
See
Steering Wheel Climate Controls on page 3-35andOnStaržSystem on page 2-42.
E. Instrument Panel Cluster. See
Instrument Panel
Cluster on page 3-38.
F. Windshield Wiper/Washer Lever. See ªWindshield
Wipersº under
Turn Signal/Multifunction Lever
on page 3-9.
G. Audio Steering Wheel Controls. See
Audio Steering
Wheel Controls on page 3-103.
H. Ignition Switch. See
Ignition Positions on page 2-24.
I. Air Outlet Thumbwheel. See
Outlet Adjustment
on page 3-33.
J. Hazard Warning Flasher Button. See
Hazard
Warning Flashers on page 3-6.K. Audio System. See
Audio System(s) on page 3-78.
L. Exterior Lamp Controls. See
Exterior Lamps on
page 3-16.
M. Hood Release. See
Hood Release on page 5-11.
N. Fuel Door Release. See
Filling Your Tank on
page 5-6.
O. Trunk Release Button. See
Trunk on page 2-12.
P. Cruise Control. See ªCruise Controlº under
Turn Signal/Multifunction Lever on page 3-9.
Q. Horn. See
Horn on page 3-7.
R. Heated Seat Controls. See
Heated Seats on
page 1-3.
S. Traction Control System (TCS) Button. See
Traction
Control System (TCS) on page 4-9.
T. Console Shift Lever. See
Automatic Transaxle
Operation on page 2-28.
U. Optional Ashtray. See
Ashtrays and Cigarette
Lighter on page 3-27.
V. Climate Controls. See
Dual Climate Control System
on page 3-28.
W. Glove Box. See
Glove Box on page 2-48.
3-5
Page 145 of 408
Outlet Adjustment
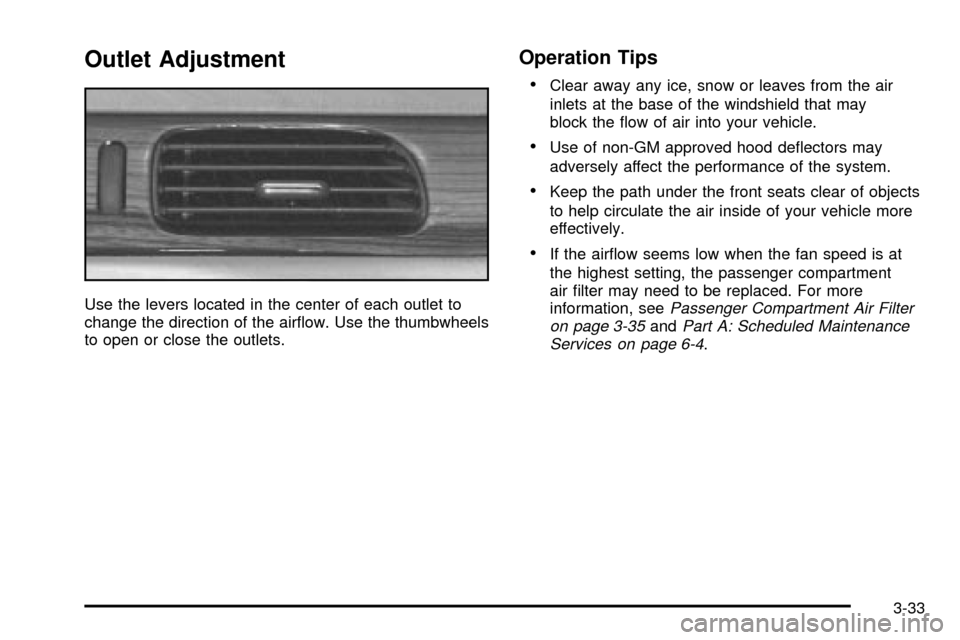
Use the levers located in the center of each outlet to
change the direction of the air¯ow. Use the thumbwheels
to open or close the outlets.
Operation Tips
·
Clear away any ice, snow or leaves from the air
inlets at the base of the windshield that may
block the ¯ow of air into your vehicle.
·Use of non-GM approved hood de¯ectors may
adversely affect the performance of the system.
·Keep the path under the front seats clear of objects
to help circulate the air inside of your vehicle more
effectively.
·If the air¯ow seems low when the fan speed is at
the highest setting, the passenger compartment
air ®lter may need to be replaced. For more
information, see
Passenger Compartment Air Filter
on page 3-35andPart A: Scheduled Maintenance
Services on page 6-4.
3-33
Page 146 of 408
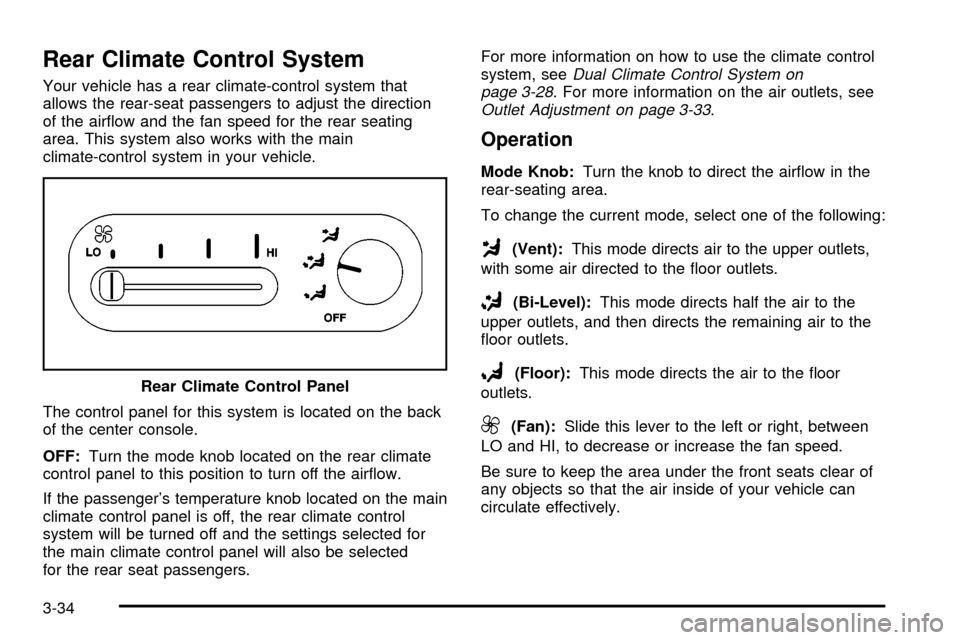
Rear Climate Control System
Your vehicle has a rear climate-control system that
allows the rear-seat passengers to adjust the direction
of the air¯ow and the fan speed for the rear seating
area. This system also works with the main
climate-control system in your vehicle.
The control panel for this system is located on the back
of the center console.
OFF:Turn the mode knob located on the rear climate
control panel to this position to turn off the air¯ow.
If the passenger's temperature knob located on the main
climate control panel is off, the rear climate control
system will be turned off and the settings selected for
the main climate control panel will also be selected
for the rear seat passengers.For more information on how to use the climate control
system, seeDual Climate Control System on
page 3-28. For more information on the air outlets, seeOutlet Adjustment on page 3-33.
Operation
Mode Knob:Turn the knob to direct the air¯ow in the
rear-seating area.
To change the current mode, select one of the following:
G(Vent):This mode directs air to the upper outlets,
with some air directed to the ¯oor outlets.
+(Bi-Level):This mode directs half the air to the
upper outlets, and then directs the remaining air to the
¯oor outlets.
8(Floor):This mode directs the air to the ¯oor
outlets.
9(Fan):Slide this lever to the left or right, between
LO and HI, to decrease or increase the fan speed.
Be sure to keep the area under the front seats clear of
any objects so that the air inside of your vehicle can
circulate effectively. Rear Climate Control Panel
3-34
Page 312 of 408
The vehicle should be properly prepared as follows:
·The vehicle should be placed so the headlamps are
25 ft. (7.6 m) from a light colored wall or other ¯at
surface.
·The vehicle must have all four tires on a perfectly
level surface which is level all the way to the wall
or other ¯at surface.
·The vehicle should be placed so it is perpendicular
to the wall or other ¯at surface.
·The vehicle should not have any snow, ice or mud
attached to it.
·The vehicle should be fully assembled and all other
work stopped while headlamp aiming is being done.
·The vehicle should be normally loaded with a
full tank of fuel and one person or 160 lbs (75 kg) on
the driver's seat.
·Tires should be properly in¯ated.
·Start the vehicle and rock it to level the suspension.
Headlamp aiming is done with the vehicle low beam
lamps. The high beam lamps will be correctly aimed if
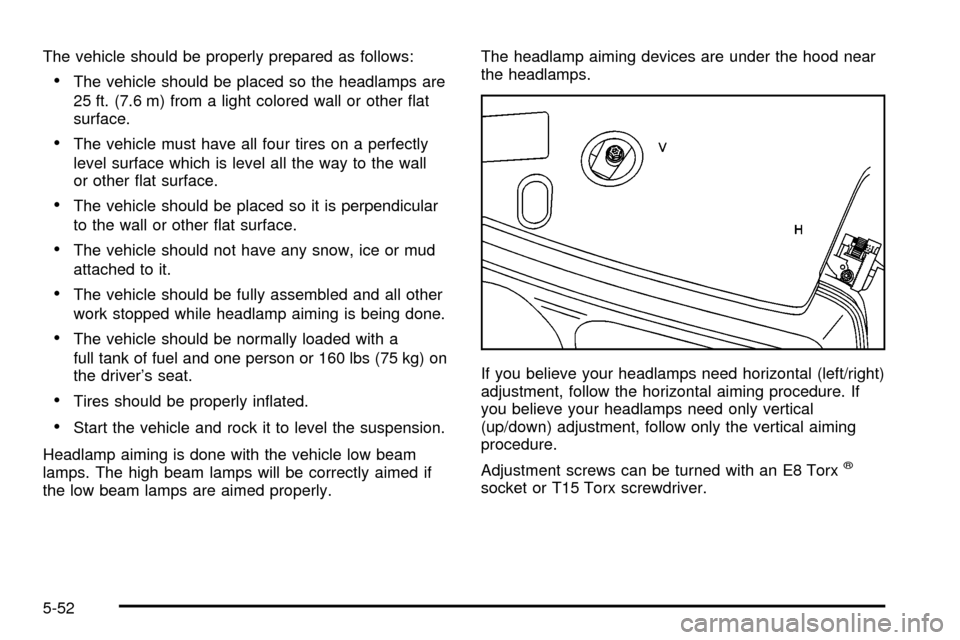
the low beam lamps are aimed properly.The headlamp aiming devices are under the hood near
the headlamps.
If you believe your headlamps need horizontal (left/right)
adjustment, follow the horizontal aiming procedure. If
you believe your headlamps need only vertical
(up/down) adjustment, follow only the vertical aiming
procedure.
Adjustment screws can be turned with an E8 Torx
ž
socket or T15 Torx screwdriver.
5-52
Page 395 of 408

Charging System Light....................................3-43
Checking Coolant............................................5-27
Checking Engine Oil........................................5-14
Checking Things Under the Hood......................5-10
Checking Your Restraint Systems......................1-52
Check...........................................................3-47
Engine Light...............................................3-47
Chemical Paint Spotting...................................5-89
Child Restraints..............................................1-30
Child Restraint Systems...............................1-30
Infants and Young Children...........................1-26
Lower Anchorages and Top Tethers for
Children (LATCH System)..........................1-36
Older Children.............................................1-24
Securing a Child Restraint Designed for
the LATCH System...................................1-38
Securing a Child Restraint in a Rear
Seat Position...........................................1-38
Securing a Child Restraint in the Right
Front Seat Position...................................1-41
Top Strap Anchor Location............................1-35
Top Strap...................................................1-33
Where to Put the Restraint...........................1-33
Cigarette Lighter.............................................3-27
Cleaning Aluminum or Chrome-Plated Wheels.....5-88
Cleaning Exterior Lamps/Lenses.......................5-87
Cleaning Fabric/Carpet....................................5-84
Cleaning Glass Surfaces..................................5-85
Cleaning Interior Plastic Components.................5-85
Cleaning Leather............................................5-85Cleaning the Mirror.................................2-37, 2-40
Cleaning the Speaker Covers...........................5-85
Cleaning the Top of the Instrument Panel...........5-85
Cleaning Tires................................................5-88
Cleaning Vinyl................................................5-84
Cleaning Windshield and Wiper Blades..............5-87
Cleaning Wood Panels....................................5-85
Cleaning........................................................5-84
Inside of Your Vehicle..................................5-84
Outside of Your Vehicle................................5-86
Underbody Maintenance...............................5-89
Weatherstrips..............................................5-86
Climate Control System...................................3-35
Air Filter, Passenger Compartment.................3-35
Climate Controls Personalization....................3-36
Dual..........................................................3-28
Outlet Adjustment........................................3-33
Rear..........................................................3-34
Steering Wheel Controls...............................3-35
Comfort Controls, DIC Personalization................3-63
Compact Disc Changer Errors.........................3-101
Compact Disc Messages..........................3-86, 3-98
Compact Spare Tire........................................5-83
Compass Calibration.......................................2-38
Compass Operation.........................................2-38
Compass Variance..........................................2-39
Control of a Vehicle.......................................... 4-6
Convenience Net............................................2-49
Coolant.........................................................3-46
Engine Temperature Gage............................3-46
3