2003 CADILLAC ESCALADE clock
[x] Cancel search: clockPage 113 of 486

Liftgate/Liftglass
{CAUTION:
It can be dangerous to drive with the liftgate or
liftglass open because carbon monoxide (CO)
gas can come into your vehicle. You can't see
or smell CO. It can cause unconsciousness
and even death. If you must drive with the
liftgate open or if electrical wiring or other
cable connections must pass through the seal
between the body and the liftgate or liftglass:
·Make sure all other windows are shut.
·Turn the fan on your heating or cooling
system to its highest speed and select the
control setting that will force outside air
into your vehicle. See ªClimate Control
Systemº in the Index.
·If you have air outlets on or under the
instrument panel, open them all the way.
See ªEngine Exhaustº in the Index.To unlock the liftgate and liftgate glass from the outside,
insert the key into the lock and turn it counterclockwise
to unlock the glass and liftgate. This can also be
done by using either the power door locks or the remote
keyless entry system.
The liftgate glass can be opened using the pushbutton
on the liftgate after the doors have been unlocked.
To open the entire liftgate, lift the handle located in the
center of the door.
To lock the liftgate and liftgate glass from the outside,
insert the key into the lock button and turn clockwise. All
doors will lock. You may also use the remote keyless
entry system or the power door locks to lock the liftgate
and liftgate glass.
2-15
Page 151 of 486

Instrument Panel Overview...............................3-4
Hazard Warning Flashers................................3-6
Other Warning Devices...................................3-7
Horn.............................................................3-7
Tilt Wheel.....................................................3-7
Turn Signal/Multifunction Lever.........................3-8
Exterior Lamps.............................................3-15
Interior Lamps..............................................3-18
Ultrasonic Rear Parking Assist (URPA)............3-20
Accessory Power Outlets...............................3-23
Ashtrays and Cigarette Lighter........................3-23
Analog Clock...............................................3-24
Climate Controls............................................3-24
Automatic Climate Control System...................3-24
Outlet Adjustment.........................................3-31
Rear Climate Control System.........................3-31
Climate Controls Personalization.....................3-33
Warning Lights, Gages and Indicators.............3-34
Instrument Panel Cluster................................3-34
Speedometer and Odometer...........................3-36
Tachometer.................................................3-36
Safety Belt Reminder Light.............................3-36
Air Bag Readiness Light................................3-37
Passenger Air Bag Status Indicator.................3-38Charging System Light..................................3-39
Voltmeter Gage............................................3-40
Brake System Warning Light..........................3-40
Anti-Lock Brake System Warning Light.............3-42
Traction Off Light..........................................3-42
Engine Coolant Temperature Gage..................3-43
Transmission Temperature Gage.....................3-43
Malfunction Indicator Lamp.............................3-44
Oil Pressure Gage........................................3-48
Security Light...............................................3-49
Cruise Control Light......................................3-49
Tow/Haul Mode Light....................................3-49
Fuel Gage...................................................3-50
Low Fuel Warning Light.................................3-50
Driver Information Center (DIC).......................3-51
DIC Operation and Displays...........................3-51
DIC Warnings and Messages.........................3-62
Audio System(s).............................................3-70
Setting the Time...........................................3-70
Radio with Cassette and CD..........................3-71
Rear Seat Entertainment System....................3-85
Navigation/Radio System...............................3-96
Rear Seat Audio (RSA).................................3-97
CD Changer................................................3-99
Section 3 Instrument Panel
3-1
Page 155 of 486

The main components of your instrument panel are the
following:
A. Air Outlets. See
Outlet Adjustment on page 3-31.
B. Exterior Lamps Control. See
Exterior Lamps
on page 3-15.
C. Turn Signal/Multifunction Lever. See
Turn
Signal/Multifunction Lever on page 3-8.
D. OnStaržand Radio Steering Wheel Buttons. SeeOnStaržSystem on page 2-38andAudio Steering
Wheel Controls on page 3-102.
E. Instrument Panel Cluster. See
Instrument Panel
Cluster on page 3-34.
F. Shift Lever/Tow/Haul Selector Button. See
Automatic
Transmission Operation on page 2-24.
G. Audio System. See
Audio System(s) on page 3-70.
H. Dome Override Button. See
Interior Lamps on
page 3-18.
I. Rear Wiper Washer. See ªRear Window
Washer/Wiperº under
Turn Signal/Multifunction Lever
on page 3-8.J. Fog Lamps Button. See
Exterior Lamps on
page 3-15.
K. Driver Information Center (DIC) Buttons. See
Driver
Information Center (DIC) on page 3-51.
L. Parking Brake Release. See
Parking Brake on
page 2-27.
M. Tilt Lever. See
Tilt Wheel on page 3-7.
N. Comfort Control System. See
Automatic Climate
Control System on page 3-24.
O. Compact Disc Changer. See
CD Changer on
page 3-99.
P. Storage Area
Q. Clock. See
Analog Clock on page 3-24.
R. Ultrasonic Rear Parking Assist Button. See
Ultrasonic Rear Parking Assist (URPA) on
page 3-20.
S. StabiliTrakžButton. SeeStabilitrakžSystem on
page 4-10.
T. Glove Box. See
Glove Box on page 2-44.
3-5
Page 174 of 486

Analog Clock
To adjust the clock, do the following:
1. Locate the adjustment button to the lower left
corner of the clock.
2. Push and hold the adjustment button to spin the
clock hands. Release the button
beforeyou get to
the desired time.
3. Push and release the button to increase the time by
one minute increments until the desired time is
reached.
Climate Controls
Automatic Climate Control System
With this system, you can control the heating,
cooling and ventilation in your vehicle. Your vehicle also
has a ¯ow-through ventilation system described later
in this section.
You can select different climate control settings for the
driver and passengers.
3-24
Page 175 of 486

Driver's Side Temperature Knob
The driver's side knob is used to adjust the temperature
of the air coming through the system on the driver's
side. The temperature can be adjusted even if the
system is turned off. This is possible since outside air
will always ¯ow through the system as the vehicle
is moving forward unless it is set to recirculation mode.
See ªRecirculationº later in this section.
Turn the knob counterclockwise or clockwise to lower or
increase the cabin temperature. The display will show
the temperature setting decreasing or increasing and an
arrow pointing to the driver will be displayed under
and to the left of the temperature setting.
Passenger's Side Temperature Knob
The passenger's side knob can be used to change the
temperature of the air coming through the system on the
passenger's side of the vehicle. The temperature can be
adjusted even if the system is turned off. This is possible
since outside air will always ¯ow through the system as
the vehicle is moving forward unless it is set to
recirculation mode. See ªRecirculationº later in this
section.
Turn the knob counterclockwise or clockwise to lower or
increase the cabin temperature. The display will show
the temperature setting decreasing or increasing and an
arrow pointing to the passenger will be displayed
under and to the right of the temperature setting.
The passenger's temperature setting can be set to
match the driver's temperature setting by pressing and
holding the AUTO button for four seconds. Both the
driver and passenger arrows will be displayed.
3-25
Page 182 of 486

AUX:Turn the knob, located on the left side of the
control panel, to this position to allow the rear seat
passengers to have control over the rear climate control
system. See ªRear Passenger Console Controlº later
for more information.
9(Off):Turn the knob, located on the left side of the
control panel, to this position to turn the rear climate
control system off.
9(Fan):To adjust the air¯ow speed, turn the fan
knob located on the left side of the control panel to the
desired setting. Choose AUTO if you want the system
to automatically choose the fan speed to maintain
a selected temperature. See ªAuto Modeº later in this
section for more information on using this feature.
ÉF (ÉC):To adjust the air temperature, turn the
temperature knob on the center of the control panel. For
cooler or warmer air turn the knob counterclockwise
toward 66ÉF (19ÉC) or clockwise toward 82ÉF (27ÉC).
To regulate the air¯ow direction, adjust the right knob on
the control panel. Turn the knob clockwise for ¯oor
vent air¯ow or counterclockwise for headliner vent
air¯ow. Generally, the upper vents are used for air
conditioning and the ¯oor vents for heating. The knob
can be set to any blend setting. Choose AUTO if
you want the system to automatically regulate the
air¯ow. See ªAuto Modeº later in this section for more
information on using this feature.
Rear Passenger Console Control
To control the rear climate control from the rear
passenger seat position, use the rear passenger console
control. The driver overhead control fan knob must be
set to the AUX position.
The rear seat controls have the following settings:
O(On/Off):Press this button to turn the rear seat
comfort controls on or off when the front overhead
control is set to AUX.Rear Controls
3-32
Page 231 of 486

4 FWD (Forward):Press this pushbutton to advance
quickly to another part of the tape. Press this pushbutton
again to return to playing speed. The radio will play
while the tape advances. The station frequency
and FWD will appear on the display. You may select
stations during forward operation by using TUNE
and SEEK.
5 SIDE:Press this pushbutton to play the other side of
the tape.
qSEEKr:The right arrow is the same as the
NEXT pushbutton, and the left arrow is the same as the
PREV pushbutton. If the arrow is held or pressed
more than once, the player will continue moving forward
or backward through the tape. SEEK and a positive
or negative number will appear on the display.
qSCANr:To scan the tape, press and hold either
SCAN arrow for more than two seconds until SCAN
appears on the display and you hear a beep. Use this
feature to listen to 10 seconds of each selection on
the current side of the tape. Press either SCAN arrow
again, to stop scanning. Your tape must have at
least three seconds of silence between each selection
for scan to work.
BAND:Press this button to listen to the radio when a
tape is playing. The tape will stop but remain in the
player.TAPE DISC:Press this button to play a tape when
listening to the radio. Press this button to switch
between the tape and compact disc if both are loaded.
The inactive tape or CD will remain safely inside the
radio for future listening.
Z(Eject):Press this button to stop a tape when it is
playing or to eject a tape when it is not playing. Eject may
be activated with the radio off. Cassette tapes may be
loaded with the radio off if this button is pressed ®rst.
Cassette Tape Messages
CHK TAPE (Check Tape):If CHK TAPE appears on
the radio display, the tape won't play because of one of
the following errors.
·The tape is tight and the player can't turn the tape
hubs. Remove the tape. Hold the tape with the
open end down and try to turn the right hub
counterclockwise with a pencil. Turn the tape over
and repeat. If the hubs do not turn easily, your
tape may be damaged and should not be used in
the player. Try a new tape to make sure your player
is working properly.
·The tape is broken. Try a new tape.
·The tape is wrapped around the tape head. Attempt
to get the cassette out. Try a new tape.
3-81
Page 271 of 486

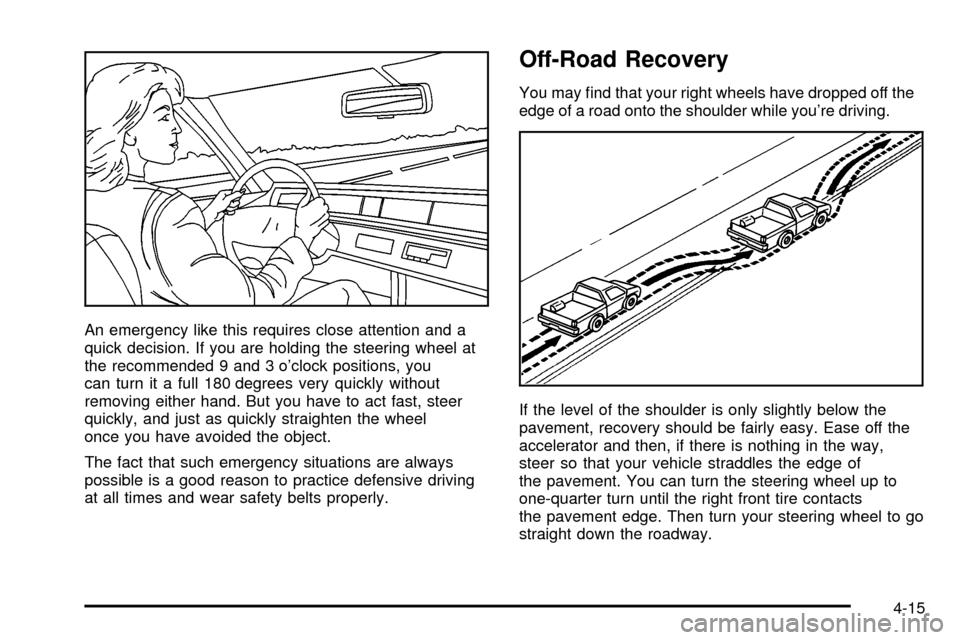
An emergency like this requires close attention and a
quick decision. If you are holding the steering wheel at
the recommended 9 and 3 o'clock positions, you
can turn it a full 180 degrees very quickly without
removing either hand. But you have to act fast, steer
quickly, and just as quickly straighten the wheel
once you have avoided the object.
The fact that such emergency situations are always
possible is a good reason to practice defensive driving
at all times and wear safety belts properly.
Off-Road Recovery
You may ®nd that your right wheels have dropped off the
edge of a road onto the shoulder while you're driving.
If the level of the shoulder is only slightly below the
pavement, recovery should be fairly easy. Ease off the
accelerator and then, if there is nothing in the way,
steer so that your vehicle straddles the edge of
the pavement. You can turn the steering wheel up to
one-quarter turn until the right front tire contacts
the pavement edge. Then turn your steering wheel to go
straight down the roadway.
4-15