Page 343 of 486
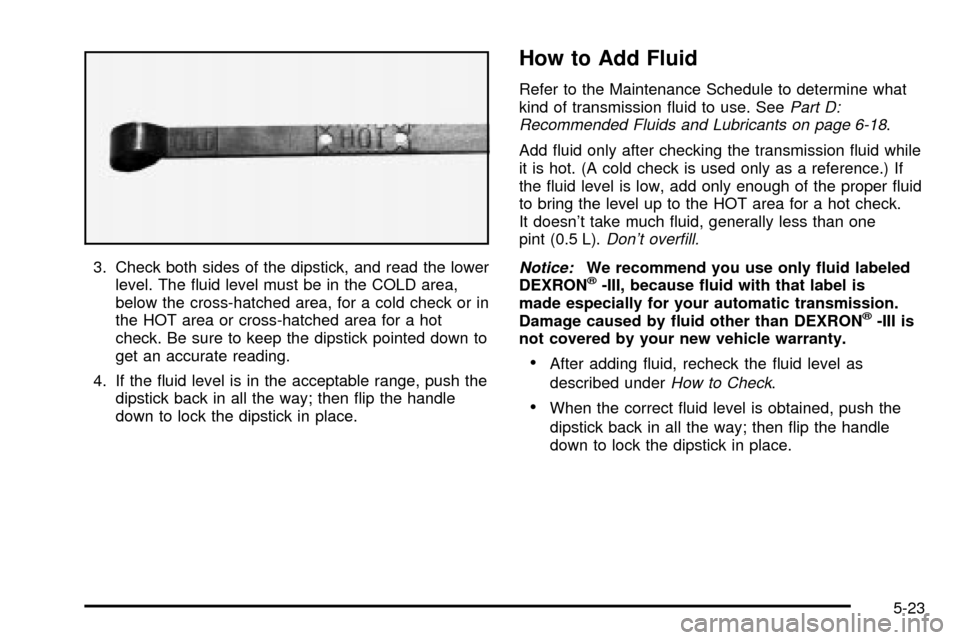
3. Check both sides of the dipstick, and read the lower
level. The ¯uid level must be in the COLD area,
below the cross-hatched area, for a cold check or in
the HOT area or cross-hatched area for a hot
check. Be sure to keep the dipstick pointed down to
get an accurate reading.
4. If the ¯uid level is in the acceptable range, push the
dipstick back in all the way; then ¯ip the handle
down to lock the dipstick in place.
How to Add Fluid
Refer to the Maintenance Schedule to determine what
kind of transmission ¯uid to use. SeePart D:
Recommended Fluids and Lubricants on page 6-18.
Add ¯uid only after checking the transmission ¯uid while
it is hot. (A cold check is used only as a reference.) If
the ¯uid level is low, add only enough of the proper ¯uid
to bring the level up to the HOT area for a hot check.
It doesn't take much ¯uid, generally less than one
pint (0.5 L).
Don't over®ll.
Notice:
We recommend you use only ¯uid labeled
DEXRONž-III, because ¯uid with that label is
made especially for your automatic transmission.
Damage caused by ¯uid other than DEXRON
ž-III is
not covered by your new vehicle warranty.
·After adding ¯uid, recheck the ¯uid level as
described under
How to Check.
·When the correct ¯uid level is obtained, push the
dipstick back in all the way; then ¯ip the handle
down to lock the dipstick in place.
5-23
Page 357 of 486

When to Check Power Steering Fluid
It is not necessary to regularly check power steering ¯uid
unless you suspect there is a leak in the system or
you hear an unusual noise. A ¯uid loss in this system
could indicate a problem. Have the system inspected
and repaired. See
Engine Compartment Overview
on page 5-12for reservoir location.
How to Check Power Steering Fluid
Turn the key off, let the engine compartment cool down,
Locate the cap with this
symbol. See
Engine
Compartment Overview on
page 5-12
for more
information on location.Wipe the cap and the top of the reservoir clean, then
unscrew the cap and wipe the dipstick with a clean rag.
Replace the cap and completely tighten it. Then
remove the cap again and look at the ¯uid level on the
dipstick.
The level should be at the FULL COLD mark. If
necessary, add only enough ¯uid to bring the level up to
the mark.
What to Use
To determine what kind of ¯uid to use, seePart D:
Recommended Fluids and Lubricants on page 6-18.
Always use the proper ¯uid. Failure to use the proper
¯uid can cause leaks and damage hoses and seals.
5-37
Page 360 of 486
Checking Brake Fluid
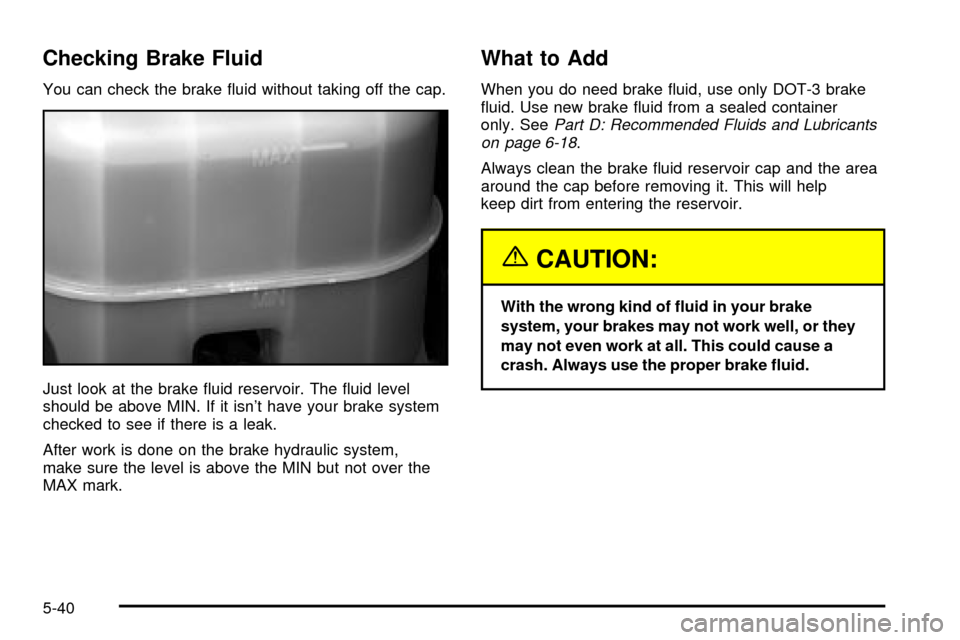
You can check the brake ¯uid without taking off the cap.
Just look at the brake ¯uid reservoir. The ¯uid level
should be above MIN. If it isn't have your brake system
checked to see if there is a leak.
After work is done on the brake hydraulic system,
make sure the level is above the MIN but not over the
MAX mark.
What to Add
When you do need brake ¯uid, use only DOT-3 brake
¯uid. Use new brake ¯uid from a sealed container
only. See
Part D: Recommended Fluids and Lubricants
on page 6-18.
Always clean the brake ¯uid reservoir cap and the area
around the cap before removing it. This will help
keep dirt from entering the reservoir.
{CAUTION:
With the wrong kind of ¯uid in your brake
system, your brakes may not work well, or they
may not even work at all. This could cause a
crash. Always use the proper brake ¯uid.
5-40
Page 370 of 486
All-Wheel Drive
Lubricant checks in this section also apply to these
vehicles. However, there are two additional systems that
need lubrication.
Transfer Case
When to Check Lubricant
Refer to the Maintenance Schedule to determine how
often to check the lubricant. SeePart C: Periodic
MaintenanceInspections on page 6-16.
How to Check Lubricant
To get an accurate reading, the vehicle should be on a
level surface.
If the level is below the bottom of the ®ller plug hole,
you'll need to add some lubricant. Add enough lubricant
to raise the level to the bottom of the ®ller plug hole.
Use care not to overtighten the plug.
What to Use
Refer to the Maintenance Schedule to determine what
kind of lubricant to use. SeePart D: Recommended
Fluids and Lubricants on page 6-18. (A) Filler Plug (B) Drain Plug
5-50
Page 371 of 486
Rear Axle
When to Check Lubricant
Refer to the Maintenance Schedule to determine how
often to check the lubricant. SeePart A: Scheduled
Maintenance Services on page 6-4.
How to Check Lubricant
To get an accurate reading, the vehicle should be on a
level surface.
The proper level is from 5/8 inch to 1 5/8 inch (15 mm to
40 mm) below the bottom of the ®ller plug hole. Add
only enough ¯uid to reach the proper level.
What to Use
Refer to the Maintenance Schedule to determine what
kind of lubricant to use. SeePart D: Recommended
Fluids and Lubricants on page 6-18.
5-51
Page 372 of 486
Front Axle
When to Check and Change Lubricant
Refer to the Maintenance Schedule to determine how
often to check the lubricant and when to change it. See
Part A: Scheduled Maintenance Services on page 6-4.
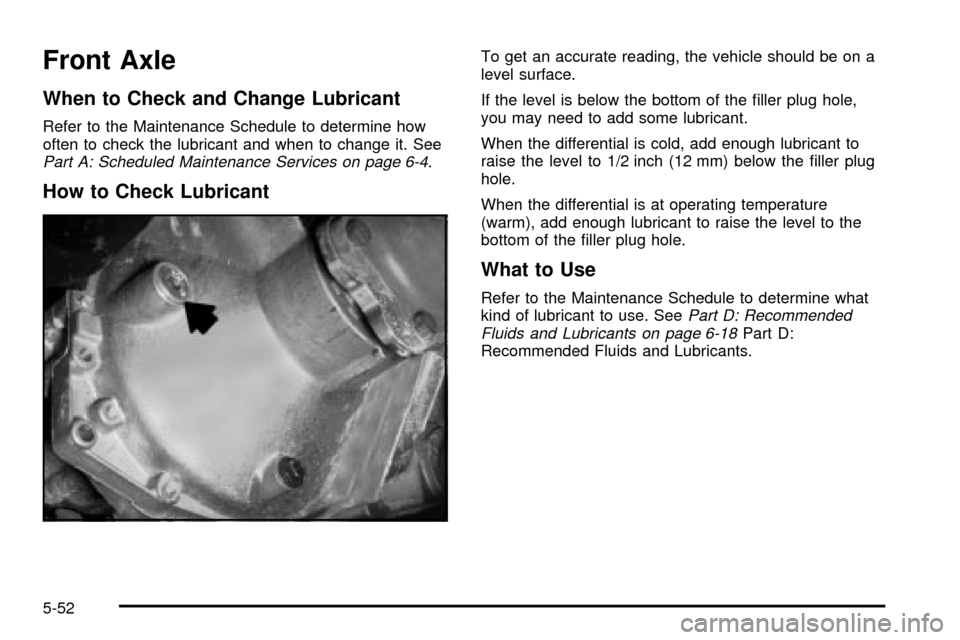
How to Check Lubricant
To get an accurate reading, the vehicle should be on a
level surface.
If the level is below the bottom of the ®ller plug hole,
you may need to add some lubricant.
When the differential is cold, add enough lubricant to
raise the level to 1/2 inch (12 mm) below the ®ller plug
hole.
When the differential is at operating temperature
(warm), add enough lubricant to raise the level to the
bottom of the ®ller plug hole.
What to Use
Refer to the Maintenance Schedule to determine what
kind of lubricant to use. SeePart D: Recommended
Fluids and Lubricants on page 6-18Part D:
Recommended Fluids and Lubricants.
5-52
Page 416 of 486
Cleaning Wood Panels
Use a clean cloth moistened in warm, soapy water (use
mild dish washing soap). Dry the wood immediately
with a clean cloth.
Cleaning the Speaker Covers
Vacuum around a speaker cover gently, so that the
speaker won't be damaged. Clean spots with just water
and mild soap.
Cleaning Glass Surfaces
Glass should be cleaned often. GM Glass Cleaner or a
liquid household glass cleaner will remove normal
tobacco smoke and dust ®lms on interior glass. See
Vehicle Care/Appearance Materials on page 5-100.
Notice:Don't use abrasive cleaners on glass,
because they may cause scratches. Avoid placing
decals on the inside rear window, since they
may have to be scraped off later. If abrasive cleaners
are used on the inside of the rear window, an
electric defogger element may be damaged. Any
temporary license should not be attached across the
defogger grid.
Care of Safety Belts
Keep belts clean and dry.
{CAUTION:
Do not bleach or dye safety belts. If you do, it
may severely weaken them. In a crash, they
might not be able to provide adequate
protection. Clean safety belts only with mild
soap and lukewarm water.
Weatherstrips
Silicone grease on weatherstrips will make them last
longer, seal better, and not stick or squeak. Apply
silicone grease with a clean cloth at least every six
months. During very cold, damp weather more frequent
application may be required. See
Part D: Recommended
Fluids and Lubricants on page 6-18.
5-96
Page 421 of 486

Vehicle Care/Appearance Materials
(cont'd)
Description Usage
White Sidewall Tire
CleanerRemoves soil and black
marks from whitewalls.
Vinyl CleanerCleans vinyl tops,
upholstery and
convertible tops.
Glass CleanerRemoves dirt, grime,
smoke and ®ngerprints.
Chrome and Wire Wheel
CleanerRemoves dirt and grime
from chrome wheels and
wire wheel covers.
Finish EnhancerRemoves dust,
®ngerprints, and surface
contaminants, Spray on
wipe off.
Swirl Remover PolishRemoves swirl marks,
®ne scratches and other
light surface
contamination.
Cleaner WaxRemoves light scratches
and protects ®nish.
Vehicle Care/Appearance Materials
(cont'd)
Description Usage
Foaming Tire Shine Low
GlossCleans, shines and
protects in one easy step,
no wiping necessary.
Wash Wax ConcentrateMedium foaming
shampoo. Cleans and
lightly waxes.
Biodegradable and
phosphate free.
Spot LifterQuickly and easily
removes spots and stains
from carpets, vinyl and
cloth upholstery.
Odor EliminatorOdorless spray odor
eliminator used on
fabrics, vinyl, leather and
carpet.
See your General Motors parts department for these
products. See
Part D: Recommended Fluids and
Lubricants on page 6-18.
5-101