2003 CADILLAC ESCALADE change time
[x] Cancel search: change timePage 241 of 486

Headphones
The RSE system includes two sets of wireless infrared
headphones.
Each set of headphones has an ON/OFF control. An
indicator light will illuminate on the headphones when
they are on. If the light does not illuminate, the batteries
may need to be replaced. See ªBattery Replacementº
later in this section for more information. To turn the
headphones OFF activate the ON/OFF control.
Each set of headphones has a volume knob. To adjust
the volume, adjust this knob.
The headphones will automatically turn off if they lose
the infrared signal from the system after approximately
four minutes in order to preserve their battery power.
The signal may be lost if the system is turned off or if the
headphones are out of range of the infrared signal
transmitters that are located below the video display
screen.
Battery Replacement
To change the batteries, do the following:
1. Loosen the screw on the battery compartment door
located on the left side of the headphone earpiece.
2. Replace the two AAA batteries in the compartment.
Make sure that they are installed correctly.
3. Tighten the screw to close the compartment door.
Notice:Do not store the headphones in heat or
direct sunlight. This could damage the headphones
and repairs would not be covered by your warranty.
Keep the headphones stored in a cool, dry place.
If the headphones are to be stored for a long period of
time, remove the batteries and keep them in a cool,
dry place.
3-91
Page 244 of 486

Problem Recommended Action
The disc was ejected, but
it was pulled back into the
DVD player.The disc is being stored in
the DVD player. Press the
eject button again to eject
the disc.
In auxiliary mode, the
picture moves or scrolls.Check the signal coming
from the auxiliary device
and make sure that the
connection and the signal
is good.
Change the Video
Format to PAL or NTSC.
See ªStereo RCA Jacksº
previously for how to
change the video format.
The language in the
audio or on the screen is
wrong.Press the Menu button
on the DVD player or on
the remote control and
change the audio or
language selection on the
DVD menu.Problem Recommended Action
The remote control does
not work.Point the remote control
directly at the infrared
window below the video
screen while using.
Check that the batteries
are not dead or put in
wrong.
The parental control
button might have been
pressed. (The power
indicator light will ¯ash.)
After stopping the player,
I push Play but
sometimes the DVD
starts where I left off and
sometimes at the
beginning.If the stop button was
pressed one time, the
DVD player will resume
playing where the DVD
was stopped. If the stop
button was pressed two
times the DVD player will
begin to play from the
beginning of the DVD.
3-94
Page 245 of 486

Problem Recommended Action
The auxiliary source is
running but there is no
picture or sound.Press the SRCE button to
change from the DVD
player mode to the
auxiliary source mode.
Check to make sure that
the auxiliary source is
connected to the inputs
properly.
My disc is stuck in the
player. The Load/Eject
button does not work.Press the Load/Eject
button on the DVD
player.
Turn the power off, then
on again, then press the
Load/Eject button on the
DVD player.
Do not attempt to forcibly
remove the disc from the
DVD player. This could
permanently damage the
DVD player.Problem Recommended Action
Sometimes the wireless
headphone audio cuts out
or buzzes.This could be caused by
interference from cellular
telephone towers or by
using your cellular
telephone in the vehicle.
I lost the remote and/or
the headphones.See your dealer for
assistance.
What is the best way to
clean the video screen?Wipe the video screen
with a soft cloth that is
damp with water.
3-95
Page 249 of 486

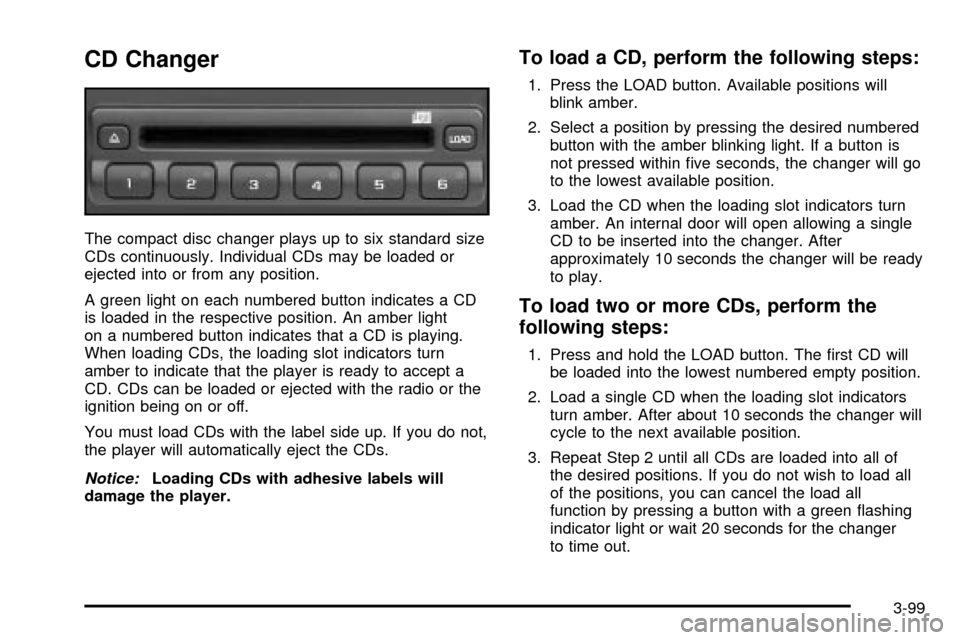
CD Changer
The compact disc changer plays up to six standard size
CDs continuously. Individual CDs may be loaded or
ejected into or from any position.
A green light on each numbered button indicates a CD
is loaded in the respective position. An amber light
on a numbered button indicates that a CD is playing.
When loading CDs, the loading slot indicators turn
amber to indicate that the player is ready to accept a
CD. CDs can be loaded or ejected with the radio or the
ignition being on or off.
You must load CDs with the label side up. If you do not,
the player will automatically eject the CDs.
Notice:Loading CDs with adhesive labels will
damage the player.
To load a CD, perform the following steps:
1. Press the LOAD button. Available positions will
blink amber.
2. Select a position by pressing the desired numbered
button with the amber blinking light. If a button is
not pressed within ®ve seconds, the changer will go
to the lowest available position.
3. Load the CD when the loading slot indicators turn
amber. An internal door will open allowing a single
CD to be inserted into the changer. After
approximately 10 seconds the changer will be ready
to play.
To load two or more CDs, perform the
following steps:
1. Press and hold the LOAD button. The ®rst CD will
be loaded into the lowest numbered empty position.
2. Load a single CD when the loading slot indicators
turn amber. After about 10 seconds the changer will
cycle to the next available position.
3. Repeat Step 2 until all CDs are loaded into all of
the desired positions. If you do not wish to load all
of the positions, you can cancel the load all
function by pressing a button with a green ¯ashing
indicator light or wait 20 seconds for the changer
to time out.
3-99
Page 254 of 486

When cleaning the cassette tape player with the
recommended non-abrasive cleaning cassette, it is
possible that the cassette may eject, because the cut
tape detection feature on your radio may recognize it as
a broken tape, in error. To prevent the cleaning
cassette from being ejected, use the following steps:
1. Turn the ignition on.
2. Turn the radio off.
3. Press and hold the TAPE DISC button for ®ve
seconds. READY will appear on the display and
the cassette symbol will ¯ash for ®ve seconds.
4. Insert the scrubbing action cleaning cassette.
5. Eject the cleaning cassette after the manufacturer's
recommended cleaning time.
When the cleaning cassette has been ejected, the cut
tape detection feature is active again.
You may also choose a non-scrubbing action, wet-type
cleaner which uses a cassette with a fabric belt to
clean the tape head. This type of cleaning cassette will
not eject on its own. A non-scrubbing action cleaner
may not clean as thoroughly as the scrubbing type
cleaner. The use of a non-scrubbing action, dry-type
cleaning cassette is not recommended.
After you clean the player, press and hold the eject
button for ®ve seconds to reset the CLEAN indicator.
The radio will display --- or CLEANED to show the
indicator was reset.Cassettes are subject to wear and the sound quality
may degrade over time. Always make sure the cassette
tape is in good condition before you have your tape
player serviced.
Care of Your CDs and DVDs
Handle discs carefully. Store them in their original cases
or other protective cases and away from direct sunlight
and dust. If the surface of a disc is soiled, dampen
a clean, soft cloth in a mild, neutral detergent solution
and clean it, wiping from the center to the edge.
Be sure never to touch the side without writing when
handling discs. Pick up discs by grasping the outer
edges or the edge of the hole and the outer edge.
Care of Your CD Changer
The use of CD lens cleaner discs is not advised, due to
the risk of contaminating the lens of the CD optics
with lubricants internal to the CD mechanism.
Care of Your CD and DVD Player
The use of CD lens cleaner discs is not advised, due to
the risk of contaminating the lens of the CD optics
with lubricants internal to the CD mechanism.
3-104
Page 264 of 486

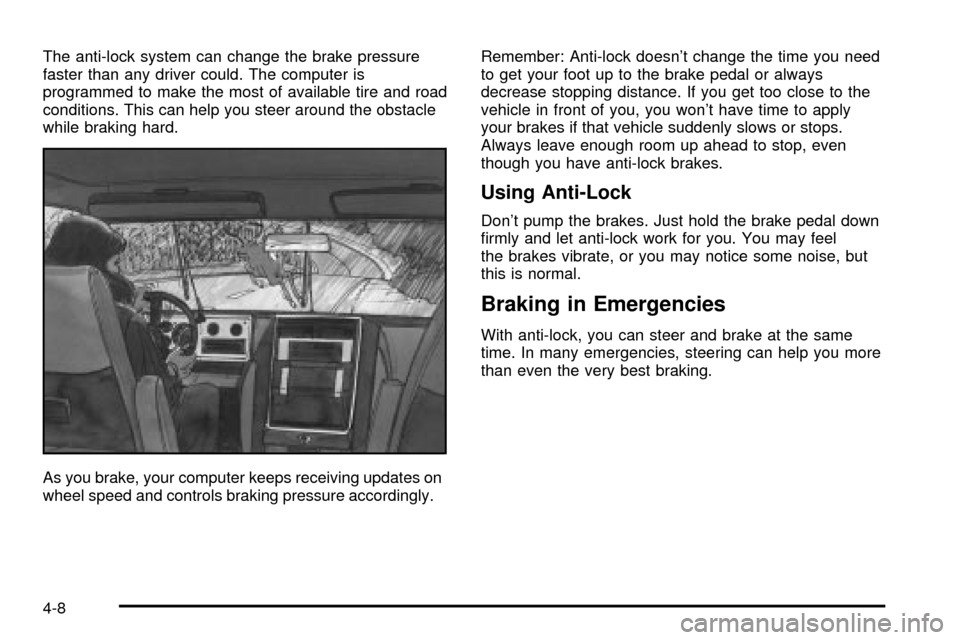
The anti-lock system can change the brake pressure
faster than any driver could. The computer is
programmed to make the most of available tire and road
conditions. This can help you steer around the obstacle
while braking hard.
As you brake, your computer keeps receiving updates on
wheel speed and controls braking pressure accordingly.Remember: Anti-lock doesn't change the time you need
to get your foot up to the brake pedal or always
decrease stopping distance. If you get too close to the
vehicle in front of you, you won't have time to apply
your brakes if that vehicle suddenly slows or stops.
Always leave enough room up ahead to stop, even
though you have anti-lock brakes.
Using Anti-Lock
Don't pump the brakes. Just hold the brake pedal down
®rmly and let anti-lock work for you. You may feel
the brakes vibrate, or you may notice some noise, but
this is normal.
Braking in Emergencies
With anti-lock, you can steer and brake at the same
time. In many emergencies, steering can help you more
than even the very best braking.
4-8
Page 273 of 486

·Check your mirrors, glance over your shoulder and
start your left lane change signal before moving out
of the right lane to pass. When you are far enough
ahead of the passed vehicle to see its front in your
inside mirror, activate your right lane change signal
and move back into the right lane. (Remember that if
your right outside mirror is convex, the vehicle you
just passed may seem to be farther away from you
than it really is.)
·Try not to pass more than one vehicle at a time on
two-lane roads. Reconsider before passing the next
vehicle.
·Don't overtake a slowly moving vehicle too rapidly.
Even though the brake lamps are not ¯ashing, it may
be slowing down or starting to turn.
·If you're being passed, make it easy for the following
driver to get ahead of you. Perhaps you can ease a
little to the right.
Loss of Control
Let's review what driving experts say about what happens
when the three control systems (brakes, steering and
acceleration) don't have enough friction where the tires
meet the road to do what the driver has asked.
In any emergency, don't give up. Keep trying to steer
and constantly seek an escape route or area of
less danger.
Skidding
In a skid, a driver can lose control of the vehicle.
Defensive drivers avoid most skids by taking reasonable
care suited to existing conditions, and by not ªoverdrivingº
those conditions. But skids are always possible.
The three types of skids correspond to your vehicle's
three control systems. In the braking skid, your wheels
aren't rolling. In the steering or cornering skid, too much
speed or steering in a curve causes tires to slip and lose
cornering force. And in the acceleration skid, too much
throttle causes the driving wheels to spin.
A cornering skid is best handled by easing your foot off
the accelerator pedal.
If you have the Traction Control System, remember: It
helps avoid only the acceleration skid. If you do not have
this system, or if the system is off, then an acceleration
skid is also best handled by easing your foot off the
accelerator pedal.
4-17
Page 278 of 486

Controlling your vehicle is the key to successful off-road
driving. One of the best ways to control your vehicle
is to control your speed. Here are some things to keep
in mind. At higher speeds:
·you approach things faster and you have less time
to scan the terrain for obstacles.
·you have less time to react.
·you have more vehicle bounce when you drive over
obstacles.
·you'll need more distance for braking, especially
since you're on an unpaved surface.
{CAUTION:
When you're driving off-road, bouncing and
quick changes in direction can easily throw
you out of position. This could cause you to
lose control and crash. So, whether you're
driving on or off the road, you and your
passengers should wear safety belts.
Scanning the Terrain
Off-road driving can take you over many different kinds
of terrain. You need to be familiar with the terrain
and its many different features. Here are some things to
consider.
Surface Conditions::Off-roading can take you over
hard-packed dirt, gravel, rocks, grass, sand, mud, snow
or ice. Each of these surfaces affects the steering,
acceleration and braking of your vehicle in different
ways. Depending upon the kind of surface you are on,
you may experience slipping, sliding, wheel spinning,
delayed acceleration, poor traction and longer braking
distances.
Surface Obstacles::Unseen or hidden obstacles can
be hazardous. A rock, log, hole, rut or bump can
startle you if you're not prepared for them. Often these
obstacles are hidden by grass, bushes, snow or
even the rise and fall of the terrain itself. Here are some
things to consider:
·Is the path ahead clear?
·Will the surface texture change abruptly up ahead?
·Does the travel take you uphill or downhill?
(There's more discussion of these subjects later.)
·Will you have to stop suddenly or change direction
quickly?
4-22