Page 242 of 473

To load a CD, perform the following steps:
1. Press the LOAD button. Available positions will
blink amber.
2. Select a position by pressing the desired numbered
button with the amber blinking light. If a button is
not pressed within ®ve seconds, the changer will go
to the lowest available position.
3. Load the CD when the loading slot indicators turn
amber. An internal door will open allowing a
single CD to be inserted into the changer.
After approximately 10 seconds the changer will
be ready to play.
To load two or more CDs, perform the
following steps:
1. Press and hold the LOAD button. The ®rst CD will
be loaded into the lowest numbered empty position.
2. Load a single CD when the loading slot indicators
turn amber. After about 10 seconds the changer will
cycle to the next available position.
3. Repeat Step 2 until all CDs are loaded into all of
the desired positions. If you do not wish to load all
of the positions, you can cancel the load all
function by pressing a button with a green ¯ashing
indicator light or wait 20 seconds for the changer
to time out.
To eject a single CD, perform the
following steps:
1. Press the eject button (upward pointing arrow).
The buttons with loaded CDs will blink amber.
2. Press one of the amber blinking buttons to select the
location of the CD you want to eject. The changer will
move to that location and eject the CD. If you do not
remove the CD from the player within 10 seconds, it
will be reloaded. If the eject button is pressed and a
numbered location button is not pressed within
®ve seconds, the current or last played CD will be
ejected.
To eject all CDs, press and hold the eject button.
There are two ways to play a CD.
Perform one of the following:
·
With the radio on, press the desired numbered
button with a green indicator light on the CD
changer.
·Press the TAPE DISC button on the radio.
The CD changer will go to its last played position.
3-96
Page 244 of 473

Theft-Deterrent Feature
THEFTLOCKžis designed to discourage theft of your
radio. The feature works automatically by learning
a portion of the Vehicle Identi®cation Number (VIN).
If the radio is moved to a different vehicle, it will
not operate and LOCKED will be displayed.
When the radio and vehicle are turned off, the blinking
red light indicates that THEFTLOCK
žis armed.
With THEFTLOCKžactivated, your radio will not operate
if stolen.
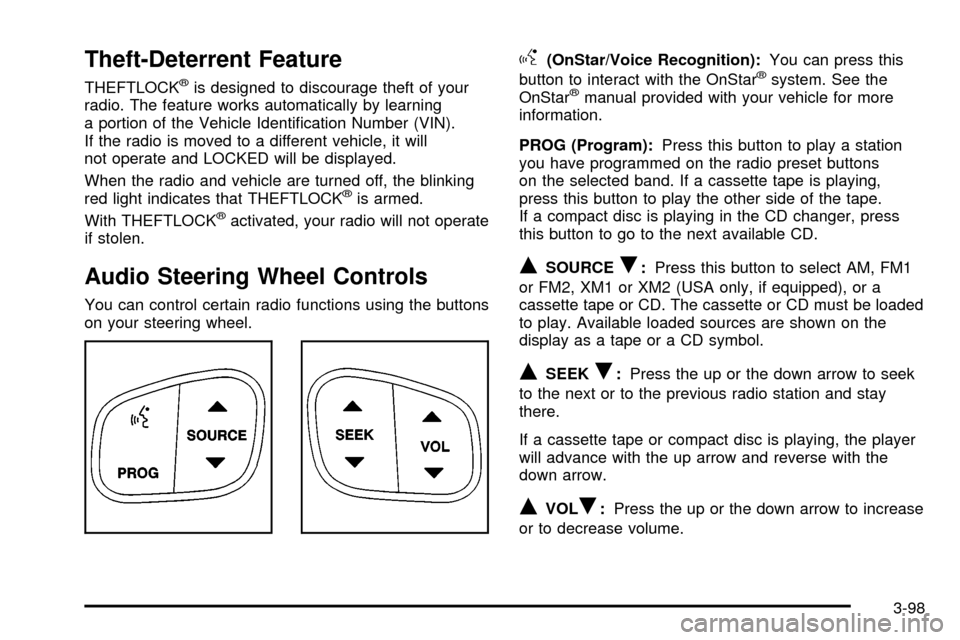
Audio Steering Wheel Controls
You can control certain radio functions using the buttons
on your steering wheel.
g(OnStar/Voice Recognition):You can press this
button to interact with the OnStaržsystem. See the
OnStaržmanual provided with your vehicle for more
information.
PROG (Program):Press this button to play a station
you have programmed on the radio preset buttons
on the selected band. If a cassette tape is playing,
press this button to play the other side of the tape.
If a compact disc is playing in the CD changer, press
this button to go to the next available CD.
QSOURCER:Press this button to select AM, FM1
or FM2, XM1 or XM2 (USA only, if equipped), or a
cassette tape or CD. The cassette or CD must be loaded
to play. Available loaded sources are shown on the
display as a tape or a CD symbol.
QSEEKR:Press the up or the down arrow to seek
to the next or to the previous radio station and stay
there.
If a cassette tape or compact disc is playing, the player
will advance with the up arrow and reverse with the
down arrow.
QVOLR:Press the up or the down arrow to increase
or to decrease volume.
3-98
Page 461 of 473

E
Easy Exit Seat...............................................2-73
Electrical System...........................................5-101
Add-On Equipment.....................................5-101
Fuses and Circuit Breakers.........................5-101
Power Windows and Other Power Options.......5-101
Windshield Wiper Fuses.............................5-101
Electrochromic Mirror Operation........................2-42
Emissions Inspection and
Maintenance Programs.................................3-44
ENGINE COOLANT HOT.................................3-59
Engine Coolant Level Check.............................6-11
Engine Oil Additives........................................5-17
Engine Oil and Chassis Lubrication Scheduled
Maintenance................................................. 6-5
Engine Oil Level Check...................................6-11
ENGINE OVERHEATED..................................3-60
Engine..........................................................5-19
Air Cleaner/Filter.........................................5-19
Battery.......................................................5-43
Check and Service Engine Soon Light............3-42
Compartment Overview................................5-12
Coolant Heater............................................2-31
Coolant Temperature Gage...........................3-40
Coolant......................................................5-24
Cooling System Inspection............................6-16
Exhaust.....................................................2-39Engine (cont.)
Fan Noise..................................................5-36
Oil .............................................................5-14
Overheating................................................5-27
Starting......................................................2-29
Entertainment System....................................3-101
Cleaning the Video Screen..........................3-101
DVD Distortion............................................3-99
Entry Lighting.................................................3-18
Environmental Concerns..................................4-20
Erasing HomeLink
žButtons..............................2-51
Exit Lighting...................................................3-18
Extender, Safety Belt.......................................1-27
Exterior Lamps...............................................3-14
F
Filter.............................................................5-19
Engine Air Cleaner......................................5-19
Finding a PTY Station (RDS and XMŸ).............3-71
Finding a Station............................................3-69
Finish Care....................................................5-96
Finish Damage...............................................5-98
Fixed Mast Antenna.......................................3-101
Flash-to-Pass................................................... 3-9
Flat Tire, Changing.........................................5-76
Flat Tire........................................................5-75
6