2003 BUICK LESABRE change wheel
[x] Cancel search: change wheelPage 109 of 380

Instrument Panel Overview...............................3-4
Hazard Warning Flashers................................3-6
Other Warning Devices...................................3-6
Horn.............................................................3-7
Tilt Wheel.....................................................3-7
Turn Signal/Multifunction Lever.........................3-7
Exterior Lamps.............................................3-14
Interior Lamps..............................................3-17
Head-Up Display (HUD).................................3-20
Accessory Power Outlets...............................3-22
Ashtrays and Cigarette Lighter........................3-23
Climate Controls............................................3-24
Climate Control System.................................3-24
Dual Automatic Climate Control System...........3-26
Outlet Adjustment.........................................3-30
Steering Wheel Climate Controls.....................3-31
Climate Controls Personalization.....................3-31
Warning Lights, Gages and Indicators.............3-32
Instrument Panel Cluster................................3-33
Speedometer and Odometer...........................3-35
Tachometer.................................................3-35
Safety Belt Reminder Light.............................3-36Air Bag Readiness Light................................3-36
Battery Warning Light....................................3-37
Brake System Warning Light..........................3-37
Anti-Lock Brake System Warning Light.............3-38
Traction Control System (TCS) Warning Light . . .3-39
Engine Coolant Temperature Gage..................3-40
Malfunction Indicator Lamp.............................3-40
Oil Pressure Light.........................................3-43
Security Light...............................................3-44
Cruise Control Light......................................3-44
Service Vehicle Soon Light............................3-44
Fuel Gage...................................................3-45
Driver Information Center (DIC).......................3-45
DIC Controls and Displays.............................3-46
DIC Warnings and Messages.........................3-49
DIC Vehicle Personalization............................3-50
Audio System(s).............................................3-55
Setting the Time...........................................3-55
Radio with CD..............................................3-56
Radio with Cassette and CD..........................3-62
Trunk-Mounted CD Changer...........................3-73
Personal Choice Radio Controls......................3-77
Section 3 Instrument Panel
3-1
Page 115 of 380

Horn
Press the center area of the steering wheel to sound
the horn.
Tilt Wheel
A tilt wheel allows you to adjust the steering wheel
before you drive. You can also raise it to the highest
level to give your legs more room when you exit
and enter the vehicle.
The lever that allows you to tilt the steering wheel is
located on the left side of the steering column.
To tilt the wheel, hold the
wheel and pull the lever
toward you. Then move the
wheel to a comfortable
position and release
the lever to lock the wheel
in place.
Turn Signal/Multifunction Lever
The lever on the left side of the steering column
includes the following:
·Turn and Lane-Change Signals
·Headlamp High/Low-Beam Changer
·Flash-To-Pass
·Windshield Wipers
·Windshield Washer
For more information on exterior lamps, see
Exterior
Lamps on page 3-14.
3-7
Page 116 of 380

Turn and Lane-Change Signals
To signal a turn, move the lever on the left side of the
steering wheel all the way up or down. The lever returns
automatically when the turn is complete.
An arrow on the instrument
panel cluster will ¯ash in
the direction of the
turn or lane change.
If your vehicle is equipped with the Head-Up Display
(HUD), an arrow will also appear in the display area to
indicate the direction of the turn or lane change.
See
Head-Up Display (HUD) on page 3-20for more
information.
You may also have an arrow in the outside mirror that
¯ashes when the turn signal is used. See
Outside Power
Mirrors on page 2-35for more information.
Raise or lower the lever until the arrow starts to ¯ash to
signal a lane change. Hold it there until the lane
change is complete.
If the arrows ¯ash very fast as you signal a turn or a
lane change, a signal bulb may be burned out and other
drivers won't see your turn signal.If a bulb is burned out, replace it to help avoid an
accident. If the arrows don't go on at all when you signal
a turn, check the fuse. See
Fuses and Circuit Breakers
on page 5-86.
Turn Signal On Chime
If your turn signal is left on for more than 0.8 miles
(1.3 km), a chime will sound at each ¯ash of the turn
signal. To turn off the chime, move the turn signal lever
to the off position.
Headlamp High/Low-Beam Changer
To change the headlamps from low beam to high beam
or high beam to low beam, pull the turn signal lever
toward you and release it.
When the high beams are
on, this light located on the
instrument panel cluster
will also be on.
If your vehicle is equipped with the Head-Up Display
(HUD), this symbol will also appear in the display area to
indicate the high beams are on. See
Head-Up Display
(HUD) on page 3-20for more information.
3-8
Page 120 of 380

When you apply your brakes, the cruise control
shuts off.
{CAUTION:
·Cruise control can be dangerous where
you can't drive safely at a steady speed.
So, don't use your cruise control on
winding roads or in heavy traffic.
·Cruise control can be dangerous on
slippery roads. On such roads, fast
changes in tire traction can cause
needless wheel spinning, and you could
lose control. Don't use cruise control on
slippery roads.
If your vehicle is in cruise control when the optional
traction control system begins to limit wheel spin, the
cruise control will automatically disengage. See
Traction
Control System (TCS) on page 4-9. When road
conditions allow you to safely use it again, you may turn
the cruise control back on.
Setting Cruise Control
{CAUTION:
If you leave your cruise control on when you're
not using cruise, you might hit a button and go
into cruise when you don't want to. You could
be startled and even lose control. Keep the
cruise control switch off until you want to use
cruise control.
1. Press the ON/OFF switch to turn cruise control on.
An indicator light will come on in the switch to show
that cruise control is on.
2. Get up to the speed you want.
3. Press the SET/COAST switch and the CRUISE light
on the instrument panel cluster will illuminate.
4. Take your foot off the accelerator pedal.
Resuming a Set Speed
Suppose you set your cruise control at a desired speed
and then you apply the brake. This, of course, shuts
off the cruise control. But you don't need to reset it.
3-12
Page 138 of 380

Passenger Temperature Control
If your vehicle has this feature, then the driver and the
front-seat passenger can select separate temperature
settings. This feature allows the passenger to select
a temperature that is 5É F (3É C) warmer or cooler than
the driver's selected temperature. The control is
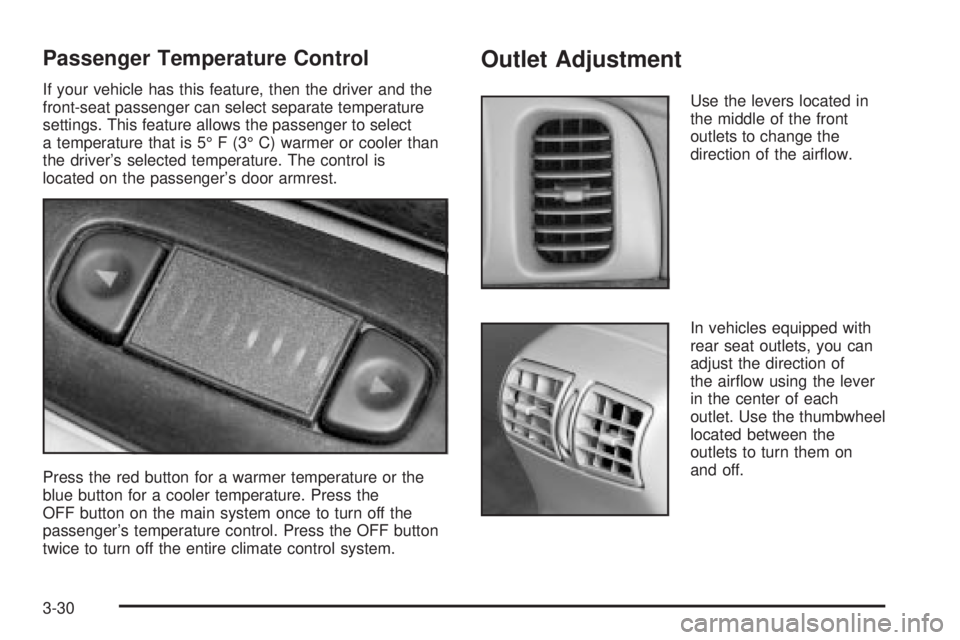
located on the passenger's door armrest.
Press the red button for a warmer temperature or the
blue button for a cooler temperature. Press the
OFF button on the main system once to turn off the
passenger's temperature control. Press the OFF button
twice to turn off the entire climate control system.
Outlet Adjustment
Use the levers located in
the middle of the front
outlets to change the
direction of the air¯ow.
In vehicles equipped with
rear seat outlets, you can
adjust the direction of
the air¯ow using the lever
in the center of each
outlet. Use the thumbwheel
located between the
outlets to turn them on
and off.
3-30
Page 139 of 380

Operation Tips
·
Clear away any ice, snow or leaves from the air
inlets at the base of the windshield that may
block the ¯ow of air into your vehicle.
·Use of non-GM approved hood de¯ectors may
adversely affect the performance of the system.
·Keep the path under the front seats clear of objects
to help circulate the air inside of your vehicle more
effectively.
Steering Wheel Climate Controls
If your vehicle has this
feature, you can control
the temperature function
by using the switch located
on your steering wheel.
wTEMPx(Temperature):Press the up or down
arrow on this switch to increase or decrease the
temperature.
Climate Controls Personalization
If your vehicle is equipped with this feature, up to two
drivers are able to store and recall climate control
settings for the temperature, the fan speed and the
direction of the air¯ow.
Memory buttons 1 and 2 are located on the driver's
door panel and correspond to the numbers 1 or 2 found
on the back of each remote keyless entry transmitter.
To store settings, do the following:
1. Select the desired temperature, fan speed and
air¯ow mode. If desired, a separate temperature
setting may also be selected for the front seat
passenger. For information on how to do this, see
Dual Automatic Climate Control System on
page 3-26.
2. Locate memory buttons 1 and 2 on the driver's
door panel.
3. Press the memory button on the door panel that
corresponds to the number on the back of the
transmitter you are programming, until you hear two
beeps. The beeps con®rm that your selection has
been saved and can now be recalled. For more
information on the memory feature, see
Memory
Seat and Mirrors on page 2-44.
Follow these steps each time you want to change the
stored settings.
3-31
Page 198 of 380

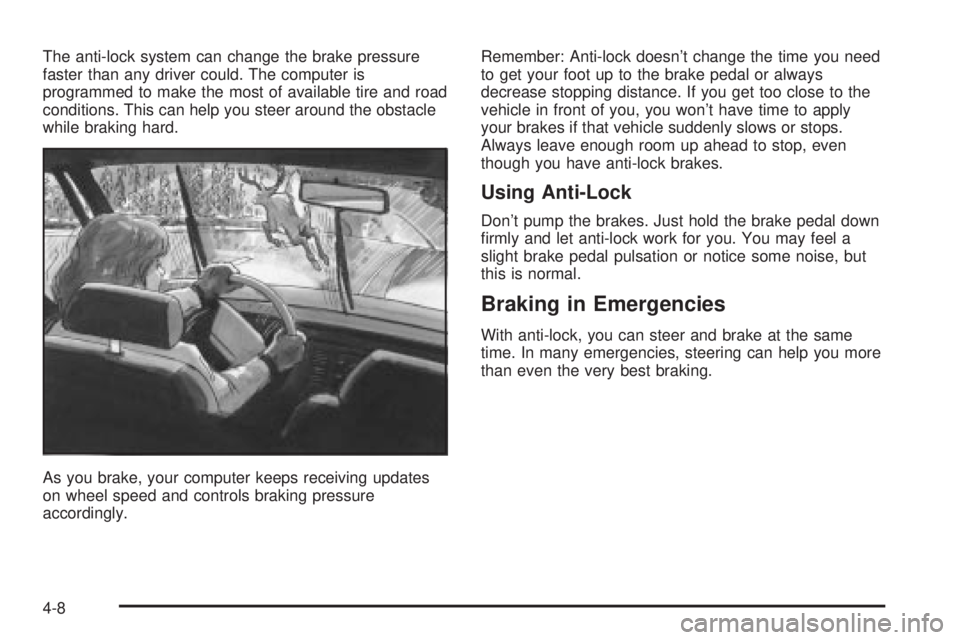
The anti-lock system can change the brake pressure
faster than any driver could. The computer is
programmed to make the most of available tire and road
conditions. This can help you steer around the obstacle
while braking hard.
As you brake, your computer keeps receiving updates
on wheel speed and controls braking pressure
accordingly.Remember: Anti-lock doesn't change the time you need
to get your foot up to the brake pedal or always
decrease stopping distance. If you get too close to the
vehicle in front of you, you won't have time to apply
your brakes if that vehicle suddenly slows or stops.
Always leave enough room up ahead to stop, even
though you have anti-lock brakes.
Using Anti-Lock
Don't pump the brakes. Just hold the brake pedal down
®rmly and let anti-lock work for you. You may feel a
slight brake pedal pulsation or notice some noise, but
this is normal.
Braking in Emergencies
With anti-lock, you can steer and brake at the same
time. In many emergencies, steering can help you more
than even the very best braking.
4-8
Page 200 of 380

To turn the system off, press the TRACTION OFF
button located at the end of the shift lever on the right
side of the steering wheel.
The traction control system warning light will come on
and stay on. If the system is limiting wheel spin
when you press the button, the warning light will come
on ± but the system won't turn off right away. It will
wait until there's no longer a current need to limit wheel
spin.
You can turn the system back on at any time by
pressing the button again. The traction control system
warning light should go off.
Steering
Power Steering
If you lose power steering assist because the engine
stops or the system is not functioning, you can steer but
it will take much more effort.
Steering Tips
Driving on Curves
It's important to take curves at a reasonable speed.
A lot of the ªdriver lost controlº accidents mentioned on
the news happen on curves. Here's why:
Experienced driver or beginner, each of us is subject to
the same laws of physics when driving on curves.
The traction of the tires against the road surface makes
it possible for the vehicle to change its path when
you turn the front wheels. If there's no traction, inertia
will keep the vehicle going in the same direction. If
you've ever tried to steer a vehicle on wet ice, you'll
understand this.
4-10