2003 BUICK CENTURY wheel covers
[x] Cancel search: wheel coversPage 63 of 344

If your vehicle has one, the driver's side impact air bag is
in the side of the driver's seatback closest to the door.
{CAUTION:
If something is between an occupant and an
air bag, the bag might not in¯ate properly or it
might force the object into that person causing
severe injury or even death. The path of an
in¯ating air bag must be kept clear. Don't put
anything between an occupant and an air bag,
and don't attach or put anything on the
steering wheel hub or on or near any other air
bag covering. Don't let seat covers block the
in¯ation path of a side impact air bag.
1-57
Page 67 of 344

In many crashes severe enough to in¯ate an air bag,
windshields are broken by vehicle deformation.
Additional windshield breakage may also occur from the
right front passenger air bag.
·Air bags are designed to in¯ate only once. After an
air bag in¯ates, you'll need some new parts for
your air bag system. If you don't get them, the air
bag system won't be there to help protect you
in another crash. A new system will include air bag
modules and possibly other parts. The service
manual for your vehicle covers the need to replace
other parts.
·Your vehicle is equipped with a crash sensing and
diagnostic module, which records information
about the frontal air bag system. The module
records information about the readiness of the
system, when the system commands air bag
in¯ation and driver's safety belt usage at
deployment. The module also records speed,
engine RPM, brake and throttle data.
·Let only quali®ed technicians work on your air bag
systems. Improper service can mean that an air
bag system won't work properly. See your dealer for
service.
Notice:If you damage the covering for the driver's
or the right front passenger's air bag, or the air
bag covering on the driver's seatback, the bag may
not work properly. You may have to replace the
air bag module in the steering wheel, both the air
bag module and the instrument panel for the
right front passenger's air bag, or the air bag
module and seatback for the driver's side impact air
bag. Do not open or break the air bag coverings.
1-61
Page 270 of 344

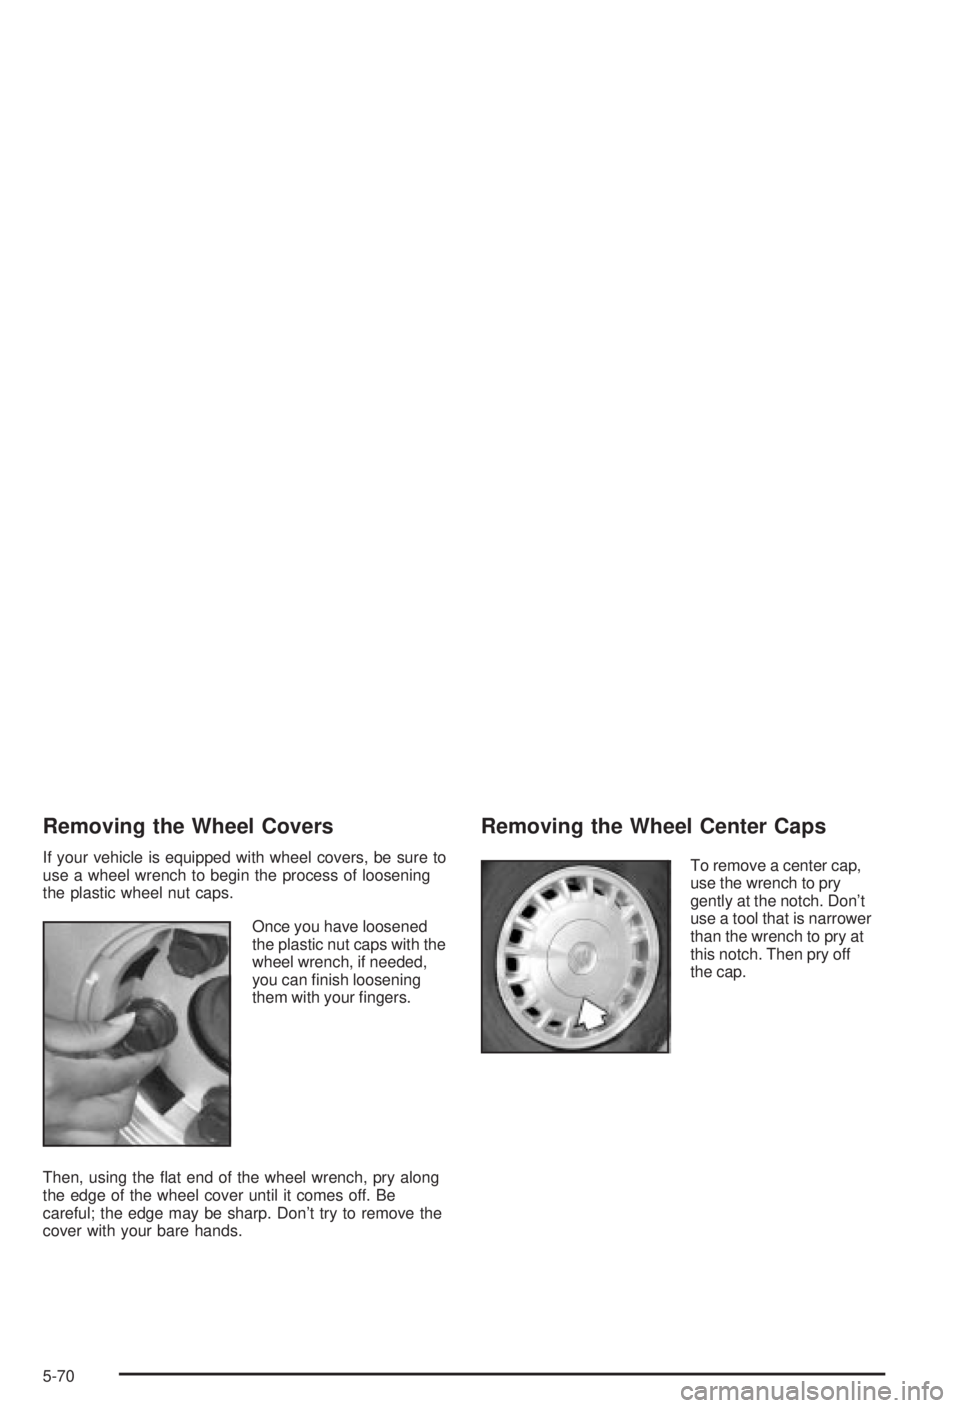
Removing the Wheel Covers
If your vehicle is equipped with wheel covers, be sure to
use a wheel wrench to begin the process of loosening
the plastic wheel nut caps.
Once you have loosened
the plastic nut caps with the
wheel wrench, if needed,
you can ®nish loosening
them with your ®ngers.
Then, using the ¯at end of the wheel wrench, pry along
the edge of the wheel cover until it comes off. Be
careful; the edge may be sharp. Don't try to remove the
cover with your bare hands.
Removing the Wheel Center Caps
To remove a center cap,
use the wrench to pry
gently at the notch. Don't
use a tool that is narrower
than the wrench to pry at
this notch. Then pry off
the cap.
5-70
Page 275 of 344

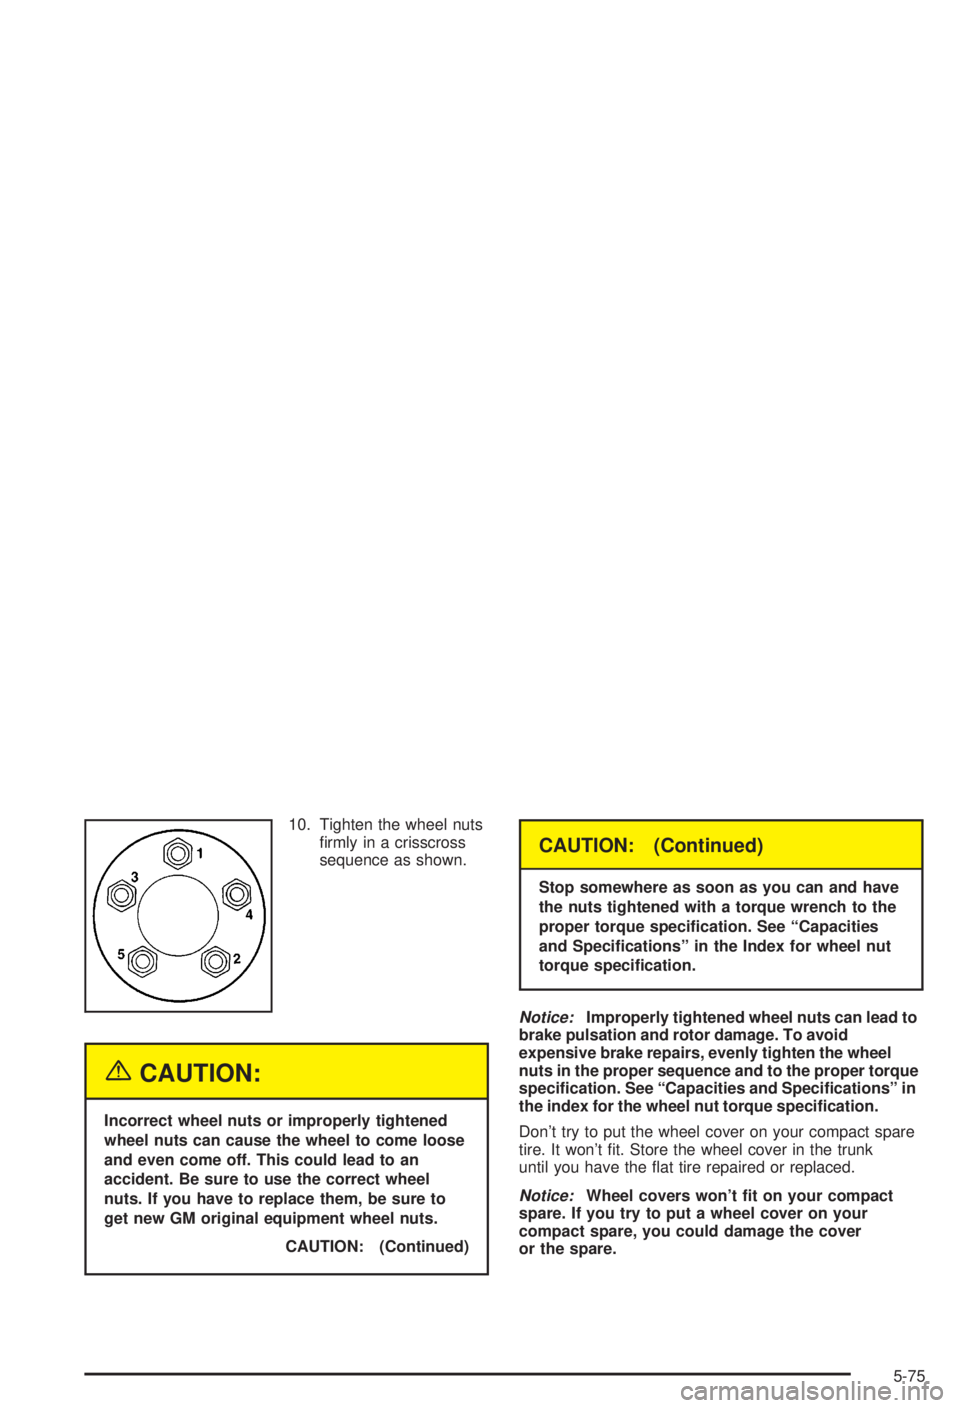
10. Tighten the wheel nuts
®rmly in a crisscross
sequence as shown.
{CAUTION:
Incorrect wheel nuts or improperly tightened
wheel nuts can cause the wheel to come loose
and even come off. This could lead to an
accident. Be sure to use the correct wheel
nuts. If you have to replace them, be sure to
get new GM original equipment wheel nuts.
CAUTION: (Continued)
CAUTION: (Continued)
Stop somewhere as soon as you can and have
the nuts tightened with a torque wrench to the
proper torque speci®cation. See ªCapacities
and Speci®cationsº in the Index for wheel nut
torque speci®cation.
Notice:Improperly tightened wheel nuts can lead to
brake pulsation and rotor damage. To avoid
expensive brake repairs, evenly tighten the wheel
nuts in the proper sequence and to the proper torque
speci®cation. See ªCapacities and Speci®cationsº in
the index for the wheel nut torque speci®cation.
Don't try to put the wheel cover on your compact spare
tire. It won't ®t. Store the wheel cover in the trunk
until you have the ¯at tire repaired or replaced.
Notice:Wheel covers won't ®t on your compact
spare. If you try to put a wheel cover on your
compact spare, you could damage the cover
or the spare.
5-75
Page 285 of 344

Underbody Maintenance
Chemicals used for ice and snow removal and dust
control can collect on the underbody. If these are not
removed, accelerated corrosion (rust) can occur on
the underbody parts such as fuel lines, frame, ¯oor pan
and exhaust system even though they have corrosion
protection.
At least every spring, ¯ush these materials from the
underbody with plain water. Clean any areas where mud
and debris can collect. Dirt packed in close areas of
the frame should be loosened before being ¯ushed.
Your dealer or an underbody car washing system can
do this for you.
Chemical Paint Spotting
Some weather and atmospheric conditions can create a
chemical fallout. Airborne pollutants can fall upon and
attack painted surfaces on your vehicle. This damage
can take two forms: blotchy, ring-shaped discolorations,
and small, irregular dark spots etched into the paint
surface.
Although no defect in the paint job causes this, GM will
repair, at no charge to the owner, the surfaces of
new vehicles damaged by this fallout condition within
12 months or 12,000 miles (20 000 km) of purchase,
whichever occurs ®rst.
Vehicle Care/Appearance Materials
See your GM dealer for more information on purchasing
the following products.
Vehicle Care/Appearance Materials
Description Usage
Polishing Cloth
Wax-TreatedInterior and exterior
polishing cloth.
Tar and Road Oil
RemoverRemoves tar, road oil and
asphalt.
Chrome Cleaner and
PolishUse on chrome or
stainless steel.
White Sidewall Tire
CleanerRemoves soil and black
marks from whitewalls.
Vinyl CleanerCleans vinyl tops,
upholstery and
convertible tops.
Glass CleanerRemoves dirt, grime,
smoke and ®ngerprints.
Chrome and Wire Wheel
CleanerRemoves dirt and grime
from chrome wheels and
wire wheel covers.
5-85
Page 339 of 344

Q
Questions and Answers About Safety Belts.........1-11
R
Radiator Pressure Cap....................................5-26
Radios..........................................................3-39
AM-FM Radio.............................................3-40
Care of Your Cassette Tape Player................3-51
Care of Your CD Player...............................3-52
Care of Your CDs........................................3-52
Radio with Cassette and CD.........................3-42
Setting the Time..........................................3-39
Theft-Deterrent............................................3-48
Understanding Reception..............................3-50
Reading Lamps..............................................3-15
Rear Safety Belt Comfort Guides......................1-27
Rear Seat Outside Passenger Positions.............1-24
Rear Seat Passengers, Safety Belts..................1-24
Rear Window Defogger....................................3-19
Rearview Mirror with OnStar
ž...........................2-32
Rearview Mirrors.............................................2-32
Reclining Seatbacks.......................................... 1-3
Recreational Vehicle Towing.............................4-32
Remote Keyless Entry System, Operation............ 2-5
Remote Keyless Entry System............................ 2-4Remote Trunk Release....................................2-13
Removing the Flat Tire and Installing
the Spare Tire.............................................5-71
Removing the Spare Tire and Tools...................5-68
Removing the Wheel Center Caps....................5-70
Removing the Wheel Covers............................5-70
Replacement Bulbs.........................................5-55
Replacing Brake System Parts..........................5-42
Replacing Restraint System Parts After a Crash.....1-63
Reporting Safety Defects.................................7-10
Canadian Government..................................7-10
General Motors...........................................7-11
United States Government............................7-10
Restraint System Check...................................6-11
Checking Your Restraint Systems...................1-63
Replacing Restraint System Parts After
a Crash..................................................1-63
Restraint Systems...........................................1-63
Checking....................................................1-63
Replacing Parts...........................................1-63
Resynchronization............................................. 2-9
Retained Accessory Power (RAP)......................2-20
Right Front Passenger Position, Safety Belts......1-21
Roadside......................................................... 7-6
Assistance Program....................................... 7-6
Rocking Your Vehicle To Get It Out...................4-31
Running Your Engine While You Are Parked.......2-31
11