Page 123 of 344

Climate Controls
Dual Climate Control System
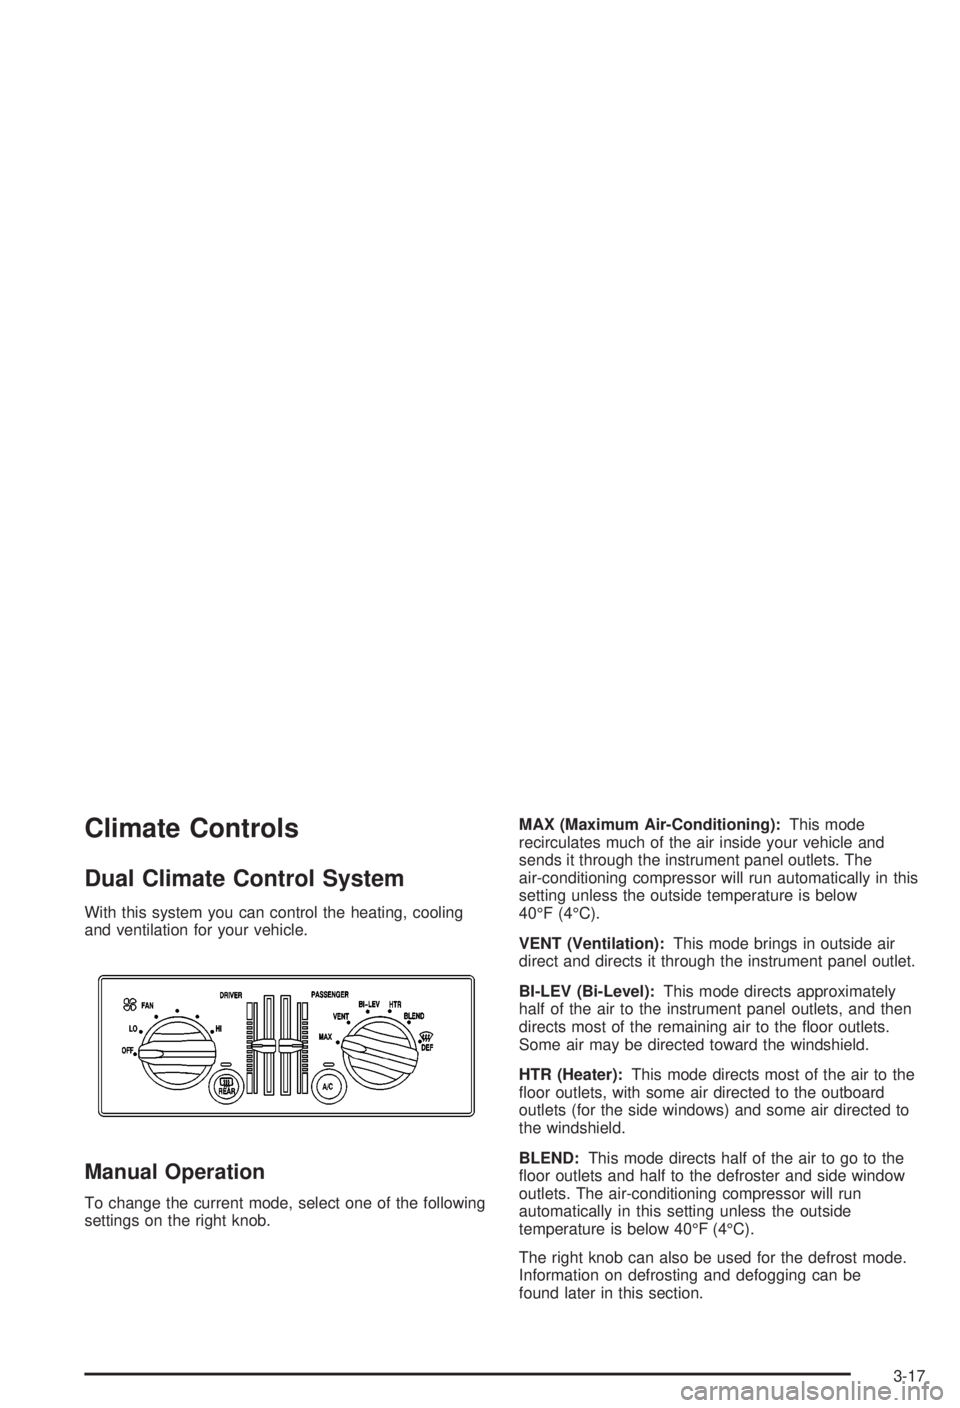
With this system you can control the heating, cooling
and ventilation for your vehicle.
Manual Operation
To change the current mode, select one of the following
settings on the right knob.MAX (Maximum Air-Conditioning):This mode
recirculates much of the air inside your vehicle and
sends it through the instrument panel outlets. The
air-conditioning compressor will run automatically in this
setting unless the outside temperature is below
40ÉF (4ÉC).
VENT (Ventilation):This mode brings in outside air
direct and directs it through the instrument panel outlet.
BI-LEV (Bi-Level):This mode directs approximately
half of the air to the instrument panel outlets, and then
directs most of the remaining air to the ¯oor outlets.
Some air may be directed toward the windshield.
HTR (Heater):This mode directs most of the air to the
¯oor outlets, with some air directed to the outboard
outlets (for the side windows) and some air directed to
the windshield.
BLEND:This mode directs half of the air to go to the
¯oor outlets and half to the defroster and side window
outlets. The air-conditioning compressor will run
automatically in this setting unless the outside
temperature is below 40ÉF (4ÉC).
The right knob can also be used for the defrost mode.
Information on defrosting and defogging can be
found later in this section.
3-17
Page 124 of 344

9FAN:The left knob controls the fan speed.
OFF:Turn the knob all the way counterclockwise to
turn off the fan.
LO (Low Fan Speed):This setting creates the lowest
fan speed.
HI (High Fan Speed):This setting creates the highest
fan speed.
DRIVER (Driver's Side Temperature):The lever on
the left adjusts the air temperature for the driver's
side outlets. Slide the lever up to raise the temperature
and down to lower the temperature.
PASSENGER (Passenger's Side Temperature):
The lever on the right adjusts the air temperature for the
passenger's side outlets. Slide the lever up to raise
the temperature and down to lower the temperature.
"(Air Conditioning):Press this button to turn the
air-conditioning on and off. An indicator light above the
button will come on when the air conditioning is on.
During daylight hours you may need to adjust the interior
lighting control to the highest setting in order to see the
light. The system will cool and dehumidify the air inside
the vehicle when the A/C indicator light is on.On very hot days, open the windows long enough to let
hot, inside air escape. This reduces the time for the
vehicle to cool down.
For a quick cool-down on a very hot day, use MAX with
the temperature levers all the way in the blue area. If this
setting is used for long periods of time, the air in your
vehicle may become too dry.
For normal cooling on hot days, use VENT with the
temperature levers in the blue area. The system will bring
in outside air and cool it.
On cool, but sunny days, the sun may warm your upper
body, but your lower body may not be warm enough.
Select BI-LEV and set the temperature levers to a
comfortable setting. The system will bring in outside air
and direct it to your upper body, while sending slightly
warmed air to your lower body. Push the A/C button for
cooling.
3-18
Page 125 of 344

Defogging and Defrosting
Fog on the inside of the windows is a result of high
humidity (moisture) condensing on the cool window
glass. This can be minimized if the climate control
system is used properly. There are two modes to clear
fog or frost from your windshield and side windows.
Use the blend mode to clear the windows of fog
or moisture and warm the passengers. Use the defrost
mode to remove frost or fog from the windshield
more quickly. For best results, clear all snow and ice
from the windshield before defrosting.
0DEF (Defrost):This setting, located on the right
knob, directs most of the air through the defroster
and the side window outlets. Some of the air is directed
to the ¯oor and side window outlets. The air-conditioning
compressor will run automatically in this setting unless
the outside temperature is below 40ÉF (4ÉC).
To defrost the window quickly, turn the mode knob to
the defrost setting and turn the driver's and passenger's
temperature levers all the way to the red area.
To warm passengers while keeping the windows clear,
use BLEND.
Do not drive the vehicle until all the windows are clear.
Rear Window Defogger
0
(Rear):Press the button to turn the defogger on.
The rear window defogger will shut off after about
15 minutes. If you turn it on again, the rear window
defogger will only run for about seven and one
half minutes before turning off. You can also turn it off
by pressing the button again.
Do not drive the vehicle until all the windows are clear.
Notice:Don't use a razor blade or something
else sharp on the inside of the rear window. If you
do, you could cut or damage the defogger and
the repairs would not be covered by your warranty.
Do not attach a temporary vehicle license, tape,
a decal or anything similar to the defogger grid.
3-19
Page 126 of 344

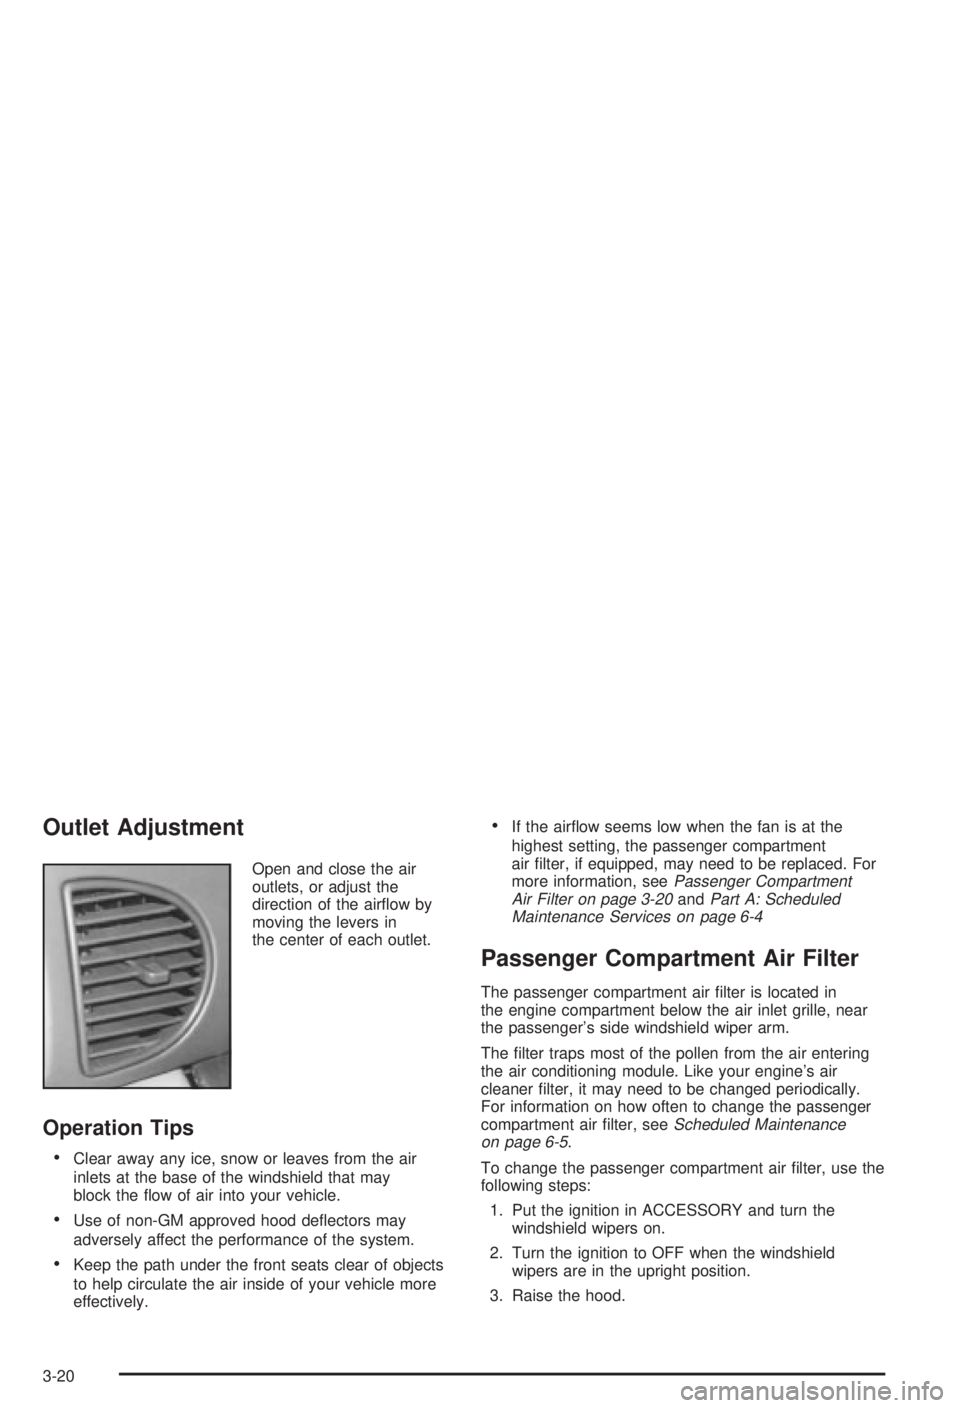
Outlet Adjustment
Open and close the air
outlets, or adjust the
direction of the air¯ow by
moving the levers in
the center of each outlet.
Operation Tips
·Clear away any ice, snow or leaves from the air
inlets at the base of the windshield that may
block the ¯ow of air into your vehicle.
·Use of non-GM approved hood de¯ectors may
adversely affect the performance of the system.
·Keep the path under the front seats clear of objects
to help circulate the air inside of your vehicle more
effectively.
·If the air¯ow seems low when the fan is at the
highest setting, the passenger compartment
air ®lter, if equipped, may need to be replaced. For
more information, see
Passenger Compartment
Air Filter on page 3-20andPart A: Scheduled
Maintenance Services on page 6-4
Passenger Compartment Air Filter
The passenger compartment air ®lter is located in
the engine compartment below the air inlet grille, near
the passenger's side windshield wiper arm.
The ®lter traps most of the pollen from the air entering
the air conditioning module. Like your engine's air
cleaner ®lter, it may need to be changed periodically.
For information on how often to change the passenger
compartment air ®lter, see
Scheduled Maintenance
on page 6-5.
To change the passenger compartment air ®lter, use the
following steps:
1. Put the ignition in ACCESSORY and turn the
windshield wipers on.
2. Turn the ignition to OFF when the windshield
wipers are in the upright position.
3. Raise the hood.
3-20
Page 290 of 344

Circuit
BreakersUsage
POWER
SEATSPower Seats
Blank Not Used
Fuses Usage
PARK LOCK Ignition Key Solenoid
Blank Not Used
Blank Not Used
PCM, BCM,
U/H RELAYIgnition Signal: Hot in Run and Start,
Powertrain Control Module, Body
Control Module, Underhood Relay
RADIO PREM.
SOUNDRemote Radio Premium Sound
POWER
MIRRORSPower Mirrors
Blank Not Used
PANEL
DIMMINGPanel Dimming
Blank Not Used
IGN 0,
CLUSTER,
PCM, BCMIgnition Signal: Hot in Run, Unlock
and Start, Cluster, Powertrain
Control Module, Body Control
Module
Blank Not Used
Fuses Usage
Blank Not Used
Blank Not Used
INADV POWER
BUSInterior Lamps
DOOR LOCKS Door Locks
Blank Not Used
TAIL LAMPS,
LIC LAMPSTaillamps, License Plate Lamps
RADIO Radio
HEATED
MIRRORNot Used
CRUISE Cruise Control
Blank Not Used
CLUSTER Instrument Panel Cluster
CIGAR LTR Cigarette Lighter
STOP LAMPS Stoplamps
ONSTAR OnStar
ž
FRT PARK LPS Front Parking Lamps
Blank Not Used
CRANK
SIGNAL, BCM,
CLUSTERCrank Signal, Body Control Module,
Cluster, Powertrain Control Module
HVACIgnition Signal, Heating Ventilation
Air Conditioning Control Head
5-90
Page 291 of 344
Fuses Usage
BTSI PARK
LOCKShifter Lock Solenoid
AIR BAG Air Bag
BCM PWR Body Control Module
HAZARD Hazard Flashers
LH HEATED
SEATDriver's Heated Seat
Blank Not Used
BCM ACCIgnition Signal: Hot in ACC and Run,
Body Control Module
Blank Not Used
LOW BLOWER Low Blower
ABS Anti-Lock Brakes
TURN
SIGNALS,
CORN LPSTurn Signals, Cornering Lamps
RADIO, HVAC,
RFA,
CLUSTERRadio, Heating Ventilation Air
Conditioning Head, Remote Keyless
Entry, Cluster
HIGH BLOWER High Blower
RH HEATED
SEATPassenger's Heated Seat
STRG WHL
CONTAudio Steering Wheel Controls
WIPER Windshield WipersUnderhood Fuse Block
Some fuses and relays are located in the underhood
fuse block on the passenger's side of the vehicle in the
engine compartment. See
Engine Compartment
Overview on page 5-12or more information on location.
Fuses Usage
1 Anti-Lock Brake System
2 Starter Solenoid
3Power Seats, Rear Window
Defogger Heated Seats
5-91
Page 292 of 344
Fuses Usage
4High Blower, Hazard Flasher,
Stoplamps, Power Mirror, Door
Locks
5Ignition Switch, BTSI, Stoplamps,
Anti-Lock Brake System, Turn
Signals, Cluster, Air Bag, Daytime
Running Lamps Module
6 Cooling Fan
7Retained Accessory Power, Keyless
Entry, Data Link, Heating Ventilation
Air Conditioning Head, Cluster,
Radio, Cigarette Lighter
8Ignition Switch, Wipers, Radio,
Steering Wheel Controls, Body
Control Module, Power Windows,
Sunroof, Heating Ventilation Air
Conditioning Controls, Daytime
Running Lamps, Rear Window
Defogger Relay
Relays Usage
9 Cooling Fan 2
10 Cooling Fan 3
11 Starter Solenoid
12 Cooling Fan 1
13 Ignition Main
14 Air Pump (Optional)
15 Not Used
16 Horn
17 Fog Lamps
18 Not Used
19 Fuel Pump
5-92
Page 294 of 344
Capacities and Speci®cations
Capacities and Speci®cations
ApplicationCapacities
English Metric
Air Conditioning Refrigerant R134a 2.4 lbs 1,1 kg
Automatic Transaxle
Pan Removal and Replacement
After Complete Overhaul
When draining/replacing converter, more ¯uid will be
needed.7.4 quarts
10.0 quarts7,0 L
9,5 L
Cooling System Including Reservoir 11.7 quarts 11,0 L
Engine Oil with Filter 4.0 quarts 3,8 L
Fuel Tank 17.0 gallons 64,0 L
Wheel Nut Torque 100 lb ft 140Y
All capacities are approximate. When adding, be sure to ®ll to the approximate level, as recommended in this
manual. See
Part D: Recommended Fluids and Lubricants on page 6-16.
Engine Speci®cations
Engine VIN Code Displacement Firing Order
3100 V6J
1191 CID 1±2±3±4±5±6
5-94