Page 254 of 344
Taillamps, Turn Signal, and
Stoplamps1. Open the trunk.
2. If your vehicle is equipped with a convenience net,
remove it.
3. Remove the three plastic wing nuts (A).
There is one wing nut located on the outside of the
carpet. The other two are located underneath
the carpet.
4. Pull the taillamp housing (B) away from the body of
the vehicle.
5. Squeeze the tab on the socket and turn the socket
counterclockwise.
6. Pull out the socket.
7. Pull the old bulb out of the socket. (There are two
bulbs on each taillamp.)
8. Push in a new bulb.
9. Reverse these steps to reinstall the lamp assembly.
5-54
Page 255 of 344
Back-Up Lamps
1. Open the trunk lid.
2. Remove the seven wing nuts (A) from the lamp
covering.
3. Remove the lamp covering.4. Twist and pull the bulb socket (B) from the trunk lid.
5. Twist and/or pull the old bulb from the bulb
socket.
6. Twist and/or push the new bulb into the lamp
socket.
7. Twist and/or push the lamp socket into the trunk lid
covering.
8. Reverse Steps 2 and 3 to reinstall the lamp
covering.
Replacement Bulbs
Exterior Lamps Bulb Number
Back-Up 1156
Center High-Mounted Stoplamp
(CHMSL)3155
Front Turn Signal and Parking
Lamps4157NAK
Headlamps, High Beam 9005
Headlamps, Low Beam 9006
Taillamps and Stoplamps/Turn
Signal3057
Taillamp 194
For any bulb not listed here contact your dealer.
5-55
Page 257 of 344

Tires
Your new vehicle comes with high-quality tires made by
a leading tire manufacturer. If you ever have questions
about your tire warranty and where to obtain service,
see your Buick Warranty booklet for details.
{CAUTION:
Poorly maintained and improperly used tires
are dangerous.
·Overloading your tires can cause
overheating as a result of too much
friction. You could have an air-out and a
serious accident. See ªLoading Your
Vehicleº in the Index.
·Underin¯ated tires pose the same danger
as overloaded tires. The resulting accident
could cause serious injury. Check all tires
frequently to maintain the recommended
pressure. Tire pressure should be checked
when your tires are cold.
CAUTION: (Continued)
CAUTION: (Continued)
·
Overin¯ated tires are more likely to be cut,
punctured or broken by a sudden
impact Ð such as when you hit a pothole.
Keep tires at the recommended pressure.
·Worn, old tires can cause accidents. If
your tread is badly worn, or if your tires
have been damaged, replace them.
In¯ation Ð Tire Pressure
The Tire-Loading Information label, which is on the
inside of the trunk lid, shows the correct in¯ation
pressures for your tires when they're cold. ªColdº means
your vehicle has been sitting for at least three hours
or driven no more than 1 mile (1,6 km).
5-57
Page 268 of 344
Removing the Spare Tire and Tools
The equipment you'll need is in the trunk.
1. Turn the center nut on
the compact spare tire
cover counterclockwise
to remove it. Then
lift and remove
the cover. See
Compact Spare Tire on
page 5-78for more
information about the
compact spare tire.
2. Remove the spare tire.
5-68
Page 275 of 344

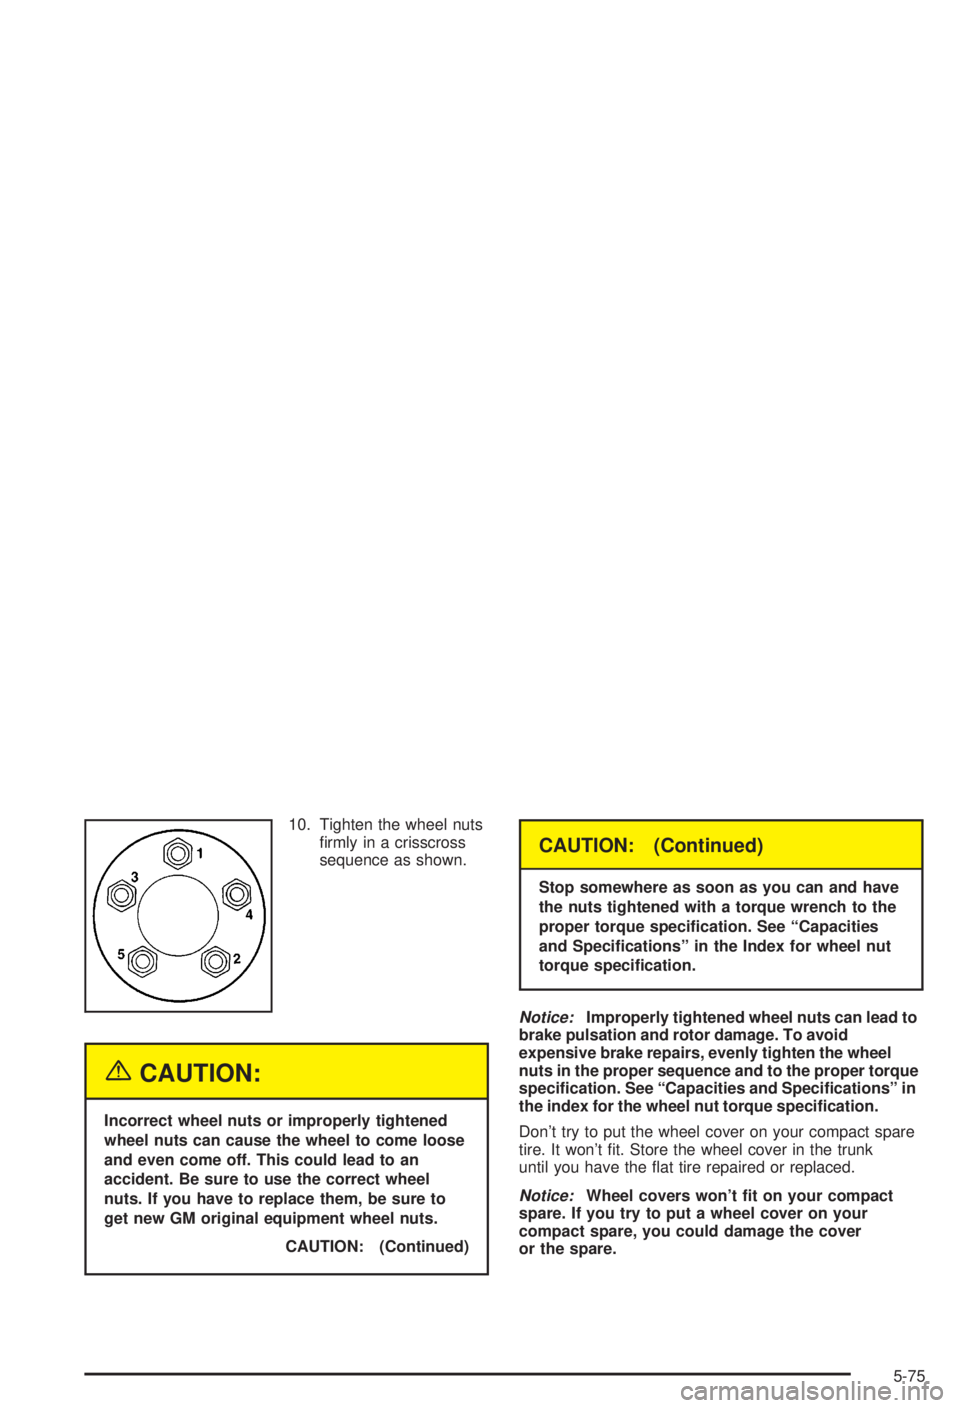
10. Tighten the wheel nuts
®rmly in a crisscross
sequence as shown.
{CAUTION:
Incorrect wheel nuts or improperly tightened
wheel nuts can cause the wheel to come loose
and even come off. This could lead to an
accident. Be sure to use the correct wheel
nuts. If you have to replace them, be sure to
get new GM original equipment wheel nuts.
CAUTION: (Continued)
CAUTION: (Continued)
Stop somewhere as soon as you can and have
the nuts tightened with a torque wrench to the
proper torque speci®cation. See ªCapacities
and Speci®cationsº in the Index for wheel nut
torque speci®cation.
Notice:Improperly tightened wheel nuts can lead to
brake pulsation and rotor damage. To avoid
expensive brake repairs, evenly tighten the wheel
nuts in the proper sequence and to the proper torque
speci®cation. See ªCapacities and Speci®cationsº in
the index for the wheel nut torque speci®cation.
Don't try to put the wheel cover on your compact spare
tire. It won't ®t. Store the wheel cover in the trunk
until you have the ¯at tire repaired or replaced.
Notice:Wheel covers won't ®t on your compact
spare. If you try to put a wheel cover on your
compact spare, you could damage the cover
or the spare.
5-75
Page 276 of 344
Storing the Flat Tire and Tools
{CAUTION:
Storing a jack, a tire, or other equipment in the
passenger compartment of the vehicle could
cause injury. In a sudden stop or collision,
loose equipment could strike someone. Store
all these in the proper place.
After you've put the compact spare tire on your vehicle,
you'll need to store the ¯at tire in your trunk. Use the
following procedure to secure the ¯at tire in the trunk.
When storing a full-size tire, use the extension with the
protector/guide, located in the foam holder, to help
avoid wheel surface damage. To store a full-size tire,
place the tire valve stem facing down, and then remove
the protector/guide and attach the retainer securely.
Store the cover as far forward as possible.
5-76
Page 277 of 344
Storing the Spare Tire and Tools
When storing a compact spare tire in the trunk, put the
protector/guide back in the foam holder.
{CAUTION:
Storing a jack, a tire, or other equipment in the
passenger compartment of the vehicle could
cause injury. In a sudden stop or collision,
loose equipment could strike someone. Store
all these in the proper place.
The compact spare is for temporary use only. Replace
the compact spare tire with a full-size tire as soon
as you can. See
Compact Spare Tire on page 5-78. See
the storage instructions label to return your compact
spare to your trunk properly.
Be sure to calibrate your low tire pressure system after
you replace your compact spare tire with a full-sized
one. See
In¯ation Ð Tire Pressure on page 5-57.A. Retainer
B. Cover
C. Compact Spare Tire
D. Nut
E. Jack
F. Wheel Wrench
G. Extension and
Protector/Guide
H. Bolt Screw
I. Foam Holder
5-77
Page 287 of 344
Vehicle Identi®cation
Vehicle Identi®cation Number (VIN)
This is the legal identi®er for your vehicle. It appears on
a plate in the front corner of the instrument panel, on
the driver's side. You can see it if you look through the
windshield from outside your vehicle. The VIN also
appears on the Vehicle Certi®cation and Service Parts
labels and the certi®cates of title and registration.
Engine Identi®cation
The 8th character in your VIN is the engine code.
This code will help you identify your engine,
speci®cations and replacement parts.
Service Parts Identi®cation Label
You'll ®nd this label on the inside of the trunk lid. It's very
helpful if you ever need to order parts. On this label is:
·your VIN,
·the model designation,
·paint information and
·a list of all production options and special equipment.
Be sure that this label is not removed from the vehicle.
5-87