Page 109 of 183

109n
OverviewControlsMaintenanceRepairsDataIndex
Automatic climate control
*
Residual heat mode
The heat which is stored in
the engine is utilized for
heating the interior when the engine
has been switched off (while waiting at
a railroad crossing, for instance).
In ignition key position 1, you can alter
the settings of the automatic climate
control. With the ignition key in posi-
tion 0, the system automatically directs
heated air to the windshield, side
windows and footwells.
This function may be activated
when the outside temperature is
below approx. 59 7/15 6, the engine
is at operating temperature, and the
battery is adequately charged. The LED
on the button will light up when all
conditions have been met.<
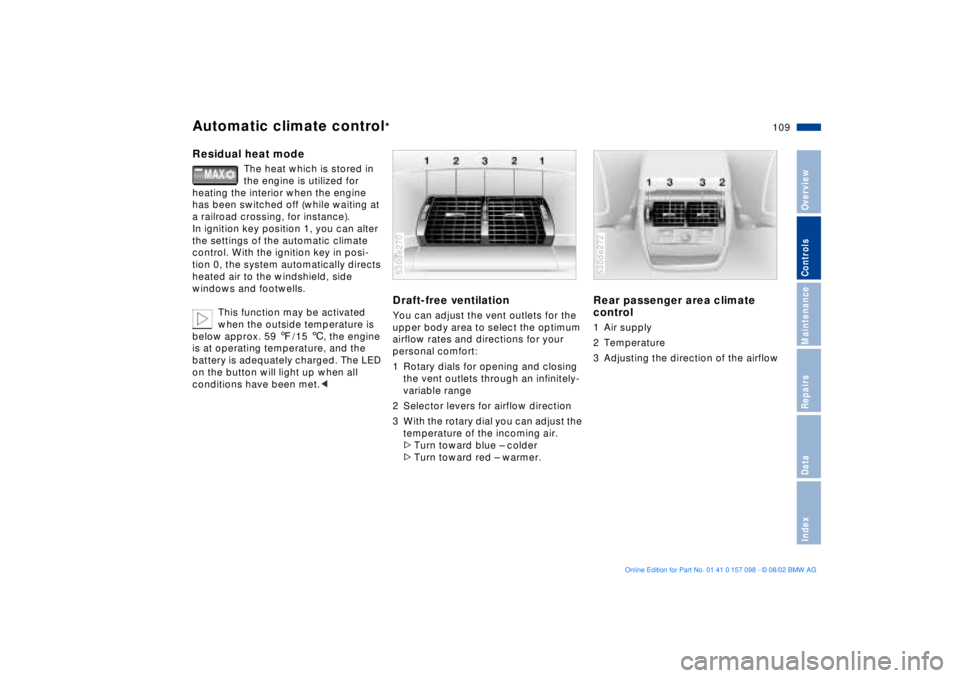
Draft-free ventilation You can adjust the vent outlets for the
upper body area to select the optimum
airflow rates and directions for your
personal comfort:
1 Rotary dials for opening and closing
the vent outlets through an infinitely-
variable range
2 Selector levers for airflow direction
3 With the rotary dial you can adjust the
temperature of the incoming air.
>Turn toward blue Ð colder
>Turn toward red Ð warmer. 530de270
Rear passenger area climate
control 1 Air supply
2 Temperature
3 Adjusting the direction of the airflow 530de272
Page 113 of 183

113n
OverviewControlsMaintenanceRepairsDataIndex
BMW Universal TransmitterChecking for the conversion code To determine whether the original
hand-held transmitter is provided with
a conversion-code system, you may
either read the instructions for the orig-
inal hand-held transmitter or program a
channel key as described on the next
page Ð left-hand column under
Programming.
Then press and hold the programmed
channel key of the BMW Universal
Transmitter. If the indicator lamp of the
BMW Universal Transmitter flashes for
two seconds and then comes on
steadily, the original hand-held trans-
mitter is provided with a conversion-
code system. With a conversion-code
system, program the channel keys as
described on the next page Ð right-hand
column under Programming a hand-
held transmitter with conversion code.
If you have additional questions,
please consult your BMW Sports
Activity Vehicle center or call
1-800-355-3515.
You can also visit this website:
www.bmwusa.com.<
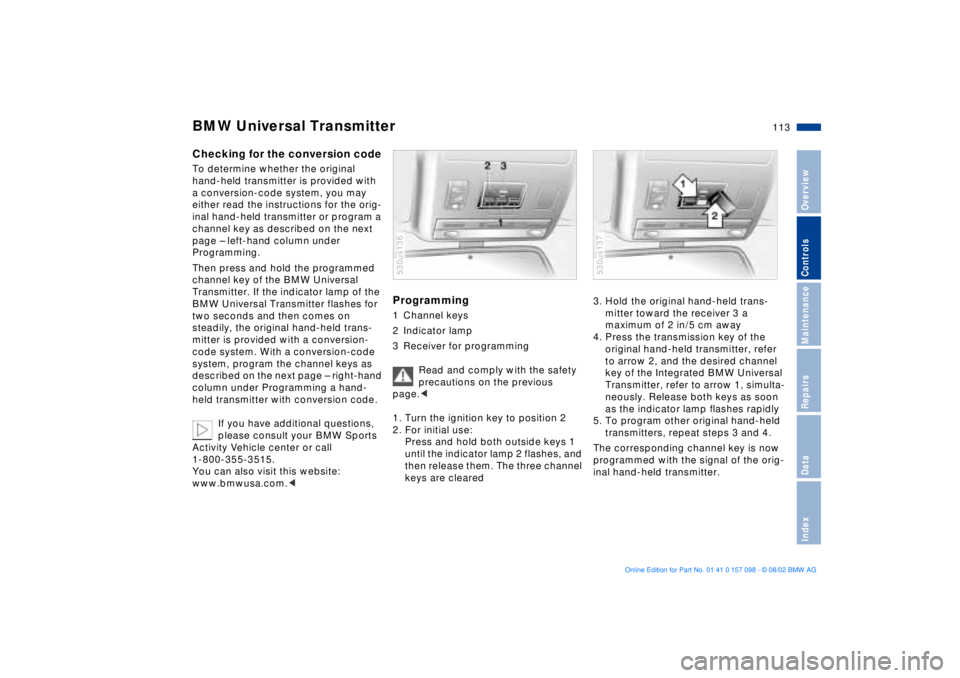
Programming 1 Channel keys
2 Indicator lamp
3 Receiver for programming
Read and comply with the safety
precautions on the previous
page.<
1. Turn the ignition key to position 2
2. For initial use:
Press and hold both outside keys 1
until the indicator lamp 2 flashes, and
then release them. The three channel
keys are cleared 530us136
3. Hold the original hand-held trans-
mitter toward the receiver 3 a
maximum of 2 in/5 cm away
4. Press the transmission key of the
original hand-held transmitter, refer
to arrow 2, and the desired channel
key of the Integrated BMW Universal
Transmitter, refer to arrow 1, simulta-
neously. Release both keys as soon
as the indicator lamp flashes rapidly
5. To program other original hand-held
transmitters, repeat steps 3 and 4.
The corresponding channel key is now
programmed with the signal of the orig-
inal hand-held transmitter. 530us137
Page 115 of 183
115n
OverviewControlsMaintenanceRepairsDataIndex
Glove compartment To open Pull the handle. The lamp inside the
glove compartment comes on.To closeFold the cover up.
To prevent injury in the event of an
accident, close the glove
compartment immediately after use.< 530de275
To lock Use one of the master keys. A master
key is also required for unlocking.
If you turn over only your door and
ignition key for valet parking, for
example, refer to page 30, access to
the glove compartment is not
possible.<
Rechargeable flashlight
*
Located on the left-hand side of the
glove compartment.
Features integral overload-protection,
so it can be left in its holder continu-
ously.
To avoid completely discharging
and possibly damaging the lamp,
always ensure that it is switched off
before inserting it in the socket.<
Page 117 of 183
117n
OverviewControlsMaintenanceRepairsDataIndex
Beverage holder Glasses compartment Ashtray, front Rear At the end of the center console under
the lighter.
Press briefly to open; push back inward
to close. 530de278
Press the button to open; fold upward
to close. 530de279
To empty Press the edge of the lid, refer to arrow:
the ashtray moves up and can be
removed.Cigarette lighter, frontPress the lighter 1 in.
The lighter can be removed as soon as
it retracts.
Hold or touch the hot cigarette
lighter by the knob only. Holding
or touching it in other areas could result
in burns.
The cigarette lighter remains opera-
tional when the ignition key has been
removed. For this reason, do not leave
unsupervised children in the vehicle.< 530de338
Page 118 of 183
118n
Ashtray, front Ashtray, rear Cigarette lighter, rearCigarette lighter socket This socket is suitable for attaching
power supplies for flashlights, car
vacuum cleaners and other appliances
up to a rating of approx. 200 watts at
12 volts. Avoid damage to the socket
caused by inserting plugs of a different
shape or size.
You will find additional power outlets in
the cargo area, refer to page 124.
To emptyRemove the insert tray. 530de282
Press the lighter in.
The lighter can be removed as soon as
it retracts.
Hold or touch the hot cigarette
lighter by the knob only. Holding
or touching it in other areas could result
in burns.
The cigarette lighter remains opera-
tional when the ignition key has been
removed. For this reason, do not leave
unsupervised children in the vehicle.< 530de239
Page 150 of 183
150n
Under the cargo area floor in a pocket.
530us106
Front 1. Move the wiper to a fold-out posi-
tion, refer to page 68
2. Lift the wiper arm and press the
securing spring, refer to arrow
3. Pull the wiper blade off toward the
wiper arm
4. Insert the new blade and snap it into
place.
Fold the wipers back down onto
the windshield before you turn the
ignition key to position 1 or 2 again. If
you do not, they could be damaged.< 530de300
Rear
1. Hold the wiper blade on the window
and remove/unclip the wiper arm at
the articulated joint, refer to arrow
2. Insert a new wiper blade and press it
on/clip it into the wiper arm.
Use only wiper blades approved
by BMW.< 530de301
Onboard tool kit Windshield wiper blades
Page 165 of 183

165n
OverviewControlsMaintenanceRepairsDataIndex
Towing the vehicle Towing a vehicle with automatic
transmission1. Place the selector lever in position N
2. Towing speed:
Maximum 45 mph/70 km/h
3. Towing distance:
Maximum 95 miles/150 km
4. Turn the ignition key to position 1 to
ensure that the brake lamps, turn
signal indicators, horn and wind-
shield wipers remain operative, and
to prevent the steering lock from
engaging
5. Switch on the hazard warning
flashers, comply with country-spe-
cific regulations.
In the event of electrical malfunction,
find some means of identifying the
vehicle in tow, for instance, place a sign
or warning triangle in the rear window.
Make sure that the ignition key
remains in position 1 even when
the electrical system has failed. This will
prevent the steering lock from
engaging. The steering and brakes are
without power assist when the engine is
not running. This means that increased
effort is required for steering and
braking.<
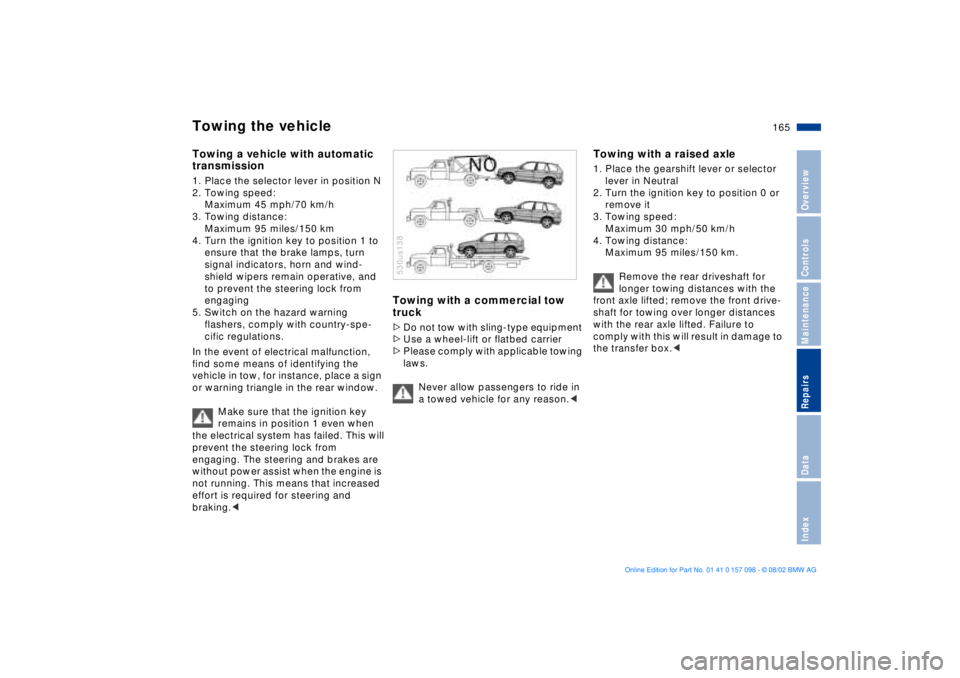
Towing with a commercial tow
truck >Do not tow with sling-type equipment
>Use a wheel-lift or flatbed carrier
>Please comply with applicable towing
laws.
Never allow passengers to ride in
a towed vehicle for any reason.< 530us138
Towing with a raised axle 1. Place the gearshift lever or selector
lever in Neutral
2. Turn the ignition key to position 0 or
remove it
3. Towing speed:
Maximum 30 mph/50 km/h
4. Towing distance:
Maximum 95 miles/150 km.
Remove the rear driveshaft for
longer towing distances with the
front axle lifted; remove the front drive-
shaft for towing over longer distances
with the rear axle lifted. Failure to
comply with this will result in damage to
the transfer box.<
Page 176 of 183

Everything from A to ZEngine compartment
essentials140
Engine coolant143
Engine oil141, 142
consumption141
grades142
level20
pressure19
Estimated time of arrival87
Exterior mirrors53
Exterior rearview mirrors,
automatic dimming
feature54FFailure of an electrical
accessory160
Filling the windshield washer
reservoir141
First-aid kit24
Fittings, tow-starting and
towing164
Flashlight115
Flat tire98, 134, 155
Fog lamps100
bulb replacement152
Folding rear backrest120
Footbrake133
Front area lighting101
Front fog lamps100
Front seat adjustment44Frost protection,
radiator143
Fuel26
capacity171
display75
gauge75
quality26
specifications26
Fuel consumption87
average87
Fuel filler door24
electrical malfunction24
Fuses160
GGarage-door opener112
Gasoline26
General driving notes132
Glasses compartment117
Glove compartment115
Gross vehicle weight170
Ground clearance131HHandbrake64
Hands-free system116
Hazard warning flashers14
Hazard warning triangle24
HDC Hill Descent
Control93Head restraints47
Headlamp flasher68
Headlamp washer
system69, 141
Heated seats51
Heated steering wheel53
Heating and
ventilation102, 105
Heating while stopped109
Heavy cargo126
Height169
Height adjustment
seats46
steering wheel52
High beams22, 100
bulb replacement151
High-mount brake lamp153
Hill Descent Control
HDC93
Holder for cans, refer to
beverage holder116
Hood139
Hood release139
Hydraulic Brake Assistant
refer to DBC21
Hydroplaning132, 134
IIce warning73
Identification, tires137
Ignition key30
Ignition lock62
Imprint4
Independent ventilation
system84, 111
switching on and off84
Indicator lamps19
Inflation pressures,
tires134
monitoring97
INSPECTION76
Instrument
cluster15, 16, 17, 18
Instrument lighting100
Instrument
panel15, 16, 17, 18
Intensive cleaning
system69
Interior lamps101
remote control32
Interior mirrors54
Interior motion sensor40
Interior rearview mirror,
automatic dimming
feature54
Interlock62
Intermittent wipe68