Page 154 of 183

154n
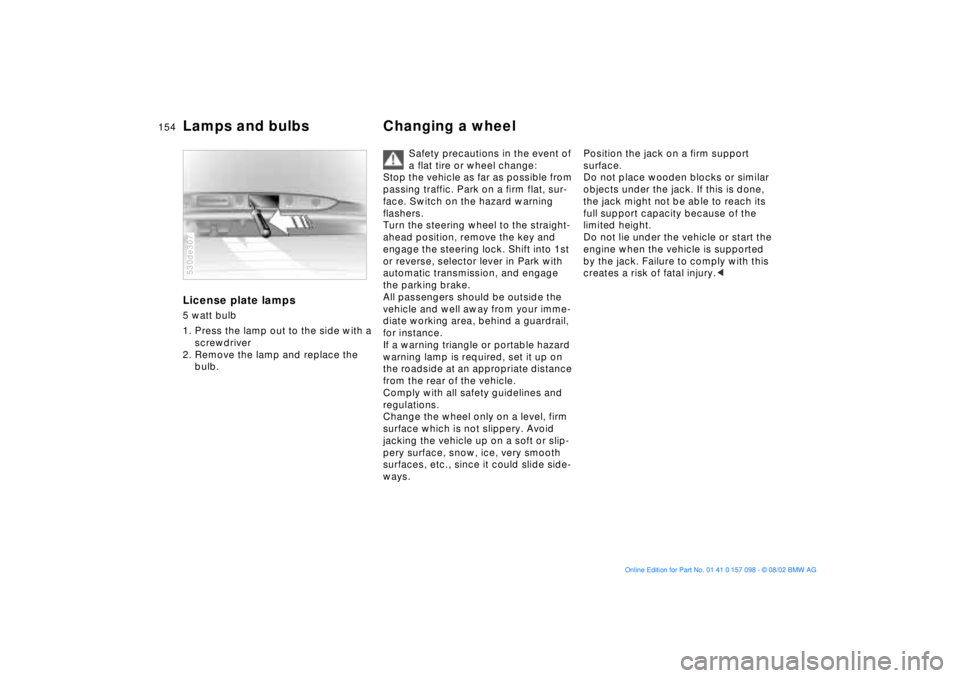
Lamps and bulbs Changing a wheel License plate lamps 5 watt bulb
1. Press the lamp out to the side with a
screwdriver
2. Remove the lamp and replace the
bulb. 530de307
Safety precautions in the event of
a flat tire or wheel change:
Stop the vehicle as far as possible from
passing traffic. Park on a firm flat, sur-
face. Switch on the hazard warning
flashers.
Turn the steering wheel to the straight-
ahead position, remove the key and
engage the steering lock. Shift into 1st
or reverse, selector lever in Park with
automatic transmission, and engage
the parking brake.
All passengers should be outside the
vehicle and well away from your imme-
diate working area, behind a guardrail,
for instance.
If a warning triangle or portable hazard
warning lamp is required, set it up on
the roadside at an appropriate distance
from the rear of the vehicle.
Comply with all safety guidelines and
regulations.
Change the wheel only on a level, firm
surface which is not slippery. Avoid
jacking the vehicle up on a soft or slip-
pery surface, snow, ice, very smooth
surfaces, etc., since it could slide side-
ways.
Position the jack on a firm support
surface.
Do not place wooden blocks or similar
objects under the jack. If this is done,
the jack might not be able to reach its
full support capacity because of the
limited height.
Do not lie under the vehicle or start the
engine when the vehicle is supported
by the jack. Failure to comply with this
creates a risk of fatal injury.<
Page 155 of 183
155n
OverviewControlsMaintenanceRepairsDataIndex
Changing a wheel What you will need In order to avoid rattling noises later,
note the position of the tools when you
remove them and return them to their
original position when you are through
using them.
>Two wedges Ð wheel chocks
Open the liftgate and tailgate.
In the cargo area, fold up the floor
cover or pull-out cargo floor, refer to
pages 123, 124 or 125.
Take out the wedges, refer to arrow,
next to the spare wheel 530us117
>Lug wrench
Is located next to the spare wheel 530us120
>Handle for the jack
Remove from its holder530de213
Page 156 of 183
156n
Changing a wheel >Jack
Remove the rubber band from the
holder, refer to arrow, and take out
the jack.
When you have completed work,
screw the jack all the way back
down, remove the handle and insert it
into its holder. 530de333
Spare wheel1. Loosen the wing nut 1
2. Remove the plate 2 to the side
3. Unscrew the threaded rod 3
completely. 530us118
Removal aid for the spare wheelBy using this device, you do not have to
lift the spare wheel out of the recess by
hand.
Its task is to help you to move the wheel
onto the tailgate, from where you can
easily lift it off.
1. Close the tailgate again
2. Grasp the handle of the removal aid
behind the spare wheel with both
hands and pull upward over the
tailgate, refer to arrow 530de310
Page 157 of 183
157n
OverviewControlsMaintenanceRepairsDataIndex
Changing a wheel 3. Hook both buckles into the latch of
the tailgate, refer to arrow; the tail-
gate is released530de311
4. Remove the support rod from the
bracket 530de312
5. Press the tailgate down and hold it
there. The spare wheel is now pulled
by means of the removal aid onto the
tailgate
Hold the tailgate in the opened
position and do not allow it to
retract sharply upward. If you do so,
there is a risk of personal injury and
vehicle damage.< 530de313
Page 158 of 183

158n
Changing a wheel 6. Insert the support rod in the tailgate
lock and press down until it engages,
refer to arrow 1; then lock hook of
rod in striker, refer to arrow 2
Be sure that the support rod is
locked firmly in place. If you fail to
do so, it could retract sharply upward
and cause personal injury and vehicle
damage.<
7. You can now release the locked tail-
gate and take the spare wheel down
from the tailgate. It is recommended
that you leave the tailgate locked into
place until you have completed the
wheel change and placed the wheel
with the defective tire into the
removal aid. 530de314
Procedure1. Read carefully and comply with the
safety precautions on page 154
2. Secure the vehicle to prevent it from
rolling:
Place the wedges (chocks) behind
the wheels on the side opposite the
side you are lifting. If the vehicle is
parked on a downward slope, place
the wedges securely in front of the
wheels. If the wheel must be
changed on a surface with a more
severe slope, take additional precau-
tions to secure the vehicle from
rolling
3. Loosen the lug bolts 1/2-turn
4. Insert the jack handle into the jack,
refer to the illustration in the next
column5. Position the jack at the jacking point
closest to the flat tire so that the jack
base is vertically below the jacking
point and the entire surface of the
head of the jack will move into the
square recess of the jacking point,
refer to the illustration detail, when
the jack is cranked
6. Jack the vehicle up until the wheel
you are changing is raised from the
ground
7. Unscrew the lug bolts and remove
the wheel
8. Remove accumulations of mud or
dirt from the mounting surfaces of
the wheel and hub. Clean the lug
bolts
530de236
Page 159 of 183

159n
OverviewControlsMaintenanceRepairsDataIndex
Changing a wheel9. Position the spare wheel. Secure
the wheel by turning at least two
lug bolts into opposite bolt holes
10. Screw in the remaining lug bolts.
Tighten all the bolts securely
11. Lower the jack and remove it from
beneath the vehicle
12. Tighten the lug bolts in a diagonal
pattern
13. Check and correct the tire inflation
pressure at the earliest opportunity.
Vehicles with Tire Pressure Monitor
RDC
*:
After mounting the spare wheel or
correcting the tire inflation pres-
sure, reactivate the system, refer to
page 97.
Protect valve stems and valves from dirt
using screw-on valve stem caps. Dirt in
the valve stems frequently leads to slow
leaks.The vehicle jack is designed for
changing wheels only. Do not
attempt to raise another vehicle model
with it or to raise any load of any kind.
To do so could cause accidents and
personal injury.
To ensure continued safety, have the
tightness of the lug bolts checked with
a calibrated lug wrench Ð torque speci-
fication: 101 lb-ft/140 Nm Ð at the
earliest opportunity.<
Store the wheel and the tools in the
order opposite that for removal.
Before removing the support rod,
be sure that the tailgate is held
down firmly. If you fail to do so, it could
retract sharply upward and cause per-
sonal injury and vehicle damage.
After you remove the rod, close the tail-
gate carefully. Continue to hold it firmly
until it is completely closed.<
If light-alloy wheels other than original
BMW light-alloy wheels have been
mounted, it may be necessary to use
different lug bolts for those wheels.
Replace the defective tire as soon as
possible and have the new wheel/tire
balanced. Driving with spare wheel
With certain wheel-and-tire com-
binations the size of the spare
wheel differs from that of the other
wheels. The spare wheel is equivalent
to these in all speed and load ranges.
However, to restore the original state,
the normal wheel should be remounted
as soon as possible.
When the spare wheel is mounted, the
maximum speed rating is 130 mph/
210 km/h.<
Page 165 of 183

165n
OverviewControlsMaintenanceRepairsDataIndex
Towing the vehicle Towing a vehicle with automatic
transmission1. Place the selector lever in position N
2. Towing speed:
Maximum 45 mph/70 km/h
3. Towing distance:
Maximum 95 miles/150 km
4. Turn the ignition key to position 1 to
ensure that the brake lamps, turn
signal indicators, horn and wind-
shield wipers remain operative, and
to prevent the steering lock from
engaging
5. Switch on the hazard warning
flashers, comply with country-spe-
cific regulations.
In the event of electrical malfunction,
find some means of identifying the
vehicle in tow, for instance, place a sign
or warning triangle in the rear window.
Make sure that the ignition key
remains in position 1 even when
the electrical system has failed. This will
prevent the steering lock from
engaging. The steering and brakes are
without power assist when the engine is
not running. This means that increased
effort is required for steering and
braking.<
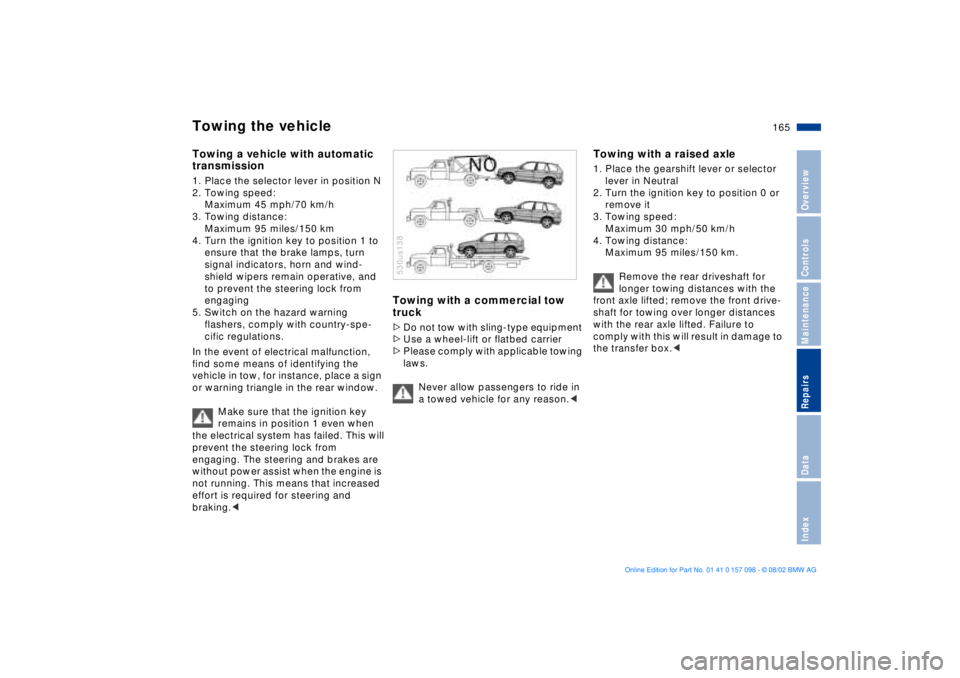
Towing with a commercial tow
truck >Do not tow with sling-type equipment
>Use a wheel-lift or flatbed carrier
>Please comply with applicable towing
laws.
Never allow passengers to ride in
a towed vehicle for any reason.< 530us138
Towing with a raised axle 1. Place the gearshift lever or selector
lever in Neutral
2. Turn the ignition key to position 0 or
remove it
3. Towing speed:
Maximum 30 mph/50 km/h
4. Towing distance:
Maximum 95 miles/150 km.
Remove the rear driveshaft for
longer towing distances with the
front axle lifted; remove the front drive-
shaft for towing over longer distances
with the rear axle lifted. Failure to
comply with this will result in damage to
the transfer box.<
Page 174 of 183

Everything from A to ZAABS Antilock Brake
System20, 132
Accessories9
Activated-charcoal
filter110
Adaptive brake light98
Adding
brake fluid144
coolant143
engine oil141
washer fluid141
Adjusting
head restraints47
mirrors53
seats44
steering wheel52
thigh support45
Air conditioner102
Air distribution103, 107
Air outlets102, 105
Air supply103, 107
Airbags20, 55
Alarm system39
Antifreeze143
Antilock Brake System
ABS20, 132
Anti-theft system31
Approved gross vehicle
weight170
Aquaplaning132, 134Arrival time87
Ashtray
front117
rear118
AUC Automatic recirculated-
air control108
Automatic climate
control105
removing condensation
from the windows107
Automatic cruise control71
Automatic curb monitor51
Automatic dimming
exterior rearview
mirrors54
interior rearview mirror54
Automatic headlamp
control99
Automatic recirculated-air
control AUC108
Automatic steering wheel
adjustment52
Automatic transmission with
Steptronic65
Average fuel
consumption80
Average speed80, 88
Avoiding unintentional
alarms40
Axle loads170
BBackup lamps65
bulb replacement153
Battery160
charge160
discharged163
Battery charge indicator
lamp19
Battery, disposal160
Belts49
Beverage holder116
Blower103, 107
BMW comfort seat46
BMW High Performance
Synthetic Oil142
BMW Maintenance
System145
BMW sports seat45
BMW Universal
Transmitter112
Brake fluid144
Brake fluid level144
Brake lamps
bulb replacement153
Brake light, adaptive98Brake system132
brake fluid144
brake fluid level133
brake pads indicator21
disc brakes133
hydraulic system
indicator19
malfunctions132
Break-in procedures130
Bulbs and lamps151
CCalifornia Proposition
65 Warning146
Can holder, refer to
beverage holder116
Capacities171
Cargo area38, 120
capacity170
cover120
lamps101
partition net122
Cargo floor, pull-out124
Cargo loading126
Cellular phone116
hands-free system116
Center Ð high-mount Ð brake
lamp153
Center (high-mount) brake
lamp153