2003 BMW X5 4.6IS engine
[x] Cancel search: enginePage 80 of 183

80n
ComputerMode selection From ignition key position 1 and up,
you can call up information from the
computer using the button in the turn
signal lever. By pressing the button
briefly in the direction of the steering
column, you can call up a new function
for display.
The displays appear in the following
order: outside temperature, average
fuel consumption, cruising range,
average speed.
Starting with ignition key position 1,
the last active setting is displayed.
The range of available displays varies
according to your individual vehicle's
equipment.530de228
Outside temperature and average
fuel consumption You can change the units of measure-
ment Ð 6/7 Ð for the outside tempera-
ture display by
1. pressing and holding the trip odo-
meter reset button with the ignition
key in position 1
2. and then turning the ignition key to 0.
At the same time the units of mea-
surement in the temperature display
of the automatic climate control will
be changed, refer to page 105.
Refer also to page 73.390us126
Cruising range and average speed The computer bases its calculations
of the cruising range on the previous
driving style and conditions.
The computer ignores any time spent
with the vehicle stationary and the
engine switched off in its average
speed calculations.To cancel the display If the button in the turn signal lever is
pressed briefly while the average speed
is displayed, the computer display can
be masked out. To restart calculationsIf you continue to press the button in
the turn signal lever, the average values
which were just displayed for fuel con-
sumption and speed will be recalcu-
lated from that point. The engine must
be running for this calculation.Computer with alphanumeric
display
*
If your vehicle has Check Control with
alphanumeric display, the system's
computer is described beginning on
page 85 and in the Owner's Manual for
the Onboard Computer.
Page 87 of 183

87n
OverviewControlsMaintenanceRepairsDataIndex
Computer
** * * in the MID
Estimated time of arrival When you have entered the distance to
your destination, you can obtain an
estimated time of arrival display which
is continuously updated by the com-
puter as your average driving period
varies.
Press the right side of the button.
Press the right side of the button:
The estimated time of arrival is dis-
played.
Cruising rangeThe distance which the vehicle should
cover on the remaining fuel in the tank
is displayed.
Press the right side of the button.
Press:
The display shows the probable range.
When you have only enough fuel
left to drive fewer than 30 miles/
50 km, then refuel, as otherwise engine
functions are not ensured and damage
can occur.<
The computer will only register fuel
amounts over 1.8 gal/6 liters.
Fuel consumptionYou can have the average fuel con-
sumption displayed for two different
distances, for example a complete
journey and part of the journey .
To start the calculation, select the
CONS function with the engine running.
Press the right side of the button.
Press the left or right side of the button:
The display will show the average fuel
consumption.
To restart the fuel consumption
calculation:
Press the left or right side of the button.
Press the right side of the button.
Page 88 of 183

88n
Computer
** * * in the MID
Speed You can call up a display of the
vehicle's average speed.
To start the calculation, select the
SPEED function with the engine run-
ning.
Press the right side of the button.
Press:
The display shows the average speed.
To recalculate the speed:
Press the right side of the button.
Extended immobilizer functionYou can establish a code that will pre-
vent the engine from being started
unless the code is entered.
If you do not have access to the code,
the emergency deactivation procedure
will have to be carried out, refer to next
page.
Establishing and activating the code:
Press the right side of the button.
Press the left side of the button.
Display shows:
Enter the code with the function but-
tons.
To correct an entry:
Press on the left side of the button and
repeat the entry.
To store the entry:
Press the right side of the button.
Turn the ignition key to position 0.
Deactivate the code:
When you are asked to enter the code Ð
ignition key in position 1 or 2:
>Enter the code at the function but-
tons.
Press the right side of the button.
After the code has been entered cor-
rectly and confirmed with the SET
button, the time display appears.
Page 89 of 183

89n
OverviewControlsMaintenanceRepairsDataIndex
Computer
** * * in the MID
After three incorrect code entries, or
three attempts to start the engine
without a code entry, the alarm will
sound for 30 seconds on vehicles fitted
with an alarm system.
Deactivating the alarm in an
emergency:
If you have forgotten the code, proceed
as follows:
1. Disconnect the battery, wait approx.
2 minutes, then reconnect it. Note
that on vehicles with an alarm
system, the alarm will sound
2. Set the ignition key to position 1:
The time display will count down for
the next ten minutes
3. After ten minutes, start the engine.
If the code becomes available
again in the meantime, it can be
entered during the waiting period after
pressing the CODE button.<
Remote control The button on the turn signal indicator
lever can be used to select the items of
computer information which are to
be displayed.
To do this, press:
>the button on the lever until PROG
shows on the display
>the MID buttons in the order in which
you wish the information to be dis-
played.
Each time an entry is stored, the pro-
gram number appears on the display.
To terminate the selection procedure:
Press the right side of the button.530de228
To have all the available information
displayed, press
>the button on the lever until the dis-
play shows PROG
>the SET button.
To obtain individual items of informa-
tion, press the button in briefly as often
as necessary.
Page 91 of 183

91n
OverviewControlsMaintenanceRepairsDataIndex
PDC
* Dynamic Stability Control DSC
The PDC system does not remove
the driver's personal responsibility
for evaluating the distance between the
vehicle and any objects. Even when
sensors are involved, there is a blind
spot in which objects cannot be
detected. This applies especially in
those cases where the system
approaches the physical constraints of
ultrasonic measurement, as occurs with
tow bars and trailer couplings, and in
the vicinity of thin or wedge-shaped
objects. Similarly, low objects that have
already been detected - e.g. a curb-
stone - may disappear out of the range
of the sensors before a continuous tone
is emitted.
Loud sources of sound, inside and out-
side the vehicle, could drown out the
PDC signal tone.<
Keep the sensors clean and free
of ice or snow in order to ensure
that they continue to operate effectively.
Do not apply high pressure spray to the
sensors for a prolonged period of time.
Maintain an adequate distance of more
than 4 in/10 cm.<
The concept DSC maintains vehicle stability, even in
critical driving situations.
The system optimizes vehicle stability
during acceleration and when starting
from a full stop, as well as optimizing
traction. In addition, it recognizes
unstable vehicle conditions, such as
understeering or oversteering, and, as
far as is possible within the laws of
physics, keeps the vehicle on a steady
course by adapting the rpms and brake
applications to the individual wheels.
The system starts up automatically
each time you start the engine.
Indicator lamp
The indicator lamp in the instru-
ment cluster goes out shortly
after you switch on the ignition,
refer to page 21.
Indicator lamp ßashes:
The system is active and governs drive
and braking force.
If the indicator lamp fails to go out after
the engine is started, or comes on
during normal driving and stays on:
The system is either defective or was
switched off with the button: the stabi-
lizing applications described to the left
are no longer available. The vehicle will
remain completely operational, how-
ever, without DSC.
Consult your BMW Sports Activity
Vehicle center to have the system
repaired.
Page 93 of 183

93n
OverviewControlsMaintenanceRepairsDataIndex
Hill Descent Control HDC The concept HDC is a system for driving downhill in
steep terrain. This system reduces
vehicle speed on steep downhill gradi-
ents, thus allowing you to maintain con-
trol of your BMW under these condi-
tions.
The vehicle moves at slightly more than
walking speed without active interven-
tion from the driver.
HDC is available for activation at
vehicle speeds below approx. 20 mph/
35 km/h. When driving down steep hills
with a speed below approx. 20 mph/
35 km/h, the vehicle reduces speed
automatically down to slightly more
than walking speed (approx. 5 mph/
8 km/h) and then maintains this speed
at a constant.
You can use the accelerator or brakes
to vary this automatically controlled
speed within a range extending from
approx. 3 mph/5 km/h to 15 mph/
25 km/h.
You can specify a target speed
within the same range by using the
+/Ð buttons of the cruise control.
HDC is automatically deactivated once
vehicle speed again exceeds approx.
35 mph/60 km/h.
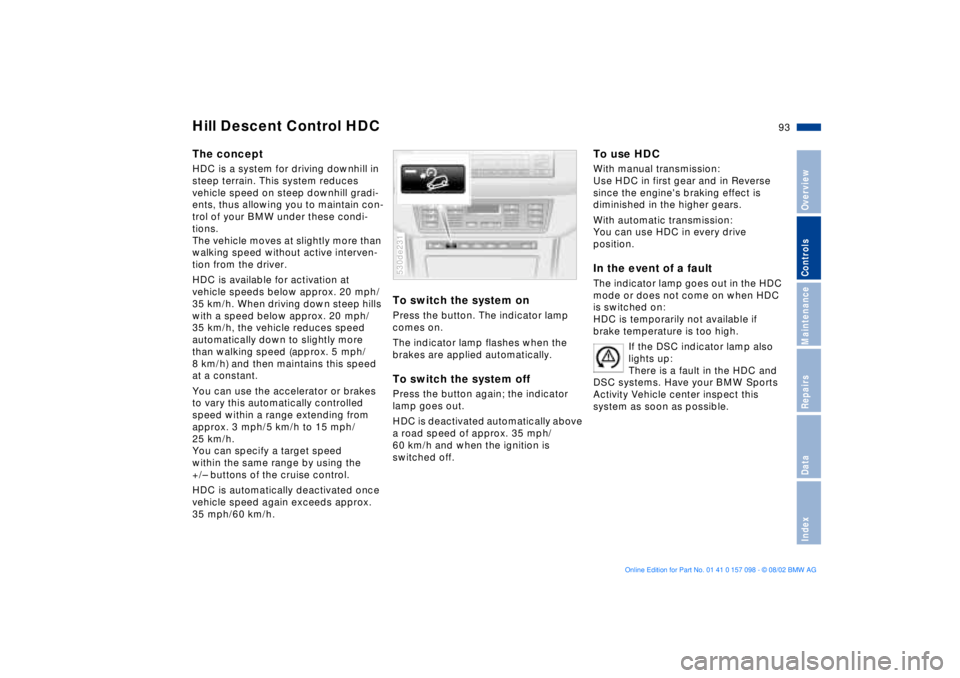
To switch the system onPress the button. The indicator lamp
comes on.
The indicator lamp flashes when the
brakes are applied automatically. To switch the system offPress the button again; the indicator
lamp goes out.
HDC is deactivated automatically above
a road speed of approx. 35 mph/
60 km/h and when the ignition is
switched off. 530de231
To use HDC With manual transmission:
Use HDC in first gear and in Reverse
since the engine's braking effect is
diminished in the higher gears.
With automatic transmission:
You can use HDC in every drive
position. In the event of a faultThe indicator lamp goes out in the HDC
mode or does not come on when HDC
is switched on:
HDC is temporarily not available if
brake temperature is too high.
If the DSC indicator lamp also
lights up:
There is a fault in the HDC and
DSC systems. Have your BMW Sports
Activity Vehicle center inspect this
system as soon as possible.
Page 94 of 183

94n
Self-leveling suspension
*
2-axle self-leveling suspension
*
The warning lamp for the self-
leveling suspension comes on,
or the message Ð SELFLEVEL
SUSP.INACT Ð appears in the Check
Control: there is a malfunction in the
self-leveling suspension.
Stop and inspect the vehicle. If it is
riding significantly lower in the rear than
in the front, or if it is sitting at an incline
Ð left rear compared to right rear - con-
sult the nearest BMW Sports Activity
Vehicle center. Drive with appropriate
caution in the meantime. The vehicle
has reduced ground clearance or
driving comfort is noticeably reduced.
Even if the attitude of the vehicle is
normal, you should consult the nearest
BMW Sports Activity Vehicle center if
the warning lamp indicates a system
malfunction.
The conceptYour vehicle is equipped with 2-axle
self-leveling suspension acting on both
the front and rear suspension. This
system combines automatic self-lev-
eling, which compensates for variations
in front-to-rear load-distribution pat-
terns, with a selection feature allowing
drivers to choose from among several
ride-height options.
You may choose from among the fol-
lowing ride heights:
>Standard
The standard setting is intended for
most operating conditions, including
trailer towing
>Off-Road
Higher ride height for increased
ground clearance
>Access
Lowers vehicle for more convenient
cargo handling or easier passenger
ingress and exitsChanges in ride height are initiated
either manually, using the control
button, refer to page 95, or automati-
cally in response to specific speeds.
When the ride height is selected manu-
ally, the driver has the additional option
of revising the ride-height selection by
entering a new command during the
adjustment process.
When the vehicle is stationary, the
system executes ride-height changes in
both directions (up and down) when-
ever the doors are closed. The tailgate/
liftgate may be open. The system raises
the vehicle only when the engine is run-
ning.
The system's automatic self-leveling
feature automatically compensates for
variations in the vehicle's load.
Frequent changes in ride height
initiated at short intervals can
overheat the compressor, causing the
system to briefly suspend active opera-
tion.<
Page 95 of 183

95n
OverviewControlsMaintenanceRepairsDataIndex
2-axle self-leveling suspension
*
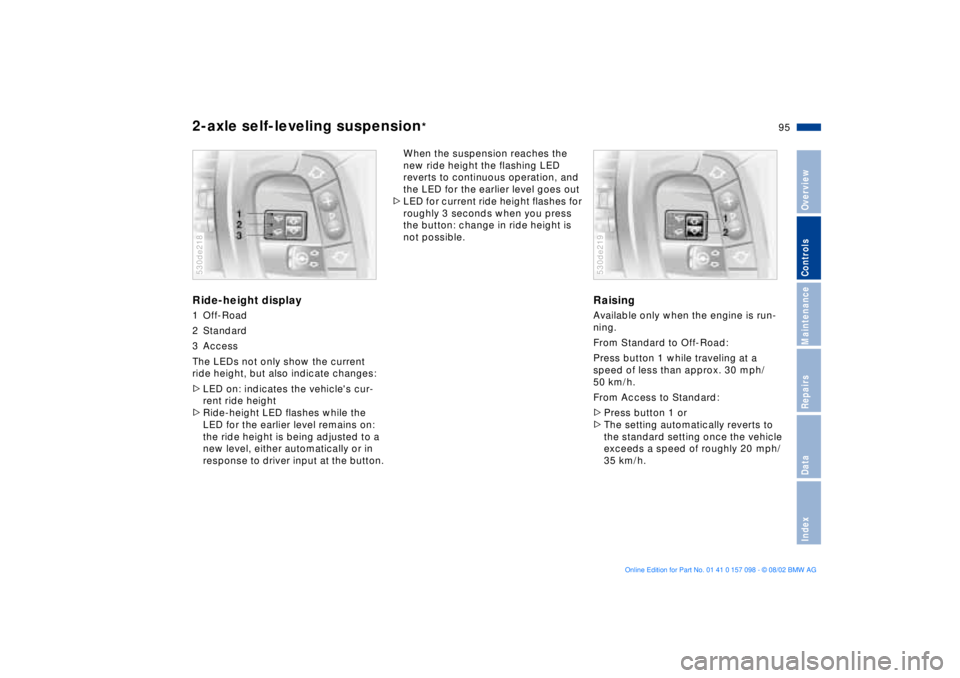
Ride-height display1 Off-Road
2 Standard
3 Access
The LEDs not only show the current
ride height, but also indicate changes:
>LED on: indicates the vehicle's cur-
rent ride height
>Ride-height LED flashes while the
LED for the earlier level remains on:
the ride height is being adjusted to a
new level, either automatically or in
response to driver input at the button.530de218
When the suspension reaches the
new ride height the flashing LED
reverts to continuous operation, and
the LED for the earlier level goes out
>LED for current ride height flashes for
roughly 3 seconds when you press
the button: change in ride height is
not possible.
RaisingAvailable only when the engine is run-
ning.
From Standard to Off-Road:
Press button 1 while traveling at a
speed of less than approx. 30 mph/
50 km/h.
From Access to Standard:
>Press button 1 or
>The setting automatically reverts to
the standard setting once the vehicle
exceeds a speed of roughly 20 mph/
35 km/h.530de219