Page 101 of 183

101n
OverviewControlsMaintenanceRepairsDataIndex
Interior lamps The interior lamps operate automati-
cally. Switching the interior lamps on
and off manuallyPress the button briefly.
If you want the interior lamps to remain
off all the time, press and hold the
button for approx. 3 seconds.
Press the button briefly to revert to
normal operation.
The button for the interior lamps in the
rear passenger area only switches
these lamps on and off. Front reading lamps
*
Switched on and off with the button 2
next to each lamp.530de337
Rear reading lamps
*
Switched on and off with the button
next to each lamp, refer to arrows.530us057
Footwell and cargo area lampsThe lamps are controlled in the same
manner as the front interior lamps.Front area lighting
*
This lighting system in the two exterior
mirrors illuminates the ground in the
area near the two front doors. It is also
controlled in the same manner as the
front interior lamps, but it does not
function while the vehicle is moving.
In order to prevent battery dis-
charge, all of the lamps in the
vehicle are switched off automatically
approx. 15 minutes after the ignition
key is turned to position 0.<
Page 109 of 183
109n
OverviewControlsMaintenanceRepairsDataIndex
Automatic climate control
*
Residual heat mode
The heat which is stored in
the engine is utilized for
heating the interior when the engine
has been switched off (while waiting at
a railroad crossing, for instance).
In ignition key position 1, you can alter
the settings of the automatic climate
control. With the ignition key in posi-
tion 0, the system automatically directs
heated air to the windshield, side
windows and footwells.
This function may be activated
when the outside temperature is
below approx. 59 7/15 6, the engine
is at operating temperature, and the
battery is adequately charged. The LED
on the button will light up when all
conditions have been met.<
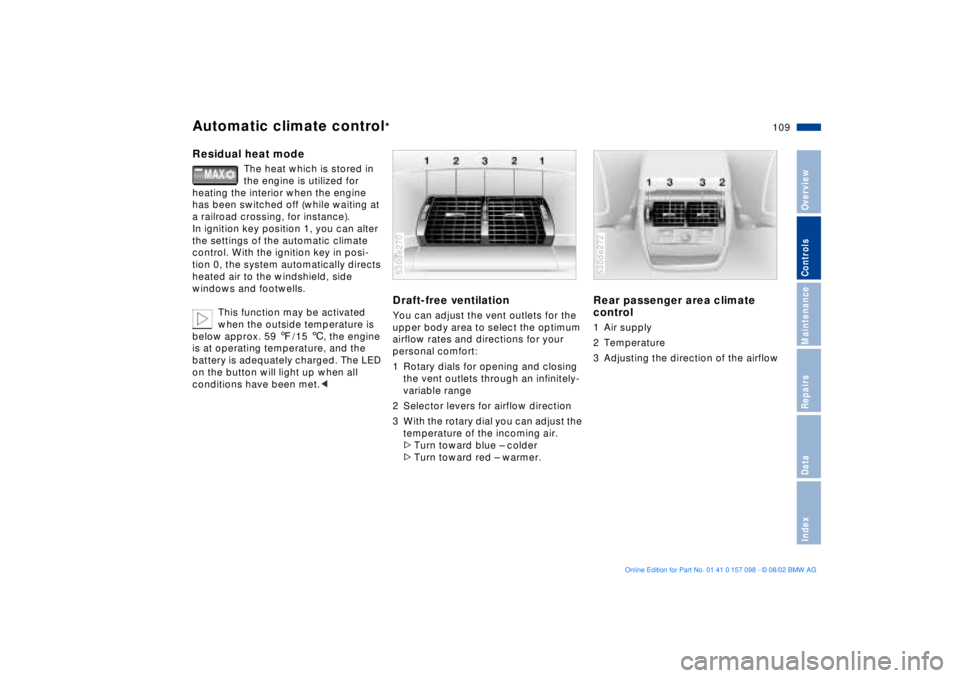
Draft-free ventilation You can adjust the vent outlets for the
upper body area to select the optimum
airflow rates and directions for your
personal comfort:
1 Rotary dials for opening and closing
the vent outlets through an infinitely-
variable range
2 Selector levers for airflow direction
3 With the rotary dial you can adjust the
temperature of the incoming air.
>Turn toward blue Ð colder
>Turn toward red Ð warmer. 530de270
Rear passenger area climate
control 1 Air supply
2 Temperature
3 Adjusting the direction of the airflow 530de272
Page 111 of 183
111n
OverviewControlsMaintenanceRepairsDataIndex
Roller sun blinds
* Independent ventilation system
*
Roller sun blinds for rear side
windows
*
Use the strap to pull out the blinds, then
hook them in the provided attachment.
With roller sun blinds attached, do
not open the windows during
travel. The blinds may otherwise be
damaged by the wind.<
You can use this system to ventilate the
interior and lower its temperature, using
the blower of the independent ventila-
tion or of the automatic climate control.
The independent ventilation system is
operated via the Multi-Information
display MID, refer to page 84 or via the
onboard computer, refer to the sepa-
rate Owner's Manual.
You can set two different times for the
system to start; it will remain active for
30 minutes. You can also switch it on
and off directly. Since the system uses
a substantial amount of electrical
current, you should refrain from
switching it on twice in succession
without allowing the battery to be
recharged in normal operation between
use. When a preselected activation time is
set, the independent ventilation system
is operational at outside temperatures
above +60 7/+16 6, or by direct
switch activation.
The air emerges via the vent outlets for
the upper body. Therefore, the vent
outlets must be open for the system to
operate.
Page 146 of 183
146n
Light-emitting diodes Ð LEDs Light-emitting diodes installed behind
translucent lenses serve as the light
source for many of the controls and dis-
plays in your vehicle. The concept
behind their operation is related to that
employed for lasers.
Do not remove the protective lens
and avoid staring directly at the
unfiltered beam for several hours, as
inflammation of the iris could result.<
California laws require us to state the
following warning:
Engine exhaust, some of its con-
stituents, and certain vehicle com-
ponents contain or emit chemicals
known to the State of California to
cause cancer and birth defects and
reproductive harm. In addition, certain
fluids contained in vehicles and certain
products of component wear contain or
emit chemicals known to the State of
California to cause cancer and birth
defects or other reproductive harm.
Battery posts, terminals and related
accessories contain lead and lead
compounds. Wash your hands after
handling.
Used engine oil contains chemicals that
have caused cancer in laboratory ani-
mals. Always protect your skin by
washing thoroughly with soap and
water.<
Technical modifications California Proposition 65 Warning
Page 151 of 183

151n
OverviewControlsMaintenanceRepairsDataIndex
Lamps and bulbsThe lamps and bulbs make essential
contributions to the safety of your
vehicle. For this reason, follow the
instructions below carefully when
replacing a bulb. If you are not familiar
with any of the procedures, consult
your BMW Sports Activity Vehicle
center.
Do not touch the glass portion of a
new bulb with your bare hands
since even small amounts of impurities
burn into the surface and reduce the
service life of the bulb. Use a clean
cloth, paper napkin, or a similar mate-
rial, or hold the bulb by its metallic
base.<
A replacement bulb set is available from
your BMW Sports Activity Vehicle
center.
Whenever working on the elec-
trical system, switch off the elec-
trical accessory you are working on or
disconnect the cable from the negative
terminal of the battery. Failure to do this
could result in short circuits.
Comply with any instructions provided
by the bulb manufacturer. If you do not,
injuries and damages during the bulb
replacement can occur.<
The right side of the engine compart-
ment.
1 Low beams
2 High beams
For checking and adjusting head-
lamp aim, please contact your
BMW Sports Activity Vehicle center.< Low beams H7 bulb, 55 watts
The bulb is pressurized. There-
fore, wear safety glasses and
protective gloves. Failure to comply
with this precaution could lead to injury
if the bulb is accidentally damaged
during replacement.< 530de302
1. Turn the bulb holder to the left, refer
to arrow, and remove
2. Remove and replace the bulb. High beams HB3 bulb, 60 watts
The bulb is pressurized. There-
fore, wear safety glasses and
protective gloves. Failure to comply
with this precaution could lead to injury
if the bulb is accidentally damaged
during replacement.<
1. Turn the bulb holder to the left and
remove
2. Disconnect the plug
3. Plug the new bulb into the plug
connector. Be sure that it is securely
engaged
4. Install in the opposite order.
Page 160 of 183

160n
Battery Fuses
Battery posts, terminals and
related accessories contain lead
and lead compounds. Wash hands after
handling.<
MaintenanceThe battery is maintenance-free, that is,
the original electrolyte will normally last
for the service life of the battery under
moderate climatic conditions.
For all questions that regard the
battery, please consult your
BMW Sports Activity Vehicle center.
Since the battery is maintenance-free,
the following is for your information
only.<
Do not disconnect the battery
when the engine is running. If
you do so, the ensuing voltage surge
will damage the vehicle's onboard elec-
tronics.<
Charging the battery Charge the battery in the vehicle only
when the engine is not running. Use the
connections provided in the engine
compartment. For correct connections,
refer to Jump-starting on page 162. Disposal
Return used batteries to a recyc-
ling point or your BMW Sports
Activity Vehicle center. Maintain the
battery in an upright position for trans-
port and storage. Secure the battery
against tilting during transport.<
In the glove compartmentOpen the glove compartment and turn
the two quick-release fasteners to the
left. 530us121
Page 162 of 183
162n
When your battery is discharged you
can used two jumper cables to start
your vehicle with power from the bat-
tery in a second vehicle. You can also
use the same method to help start
another vehicle. Always use jumper
cables with fully insulated handles on
the terminal clamps.
Do not touch the live parts while
the engine is running. Failure to
comply with this creates a risk of fatal
injury. Carefully observe the following
instructions to avoid personal injury
and/or damage to one or both vehi-
cles.<
1. Make sure, that the battery on the
support vehicle is rated at 12 volts.
This information is provided on the
battery label
2. Switch off the engine of the support
vehicle. Switch off all electrical
accessories in both vehicles Ð except
the hazard warning flashers of the
support vehicle
3. Make absolutely certain that there is
no contact between the bodywork of
the two vehicles Ð risk of short circuit
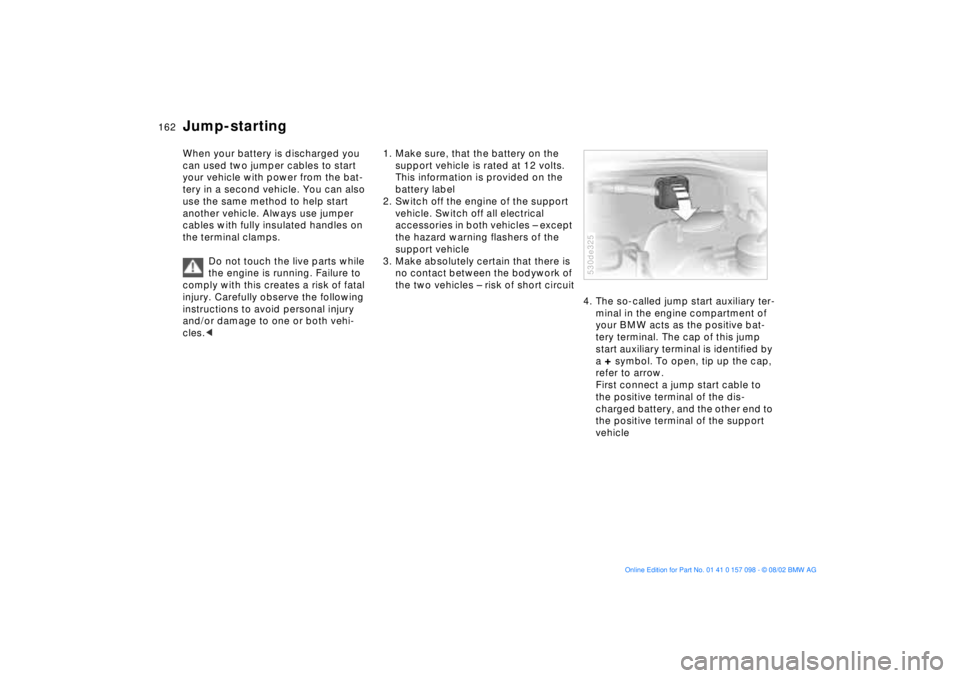
4. The so-called jump start auxiliary ter-
minal in the engine compartment of
your BMW acts as the positive bat-
tery terminal. The cap of this jump
start auxiliary terminal is identified by
a
+ symbol. To open, tip up the cap,
refer to arrow.
First connect a jump start cable to
the positive terminal of the dis-
charged battery, and the other end to
the positive terminal of the support
vehicle
530de325
Jump-starting
Page 163 of 183
163n
OverviewControlsMaintenanceRepairsDataIndex
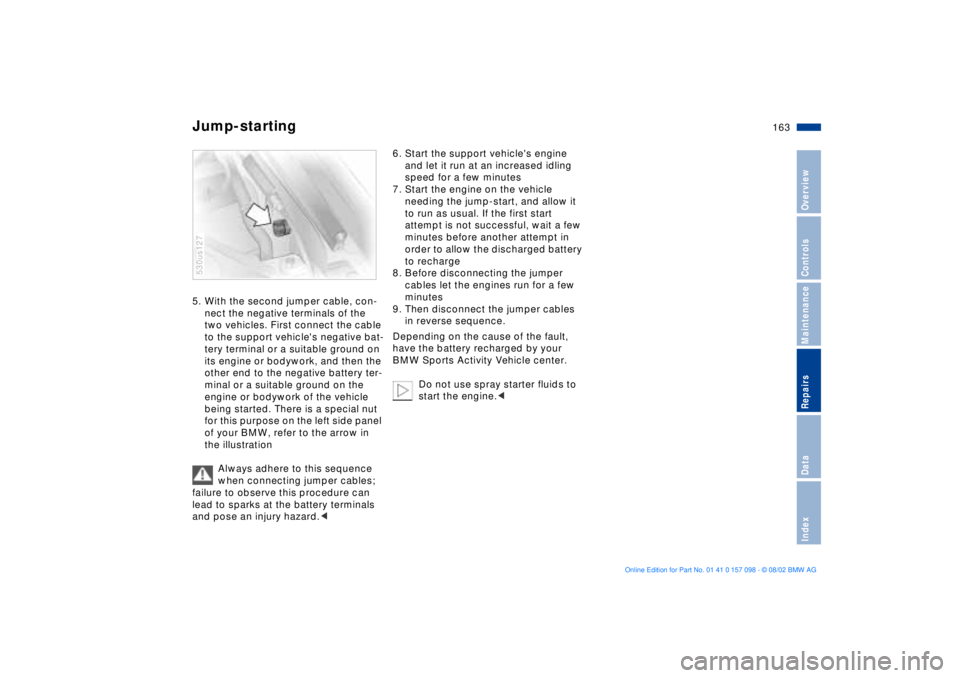
Jump-starting 5. With the second jumper cable, con-
nect the negative terminals of the
two vehicles. First connect the cable
to the support vehicle's negative bat-
tery terminal or a suitable ground on
its engine or bodywork, and then the
other end to the negative battery ter-
minal or a suitable ground on the
engine or bodywork of the vehicle
being started. There is a special nut
for this purpose on the left side panel
of your BMW, refer to the arrow in
the illustration
Always adhere to this sequence
when connecting jumper cables;
failure to observe this procedure can
lead to sparks at the battery terminals
and pose an injury hazard.< 530us127
6. Start the support vehicle's engine
and let it run at an increased idling
speed for a few minutes
7. Start the engine on the vehicle
needing the jump-start, and allow it
to run as usual. If the first start
attempt is not successful, wait a few
minutes before another attempt in
order to allow the discharged battery
to recharge
8. Before disconnecting the jumper
cables let the engines run for a few
minutes
9. Then disconnect the jumper cables
in reverse sequence.
Depending on the cause of the fault,
have the battery recharged by your
BMW Sports Activity Vehicle center.
Do not use spray starter fluids to
start the engine.<