2003 BMW M5 SEDAN ignition
[x] Cancel search: ignitionPage 58 of 155
58n
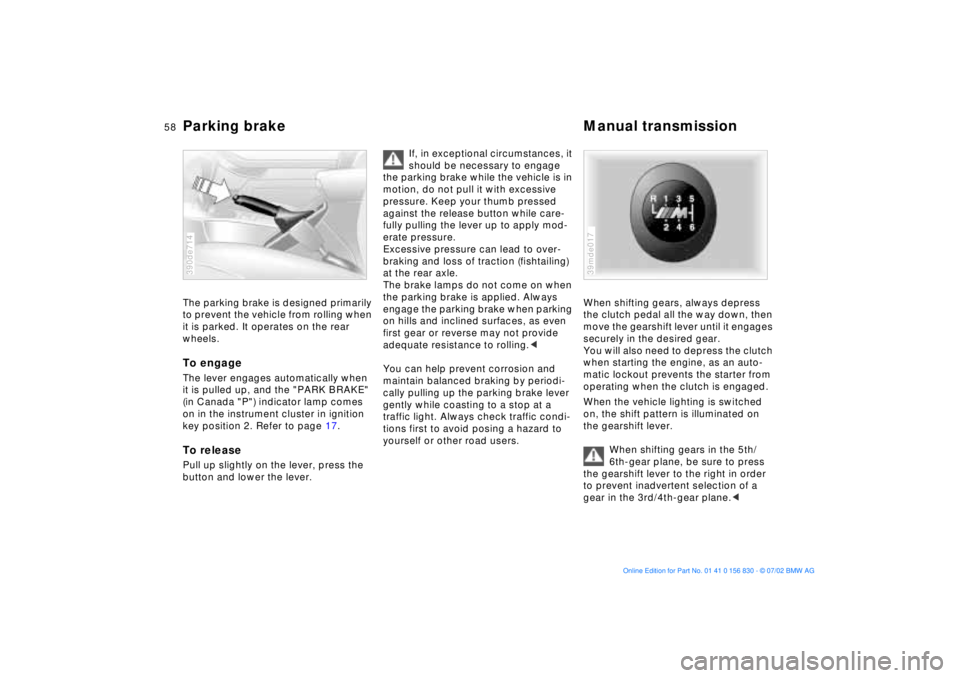
Parking brake Manual transmission The parking brake is designed primarily
to prevent the vehicle from rolling when
it is parked. It operates on the rear
wheels.To engageThe lever engages automatically when
it is pulled up, and the "PARK BRAKE"
(in Canada "P") indicator lamp comes
on in the instrument cluster in ignition
key position 2. Refer to page 17. To releasePull up slightly on the lever, press the
button and lower the lever.390de714
If, in exceptional circumstances, it
should be necessary to engage
the parking brake while the vehicle is in
motion, do not pull it with excessive
pressure. Keep your thumb pressed
against the release button while care-
fully pulling the lever up to apply mod-
erate pressure.
Excessive pressure can lead to over-
braking and loss of traction (fishtailing)
at the rear axle.
The brake lamps do not come on when
the parking brake is applied. Always
engage the parking brake when parking
on hills and inclined surfaces, as even
first gear or reverse may not provide
adequate resistance to rolling.<
You can help prevent corrosion and
maintain balanced braking by periodi-
cally pulling up the parking brake lever
gently while coasting to a stop at a
traffic light. Always check traffic condi-
tions first to avoid posing a hazard to
yourself or other road users.
When shifting gears, always depress
the clutch pedal all the way down, then
move the gearshift lever until it engages
securely in the desired gear.
You will also need to depress the clutch
when starting the engine, as an auto-
matic lockout prevents the starter from
operating when the clutch is engaged.
When the vehicle lighting is switched
on, the shift pattern is illuminated on
the gearshift lever.
When shifting gears in the 5th/
6th-gear plane, be sure to press
the gearshift lever to the right in order
to prevent inadvertent selection of a
gear in the 3rd/4th-gear plane.<39mde017
Page 59 of 155
59n
OverviewControlsMaintenanceRepairsDataIndex
Manual transmission Turn signal/Headlamp flasherReverse Select only when the vehicle is com-
pletely stopped. Press the gearshift
lever to the left to overcome the resis-
tance.
As you do this, the backup lamps will
turn on automatically when the ignition
key is in position 2.
Do not hold the vehicle in place on
slopes by slipping or "riding" the
clutch. Use the parking brake instead.
Riding the clutch causes the clutch
assembly to wear out prematurely.<
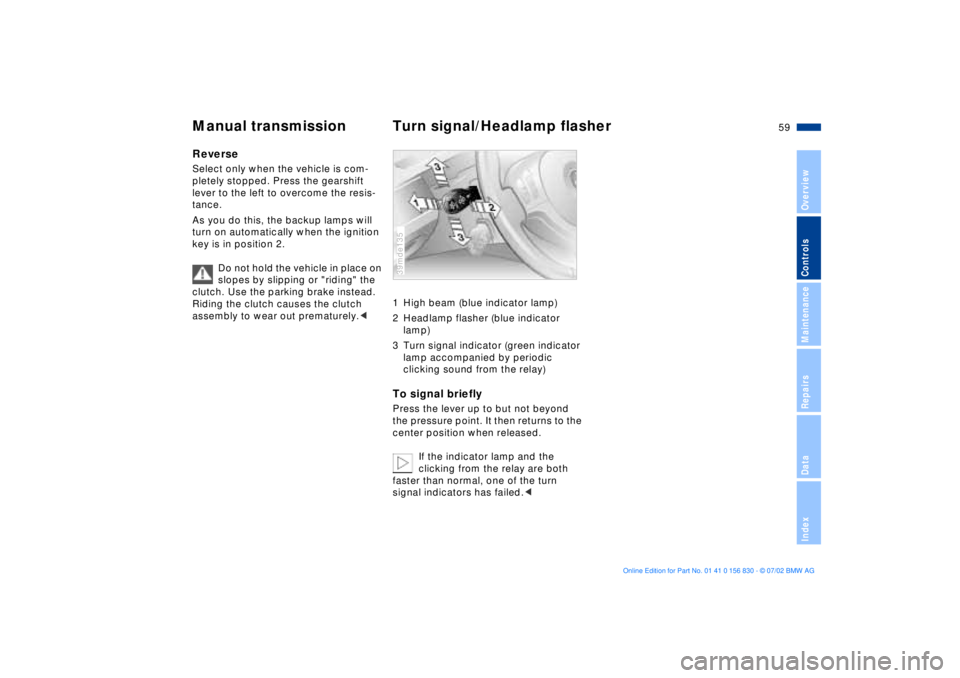
1 High beam (blue indicator lamp)
2 Headlamp flasher (blue indicator
lamp)
3 Turn signal indicator (green indicator
lamp accompanied by periodic
clicking sound from the relay)To signal brieflyPress the lever up to but not beyond
the pressure point. It then returns to the
center position when released.
If the indicator lamp and the
clicking from the relay are both
faster than normal, one of the turn
signal indicators has failed.<39mde135
Page 60 of 155
60n
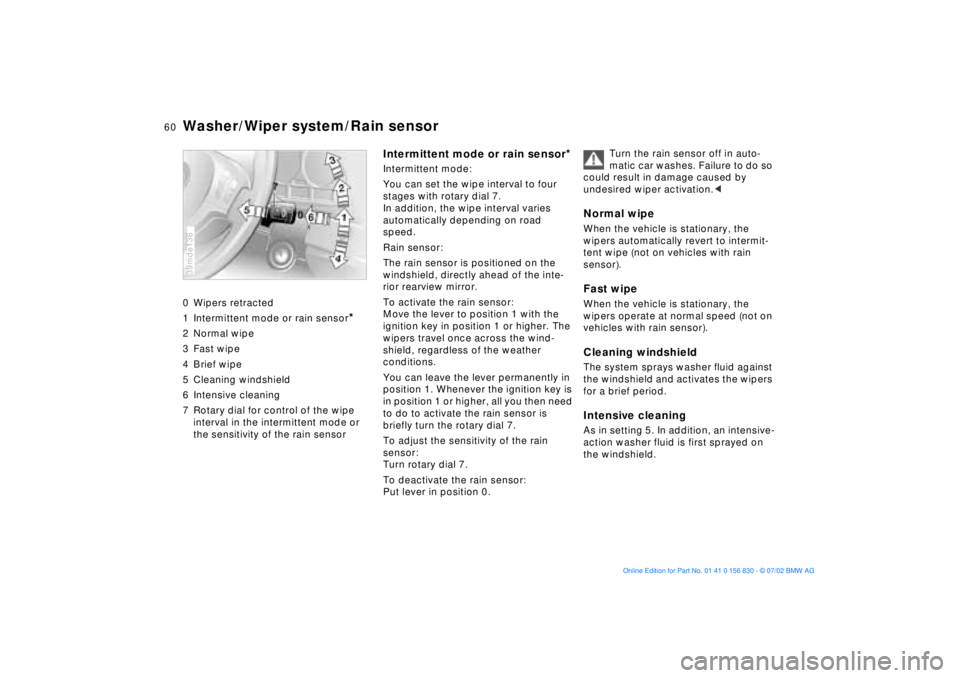
Washer/Wiper system/Rain sensor0 Wipers retracted
1 Intermittent mode or rain sensor
*
2 Normal wipe
3 Fast wipe
4 Brief wipe
5 Cleaning windshield
6 Intensive cleaning
7 Rotary dial for control of the wipe
interval in the intermittent mode or
the sensitivity of the rain sensor39mde136
Intermittent mode or rain sensor
*
Intermittent mode:
You can set the wipe interval to four
stages with rotary dial 7.
In addition, the wipe interval varies
automatically depending on road
speed.
Rain sensor:
The rain sensor is positioned on the
windshield, directly ahead of the inte-
rior rearview mirror.
To activate the rain sensor:
Move the lever to position 1 with the
ignition key in position 1 or higher. The
wipers travel once across the wind-
shield, regardless of the weather
conditions.
You can leave the lever permanently in
position 1. Whenever the ignition key is
in position 1 or higher, all you then need
to do to activate the rain sensor is
briefly turn the rotary dial 7.
To adjust the sensitivity of the rain
sensor:
Turn rotary dial 7.
To deactivate the rain sensor:
Put lever in position 0.Turn the rain sensor off in auto-
matic car washes. Failure to do so
could result in damage caused by
undesired wiper activation.<
Normal wipeWhen the vehicle is stationary, the
wipers automatically revert to intermit-
tent wipe (not on vehicles with rain
sensor).Fast wipeWhen the vehicle is stationary, the
wipers operate at normal speed (not on
vehicles with rain sensor).Cleaning windshieldThe system sprays washer fluid against
the windshield and activates the wipers
for a brief period.Intensive cleaningAs in setting 5. In addition, an intensive-
action washer fluid is first sprayed on
the windshield.
Page 61 of 155
61n
OverviewControlsMaintenanceRepairsDataIndex
Washer/Wiper system Cruise control Cleaning headlampsWhen the headlamps are on, they are
also cleaned automatically every fifth
time you activate "Cleaning windshield"
5 or "Intensive cleaning" 6.
Do not use the washers if there is
any danger that the fluid will
freeze on the windshield, as your vision
could be obscured. You can reduce this
danger by adding a windshield washer
antifreeze. Refer to page 115. Do not
activate the washer if the reservoir is
empty, as the washer pump could be
damaged.
position 2.
You can store and automatically main-
tain any desired vehicle speed above
approx. 20 mph (30 km/h).
The cruise control is available whenever
the engine is running and the system
has been activated.
To activate the system From ignition key position 2:
Press the button and the indicator lamp
on the instrument cluster (refer to
page 18) will come on. You can now
use the cruise control.
Do not use cruise control on
twisting roads, when high traffic
density prevents driving at a constant
speed, or when the road surface is slick
(snow, rain, ice) or loose (rocks or
gravel, sand).
cluster goes out.
Cruise control is also deactivated when
the ignition key is in position 0.
The speed stored in memory is deleted.
Page 63 of 155
63n
OverviewControlsMaintenanceRepairsDataIndex
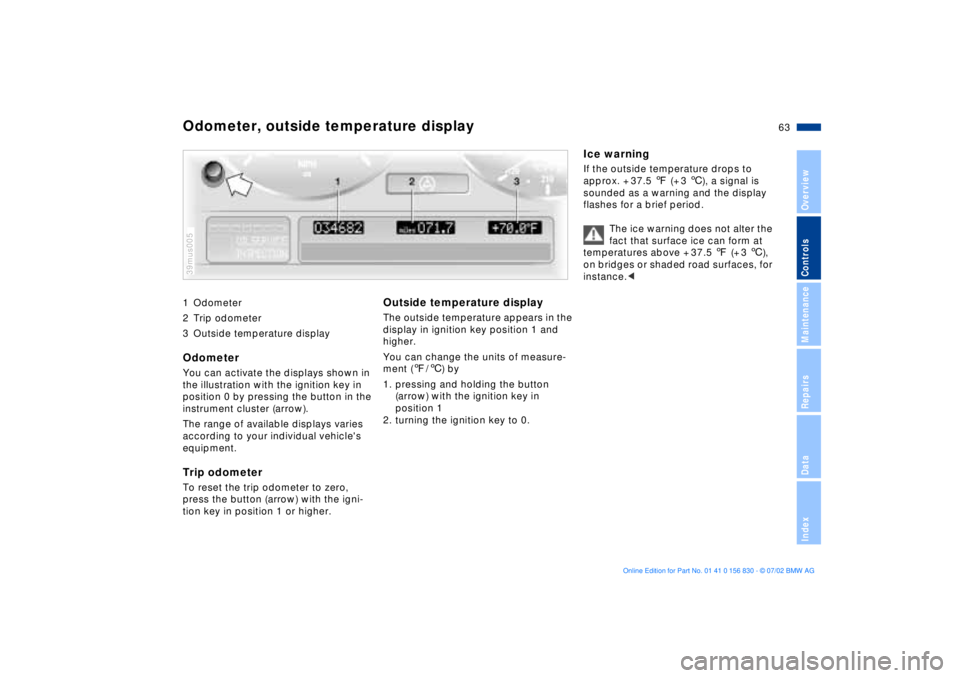
1 Odometer
2 Trip odometer
3 Outside temperature display Odometer You can activate the displays shown in
the illustration with the ignition key in
position 0 by pressing the button in the
instrument cluster (arrow).
The range of available displays varies
according to your individual vehicle's
equipment.Trip odometer To reset the trip odometer to zero,
press the button (arrow) with the igni-
tion key in position 1 or higher. 39mus005
Outside temperature display The outside temperature appears in the
display in ignition key position 1 and
higher.
You can change the units of measure-
ment (7/6) by
1. pressing and holding the button
(arrow) with the ignition key in
position 1
2. turning the ignition key to 0.
Ice warningIf the outside temperature drops to
approx. + 37.5 7 (+ 3 6), a signal is
sounded as a warning and the display
flashes for a brief period.
The ice warning does not alter the
fact that surface ice can form at
temperatures above + 37.5 7 (+ 3 6),
on bridges or shaded road surfaces, for
instance.<
Odometer, outside temperature display
Page 64 of 155
64n
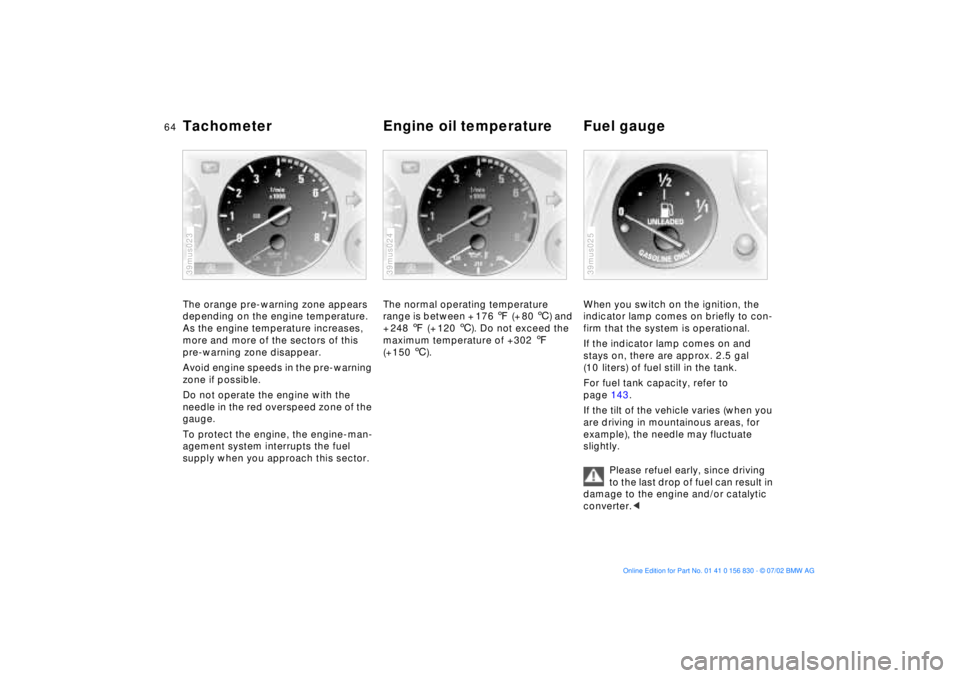
Tachometer Engine oil temperature Fuel gauge The orange pre-warning zone appears
depending on the engine temperature.
As the engine temperature increases,
more and more of the sectors of this
pre-warning zone disappear.
Avoid engine speeds in the pre-warning
zone if possible.
Do not operate the engine with the
needle in the red overspeed zone of the
gauge.
To protect the engine, the engine-man-
agement system interrupts the fuel
supply when you approach this sector.39mus023
The normal operating temperature
range is between + 176 7 (+ 80 6) and
+ 248 7 (+ 120 6). Do not exceed the
maximum temperature of +302 7
(+150 6). 39mus024
When you switch on the ignition, the
indicator lamp comes on briefly to con-
firm that the system is operational.
If the indicator lamp comes on and
stays on, there are approx. 2.5 gal
(10 liters) of fuel still in the tank.
For fuel tank capacity, refer to
page 143.
If the tilt of the vehicle varies (when you
are driving in mountainous areas, for
example), the needle may fluctuate
slightly.
Please refuel early, since driving
to the last drop of fuel can result in
damage to the engine and/or catalytic
converter.<39mus025
Page 66 of 155

66n
Text messages are used to alert the
driver to system malfunctions with the
ignition key in position 2 and higher.
The alert is accompanied by a gong.
1 Status symbol for messages
2 Display
3 CHECK button
Messages warning of system malfunc-
tions are assigned one of two priority
levels.
39mus027
Priority 1
These defects are immediately indi-
cated by a gong and a flashing warning
symbol 1. Simultaneous defects will be
displayed consecutively. These status
messages remain in the display until the
defects are corrected. They cannot be
deleted by pressing the CHECK
button 3:
>"RELEASE PARKINGBRAKE"
>"COOLANT TEMPERATURE"
The coolant is overheated. Stop the
vehicle and switch off the engine
immediately. Refer to page 117
>"STOP!ENGINE OILPRESS"
The oil pressure is too low. Stop the
vehicle and switch off the engine
immediately. Refer to pages 16, 115>"CHECK BRAKE FLUID"
The level has dropped nearly to the
minimum. Top up the brake fluid at
the earliest opportunity. Refer to
page 118. Have the source of the
brake fluid loss diagnosed and cor-
rected at your BMW center
>"TIRE DEFECT"
Reduce vehicle speed immediately
and stop the vehicle. Avoid hard
brake applications. Do not oversteer.
Refer to page 83
>"LIMIT"
*
This is displayed if the programmed
speed limit has been exceeded.
Refer to page 73.
Check Control
Page 67 of 155

67n
OverviewControlsMaintenanceRepairsDataIndex
Check Control Priority 2
These displays appear for 20 seconds
with the ignition key in position 2. The
warning symbols remain after the mes-
sage disappears. The messages can be
recalled again with CHECK button 3.
>"TRUNKLID OPEN"
This message appears only when you
initially begin a trip
>"DOOR OPEN"
This message appears after a defined
road speed has been exceeded
>"FASTEN SEAT BELTS"
*
In addition to this message, an indi-
cator lamp with the safety belt icon
appears and an acoustic signal is
sounded
>"WASHER FLUID LOW"
Too low; top up fluid at the next
opportunity. Refer to page 115
>"CHECK ENGINE OIL LEV"
The oil level is at the absolute min-
imum, so add engine oil as soon as
possible. Refer to page 115. Until
then, do not drive more than approx.
30 miles (50 km)>"TIRE PRESSURE SET"
The Flat Tire Monitor has adopted the
tires' current inflation pressures as its
reference levels. Refer to page 82
>"TIRECONTROL INACTIVE"
Transient malfunctions and system
errors in the Flat Tire Monitor. Refer
to page 83
>"CHECK BRAKE LIGHTS"
A lamp has failed or the electrical cir-
cuit has a fault. Refer to pages 126
and 132 or consult a BMW center
>"CHECK LOWBEAM LIGHTS"
"CHECK SIDE LIGHTS"
"CHECK REAR LIGHTS"
"CHECK FRONT FOGLAMPS"
"CHECK LICPLATE LIGHT"
"CHECK HIGHBEAM LIGHT"
"CHECK BACK UP LIGHTS"
Defective bulb or circuit. Refer to
page 124 and following and
page 132 or consult a BMW center>"CHECK BRAKE LININGS"
Have the brake pads checked at your
BMW center. Refer to page 108
>"CHECK COOLANT LEVEL"
The coolant level is too low; top off
at the next opportunity. Refer to
page 118
>"CHECK FILLER CAP"
Check to see whether the fuel filler
cap has been properly closed. Refer
to page 21
>"ENGINE FAILSAFE PROG"
Indicates a malfunction in the elec-
tronic engine-management system,
which then reverts to an emergency
default program allowing continued
operation at reduced power and
lower engine speeds.
Please have the system inspected by
your BMW center
>
"OUTSIDE TEMPERATURE 24 7
(Ð 5.0 6)"This temperature display is only an
example. The current temperature is
displayed at outside temperatures of
37.5 7 (+3 6) and below. Refer also
to page 63.