2003 BMW M3 COUPE gearbox
[x] Cancel search: gearboxPage 68 of 158

68
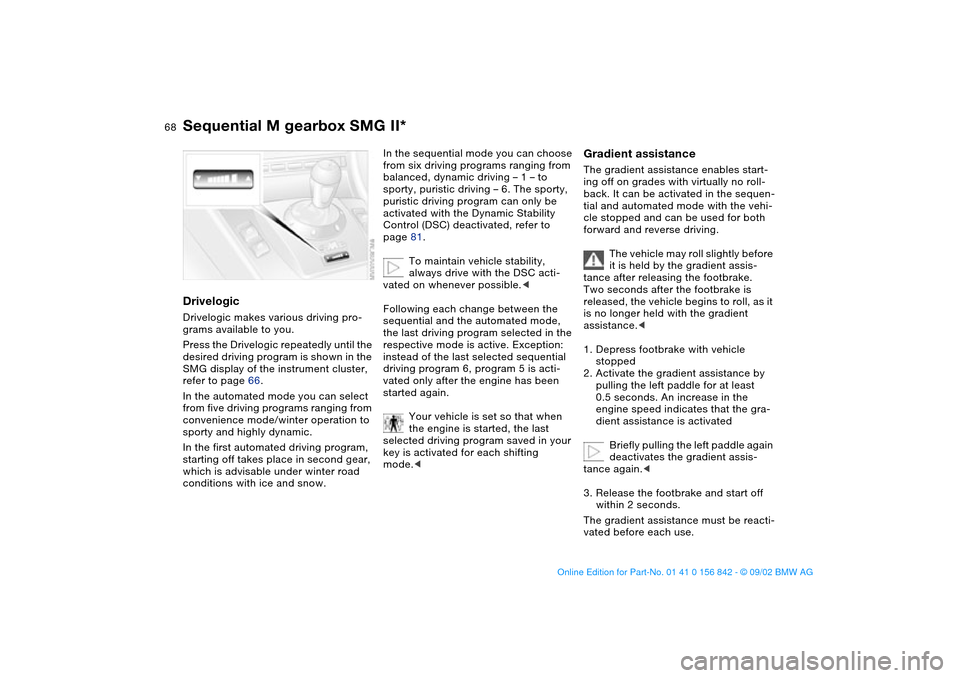
DrivelogicDrivelogic makes various driving pro-
grams available to you.
Press the Drivelogic repeatedly until the
desired driving program is shown in the
SMG display of the instrument cluster,
refer to page 66.
In the automated mode you can select
from five driving programs ranging from
convenience mode/winter operation to
sporty and highly dynamic.
In the first automated driving program,
starting off takes place in second gear,
which is advisable under winter road
conditions with ice and snow.
In the sequential mode you can choose
from six driving programs ranging from
balanced, dynamic driving – 1 – to
sporty, puristic driving – 6. The sporty,
puristic driving program can only be
activated with the Dynamic Stability
Control (DSC) deactivated, refer to
page 81.
To maintain vehicle stability,
always drive with the DSC acti-
vated on whenever possible.<
Following each change between the
sequential and the automated mode,
the last driving program selected in the
respective mode is active. Exception:
instead of the last selected sequential
driving program 6, program 5 is acti-
vated only after the engine has been
started again.
Your vehicle is set so that when
the engine is started, the last
selected driving program saved in your
key is activated for each shifting
mode.<
Gradient assistanceThe gradient assistance enables start-
ing off on grades with virtually no roll-
back. It can be activated in the sequen-
tial and automated mode with the vehi-
cle stopped and can be used for both
forward and reverse driving.
The vehicle may roll slightly before
it is held by the gradient assis-
tance after releasing the footbrake.
Two seconds after the footbrake is
released, the vehicle begins to roll, as it
is no longer held with the gradient
assistance.<
1. Depress footbrake with vehicle
stopped
2. Activate the gradient assistance by
pulling the left paddle for at least
0.5 seconds. An increase in the
engine speed indicates that the gra-
dient assistance is activated
Briefly pulling the left paddle again
deactivates the gradient assis-
tance again.<
3. Release the footbrake and start off
within 2 seconds.
The gradient assistance must be reacti-
vated before each use.
Sequential M gearbox SMG II*
handbook.book Page 68 Saturday, July 27, 2002 1:12 PM
Page 69 of 158

69
Indicator lamp
The transmission indicator lamp
in the instrument cluster goes
out after the engine is started.
>If it does not go out, or if it lights up
during driving, a fault has occurred.
The available functions may be lim-
ited under certain circumstances.
Drive carefully and with the Dynamic
Stability Control (DSC) activated.
Have the system checked by the
nearest BMW center
>If the indicator lamp flashes while
driving, the system is overloaded.
Avoid high loads until the indicator
lamp goes out again permanently.
Shift lightsTo achieve the best possible vehicle
acceleration with a sporty driving style
in the sequential mode, shift lights in
the instrument cluster indicate the opti-
mum shifting point shortly before the
maximum engine speed is reached.
1. When the maximum engine speed is
approached, yellow indicator fields –
shift lights – in the tachometer light
up consecutively to indicate the
approaching upshift time
2. Shift at the latest when the last indi-
cator field lights up red.
Tire replacement, snow chainsFollowing a tire or wheel change and
after mounting or removing snow
chains, the slip recognition of the
SMG II must become familiar with the
changed condition.
Reinitialize the system afterwards.
1. Move the selector lever into
position 0 on a straight stretch of
road at a speed of over 20 mph /
30 km/h
2. Pull both shift paddles for approx.
2 seconds.
If you do not carry out the initialization,
the system automatically learns the
changed condition gradually during
driving. This can become apparent due
to brief opening and closing of the
clutch.
Sequential M gearbox SMG II*
OverviewControlsMaintenanceRepairsDataIndex
handbook.book Page 69 Saturday, July 27, 2002 1:12 PM
Page 73 of 158

73
Cruise control is also deactivated when
the ignition key is in position 0.
The speed stored in memory is deleted.To store and maintain speed or to
acceleratePress button "+" briefly.
The system stores and maintains the
current vehicle speed. Every time you
tap the button, the speed increases by
0.6 mph / 1 km/h.
Press and hold button "+":
The vehicle accelerates without pres-
sure on the accelerator pedal. When
you release the button, the system
stores and maintains the current speed.
If on a downhill gradient the
engine braking effect is not suffi-
cient, the controlled speed can be
exceeded. Speed can drop on uphill
grades if the engine output is insuffi-
cient.
of the button reduces the speed by
approx. 0.6 mph / 1 km/h.
Press and hold button "–":
With the cruise control active, the sys-
tem automatically reduces the throttle
opening to slow the vehicle. When you
release the button, the system stores
and maintains the current speed.To interrupt the cruise controlWhen the system is activated, press the
button. The indicator lamp stays on.
You can use the cruise control again
whenever you want by calling up the
speed that was stored last.
In addition, cruise control is interrupted
automatically:
>When the brakes are applied
>When pressing down the clutch pedal
>If you exceed or fall below the pro-
grammed speed for an extended
period – by depressing the accelera-
tor, for example
>Sequential M gearbox SMG II – refer
to page 65: when shifting in the
sequential mode.
To recall the stored settingPress button:
The vehicle accelerates to and main-
tains the last speed stored.
Cruise control
OverviewControlsMaintenanceRepairsDataIndex
handbook.book Page 73 Saturday, July 27, 2002 1:12 PM
Page 113 of 158

113
Do not exceed specified
maximum speeds
Never exceed the maximum
speed for which the winter tires
are rated.
Unprofessional attempts by laymen to
service tires can lead to damage and
accidents.
Have this work performed by skilled
professionals only. Your BMW center
will be glad to assist you with both their
expertise and the proper equipment for
your vehicle.<
Tire condition, tire pressureAt tread depths below approx. 3/16 in /
4 mm, their performance under winter
driving conditions deteriorates notice-
ably. Worn tires should therefore be
replaced for safety considerations.
Comply with the specified tire inflation
pressures – and be sure to have the
wheel and tire assembly balanced
every time you change a tire or wheel.
Snow chains*Only certain snow chains have been
tested by BMW and determined and
approved as roadworthy. Consult your
BMW center for more information.
BMW recommends using only these
approved fine-link snow chains. Use
them in pairs on winter tires, but only on
both rear wheels.
Comply with all manufacturer's safety
precautions when mounting the chains.
Do not exceed a maximum speed of
30 mph / 50 km/h when using snow
chains.
After mounting or removing snow
chains, always reinitialize the sequential
M gearbox SMG II, refer to page 69.
It is not possible to mount snow
chains on tires with 18-inch and
19-inch wheels.
Deactivate the Flat Tire Monitor when
using snow chains. Malfunction warn-
ings and undetected losses in pressure
are a possibility when driving with snow
chains.
For additional information, refer to
page 82.<
Winter tires
OverviewControlsMaintenanceRepairsDataIndex
handbook.book Page 113 Saturday, July 27, 2002 1:12 PM
Page 141 of 158

141
Use only a nylon towing strap to tow
the vehicle, since the inherent resil-
ience of this material helps protect both
vehicles from sudden jerking move-
ments.
The towed vehicle should always
be the lighter of the two vehicles.
If this is not the case, it will not be pos-
sible to control vehicle handling.
Never attempt to use your vehicle to
push another vehicle, since damage to
the energy-absorbing bumpers could
result.Towing a vehicle1. Gearshift lever in Neutral
2. Towing speed:
max. 45 mph / 70 km/h
3. Towing distance:
max. 95 miles/150 km
4. Leave the ignition key at position 1 to
ensure that the brake lamps, turn sig-
nal indicators, horn and windshield
wipers remain operative, and to pre-
vent the steering lock detent from
engaging
5. Switch on the hazard warning system
– observe applicable legal regula-
tions.
Find some means of identifying the
vehicle in tow, for instance, place a sign
or warning triangle in the rear window.
Make sure that the ignition key
remains in position 1 even when
the electrical system has failed to pre-
vent the steering lock from engaging.
The steering and brakes are without
power-assist when the engine is off.
This means that increased effort is
required for steering and braking.<
Vehicle with sequential M gearbox
SMG II:
To push or tow, engage selector lever
in position 0.
Never work on the vehicle with a
driving position engaged.<
Towing with a commercial tow
truck>Do not tow with sling-type equipment
>Use wheel lift or flatbed equipment
>Please comply with applicable state
towing laws.
Never allow passengers to ride in
a towed vehicle for any reason.
Never attach tie-down hooks, chains,
straps, or tow hooks to tie rods, control
arms, or any other part of the vehicle
suspension, as severe damage to these
components will occur, possibly lead-
ing to accidents.<
Towing the vehicle
OverviewControlsMaintenanceRepairsDataIndex
handbook.book Page 141 Saturday, July 27, 2002 1:12 PM
Page 152 of 158

Everything from A to ZEngine speed 144
Entering the rear 47
Exterior mirrors 51
Eyelet, towing 140
F
False alarm, avoiding 39
Fault displays 76
First-aid kit 23
Flat tire 109
repairing 133
Flat Tire Monitor 82
indicator lamp 18, 19
Fog lamps 88
Folding rear backrest 100
Follow me home lamps 86
Footbrake 108
see Driving notes 107
Footwell lamps 88
Front fog lamps 88
indicator lamp 20
Front seat adjustment 44
Frost protection,
radiator 120
Fuel 25
Fuel consumption 79
display 75
Fuel filler door 24
release following an elec-
trical malfunction 24
Fuel gauge 75
Fuel specifications 25Fuel tank capacity 147
Fuel tank display 75
Fuel tank gauge 75
Fuel-injection system 144
Fuses 138
replacing 138
G
Gasoline 25
gauge 75
Gearbox, sequential 65
Gearshift lever 64
Glove compartment 95
Gradient assistance 68
Grills 90
Gross vehicle weight 146
H
Hands-free system 97
Harman Kardon premium
sound system 95
Hazard warning flashers 14
Hazard warning triangle 23
Head airbags 53
Head restraints 46
Headlamp 86
Headlamp cleaning system
116, 118, 147
Headlamp control 86
Headlamp flasher 70, 87
Heated mirror 51
Heated seats 50Heavy loads 102
High beams 70, 87
indicator lamps 21
Holder for beverages 96
Hood release 114
Horn 14
Hydroplaning 107, 109
I
Ice warning 78
Ignition key 30
positions 60
Ignition lock 60
Imprint 4
Indicator lamps 18
Individual settings
Vehicle Memory, Key
Memory 59
Inflation pressure 25, 109
INSPECTION 76
Instrument cluster 16
Instrument lighting 87
Instrument panel 14, 16
Interface socket for onboard
diagnostics (OBD) 124
Interior lamps 32, 88
remote control 32
Interior motion sensor 38
remote control 32
switching off 32, 39Interior rearview mirror
automatic dimming
feature 52
Interior temperature
adjusting 92
Intermittent mode 71
J
Jump-starting 139
K
Key Memory 59
Keys 30
L
Lamps
daytime driving lamps 86
fog lamps 88
footwell lamps 88
headlamp flasher 70, 87
high beams 87
instrument lighting 87
interior lamps 88
low beams 86
parking lamps 86
reading lamps 88
replacing 129
standing lamps 87
Lashing fittings 103
LATCH child-restraint
mounting system 57
handbook.book Page 152 Saturday, July 27, 2002 1:12 PM
Page 154 of 158

Everything from A to ZRadio, refer to the Owner's
Manual for Radio
Rain sensor 71
Range 79
Reading lamps
front 88
rear 88
Rear backrest, folding 100
Rear lamps 131
Rear window defroster 93
Rear-entry assist 47
Rearview mirror 51
Recirculated-air mode 93
Refueling 24
Remote control 31
Remote key 30
Replacement key 30, 31
Reporting safety defects 6
Reserve indicator lamp 75
Restraint system 55
Reverse 64
Rims 112
Roof load capacity 146
Roof-mounted luggage
rack 103
S
Safe seating position 43
Safety belts 47
3-point safety belt 100
height adjustment 48Safety feature
power windows 40
sliding/tilt sunroof 41
Seat adjustment 43, 44
adjusting the lumbar sup-
port 45
backrest width adjust-
ment 46
lumbar support 45
manual 44
power 45
Seat heating 50
Seat height adjustment 44
Seat memory 49
Securing cargo 102
Securing child-restraint sys-
tem 57
Securing devices 103
Sequential M gearbox
SMG II 65
indicator lamp 19, 69
Service and Warranty Infor-
mation Booklet 122
SERVICE ENGINE SOON
warning lamp 19
Service interval display
76, 122
Set clock 77
Shift lights 69
Side airbags 53
Side turn signals
bulb replacement 130Size 145
Ski bag 101
Sliding/tilt sunroof 40
closing following an elec-
trical malfunction 42
convenience operation
31, 33
manual operation 42
remote control 31
SMG gearbox 65
Snow chains 113
Socket 98
Spare key 30
Speedometer 16
Sport mode 85
Standing lamps 87
bulb replacement 129
Starting 61
Starting problems 61
Steering wheel lock 60
Steering wheel with multi-
function buttons 22
Steering wheel, adjusting 51
Storage compartments 96
Stroke 144
Summer tires 112
Sun blind 94
Surface ice warning 78
Switching off the engine 63
Symbols used 4T
Tachometer 16, 74
Tail lamps 131
replacing bulb 131
Tank capacity 147
Technical data 144
Technical modifications 5
Telephone hookup 97
Telephone, refer to the sep-
arate Owner's Manual
Temperature adjustment 92
Temperature display
engine coolant 75
ice warning 78
interior temperature 92
outside temperature 78
Temperature gauge 74
Temperature layering 93
Thigh support area, adjust-
ing 45
Third brake lamp 132
Through-loading system 100
Tilt alarm sensor
remote control 32
switching off 32, 39
Time 77
Tire code 112
Tire damage 109
Tire inflation pressure
25, 109
checking 25
Tire replacement 110
handbook.book Page 154 Saturday, July 27, 2002 1:12 PM