Page 14 of 187
14n
1 Parking lamps/Low beams103
2
>
Turn signal indicators78
>
Standing lamps104
>
High beams104
>
Headlamp flasher78
>
Computer883 Fog lamps104
4 Washer/Wiper system78
5 Central locking system32
6 Hazard warning flashers7 Rear window defroster107, 112
8 Horn, the entire surface
9 Adjusting the steering wheel56
Cockpit
390de788
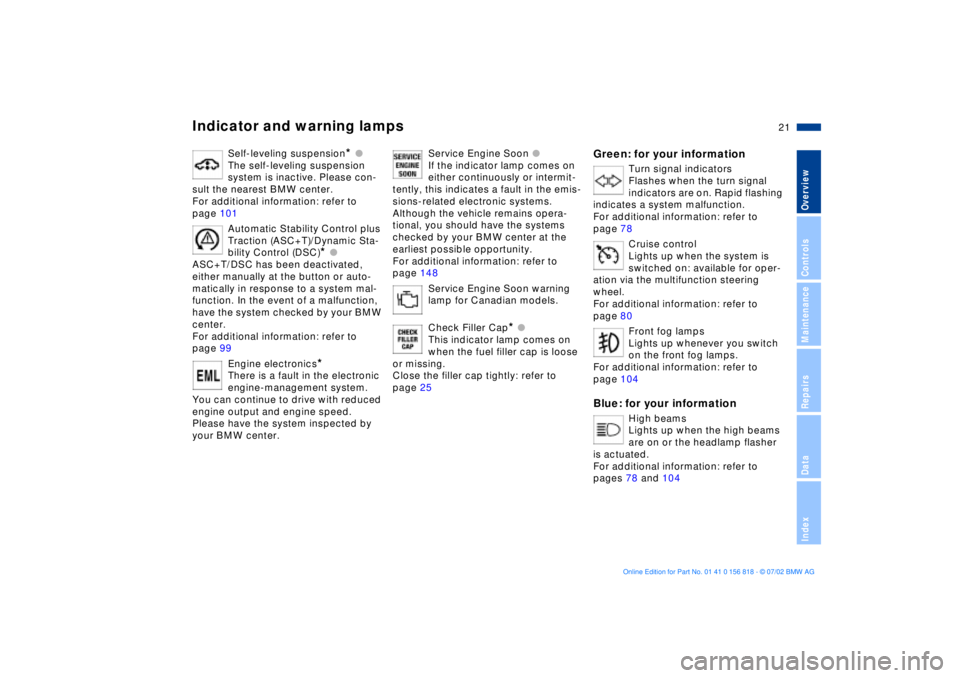
Page 15 of 187
15n
OverviewControlsMaintenanceRepairsDataIndex
1 Fuel gauge83
2 Indicator lamp for turn signal
indicators21
3 Speedometer
4 Indicator lamp for high beams215 Tachometer and Energy Control83
6 Coolant temperature gauge84
7 Indicator and warning
lamps19 to 218 Selector lever and program display
for automatic transmission
*
72, 75
9 Service Interval Display84
Instrument cluster
390us740
Page 16 of 187
16n
Instrument cluster
10 Display for the computer Ð opera-
tion via the turn signal lever,
refer to page 88:
>
Outside temperature
>
Average fuel consumption
>
Cruising range
>
Average speed11 Indicator lamp for Automatic Sta-
bility Control plus Traction (ASC+T)/
Dynamic Stability Control
(DSC)
*
21
12 Indicator lamp for self-leveling
suspension
*
2113 Odometer and trip odometer82
14 Indicator for Check Control85
15 Reset trip odometer to zero82
16 Indicator and warning
lamps19 to 21
390us740
Page 17 of 187
17n
OverviewControlsMaintenanceRepairsDataIndex
Instrument cluster
*
1 Fuel gauge83
2 Indicator lamp for turn signal
indicators21
3 Speedometer4 Indicator lamp for high beams21
5 Tachometer and Energy Control83
6 Coolant temperature gauge847 Indicator and warning
lamps19 to 21
8 CHECK button85
9 Selector lever and program display
for automatic transmission
*
72, 75
390us741
Page 21 of 187

21n
OverviewControlsMaintenanceRepairsDataIndex
Indicator and warning lamps
Self-leveling suspension
* l
The self-leveling suspension
system is inactive. Please con-
sult the nearest BMW center.
For additional information: refer to
page 101
Automatic Stability Control plus
Traction (ASC+T)/Dynamic Sta-
bility Control (DSC)
* l
ASC+T/DSC has been deactivated,
either manually at the button or auto-
matically in response to a system mal-
function. In the event of a malfunction,
have the system checked by your BMW
center.
For additional information: refer to
page 99
Engine electronics
*
There is a fault in the electronic
engine-management system.
You can continue to drive with reduced
engine output and engine speed.
Please have the system inspected by
your BMW center.
Service Engine Soon l
If the indicator lamp comes on
either continuously or intermit-
tently, this indicates a fault in the emis-
sions-related electronic systems.
Although the vehicle remains opera-
tional, you should have the systems
checked by your BMW center at the
earliest possible opportunity.
For additional information: refer to
page 148
Service Engine Soon warning
lamp for Canadian models.
Check Filler Cap
* l
This indicator lamp comes on
when the fuel filler cap is loose
or missing.
Close the filler cap tightly: refer to
page 25
Green: for your information
Turn signal indicators
Flashes when the turn signal
indicators are on. Rapid flashing
indicates a system malfunction.
For additional information: refer to
page 78
Cruise control
Lights up when the system is
switched on: available for oper-
ation via the multifunction steering
wheel.
For additional information: refer to
page 80
Front fog lamps
Lights up whenever you switch
on the front fog lamps.
For additional information: refer to
page 104
Blue: for your information
High beams
Lights up when the high beams
are on or the headlamp flasher
is actuated.
For additional information: refer to
pages 78 and 104
Page 33 of 187
33n
OverviewControlsMaintenanceRepairsDataIndex
Opening and closing Ð via the door lockUsing the keyOne turn of the key in the driver's door
lock unlocks the driver's door only.
Turning the key a second time unlocks
all of the remaining doors, the luggage
compartment lid/tailgate and the fuel
filler door.
You can have a signal set to con-
firm that the vehicle's locks have
engaged securely.< 390de723
Convenience operationYou can also operate the windows and
sliding/tilt sunroof via the door lock.
>To open: with the door closed, turn
the key to the "Unlock" position and
hold it
>To close: with the door closed, turn
the key to the "Lock" position and
hold it.
Watch the closing process care-
fully and be sure that no one is
trapped by the closing motion. The
closing process stops immediately
when you release the key.< Manual operationin the event of an electrical malfunction
Turn the key to the extreme left or right
to unlock/lock the driver's door.
Page 43 of 187

43n
OverviewControlsMaintenanceRepairsDataIndex
Alarm systemTo arm and disarm the alarm
systemWhen the vehicle is locked or unlocked
with the key or the remote control, the
alarm system is also simultaneously
armed or disarmed.
You can have different acknowl-
edgment signals set to confirm
arming and disarming.<
You can also open the luggage com-
partment lid/tailgate when the system is
armed by pressing the button on the
remote control (refer to page 35). When
you close the luggage compartment lid/
tailgate, the luggage compartment is
secured again.
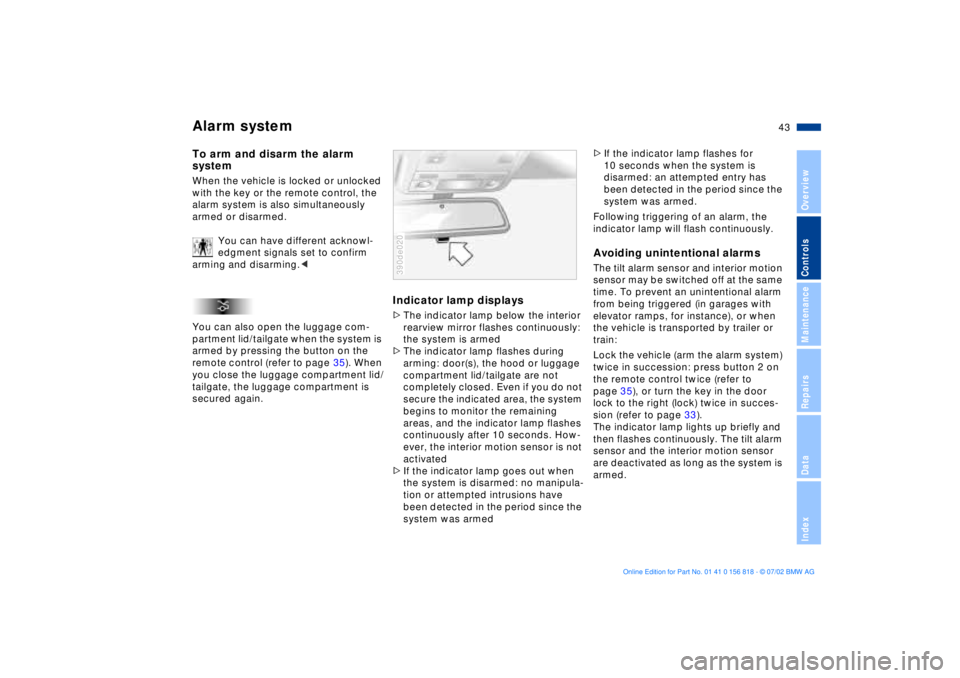
Indicator lamp displays>The indicator lamp below the interior
rearview mirror flashes continuously:
the system is armed
>The indicator lamp flashes during
arming: door(s), the hood or luggage
compartment lid/tailgate are not
completely closed. Even if you do not
secure the indicated area, the system
begins to monitor the remaining
areas, and the indicator lamp flashes
continuously after 10 seconds. How-
ever, the interior motion sensor is not
activated
>If the indicator lamp goes out when
the system is disarmed: no manipula-
tion or attempted intrusions have
been detected in the period since the
system was armed390de020
>If the indicator lamp flashes for
10 seconds when the system is
disarmed: an attempted entry has
been detected in the period since the
system was armed.
Following triggering of an alarm, the
indicator lamp will flash continuously.Avoiding unintentional alarmsThe tilt alarm sensor and interior motion
sensor may be switched off at the same
time. To prevent an unintentional alarm
from being triggered (in garages with
elevator ramps, for instance), or when
the vehicle is transported by trailer or
train:
Lock the vehicle (arm the alarm system)
twice in succession: press button 2 on
the remote control twice (refer to
page 35), or turn the key in the door
lock to the right (lock) twice in succes-
sion (refer to page 33).
The indicator lamp lights up briefly and
then flashes continuously. The tilt alarm
sensor and the interior motion sensor
are deactivated as long as the system is
armed.
Page 78 of 187

78n
Indicator/Headlamp flasher
Washer/Wiper system
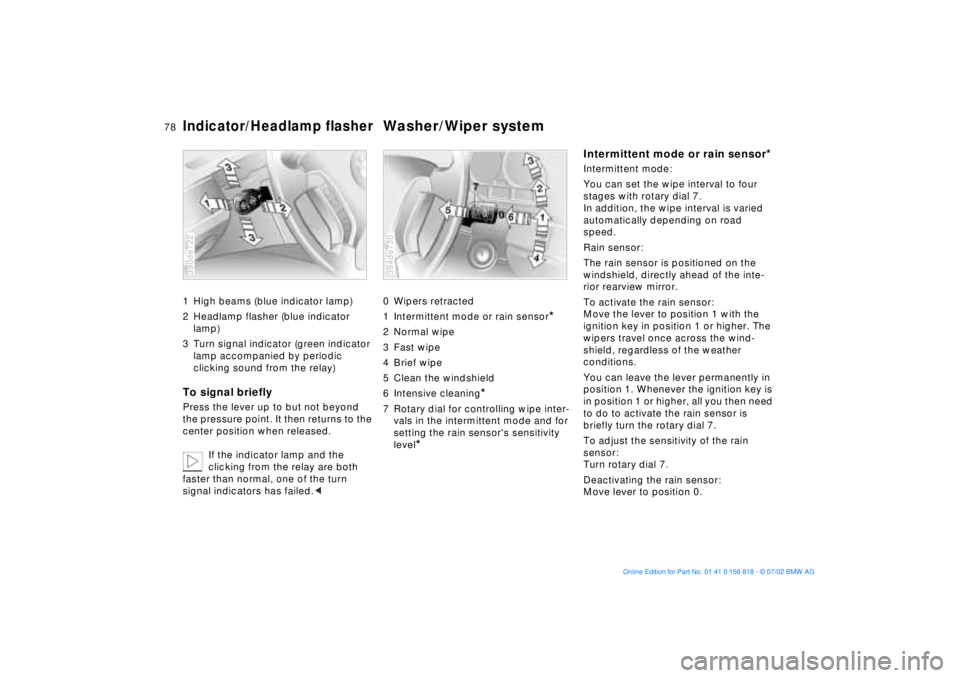
1 High beams (blue indicator lamp)
2 Headlamp flasher (blue indicator
lamp)
3 Turn signal indicator (green indicator
lamp accompanied by periodic
clicking sound from the relay)To signal brieflyPress the lever up to but not beyond
the pressure point. It then returns to the
center position when released.
If the indicator lamp and the
clicking from the relay are both
faster than normal, one of the turn
signal indicators has failed.<390de722
0 Wipers retracted
1 Intermittent mode or rain sensor
*
2 Normal wipe
3 Fast wipe
4 Brief wipe
5 Clean the windshield
6 Intensive cleaning
*
7 Rotary dial for controlling wipe inter-
vals in the intermittent mode and for
setting the rain sensor's sensitivity
level
*
394de730
Intermittent mode or rain sensor
*
Intermittent mode:
You can set the wipe interval to four
stages with rotary dial 7.
In addition, the wipe interval is varied
automatically depending on road
speed.
Rain sensor:
The rain sensor is positioned on the
windshield, directly ahead of the inte-
rior rearview mirror.
To activate the rain sensor:
Move the lever to position 1 with the
ignition key in position 1 or higher. The
wipers travel once across the wind-
shield, regardless of the weather
conditions.
You can leave the lever permanently in
position 1. Whenever the ignition key is
in position 1 or higher, all you then need
to do to activate the rain sensor is
briefly turn the rotary dial 7.
To adjust the sensitivity of the rain
sensor:
Turn rotary dial 7.
Deactivating the rain sensor:
Move lever to position 0.