2003 BMW 330I bulb
[x] Cancel search: bulbPage 10 of 166
Contents
Operation, maintenance
Special operating instructions:
Break-in procedures114
Driving notes115
Antilock Brake System
(ABS)115
Brake system116
Wheels and tires:
Tire inflation pressure117
Tire condition117
Tire replacement118
Wheel and tire
combinations120
Winter tires120
In the engine compartment:
Hood122
Engine compartment
essentials124
Washer fluids126
Engine oil126
Coolant128
Brake fluid129
Maintenance:
The BMW Maintenance
System130
Laws and regulations:
California Proposition 65
warning131
OBD interface socket131
Owner service procedures
Replacement procedures:
Onboard tool kit136
Windshield wiper blades136
Lamps and bulbs137
Changing a wheel141
Run Flat tires*145
Battery146
Fuses146
Giving and receiving
assistance:
Jump-starting147
Towing the vehicle148
Technical data
Engine data152
Dimensions153
Weights154
Capacities155
Page 137 of 166
137
Lamps and bulbsThe lamps and bulbs make essential
contributions to the safety of your vehi-
cle. Therefore, comply fully with the fol-
lowing instructions during bulb replace-
ment. If you are not familiar with any of
the procedures, consult your BMW
center.
Do not touch the glass portion of
a new bulb with your bare hands
since even small amounts of impurities
burn in to the surface and reduce the
service life of the bulb. Use a clean
cloth, paper napkin, or a similar mate-
rial, or hold the bulb by its metallic
base.<
A replacement bulb set is available from
your BMW center.
Before working on the electrical
system, switch off the electrical
accessory you are working on or dis-
connect the cable from the negative
terminal of the battery. Failure to
observe this precaution could result in
short circuits.
To prevent injuries and damage, com-
ply with any instructions provided by
the bulb manufacturer.<
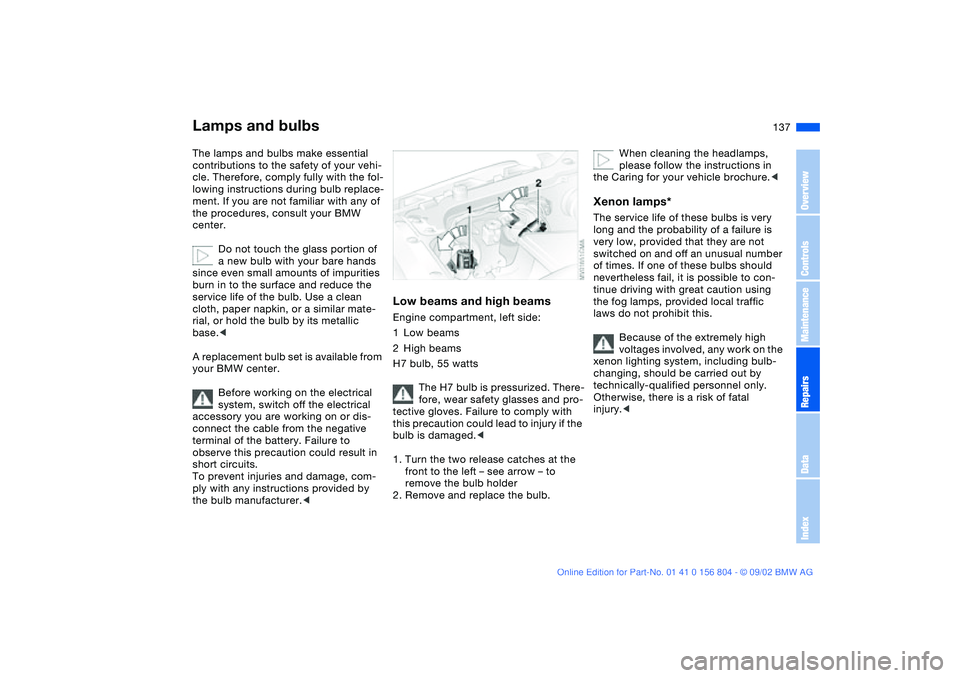
Low beams and high beamsEngine compartment, left side:
1Low beams
2High beams
H7 bulb, 55 watts
The H7 bulb is pressurized. There-
fore, wear safety glasses and pro-
tective gloves. Failure to comply with
this precaution could lead to injury if the
bulb is damaged.<
1. Turn the two release catches at the
front to the left – see arrow – to
remove the bulb holder
2. Remove and replace the bulb.
When cleaning the headlamps,
please follow the instructions in
the Caring for your vehicle brochure.<
Xenon lamps*The service life of these bulbs is very
long and the probability of a failure is
very low, provided that they are not
switched on and off an unusual number
of times. If one of these bulbs should
nevertheless fail, it is possible to con-
tinue driving with great caution using
the fog lamps, provided local traffic
laws do not prohibit this.
Because of the extremely high
voltages involved, any work on the
xenon lighting system, including bulb-
changing, should be carried out by
technically-qualified personnel only.
Otherwise, there is a risk of fatal
injury.<
OverviewControlsMaintenanceRepairsDataIndex
Page 138 of 166
138
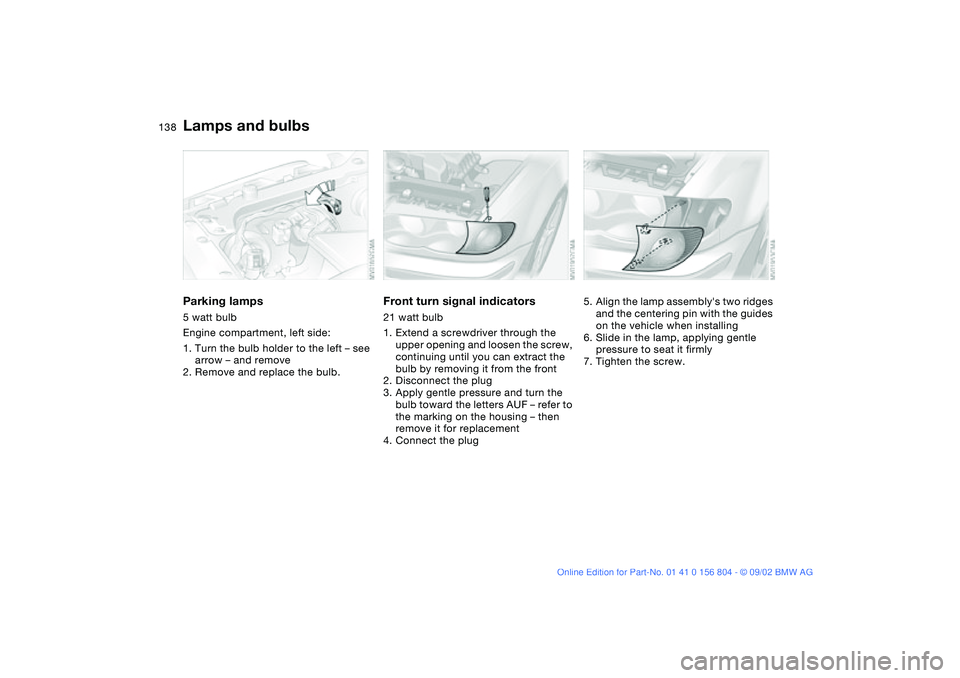
Parking lamps5 watt bulb
Engine compartment, left side:
1. Turn the bulb holder to the left – see
arrow – and remove
2. Remove and replace the bulb.
Front turn signal indicators21 watt bulb
1. Extend a screwdriver through the
upper opening and loosen the screw,
continuing until you can extract the
bulb by removing it from the front
2. Disconnect the plug
3. Apply gentle pressure and turn the
bulb toward the letters AUF – refer to
the marking on the housing – then
remove it for replacement
4. Connect the plug
5. Align the lamp assembly's two ridges
and the centering pin with the guides
on the vehicle when installing
6. Slide in the lamp, applying gentle
pressure to seat it firmly
7. Tighten the screw.
Lamps and bulbs
Page 139 of 166
139
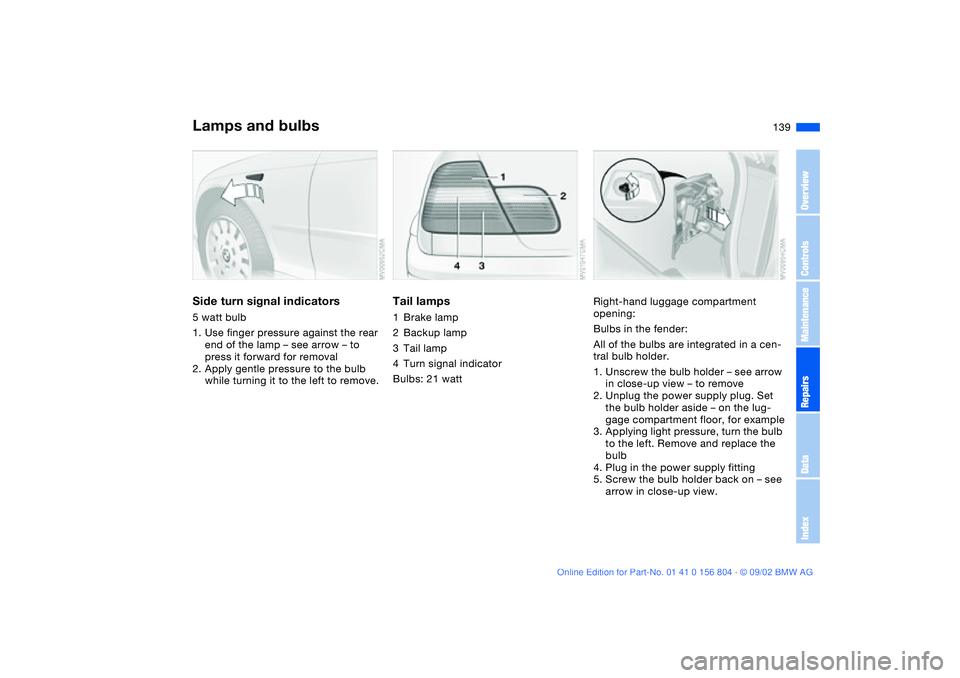
Side turn signal indicators5 watt bulb
1. Use finger pressure against the rear
end of the lamp – see arrow – to
press it forward for removal
2. Apply gentle pressure to the bulb
while turning it to the left to remove.
Tail lamps1Brake lamp
2Backup lamp
3Tail lamp
4Turn signal indicator
Bulbs: 21 watt
Right-hand luggage compartment
opening:
Bulbs in the fender:
All of the bulbs are integrated in a cen-
tral bulb holder.
1. Unscrew the bulb holder – see arrow
in close-up view – to remove
2. Unplug the power supply plug. Set
the bulb holder aside – on the lug-
gage compartment floor, for example
3. Applying light pressure, turn the bulb
to the left. Remove and replace the
bulb
4. Plug in the power supply fitting
5. Screw the bulb holder back on – see
arrow in close-up view.
Lamps and bulbs
OverviewControlsMaintenanceRepairsDataIndex
Page 140 of 166
140
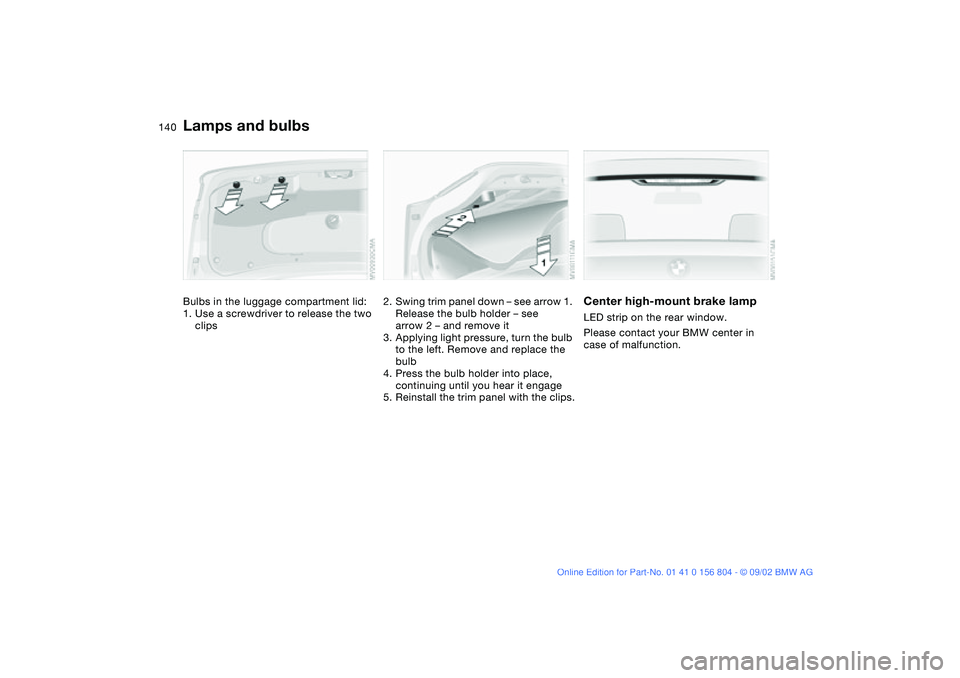
Bulbs in the luggage compartment lid:
1. Use a screwdriver to release the two
clips
2. Swing trim panel down – see arrow 1.
Release the bulb holder – see
arrow 2 – and remove it
3. Applying light pressure, turn the bulb
to the left. Remove and replace the
bulb
4. Press the bulb holder into place,
continuing until you hear it engage
5. Reinstall the trim panel with the clips.
Center high-mount brake lampLED strip on the rear window.
Please contact your BMW center in
case of malfunction.
Lamps and bulbs
Page 141 of 166
141
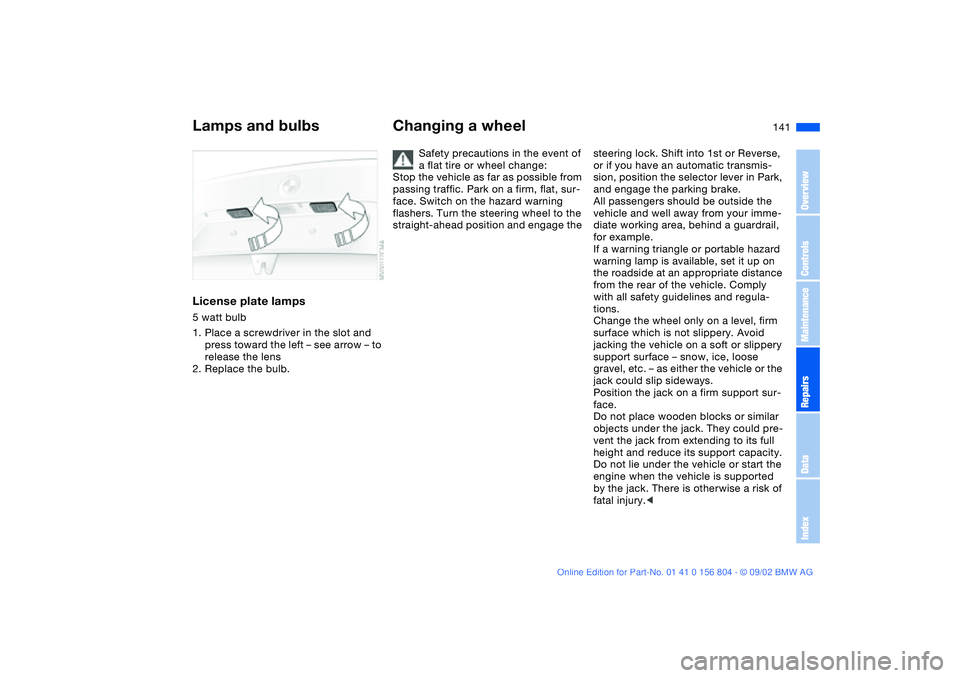
License plate lamps5 watt bulb
1. Place a screwdriver in the slot and
press toward the left – see arrow – to
release the lens
2. Replace the bulb.
Changing a wheel
Safety precautions in the event of
a flat tire or wheel change:
Stop the vehicle as far as possible from
passing traffic. Park on a firm, flat, sur-
face. Switch on the hazard warning
flashers. Turn the steering wheel to the
straight-ahead position and engage the
steering lock. Shift into 1st or Reverse,
or if you have an automatic transmis-
sion, position the selector lever in Park,
and engage the parking brake.
All passengers should be outside the
vehicle and well away from your imme-
diate working area, behind a guardrail,
for example.
If a warning triangle or portable hazard
warning lamp is available, set it up on
the roadside at an appropriate distance
from the rear of the vehicle. Comply
with all safety guidelines and regula-
tions.
Change the wheel only on a level, firm
surface which is not slippery. Avoid
jacking the vehicle on a soft or slippery
support surface – snow, ice, loose
gravel, etc. – as either the vehicle or the
jack could slip sideways.
Position the jack on a firm support sur-
face.
Do not place wooden blocks or similar
objects under the jack. They could pre-
vent the jack from extending to its full
height and reduce its support capacity.
Do not lie under the vehicle or start the
engine when the vehicle is supported
by the jack. There is otherwise a risk of
fatal injury.<
Lamps and bulbs
OverviewControlsMaintenanceRepairsDataIndex
Page 158 of 166
Everything from A to ZA
ABS Antilock Brake System
18, 115
Accessories 5
Activated-charcoal filter 100
ADB Automatic Differential
Braking 78
Adding brake fluid 129
Air conditioning 92, 98
Air distribution 94, 98
Air nozzles 92, 96
Air outlets 92, 96
Air pressure 117
check 25
Air supply 94, 98
Airbags 19, 53
Alarm system 38
Antifreeze 128
Antilock Brake System (ABS)
18, 115
Anti-theft system 38
Armrest 102
ASC+T Automatic Stability
Control plus Traction 18,
19, 78
Ashtray
front 104
rear 105
AUC Automatic recircu-
lated-air control 99Automatic car wash, refer to
the Caring for your vehicle
brochure
Automatic climate control 96
Automatic cruise control 69
Automatic Differential Brak-
ing (ADB) 78
Automatic dimming, interior
rearview mirror 52
Automatic headlamp
control 89
Automatic recirculated-air
control (AUC) 99
Automatic Stability Control
plus Traction (ASC+T) 18,
19, 78
Automatic transmission with
Steptronic 19, 64
Average fuel
consumption 76
Average speed 76
Avoiding unintentional
alarms 39
Axle loads 154
B
Backrest, adjusting 45
Backup lamps 63
replacing bulb 139
Battery
charge 146
discharged 146Battery charge current 18
Belts 47
Beverage holder 102, 103
Blower 94, 98
BMW High Performance
Synthetic Oils 127
BMW sports seat 45
Bore 152
Bottle holder, see Beverage
holder 102
Brake hydraulic system 18
Brake lamps
replacing bulb 139
Brake pads 19
Brake, parking 62
Brakes
malfunctions 116
Break-in procedures 114
Bulb, replacing 137
C
California Proposition 65
warning 131
Can holder, see Beverage
holder 102
Capacities 155
Car care, refer to the Caring
for your vehicle brochure
Car radio
refer to the Owner's Man-
ual for RadioCar telephone
refer to the separate
Owner's Manual
Car vacuum cleaner, con-
necting 104
Car wash, refer to the Caring
for your vehicle brochure
Cargo loading 108
Cassette player operation,
refer to the Owner's Man-
ual for Radio
Cassette player operation,
see Owner's Manual for
Radio
CBC Cornering Brake
Control 18, 115
CD player operation, refer to
the Owner's Manual for
Radio
Cellular phone 104
Center armrest 102
Center high-mount brake
lamp 140
Central locking system 30
button 34
Changing a wheel 141
Charge indicator lamp 18
Check Control 73
Child-restraint mounting
system (LATCH) 57
Cigarette lighter 104
Cleaning windshield 69
Page 160 of 166
Everything from A to ZFuel consumption 76
display 72
Fuel economy, refer to
Energy control 71
Fuel filler door 24
release following an elec-
trical malfunction 24
Fuel gauge 72
Fuel specifications 25
Fuel tank capacity 155
Fuel tank display 72
Fuel tank gauge 72
Fuel-injection system 152
Fuses, replacing 146
G
Gasoline 25
Gasoline gauge 72
Glove compartment 101
Grills 92, 96
Gross vehicle weight 154
H
Hands-free system 104
Harman Kardon premium
sound system 101
Hazard warning flashers 14
Hazard warning triangle 23
HDC Hill Descent Control 84
Head airbags 53
Head restraints 47
Headlamp flasher 90Headlamp washer system
126, 155
Headlamps 89
automatic control 89
Heated seats 50
Heating and ventilation 96
Heavy loads 108
High beams 21, 67, 90
replacing bulb 137
Hill Descent Control
(HDC) 84
Holder for
beverages 102
litter bag 103
Hood release 122
Horn 14
Hydraulic brake assistant,
see DBC
Hydroplaning 115, 117
I
Ice warning 75
Icy roads 75
Ignition key 30
Ignition lock 60
Imprint 4
Indicator lamps 18
Inflation pressure 25, 117
monitoring 85
INSPECTION 73
Instrument cluster 16
Instrument lighting 90Instrument panel 14, 16
Interface socket for onboard
diagnostics 131
Interior lamps 32, 91
remote control 32
Interior motion sensor 38
switching off 39
Interior rearview mirror 52
automatic dimming
feature 52
Interlock 60
Intermittent mode 68
J
Jack 141
Jump-starting 147
K
Key Memory 59
Keys 30
with remote control 30
L
Lamp, replacing 137
Lashing fittings 109
LATCH child-restraint
mounting system 57
Length 153
License plate lamp
replacing bulb 141
Light switch 89
Lighter 104LIGHTS ON warning 89
Litter bag holder 103
Load-securing devices 109
Lock, steering wheel 60
Low beams 89
automatic 89
replacing bulb 137
Lug wrench 141
Luggage compartment 35
capacity 154
floor mat 38
floor panel 37
lighting 35
Luggage compartment lid 35
emergency operation 35
emergency release 37
remote control 32
securing separately 35
Luggage rack 110
Lumbar support 46
M
M+S tires 120
Maintenance 73, 130
Malfunction displays 73
Manual transmission 63
MC operation, refer to the
Owner's Manual for Radio
MD operation, refer to the
Owner's Manual for Radio
Memory 49
Memory settings 59