2003 BMW 325xi TOURING steering
[x] Cancel search: steeringPage 59 of 166

59 Driving
Ignition lock0Steering locked
1Steering unlocked
2Ignition switched on
3Starting the engine
Vehicles with automatic transmis-
sion:
Do not move the selector lever from
position P until the engine is running,
ignition key position 2.
Your vehicle is equipped with an inter-
lock. Therefore, the ignition key cannot
be turned to position 0 or removed until
the selector lever is in position P.<
Vehicles with manual transmis-
sion:
Step on the clutch when starting the
vehicle. A lockout prevents the engine
from starting if the clutch is not
depressed.<
Steering lockedThe key can only be inserted and
removed in this position.
After removing the key, turn the steer-
ing wheel slightly to the left or right until
you hear the lock engage.
If the key is not removed, an acoustic
signal is sounded after the driver's door
has been opened.
The sound system remains operational
for approx. 20 minutes after you switch
off the ignition – ignition key in position
0 or key removed. Simply switch it back
on.Steering unlockedYou will find that it is often easier to turn
the ignition key from position 0 to posi-
tion 1 when you move the steering
wheel slightly to help disengage the
lock.
Individual electrical accessories are
ready for operation.
Starting the engineBefore starting>Engage the parking brake
>Ensure that the gearshift lever is in
neutral, or, with an automatic trans-
mission, that the selector lever is in
Park
>Depress the clutch pedal.
Do not allow the engine to run in
enclosed spaces. Otherwise,
breathing the exhaust fumes can lead
to unconsciousness and death. The
exhaust gases contain carbon monox-
ide, an odorless and colorless, but
highly toxic gas. Do not leave the vehi-
cle unattended with the engine running.
An unattended vehicle with a running
engine represents a safety hazard.<
When driving, standing at idle,
and parking the vehicle, take care
to avoid contact between the hot
exhaust system and flammable materi-
als – grass, hay, leaves, etc. Such con-
tact could lead to a fire, resulting in
serious personal injury and property
damage.<
>Start the engine. Do not press the
accelerator pedal.
OverviewControlsMaintenanceRepairsDataIndex
handbook.book Page 59 Saturday, July 27, 2002 1:36 PM
Page 61 of 166

61
Switching off the engineTurn the ignition key to position 1 or 0.
You should never remove the igni-
tion key when the vehicle is in
motion, as the steering lock could
engage.
When you leave the vehicle, always
remove the ignition key and engage the
steering lock.
Vehicles with manual transmission:
Always engage the parking brake when
parking on slopes and inclined sur-
faces. Placing the lever in gear may not
provide adequate resistance to rolling.
Vehicles with automatic transmission:
Place the selector lever in Park.<
Parking brakeThe parking brake is primarily designed
to prevent the vehicle from rolling while
parked. It operates on the rear wheels.To engageThe detent engages automatically, and
the indicator lamp in the instrument
cluster comes on when the ignition key
is in position 2, refer to page 18.To releasePull up slightly on the lever, press the
button – see arrow – and lower the
lever.
OverviewControlsMaintenanceRepairsDataIndex
handbook.book Page 61 Saturday, July 27, 2002 1:36 PM
Page 75 of 166
75
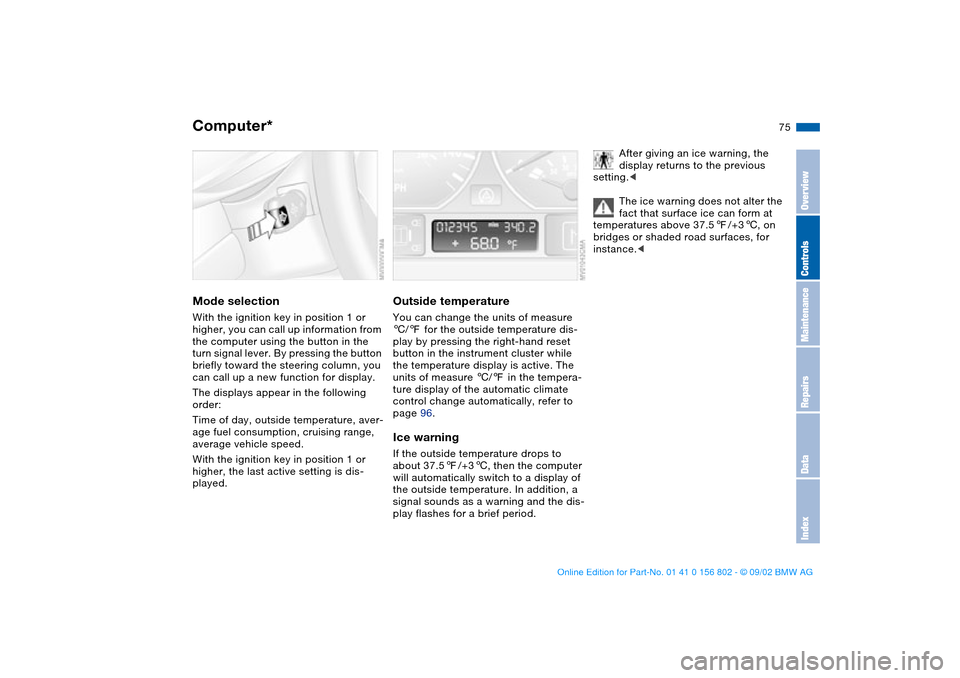
Computer*Mode selectionWith the ignition key in position 1 or
higher, you can call up information from
the computer using the button in the
turn signal lever. By pressing the button
briefly toward the steering column, you
can call up a new function for display.
The displays appear in the following
order:
Time of day, outside temperature, aver-
age fuel consumption, cruising range,
average vehicle speed.
With the ignition key in position 1 or
higher, the last active setting is dis-
played.
Outside temperatureYou can change the units of measure
6/7 for the outside temperature dis-
play by pressing the right-hand reset
button in the instrument cluster while
the temperature display is active. The
units of measure 6/7 in the tempera-
ture display of the automatic climate
control change automatically, refer to
page 96.Ice warningIf the outside temperature drops to
about 37.57/+36, then the computer
will automatically switch to a display of
the outside temperature. In addition, a
signal sounds as a warning and the dis-
play flashes for a brief period.
After giving an ice warning, the
display returns to the previous
setting.<
The ice warning does not alter the
fact that surface ice can form at
temperatures above 37.57/+36, on
bridges or shaded road surfaces, for
instance.<
OverviewControlsMaintenanceRepairsDataIndex
handbook.book Page 75 Saturday, July 27, 2002 1:36 PM
Page 84 of 166
84
Hill Descent Control (HDC)*The conceptBy reducing the vehicle's speed on
steep downhill stretches, HDC main-
tains predictable vehicle handling
response to provide you with control of
your BMW during extreme descents.
The vehicle slows to a pace just slightly
faster than walking speed.
HDC is available for activation at vehi-
cle speeds below approx. 22 mph /
35 km/h. When driving down steep
hills, the vehicle reduces speed auto-
matically down to about double walking
speed – approx. 7.5 mph / 12 km/h –
and then maintains this speed at a con-
stant.
You can use the accelerator or brakes
to vary this speed within a range from
approx. 3 mph / 5 km/h to approx.
15 mph / 25 km/h.
In conjunction with the multifunction
steering wheel you can use the +/–
button to set the cruise control to a tar-
get speed in the range from approx.
3 mph / 5 km/h to approx. 15 mph /
25 km/h.
HDC is automatically deactivated once
vehicle speed again exceeds approx.
37 mph / 60 km/h.
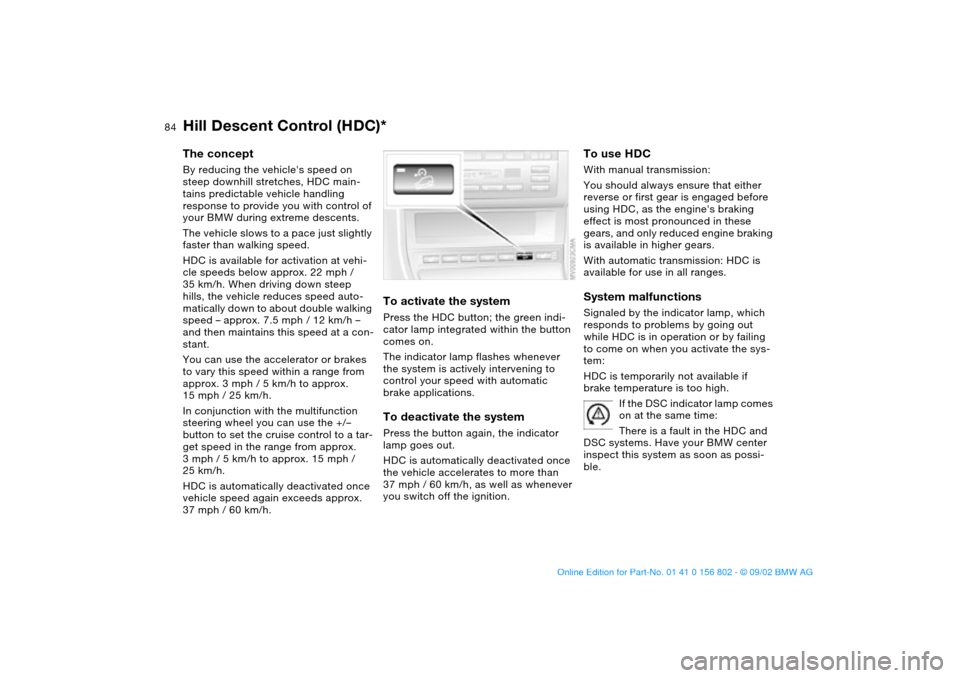
To activate the systemPress the HDC button; the green indi-
cator lamp integrated within the button
comes on.
The indicator lamp flashes whenever
the system is actively intervening to
control your speed with automatic
brake applications.To deactivate the systemPress the button again, the indicator
lamp goes out.
HDC is automatically deactivated once
the vehicle accelerates to more than
37 mph / 60 km/h, as well as whenever
you switch off the ignition.
To use HDCWith manual transmission:
You should always ensure that either
reverse or first gear is engaged before
using HDC, as the engine's braking
effect is most pronounced in these
gears, and only reduced engine braking
is available in higher gears.
With automatic transmission: HDC is
available for use in all ranges.System malfunctionsSignaled by the indicator lamp, which
responds to problems by going out
while HDC is in operation or by failing
to come on when you activate the sys-
tem:
HDC is temporarily not available if
brake temperature is too high.
If the DSC indicator lamp comes
on at the same time:
There is a fault in the HDC and
DSC systems. Have your BMW center
inspect this system as soon as possi-
ble.
handbook.book Page 84 Saturday, July 27, 2002 1:36 PM
Page 111 of 166
111
Roof-mounted luggage rack*A special roof-rack system is available
as an optional extra for your BMW.
Please observe the precautions
included with the installation instruc-
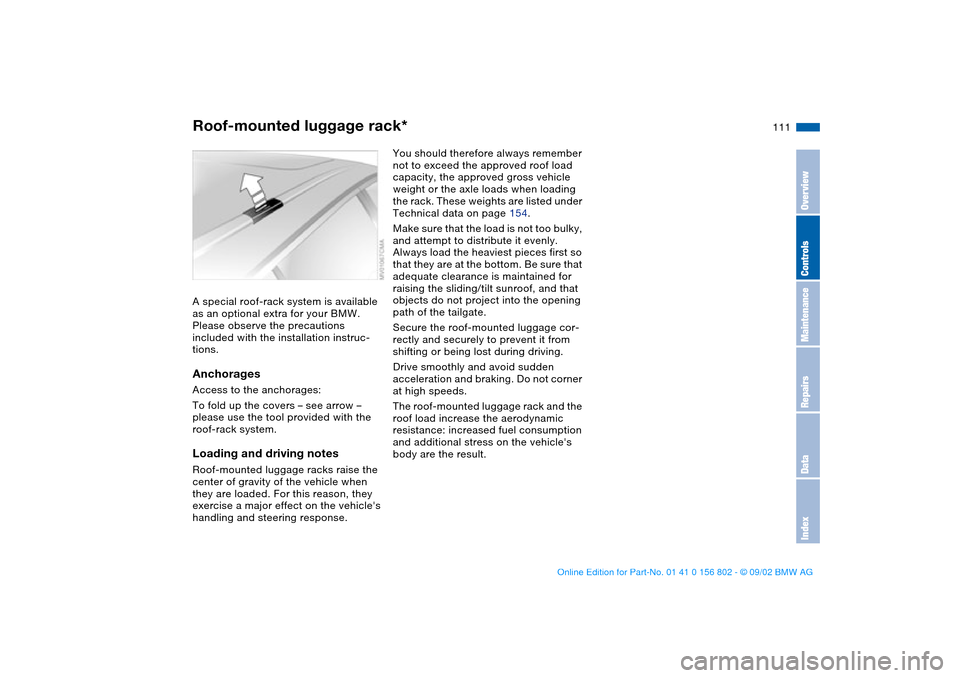
tions.AnchoragesAccess to the anchorages:
To fold up the covers – see arrow –
please use the tool provided with the
roof-rack system.Loading and driving notesRoof-mounted luggage racks raise the
center of gravity of the vehicle when
they are loaded. For this reason, they
exercise a major effect on the vehicle's
handling and steering response.
You should therefore always remember
not to exceed the approved roof load
capacity, the approved gross vehicle
weight or the axle loads when loading
the rack. These weights are listed under
Technical data on page 154.
Make sure that the load is not too bulky,
and attempt to distribute it evenly.
Always load the heaviest pieces first so
that they are at the bottom. Be sure that
adequate clearance is maintained for
raising the sliding/tilt sunroof, and that
objects do not project into the opening
path of the tailgate.
Secure the roof-mounted luggage cor-
rectly and securely to prevent it from
shifting or being lost during driving.
Drive smoothly and avoid sudden
acceleration and braking. Do not corner
at high speeds.
The roof-mounted luggage rack and the
roof load increase the aerodynamic
resistance: increased fuel consumption
and additional stress on the vehicle's
body are the result.
OverviewControlsMaintenanceRepairsDataIndex
handbook.book Page 111 Saturday, July 27, 2002 1:36 PM
Page 115 of 166
115
Driving notes
Brakes: do not drive with your foot
resting on the brake pedal. Even
light but consistent pressure on the
brake pedal can lead to high tempera-
tures, accelerated brake wear and pos-
sibly even brake failure.
Hydroplaning: when driving on wet or
slushy roads, reduce your speed. If you
do not, a wedge of water may form
between tires and road surface. This
phenomenon can lead to partial or
complete loss of contact between the
tires and road surface, as well as loss of
vehicle control and braking ability.
Driving through water: do not drive
through water on the road if it is deeper
than 1 ft/30 cm, and then only at walk-
ing speed. Otherwise, the vehicle's
engine, the electrical systems and the
transmission may be damaged.
Cargo area cover: never use it to store
heavy or hard objects, as otherwise
occupants could be injured during
braking maneuvers.
Clothes hooks: when hanging clothing
from the hooks, be sure that they will
not obstruct the driver's vision. Do not
hang heavy objects on the hooks. If you
do so, they could cause personal injury
during braking or evasive maneuvers.<
Antilock Brake System (ABS)The conceptABS keeps the wheels from locking
during braking, thereby enhancing
active driving safety.Braking with ABSIf you are in a situation that requires full
braking, you will exploit the full benefits
of ABS system if you apply maximum
pedal pressure – panic stop. Since the
vehicle maintains steering responsive-
ness, you can avoid possible obstacles
with a minimum of steering effort,
despite the full brake application.
Pulsation at the brake pedal combined
with sounds from the hydraulic circuits
indicates to the driver that ABS is in its
active mode.Dynamic Brake Control (DBC)DBC is included in the DSC, refer to
page 80.
The system responds to sudden, high-
intensity applications of force to the
brake pedal by automatically braking
the vehicle with maximum boost to
achieve the shortest-possible braking
distances during "panic stops". This
system exploits all the benefits of ABS.Do not reduce the pressure exerted
against the brake pedal until the brak-
ing maneuver has been completed.
DBC is deactivated when you release
the brake pedal.
Cornering Brake Control (CBC)CBC is an advanced engineering devel-
opment of ABS. When braking during
cornering with high lateral accelera-
tion, or when braking during a lane
change, vehicle stability is improved
and the steering response is enhanced.
OverviewControlsMaintenanceRepairsDataIndex
handbook.book Page 115 Saturday, July 27, 2002 1:36 PM
Page 116 of 166
116
Brake systemBrake fluid levelIf the brake fluid level is too low and
brake pedal travel has become longer,
there may be a defect in one of the two
brake system's hydraulic circuits.
Proceed to the nearest BMW cen-
ter. It may be necessary to apply
higher levels of pressure to the pedal
when stopping and braking distances
may also be longer. Please remember
to adapt your driving style accord-
ingly.
and operating conditions in which brak-
ing is restricted to gentle, low-pressure
applications will all increase the ten-
dency for corrosion to form on the
rotors; this is often accompanied by a
simultaneous accumulation of contami-
nation on the brake pads. The pads
must exert a certain minimal level of
pressure against the rotors for the disc
brakes' inherent self-cleaning effect to
remain effective; the pressure available
under the above conditions may not
provide adequate cleansing.
If the brake rotors are corroded, they
will tend to respond to braking with a
pulsating effect that even extended
brake applications will fail to cure.
When driving in heavy rain and on wet
roads it is useful to apply light pressure
to the brake pedal every few miles.
Monitor traffic conditions to ensure that
this maneuver does not pose a hazard
to you or to other road users. The heat
generated in this process helps dry the
pads and rotors to ensure that your
brake system will respond with undi-
minished efficiency when you need it.
When descending steep hills and
extended grades, downshift to a gear
that will allow you to continue safely
with only a minimal amount of braking.
By minimizing the loads placed on the
brake system, this strategy helps
ensure that optimal brake system
response will remain available at all
times. Use care to avoid exceeding the
approved engine-speed range, refer to
page 71.
Do not coast with the clutch
depressed or with the transmis-
sion or selector lever in Neutral. Do not
coast with the engine shut off. The
engine provides no braking effect when
the clutch is depressed and there is no
power-assist for braking or steering
when the engine is not running.
BMW 325xi: always refer all brake
inspection and service work to your
BMW center, as failure to observe the
special procedures could result in dam-
age to components of the all-wheel
drive.
Never allow floor mats, carpets or any
other objects to protrude into the area
around the accelerator, clutch and
brake pedals and obstruct their move-
ment.
brake pads that BMW has
released for your particular vehicle
model. BMW cannot evaluate non-
approved brake pads to determine if
they are suitable for use, and therefore
cannot ensure the operating safety of
the vehicle if they are installed.<
handbook.book Page 116 Saturday, July 27, 2002 1:36 PM
Page 117 of 166
117 Wheels and tires
Tire inflation pressureInformation for your safetyThe factory-approved tires are matched
to your vehicle and have been selected
to provide optimum safety and driving
comfort when used properly.
It is not merely the tire's service life, but
also driving comfort and – above all else
– driving safety that depend on the con-
dition of the tires and the maintenance
of the specified tire inflation pressure.
Incorrect tire inflation pressure is a fre-
quent cause of tire damage. It also sig-
nificantly influences the roadholding
ability of your BMW.
Be sure to check the tire inflation
pressure, including the space-
saver spare tire or the spare tire, on a
regular basis, at least twice a month
and before every extended journey,
refer to page 25. If this is not done,
incorrect tire pressures can cause driv-
ing instability and tire damage, ulti-
mately resulting in an accident.<
Tire conditionTire tread – tire damageInspect your tires frequently for tread
wear, signs of damage and for foreign
objects lodged in the tread. Check the
tread depth.
Tread depth should not be allowed to
go below 1/8 in / 3 mm, even though
the legally specified minimum tread
depth is 1/16 in / 1.6 mm.
Below 1/8 in / 3 mm tread depth, there
is a great risk of hydroplaning, even at
relatively moderate speeds and with
only small amounts of water on the
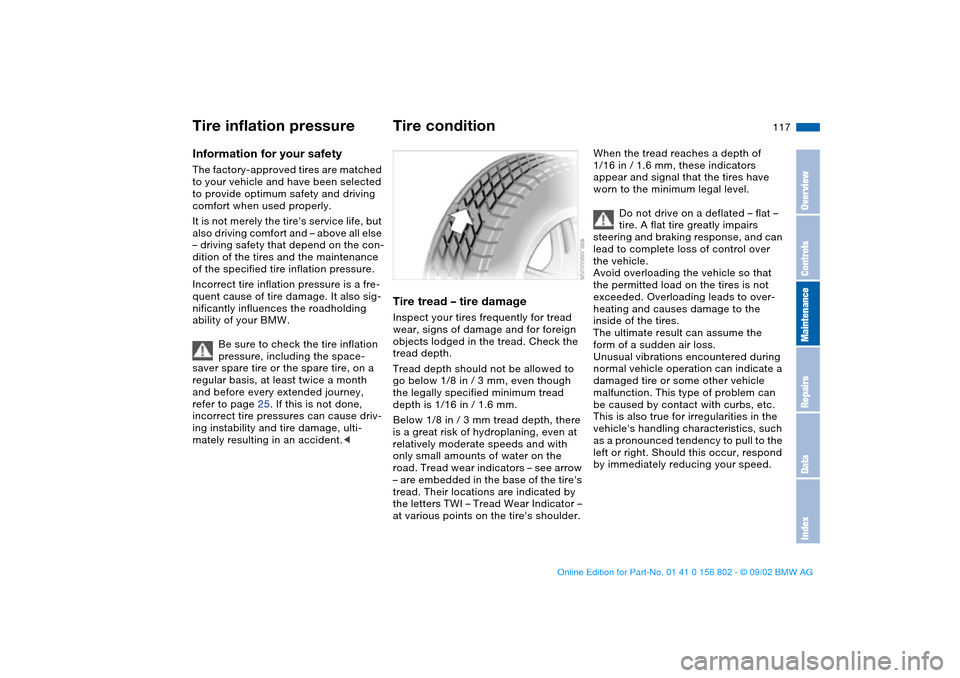
road. Tread wear indicators – see arrow
– are embedded in the base of the tire's
tread. Their locations are indicated by
the letters TWI – Tread Wear Indicator –
at various points on the tire's shoulder.
When the tread reaches a depth of
1/16 in / 1.6 mm, these indicators
appear and signal that the tires have
worn to the minimum legal level.
Do not drive on a deflated – flat –
tire. A flat tire greatly impairs
steering and braking response, and can
lead to complete loss of control over
the vehicle.
Avoid overloading the vehicle so that
the permitted load on the tires is not
exceeded. Overloading leads to over-
heating and causes damage to the
inside of the tires.
The ultimate result can assume the
form of a sudden air loss.
Unusual vibrations encountered during
normal vehicle operation can indicate a
damaged tire or some other vehicle
malfunction. This type of problem can
be caused by contact with curbs, etc.
This is also true for irregularities in the
vehicle's handling characteristics, such
as a pronounced tendency to pull to the
left or right. Should this occur, respond
by immediately reducing your speed.
OverviewControlsMaintenanceRepairsDataIndex
handbook.book Page 117 Saturday, July 27, 2002 1:36 PM